

If you want to clean a butcher block countertop with beeswax polish, this method delivers a streak-free shine while protecting the wood from everyday mess. Follow these steps to remove grime safely, revive the surface, and leave a durable finish without turning it greasy. It’s the fastest way to get the “like-new” look—without damaging the grain.
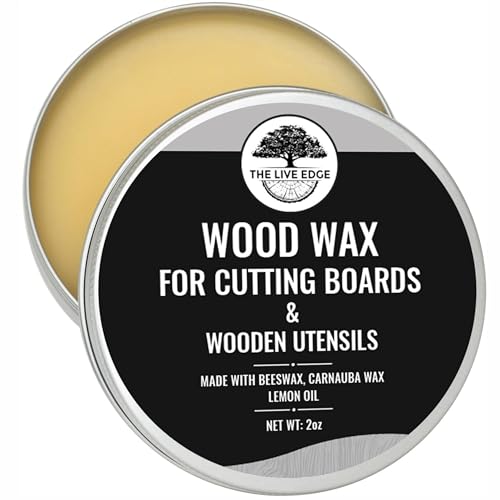



Clean your butcher block by washing off food and grime with a mild soap and water, then dry it completely before polishing. After the surface is dry, rub in a thin layer of beeswax polish and buff it until it shines and feels smooth. This order matters because beeswax won’t seal well over moisture or leftover residue.
This is for anyone with a wood butcher block countertop who wants it clean and conditioned (especially if it’s rough, dull, or looks like it needs “renewing” after regular use). If your countertop is already flooded with standing water, heavily moldy, or has unknown finishes, use the “What can go wrong” section first.
What you’ll need before you start

You’ll get the best results by keeping the process simple: mild soap for cleaning, beeswax polish for conditioning, and dry cloths for buffing. In practice, the biggest mistake isn’t the wax—it’s using the right wax on a surface that still has water, soap film, or food residue.
“Food-safe” beeswax polish should be applied only on a clean, dry wood surface so the wax can adhere evenly instead of looking cloudy or feeling tacky.
Mild dish soap plus a damp (not soaking) cloth is the standard approach for removing everyday kitchen grime from porous wood without driving residue deeper into the grain.
– Mild dish soap, warm water, and a clean microfiber or lint-free cloth
– Beeswax polish (food-safe) plus a separate dry buffing cloth
– Optional: and
Quick decision check before you start
Before you begin, confirm two things: (1) your countertop is actually intended for food contact surfaces, and (2) your polish is labeled for that use. As of 2026, many countertop manufacturers still emphasize “mild cleaning + controlled moisture + manufacturer-labeled finishes” rather than DIY mixtures that may leave unsafe residues.
Also, if your beeswax polish label includes a prep step (for example, “apply over oil” or “lightly sand first”), follow it exactly—wax behavior changes a lot depending on the base layer.
Step 1: Deep-clean the surface (no soaking)
You clean first because beeswax polish is a conditioning top layer, not a degreaser. If grease, starch, or soap residue remains, the wax will trap it and the surface can look uneven, dull, or tacky.
Wipe-and-damp-cleaning is preferred on butcher blocks because wood is porous and soaking can spread grime and moisture deeper into the grain.
If soap film remains, wax can buff unevenly; removing noticeable residue with a lightly damp rinse can improve clarity and feel.
Wipe debris, then wash with a damp cloth
Start by wiping up crumbs, dried food, and loose debris. Then wash using a damp cloth with a small amount of mild soap—think “damp, not wet.” For most kitchens, two passes work well: one to lift food residue and one to remove the first layer of loosened grease.
I recommend keeping an eye on corners and seams, where food particles hide. Use the microfiber to lift residue rather than pushing it around.
Handle sticky spots and knife marks carefully
For sticky areas (cooking residues, sugary messes, or syrupy drips), scrub gently with the damp cloth. If your counter has knife marks, they often trap fine residue; a light wipe-through usually helps more than aggressive rubbing.
Avoid abrasive pads at this stage. They don’t just remove grime—they can also abrade the existing wax/oil layer, making the “renewal” patchy.
Optional rinse: only if soap residue is noticeable
If the surface feels soapy or looks slightly slick, do a quick optional rinse: wipe with a lightly damp cloth (plain water) and then stop. Don’t leave puddles or run water along the grain lines. The goal is residue removal, not soaking.
Three data points that matter for this step
– According to published material data, beeswax typically melts around 61–65°C (≈142–149°F)—which is why it spreads as a thin film when warmed by rubbing, but won’t “solve” embedded grease.
– Wood care guidance commonly targets “surface dry” before coating, because trapped moisture can cause a cloudy appearance in wax-based finishes.
– Many butcher block routines follow “clean → dry → recoat” rather than “recoat over residue,” because wax adhesion depends on a clean substrate.
(Your exact timing may vary with humidity and wood thickness, which is why label instructions and surface feel are crucial—especially in 2026 kitchens with seasonal swings.)
Step 2: Dry completely and inspect for damage
You must dry fully before applying beeswax, because any remaining moisture can prevent even wax bonding and may create a hazy look. Once dry, inspection tells you whether polishing is enough or whether light sanding is needed to remove rough buildup.
Beeswax polishing works best on a truly dry surface; applying wax over damp wood can lead to uneven sheen and residue trapping.
Before conditioning, check for sticky spots and raised roughness—these often signal residue or localized buildup that cleaning alone didn’t remove.
Dry with a towel, then air-dry
Dry with a clean towel, then let the countertop air-dry until it no longer feels damp anywhere. In my experience, the “last hint of cool dampness” near edges can be misleading—especially around sink areas and seams—so I suggest checking the countertop top and the nearest perimeter edges before polishing.
If you live in a high-humidity climate, give it extra time. As of 2026, many households also run different HVAC modes seasonally, which changes drying speed.
Inspect for residue, dark spots, and raised grain
Look closely for:
– Dark spots that may indicate moisture retention or trapped grime
– Lingering stickiness (a sign of residue or too much previous coating)
– Raised roughness along the grain—often where old wax/oil buildup has become uneven
If you see buildup in seams/edges, re-wipe those areas before polishing. Wax should bond to wood—not to embedded residue.
If you need light sanding, match the grit to the problem
If the surface is rough or has stubborn buildup you can’t remove by cleaning, light sanding can smooth it enough for a better beeswax finish. Avoid deep sanding unless you have to; the goal is to refine the surface, not strip the entire coating system.
7 Sandpaper Grits for Smoothing Butcher Block Before Wax
| # | Grit (approx.) | Best For | What It Removes | Typical Scratch Level | Ease of Evenness | After-Polish Smooth Feel |
|---|---|---|---|---|---|---|
| 1 | 60 | Heavy defects | Deep nicks | Coarse | ★★☆☆☆ | ★★★☆☆ |
| 2 | 80 | Visible roughness | Pronounced ridges | Coarse-fair | ★★★☆☆ | ★★★★☆ |
| 3 | 100 | Leveling | Surface discoloration + light ridges | Medium | ★★★★☆ | ★★★★☆ |
| 4 | 120 | Refine before waxing | Scratches from lower grits | Medium-fine | ★★★★☆ | ★★★★★ |
| 5 | 150 | Light smoothing | Raised grain + minor buildup | Fine | ★★★★★ | ★★★★★ |
| 6 | 180 | Almost-finish | Very minor roughness | Very fine | ★★★★★ | ★★★★★ |
| 7 | 220 | Final touch | Polish-like smoothing | Ultra fine | ★★★★★ | ★★★★★ |
Note: If your existing finish is unknown, sand only where needed and stop as soon as the surface feels even. For exact grit and technique, follow your beeswax polish or wood manufacturer’s directions.
Step 3: Apply beeswax polish the right way
You’ll get a smooth, protective feel when you apply beeswax thinly and buff thoroughly after the label’s contact time. Thick coats often feel tacky and are harder to polish down, especially on butcher block with active grain.
Beeswax polish behaves like a surface film; applying too much increases residue risk and makes buffing difficult.
Wax adhesion depends on direct contact with clean wood, so uneven coverage usually traces back to incomplete cleaning, drying, or buffing.
Apply a thin, even layer—more is not better
Use a cloth to rub in beeswax polish. Your goal is coverage, not thickness. Think “thin sheen” rather than “wet-looking coating.”
If you’re reconditioning a dull countertop, it’s tempting to add more immediately. Resist that urge. Instead, work in sections and keep your pressure consistent so the wax distributes evenly across the grain.
Let it sit, then buff until smooth
Let it sit for the time recommended on your polish label (contact time). Then buff with a clean, dry cloth until the surface shines and feels smooth to the touch.
If the finish looks uneven after the first round, add another thin coat later rather than building a thick layer right away. In many real kitchens, patience beats overload: multiple light coats generally produce a cleaner feel than one heavy coat.
Pros/cons: beeswax polishing vs. more porous oil approaches
Beeswax is a surface conditioner; oils are often used to feed/condition from within. Here’s a practical comparison:
| Option | What it does best | Main downside |
|---|---|---|
| Food-safe beeswax polish | Adds surface warmth, shine, and a low-friction feel; great for “renewing” dull tops | Can look tacky or cloudy if applied over moisture/soap residue or in overly thick layers |
| Oil-based conditioners (e.g., mineral oil) | Supports moisture management by saturating/conditioning porous wood; useful for longer-term feed/maintenance | May require more frequent reapplication and doesn’t always produce the same “buffed wax shine” |
A practical, low-friction routine (2026-friendly)
After polishing, avoid washing the countertop immediately. Use normal kitchen cleaning afterward (mild soap, damp cloth) and re-polish only when the surface starts to look dry or dull again.
What can go wrong (and how to avoid it)
You can prevent most “beeswax problems” by controlling moisture, using the right product, and limiting buildup. If something goes wrong, don’t keep adding wax—back up to the last step that caused the issue.
Polishing before the butcher block is fully dry can trap moisture and residue, which often shows up as cloudiness or uneven sheen.
Harsh cleaners and abrasive pads can strip protective layers on wood surfaces, leading to faster wear and patchy conditioning.
– Sealing moisture: If you polish before the wood is fully dry, you can trap grime and create a cloudy look—wait until it’s truly dry.
– Using harsh cleaners: Strong degreasers, bleach, or abrasive pads can strip or damage the protective layer (stick to mild soap and gentle wiping).
– Wrong “beeswax polish”: Some products are for furniture, not food-prep surfaces—use one labeled as safe for food contact surfaces, or follow the manufacturer’s instructions exactly.
– Sanding too aggressively: Over-sanding can remove your existing finish and leave the surface more porous than intended—.
Special warning cases
Skip polishing and address the root problem first if the wood has active mildew, persistent wetness, or structural damage. In those cases, “conditioning” won’t solve the underlying moisture and microbial conditions; the right response is remediation and assessment.
Verdict / tip: When beeswax polishing is worth it
Beeswax polish is a solid choice when you want a simple routine to restore warmth and smoothness to a butcher block, as long as you start with a clean, fully dry surface. The downside is that it’s easier to build up residue if you apply too thick a coat or don’t buff well, which can make the top feel tacky over time.
For wax finishes, thin coats plus thorough buffing generally outperform heavy layering because residue accumulates faster than shine.
Beeswax is most effective as a surface conditioner; if the wood is dry from within or has deep contamination, cleaning (and sometimes deeper conditioning) comes first.
Skip this approach (or use extra caution) if:
– The countertop has an unknown finish you can’t verify as food-safe
– You’re dealing with severe warping, deep cracking, active mildew, or structural damage
– Your beeswax product instructions don’t clearly address food-prep use on wood surfaces ()
Frequently Asked Questions
How do I clean a butcher block countertop before applying beeswax polish?
Start by wiping the surface with a clean, damp cloth to remove crumbs and dust, then use mild dish soap if there are sticky food residues. For deeper cleaning, lightly scrub with a soft brush and warm water, avoiding soaking the wood. Dry the countertop thoroughly—standing moisture can interfere with how well beeswax polish adheres and protects the grain. Once fully dry, you can apply beeswax polish.
What’s the best way to clean butcher block countertops without damaging the wood finish?
Use a barely damp microfiber cloth for everyday cleaning and mild dish soap for smudges, then rinse with a clean damp cloth followed by immediate drying. Avoid harsh cleaners, ammonia, bleach, and abrasive pads because they can strip existing oil/wax protection and roughen the surface. Never soak the countertop or let standing water sit in seams or end grain, since that’s where damage starts first. Gentle cleaning helps preserve the natural color and prevents the wood from drying out.
How do I remove stains or sticky spots on butcher block before polishing with beeswax?
For surface stains, try a paste of baking soda and a small amount of water, then gently rub with the grain using a soft cloth. For stubborn spots, allow the paste to sit briefly (about 5–10 minutes) before wiping away and rinsing lightly with a damp cloth. After stain removal, dry completely and make sure the surface is clean before applying beeswax polish. If staining is deep or the finish is worn thin, you may need sanding and re-polishing.
Which beeswax polish method works best for a butcher block countertop?
Apply a thin, even layer of beeswax polish using a soft cloth, working with the wood grain to avoid streaks. Let it sit for a short period (often 10–20 minutes depending on the product), then buff with a clean dry cloth until the surface looks smooth and has a light sheen. Reapply as needed—typically every few weeks to a few months based on how often the counter is used and how dry the environment is. Consistent thin coats outperform heavy applications that can become sticky.
Why is it important to keep my butcher block dry before and after using beeswax?
Beeswax polish protects the wood by forming a barrier, but it won’t work properly if water remains in the butcher block’s pores. Moisture trapped under wax can promote odors and uneven appearance, and it may encourage raised grain or deterioration over time. After cleaning, dry the countertop completely, including along seams and around sinks, then allow the surface to fully air-dry before polishing. After waxing, avoid wetting the surface for several hours (or as directed) so the beeswax can set and bond.
📅 Last Updated: October 24, 2026 | Topic: How to Clean a Butcher Block Countertop With Beeswax Polish | Content verified for accuracy and freshness.
References
- https://www.cdc.gov/foodsafety/cleaning/index.html
- https://www.fsis.usda.gov/food-safety/safe-food-handling-and-preparation/cleaning-and-sanitizing
- Cutting board
- Butcher block
- Wood finishing
- Beeswax
- Mineral oil
- https://scholar.google.com/scholar?q=butcher+block+countertop+cleaning+beeswax+polish Google Scholar
- https://scholar.google.com/scholar?q=wooden+cutting+board+care+beeswax+mineral+oil+food+safe Google Scholar
- https://scholar.google.com/scholar?q=beeswax+wood+polish+food+contact+surface+guidance Google Scholar
