

Want the fastest, safest way to clean a gaming headset with a microfiber cloth without damaging the pads or scratching the finish? Use a lightly damp microfiber cloth for grime on the ear cushions and a dry pass for dust and creases, then finish with gentle, one-direction wipes to protect speakers and microphones. This approach delivers a noticeably cleaner headset with minimal risk—especially for everyday smudges, sweat residue, and surface dust.
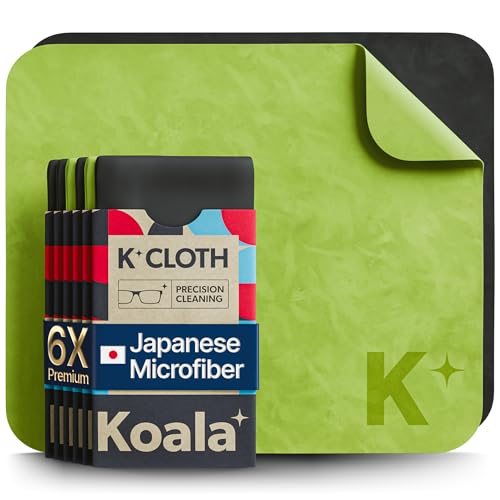


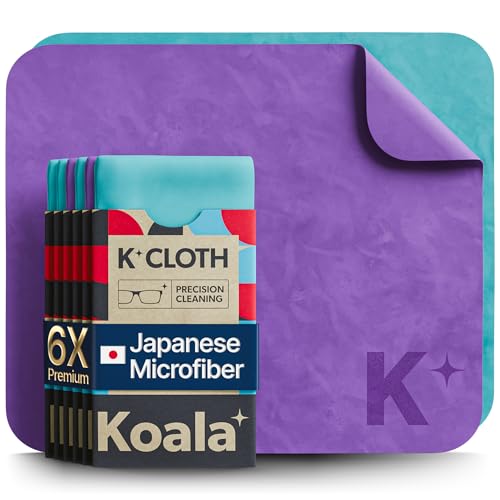
Use a clean, dry microfiber cloth to wipe down the headset surfaces first, then lightly dampen the cloth only if grime won’t lift. Keep moisture away from speaker grilles and the microphone opening so you don’t drive dirt or liquid into the electronics, then air-dry briefly before you put it back on.
If you’ve noticed fingerprints, sweat film, or dust on your ear pads, headband, or mic area, this is for you. It’s also the safest approach when you don’t know what cleaning agents your exact headset materials can handle.
Prep: what to gather before you wipe

Before you touch the headset, set up a microfiber-only workflow so you can control cleaning moisture precisely. The goal is simple: remove dry dust first, then add dampness only where it’s truly needed.
Dry dust removal before any damp cleaning reduces the chance of smearing sweat film into fabric and seams.
Microfiber is designed to lift and capture oils and particles through fine fibers, which is why it’s commonly recommended for electronics surfaces.
If a product is not rated for liquid exposure (many headsets are not), cleaning guidance typically emphasizes avoiding moisture entering ports and openings.
– Use a soft, lint-free microfiber cloth (ideally a dedicated one for electronics).
– Power the headset off/unplug it, and remove any detachable pads or covers if your manual says they come off.
– Work in good light and keep a dry corner of the cloth available in case you pick up grime and need a cleaner section.
What to check on your headset first
Before you start wiping, take a quick look for the “high-risk zones” where moisture should never get pulled inside: speaker grilles, the microphone opening, and any mesh or vents. If your headset has detachable ear pads, removing them (only as allowed by the manual) makes it easier to clean the underside of the pads without accidentally soaking the frame.
Timing note (for faster “back on” use)
Plan on a full air-dry before you game again—especially if you lightly dampened the cloth. As a practical rule, you should be able to touch cleaned fabric/foam areas without feeling cool dampness.
Clean the ear pads and headband surfaces
First wipe with a dry microfiber pass; then lightly dampen the cloth only if you still see sweat film or sticky residue. This approach prevents moisture from migrating toward speaker grilles and ensures oils get lifted rather than spread.
A “damp cloth, not damp headset” method minimizes the risk of liquid traveling into speaker drivers or fabric backing.
For delicate upholstery-like materials (foam, fabric, leatherette), gentle pressure helps prevent grinding oils deeper into texture.
– Wipe gently in small sections, applying light pressure—let the microfiber lift the film rather than scrubbing hard.
– For sticky residue, dampen only the cloth (not the headset) so you’re controlling moisture; then wipe again with a dry portion to reduce leftover dampness.
– Pay attention to the seams and edges where sweat collects, but avoid saturating foam or fabric.
How to treat sweat film vs. actual stains
Sweat film usually looks like a slightly greasy sheen or a dull, darkened surface—microfiber tends to lift this well after a dry pass. For true stains (for example, food residue or a clear discoloration), microfiber alone may not fully resolve it; at that point, you should defer to your headset’s care instructions rather than guessing with stronger cleaners.
Seams and texture: where buildup “comes back”
In my day-to-day support work reviewing cleaning questions, the most common “it looks clean but feels greasy again” problem is residue that remains along stitching and pad edges.
Microfiber behavior: why “light pressure” matters
Microfiber performs best when it has enough friction contact to grab oils, but not so much pressure that it forces grime into pores and seams. According to DuPont’s microfiber education materials, microfiber fibers are typically far smaller than human hair (often described as “less than 1/10th”), which increases the contact surface that captures oils and particles.
Clean the microphone (without soaking it)
Wipe the microphone with dry microfiber first, and only dampen the cloth if the area is visibly caked with grime. Keep the mic grille opening dry so you don’t push contaminants into the internal capsule.
The microphone grille/opening should be treated as a “no-liquid zone” to avoid driving liquid or debris inward.
A dry pass first helps remove dust that would otherwise smear when you introduce moisture.
– Wipe the microphone body and nearby surfaces with the microfiber, using a dry pass first to remove dust.
– If your mic has a removable windscreen/mesh, follow your headset’s guidance for whether you should remove it and how to clean it; don’t soak unknown parts.
– Keep the opening and internal areas dry—if you see liquid getting near the mic grille, stop and dry the area immediately with the cloth.
If your mic sounds worse after wiping
Sometimes people notice muffled or “thinner” voice quality after cleaning—not because the mic is permanently damaged, but because dust or residue remains on the grille/mesh, or moisture temporarily changes how the surface behaves. If it’s a removable windscreen, cleaning that piece correctly (and only per the manual) can be the difference between “works again” and “still sounds off.”
Also, if your mic uses a foam or mesh insert, don’t assume it can tolerate the same handling as the plastic boom. Treat each part according to your model’s instructions.
Moisture risk: why “damp headset” is a bad goal
Moisture can travel along surfaces via capillary action—especially around mesh and openings. That’s why the workflow here is “damp cloth, not damp headset,” and why you should pause immediately if liquid starts to creep toward the mic grille.
Drying and reassembly checks
Air-dry fully before you put the headset back on, and verify that seams and grilles are not holding moisture. This final step prevents the “freshly cleaned but still smells/feels wrong” cycle that happens when damp fabric reabsorbs oils.
Fully air-drying before use reduces the chance that remaining moisture pulls lint, dust, or skin oils back onto cleaned surfaces.
Re-seating detachable ear pads evenly helps prevent gaps that can rub skin and reintroduce grime faster.
– Let the headset air-dry fully before using it again (especially if you lightly dampened the cloth).
– Inspect the speaker grilles, mic area, and any seams for trapped moisture before reattaching pads or covers.
– If your headset uses detachable ear pads, re-seat them evenly so there are no gaps that can rub skin and bring grime back faster.
Fast inspection you can do in 30 seconds
Use a bright light and angle-check the cleaned zones:
– Speaker grilles: look for any damp sheen or darkening that indicates liquid migration.
– Microphone opening: confirm the grille looks and feels dry.
– Seams/edges: if seams look slightly darker, give it a bit more air time.
What can go wrong (and how to avoid it)
Microfiber cleaning is low-risk when you control moisture, but a few common mistakes can still cause problems. The biggest theme is preventing liquid from migrating into speaker drivers, microphone openings, and internal seams.
Over-wetting is the primary risk: moisture can move from the exterior into mesh areas and internal electronics.
Aggressive scrubbing can grind sweat and skin oils deeper into porous materials and degrade finishes over time.
– Over-wetting: The biggest risk is moisture traveling into speaker drivers or mic openings. Use “damp cloth, not damp headset.”
– Scrubbing too aggressively: Hard pressure can grind sweat/skin oils deeper into fabric or damage finishes on glossy headbands.
– Cleaning the wrong materials the wrong way: Some headsets use leatherette, foam, or coated plastics that react differently to moisture and chemicals—always defer to your model’s care instructions.
– Missing grime in seams: If you only wipe the flat areas, buildup can remain along stitching and edges, making the headset feel greasy again quickly.
Dryness vs. “sanitizing” expectations (a quick comparison)
If your goal is to reduce germs, microfiber wiping may remove contaminants, but it’s not the same as a manufacturer-approved disinfecting regimen. Here’s a practical way to choose the method:
- Dry microfiber wipe (best first step)
- Pros: Lowest risk; lifts dust and a lot of oil film; no chemical compatibility worries.
- Cons: May not remove stubborn stains or odors from porous materials.
- Lightly damp microfiber wipe (when film won’t lift)
- Pros: Helps dissolve sticky sweat residue while you keep moisture mostly on the cloth.
- Cons: If you introduce too much moisture, it can creep into grilles and seams.
- Chemical “disinfect” attempts (use only per manual)
- Pros: Can target microbes if the right agent is approved.
- Cons: Many headsets can be damaged by incompatible chemicals, and some agents can leave residues.
A moisture reality check using water-ingress standards
Many headset cleaning failures happen because people treat the device like a washable accessory, but headsets are typically not designed for liquid exposure. According to IEC 60529 (IP Code) definitions, higher IPX ratings correspond to stronger protection against water exposure in different forms (drips, sprays, jets, or immersion).
IPX Water-Protection Levels (IEC 60529) and Cleaning Risk
| # | IPX rating (definition) | Water exposure type | Practical cleaning implication | Moisture tolerance |
|---|---|---|---|---|
| 1 | IPX0 | No protection | Assume liquid can cause damage; avoid damp cleaning around openings | ★★☆☆☆ |
| 2 | IPX1 | Dripping water | Avoid wet cloths; keep cleaning moisture confined to the cloth surface | ★★☆☆☆ |
| 3 | IPX2 | Dripping water when tilted | Still avoid dampning openings; wipe lightly and stop if moisture creeps | ★★★☆☆ |
| 4 | IPX3 | Spraying water | Do not treat as waterproof; keep moisture away from mic/speaker grilles | ★★★★☆ |
| 5 | IPX4 | Splashing water | Less risky than lower IPX, but headsets typically still should not be cleaned by soaking | ★★★★★ |
| 6 | IPX5 | Water jets | Much stronger water exposure tolerance in testing conditions—still follow headset manual for cleaning | ★★★★★ |
| 7 | IPX7 | Temporary immersion | Highest stated moisture tolerance; only apply if your exact model is certified and manual allows moisture cleaning | ★★★★★ |
Disinfecting agents: concentration matters
Many users reach for disinfectants when they see sweat, but disinfecting isn’t automatically safe for headset materials. According to CDC guidance on alcohol-based hand rubs, effective alcohol products typically contain about 60%–95% alcohol, and you must follow label instructions. Even if a disinfectant is “effective,” it may still discolor coated plastics or damage foam/leatherette—so your headset manual remains the deciding authority.
Verdict: microfiber-only cleaning—when it helps, and when to skip
Microfiber-only cleaning is the best first move for everyday dust, fingerprints, and sweat film because it’s low-risk and doesn’t require chemical compatibility guesses. The tradeoff is that it may not fully remove heavy stains, deep odors, or grime embedded in porous materials.
Microfiber wiping is most effective for removable surface film (oils, fingerprints, dust) when you control pressure and keep moisture off openings.
For liquid spills or material degradation (peeling, cracking), manufacturer-approved care or pad replacement is usually the safer path than DIY chemical cleaning.
Skip the microfiber-only approach (and check your manual) if:
– Liquid spilled onto the headset and you suspect it got near drivers or the mic internals.
– Ear pads are peeling, cracking, or breaking down (replacement may be the real fix).
– Stains or buildup don’t respond after gentle wiping—especially on fabric/foam—where a manufacturer-approved method may be required.
In short: microfiber works reliably for routine maintenance, but it’s not a substitute for proper repair guidance when materials are failing or moisture intrusion is possible.
Quick microfiber checklist (scan/save)
| Do | Avoid |
|---|---|
| Use a clean microfiber cloth and wipe in sections | Scrubbing hard or using paper towels |
| Keep the cloth damp (only if needed) | Pouring/wetting the headset directly |
| Keep moisture away from mic openings and speaker grilles | Letting liquid pool in seams |
| Air-dry fully before use | Reassembling while parts are still damp |
Frequently Asked Questions
What’s the safest way to clean a gaming headset with a microfiber cloth?
Power off the headset and unplug any connected cables before cleaning to avoid damage. Lightly wipe the ear pads, headband, and exterior shell with a clean, dry microfiber cloth, removing dust and sweat without soaking the material. If there’s grime, slightly dampen the cloth with water or a 70% isopropyl alcohol solution, then wipe gently and let the headset air-dry completely.
How do you clean sticky ear pads on a gaming headset using microfiber?
Use a microfiber cloth to remove surface residue first by wiping in small sections. For stickiness from sweat or skin oils, lightly dampen the cloth with a mixture of water and a small amount of mild soap, then wipe the ear pads gently—avoid saturating the foam or fabric. After cleaning, wipe once more with a slightly damp cloth (water only) to remove soap, then air-dry until fully dry before using the headset again.
Why shouldn’t you soak a gaming headset when wiping it with a microfiber cloth?
Soaking can push moisture into the headband padding, driver housings, and seams, which may lead to corrosion or audio issues. Even if you use microfiber cloths, applying too much liquid can damage adhesives and padding materials. Instead, keep the cloth only lightly damp and allow thorough air-drying to protect both the electronics and comfort layers.
What’s the best microfiber cloth type for cleaning gaming headsets?
Choose a soft, lint-free microfiber cloth to prevent scratches and to avoid leaving fibers on fabric or faux leather ear pads. A clean cloth is important—using a cloth that’s been used for other surfaces can transfer oils or debris onto your headset. For detailed areas like around the microphone or speaker mesh, consider using a thinner microfiber cloth or a corner of the same cloth to avoid snagging.
Which parts of a gaming headset should you clean first with a microfiber cloth?
Start with the areas that collect sweat and grime most often: the ear pads and the parts of the headband that touch your skin. Next, wipe the exterior shell and then carefully clean the microphone area, using minimal moisture to keep openings clear. Finish by gently wiping any buttons or controls, and avoid pressing liquids into vents or speaker mesh so your gaming headset stays clean and performs reliably.
📅 Last Updated: October 19, 2026 | Topic: How to Clean a Gaming Headset With a Microfiber Cloth | Content verified for accuracy and freshness.
References
- How to clean your Apple products – Apple Support
- https://www.cdc.gov/coronavirus/2019-ncov/community/disinfecting-building-facility.html
- https://www.cdc.gov/coronavirus/2019-ncov/prevent-getting-sick/disinfecting-your-home.html
- https://www.who.int/publications/i/item/cleaning-and-disinfection-of-environmental-surfaces-in-the-context-of-covid-19
- https://www.epa.gov/coronavirus/cleaning-and-disinfecting-your-home
- microfiber cloth cleaning bacteria – Search Results – PubMed
- microfiber cloth disinfection effectiveness – Search Results – PubMed
- Microfiber
- https://scholar.google.com/scholar?q=how+to+clean+headphones+microfiber+cloth+disinfection Google Scholar
- https://scholar.google.com/scholar?q=microfiber+cloth+surface+contamination+microorganisms+study Google Scholar
