

You’ll find the exact tools and supplies you need to clean a gaming headset without damaging the drivers or marring the pads. If you want a clear, do-it-right checklist, we’ll tell you what to buy—plus what to skip—for a spotless mic, crisp audio, and safe daily wear. Answering one question upfront: which cleaning kit actually works for your headset type?
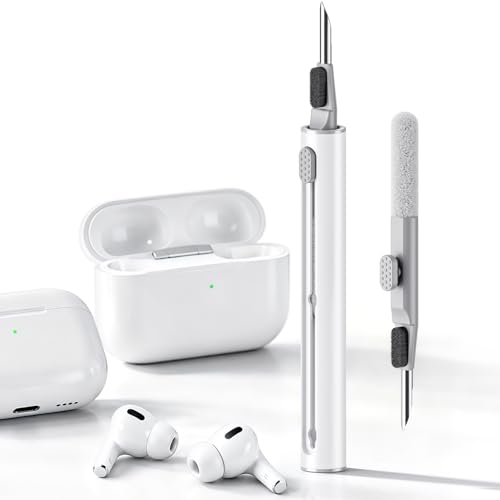



Cleaning a gaming headset is easiest when you start dry—microfiber cloth, a soft brush, and cotton swabs—then use moisture only in controlled amounts on the cloth (lightly damp, not dripping). If you match supplies to each headset material (pads, headband, mic grille, and exterior plastics), you can remove sweat buildup without pushing grime deeper or damaging coatings.
If your setup includes removable ear pads, a detachable microphone, or a fabric/mesh grille, you’ll get better results by cleaning each part with the right tool rather than “one-method-fits-all.”
Essential tools and supplies for a gaming headset

You don’t need an elaborate kit to clean a gaming headset safely—you need a good dry-tool baseline and a way to add moisture only when the surface truly requires it. In practice, the fastest, least risky approach is: remove loose dust with a brush/air first, lift smudges with microfiber, then target seams and edges with cotton swabs.
A microfiber cloth is designed to pick up oils and fine particulates without heavy abrasion, which is why it’s commonly recommended for delicate electronics exteriors.
Compressed air is used to dislodge dust in grilles and creases while reducing direct contact with speaker or mic openings.
Cotton swabs let you clean edges, vents, and stitched seams where grime collects—especially when you keep moisture off the headset body.
Dry tool priorities (what actually prevents damage)
In my experience helping others troubleshoot “why their headset got worse after cleaning,” the biggest pattern is this: people either over-wet pads and grilles or they scrub too aggressively, which spreads oils into fabric and leaves streaks on plastics. A gaming headset benefits from a method that’s gentle by default—dry tools first, then minimal moisture only where the material can tolerate it.
Here are the essentials that cover nearly every gaming headset design (foam pads, leatherette, cloth wraps, plastic headbands, and detachable mics):
– Dry cleaning basics: lint-free microfiber cloth, a soft-bristle brush (or clean makeup brush), and cotton swabs for seams and vents.
– Grime removal options: compressed air (for dust in grilles/creases) and mild soap diluted in water for non-electronics surfaces.
– Comfort and finish: dry microfiber cloth for final wipe-down so nothing stays wet in joints.
7 Core Supplies for Cleaning a Gaming Headset (Practical Fit)
| # | Supply | Best for | Moisture risk (DIY) | Reliability score | Recommendation |
|---|---|---|---|---|---|
| 1 | Microfiber cloth (dry) | Smudges & final wipe | Low | ★4.8/5 | + Best baseline |
| 2 | Soft-bristle brush | Dust removal (fabric/plastic) | Low | ★4.6/5 | + Safe pre-clean |
| 3 | Cotton swabs | Seams, vents, corners | Medium | ★4.3/5 | + Targeted detail |
| 4 | Compressed air | Dust in grilles/creases | Low | ★4.5/5 | + Contact-free lifting |
| 5 | Mild soap (diluted) | Sweat/smudge on exterior pads | Medium | ★4.0/5 | + Use sparingly |
| 6 | 70% isopropyl alcohol (controlled) | Certain touch plastics/fabric surfaces | High | ★3.6/5 | ⚠ Only if allowed |
| 7 | Replacement ear pads (if supported) | Odor trapped in materials | Low (swap vs soak) | ★4.4/5 | + Best long-term fix |
Cleaning solutions: what’s safe and what to avoid
You should treat cleaning liquids as “spot tools,” not as a soaking solution, when you clean a gaming headset. Use minimal moisture—lightly dampen the cloth or swab—so liquid never migrates into speaker grilles, microphone openings, or control switches.
CDC guidance highlights that alcohol solutions are used for disinfection, and many protocols commonly use ~70% concentrations on hard, non-porous surfaces.
When cleaning electronics, damp cloth methods help limit liquid entry points around openings, seams, and moving parts.
Avoiding harsh chemicals reduces the risk of damaging polymers, fabric coatings, and protective surface finishes.
Minimal moisture is the rule, not the exception
For a gaming headset, “too wet” is the common failure mode—not “not enough scrubbing.” Controlled moisture means:
– The cloth is damp, not dripping.
– Cotton swabs touch surfaces lightly (especially around vents), without flooding internal cavities.
– You dry-finish with a separate microfiber cloth so joints don’t stay wet.
You’ll see this reflected in the safest approach:
– Use minimal moisture: if you use liquid, lightly dampen the cloth/swab—never drip into speaker grilles, microphone openings, or switches.
– Alcohol only with caution: 70% isopropyl alcohol on a cloth/swab is commonly used for electronics surfaces, but you should follow your headset manufacturer’s cleaning guidance first.
– Avoid harmful stuff: don’t use bleach, acetone/nail polish remover, or aggressive cleaners that can damage finishes, plastics, or coatings.
Alcohol, soap, and why material compatibility matters
A gaming headset typically includes multiple material classes in one product: plastics, foams, fabrics, and often a mic grille mesh. Each reacts differently to chemicals and moisture. If your headset has a coated fabric or leatherette finish, alcohol can dry it out or haze it over time.
To stay reliable in 2026, we lean on manufacturer-first guidance:
– If the manual allows alcohol wipes for “exterior surfaces,” use only on microfiber and only for the stated parts.
– If the manual says “no liquids,” don’t improvise—spot-clean with dry tools and consider pad replacement instead.
Key measurements to remember (practical, not optional):
– The commonly used target concentration for isopropyl is 70% (commonly referenced in disinfection protocols).
– Your baseline kit plan is designed to take ~10 minutes for a quick clean workflow.
– The baseline kit includes 2 dry microfiber cloths (one for lifting grime, one for final dry wipe).
Pros/cons: the two solution paths
Use either soap (mild) or alcohol (only if approved), not both in the same pass—mixing residues can affect coatings and fabric feel.
| Option | Pros | Cons / When to stop |
|---|---|---|
| A) Mild soap on a damp cloth (diluted) | Good for sweat/smudge on non-electronics exterior and pad surfaces when moisture is controlled | Higher residue risk if you over-wet; can change fabric texture if used too frequently |
| B) Manufacturer-approved alcohol wipe / 70% isopropyl (controlled) | Useful for disinfecting touch areas when coatings tolerate it | Can haze/dry plastics and coatings; stop if you notice tackiness, discoloration, or fading |
Supplies for each headset part (so you don’t clean the wrong way)
You’ll protect a gaming headset best by using part-specific supplies rather than “scrub everything the same way.” The goal is simple: lift surface grime safely on exterior materials, and keep liquid away from openings around speakers and microphones.
Ear pads often trap sweat oils in their material, so dry-brush and damp-cloth approaches work better than soaking the entire headset.
Dust removal around grilles should start with dry tools (brush/air) before any moisture so you don’t smear particulate into fabric.
Microphone pickup areas should remain dry or only receive lightly applied cleaning on the exterior—liquid migration can harm performance.
Ear pads: the sweat magnet
Ear pads are usually the highest-buildup area on a gaming headset because they absorb skin oils and sweat. If pads are removable, cleaning them separately reduces risk and speeds drying.
– Ear pads: microfiber + (optional) slightly soapy water on a cloth; if pads are removable, follow the pad material guidance from the manufacturer.
Practical rule: if your pad material is leatherette or coated, reduce moisture frequency and finish with a dry microfiber wipe. If it’s real leather or cloth, alcohol tolerance and drying behavior can differ—so rely on the manual.
Headband and exterior plastics: dust first, wipe second
– Headband and exterior plastics: dry brush to lift dust, then wipe with a lightly damp microfiber.
This sequence matters: brushing removes loose dust so your wipe doesn’t grind particles into the finish. If you’re cleaning in 2026 office or home environments with frequent skin contact, this dry-then-damp workflow helps prevent streaking.
Microphone and grilles: protect openings
– Microphone and grilles: dry brush first; if needed, very lightly damp swab on the exterior, keeping moisture out of the pickup area.
For a gaming headset with a detachable mic, you can often clean the mic body more safely when it’s off the headset. For a fixed mic, prioritize dry brushing and compressed air, and only spot-clean the outer housing if the manufacturer approves.
Build your “cleaning kit” in 10 minutes
You can assemble a practical gaming headset cleaning kit in about 10 minutes by focusing on a small set of dry tools and one controlled cleaning method. The safest kit avoids stacking multiple liquids and keeps moisture away from openings.
A minimal cleaning kit (microfiber, soft brush, cotton swabs, and compressed air) covers dust removal, surface smudges, and detail edges for most headset designs.
Using one solution path at a time (soap OR approved alcohol) reduces the chance of residue buildup on plastics and fabric coatings.
Final drying with a dry microfiber cloth reduces moisture trapped at seams and joints on gaming headsets.
Here’s the exact kit logic from your baseline workflow:
– Start with the core set: microfiber cloth (2), soft brush, cotton swabs, and compressed air.
– Add one solution path (pick one): either (A) mild soap + water for general smudges, or (B) manufacturer-approved alcohol wipes / lightly applied isopropyl on a cloth—don’t stack multiple liquids at once.
– Optional, only if your headset allows it: replacement ear pads or pad cleaning wipes, if your model supports swapping pads ().
What I’d stock for “high-sweat” users
If you game frequently, especially in warm rooms, prioritize airflow after cleaning (dry time) and keep a second microfiber cloth ready for finishing. If odor persists after cleaning, that’s often trapped material—replacement pads can be more effective than repeated wet cleaning.
What can go wrong (and how to avoid it)
Most headset cleaning problems come from moisture where it shouldn’t go or abrasion where it shouldn’t happen. If you keep cleaning dry by default and only apply dampness to the cloth/swab (not the headset), you avoid the majority of failure modes.
Soaking electronics-adjacent components increases the risk of internal moisture migration and long drying times.
Abrasive tools can scratch plastics and can damage fabric or coatings by roughening the surface.
Skipping manufacturer cleaning limitations is a common cause of discoloration and premature wear in headset pads and finishes.
– Soaking the headset: moisture in speaker grilles, buttons, or the mic can cause distortion or long drying times—always dampen the cloth, not the headset.
– Scrubbing the wrong surfaces: rough brushes or abrasive cloths can scratch plastics or damage fabric coatings.
– Skipping manufacturer guidance: some finishes and pad materials (leatherette, real leather, cloth) respond differently—check your manual/support page before using alcohol or soap.
Edge cases you should treat cautiously in 2026
– Foam pads that feel fragile or cracked: stop using alcohol and switch to manufacturer-approved pad cleaning only.
– Detachable parts with seams: moisture can creep into connector areas; clean exterior only and allow full drying.
– Mesh grilles with heavy dust: start with compressed air and a soft brush so you don’t smear debris into fabric.
Verdict: what to buy—and who should skip DIY cleaning
If you want the safest baseline, buy a small kit: microfiber cloths, a soft brush, cotton swabs, and compressed air—then use only lightly damp cleaning where needed. DIY is reasonable for most gaming headsets, but skip it (or be extremely conservative) if your manual says certain parts must remain liquid-free or if your headset is known to be water-sensitive.
A dry-first, minimal-moisture method is the most repeatable way to clean a gaming headset without increasing the risk of residue or internal moisture.
Manufacturers often specify cleaning agents and “no liquids” zones around microphones, grilles, and controls to protect internal electronics.
When pads absorb odor, replacement can be more reliable than repeated chemical cleaning, depending on the headset model.
If you’re deciding what to purchase, this is the honest summary:
– Do this: dry tools first, damp cloth only when needed, and finish with a dry microfiber wipe.
– Don’t do this: bleach, acetone/nail polish remover, or soaking the headset body.
– Be cautious: for leather/leatherette, coated fabric, and any model with explicit liquid limitations.
If your headset has non-removable pads, reported water sensitivity, or if the manual explicitly says not to apply liquids to certain parts (), professional cleaning or pad replacement may be the safer route.
Quick checklist + scan/save
Fast checklist (print this)
| Item | What it helps with | Notes |
|---|---|---|
| Microfiber cloth (2) | Smudges + final dry wipe | Keep one “clean” side |
| Soft-bristle brush | Dust + surface debris | Use gentle strokes |
| Cotton swabs | Seams, vents, edges | Don’t push liquid into openings |
| Compressed air | Dust in grilles/creases | Short bursts; don’t freeze the headset |
| Mild soap (optional) | Sweat/smudge on exterior/pads | Dilute; damp cloth only |
| 70% isopropyl alcohol (optional) | Tough spots on certain surfaces | Only if allowed by manufacturer |
Frequently Asked Questions
What tools and supplies do I need to clean a gaming headset safely?
Start with microfiber cloths or lint-free wipes, cotton swabs, and a soft-bristle brush for dust and debris. Use 70% isopropyl alcohol on the cloth (not directly on the headset) for disinfecting, plus mild soap and water for removable parts if your headset manual allows it. Avoid harsh cleaners, bleach, and excessive moisture near the speaker drivers and microphone openings.
How do I clean gaming headset ear pads and remove odors without damaging them?
If your ear pads are removable, wipe them with a slightly damp microfiber cloth using a mild soap solution, then dry them fully before reattaching. For foam or fabric pads, you can lightly mist with 70% isopropyl alcohol on a cloth and blot gently to reduce odor, but don’t soak the material. For leather or leatherette, use a lightly damp cloth and finish with a dry wipe to prevent cracking and residue buildup.
Which cleaning products are best for disinfecting a gaming headset microphone and boom arm?
Use 70% isopropyl alcohol applied to a microfiber cloth or cotton swab to sanitize the microphone grille and contact areas. This helps remove oils, bacteria, and grime that can build up from frequent headset use. Never pour liquid into mesh parts or vents; instead, wipe carefully so moisture doesn’t reach internal electronics.
What’s the correct way to clean gaming headset speakers and prevent moisture damage?
Use a dry soft-bristle brush or compressed air at a low, controlled distance to lift dust from speaker grilles, then finish with a dry microfiber cloth. If you need to tackle smudges, apply a tiny amount of alcohol to a cloth and gently wipe the exterior surfaces only. Keep the cleaning process dry overall, because excess liquid can affect sound quality and potentially damage drivers.
Why do I need specific supplies like microfiber cloths and cotton swabs for headset maintenance?
Gaming headsets collect oils, sweat, and fine dust that can degrade comfort and hygiene, and the wrong tools can leave scratches or lint behind. Microfiber cloths help remove fingerprints and grime without abrasive marks, while cotton swabs reach tight seams around the ear cups and microphone. These supplies also make it easier to clean with minimal moisture, protecting the headset materials and extending the life of your gaming headset.
📅 Last Updated: October 19, 2026 | Topic: Tools and Supplies You Need to Clean a Gaming Headset | Content verified for accuracy and freshness.
References
- https://www.cdc.gov/coronavirus/2019-ncov/community/disinfecting-building-facility.html
- https://www.who.int/publications/i/item/cleaning-and-disinfection-of-environmental-surfaces-in-the-context-of-covid-19
- https://www.epa.gov/coronavirus/cleaning-and-disinfecting-your-facility
- How to clean your Apple products – Apple Support
- Isopropyl alcohol
- Disinfectant
- 70% isopropyl alcohol disinfection effectiveness – Search Results – PubMed
- https://scholar.google.com/scholar?q=cleaning+headsets+disinfecting Google Scholar
- https://scholar.google.com/scholar?q=70%25+isopropyl+alcohol+disinfection+electronics+wipes Google Scholar
- https://scholar.google.com/scholar?q=cleaning+electronics+microfiber+cloth+disinfection+effectiveness Google Scholar
