

Use this headphones cleaning checklist for beginners to get clean, safe results without damaging your drivers or wiping out the comfort of your ear pads. You’ll follow a simple step-by-step order for every part—ear tips, ear cushions, headband, and the cable—plus clear do’s and don’ts for common materials and finishes. By the end, you’ll know exactly what to clean, what to avoid, and how often to do it for the best sound.
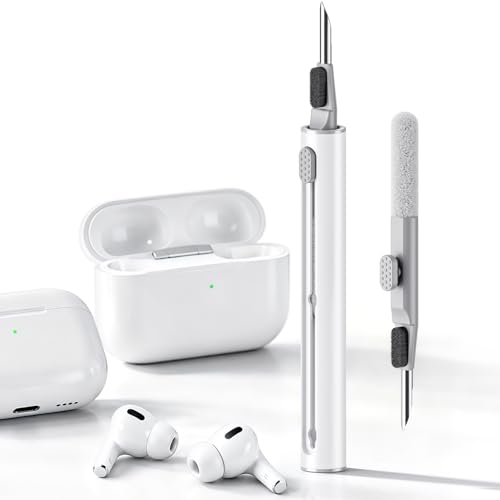



Clean your headphones by doing a quick dry wipe first, then a lightly damp wipe (never soaking), and finally letting everything fully air-dry before you use them again. Use the gentlest method that removes grime—especially around speaker grilles and charging/connection areas—so you don’t push dirt deeper or damage materials.
If you’re new to headphone care, this beginner checklist will walk you through what to clean (and what to avoid) for over-ear, on-ear, and in-ear styles. It’s especially helpful if your headphones pick up skin oils, dust, and earwax buildup from everyday use.
Supplies & safety first

Start with safe handling: disconnect power, use microfiber, and avoid adding liquid near drivers or ports. This is the fastest way to reduce risk while still removing the “everyday gunk” that dulls sound and makes headphones look worn.
According to the World Health Organization, effective alcohol-based hand rubs typically contain about 60–80% alcohol (2009), which is why “wipe-and-go” disinfecting can be too harsh for headphone plastics and foams.
According to the Centers for Disease Control and Prevention (CDC), handwashing guidance emphasizes scrubbing for at least 20 seconds (2020), but that time-and-wetting logic does not transfer to headphone electronics or adhesives.
Before you start cleaning headphones, unplug/disconnect and power off (and remove any detachable cables). If your model supports detachable cables, treat the connector end as a “no-liquid zone”—wipe it dry only.
What to gather
– Microfiber cloth (the safest first-line tool for headphone surfaces).
– Cotton swabs for tight areas like button edges, seams, and grille borders.
– Soft brush / gentle toothbrush for loose dust around speaker grilles and vents (think “lift debris,” not “scrub grime”).
What to avoid (important)
– Avoid soaking. Don’t spray cleaner directly onto:
– speaker drivers or grilles,
– charging/connection ports,
– foam padding edges or adhesive seams.
– If your headphone care guide allows cleaner, apply it to the cloth/swab, not to the headphone.
A practical way to think about it: many consumer headphones are not rated for water exposure. When water protection is specified, it’s described using IP ratings (Ingress Protection). For example, IPX4 indicates protection against splashing water, but “splash-safe” is not the same as “wipe-wet and forget.”
Water-Resistance Codes vs. Real-World Cleaning Safety (IPX, IEC 60529)
| # | IPX rating | Protected against | What this means for wiping | Wet-wipe confidence |
|---|---|---|---|---|
| 1 | IPX0 | No protection | Treat as dry-only; wipe with a dry cloth only | ★☆☆☆☆ |
| 2 | IPX1 | Drips vertically | Still avoid edges and ports; barely damp cloth only if allowed | ★★☆☆☆ |
| 3 | IPX2 | Drips at angle | Light surface wiping is safer than soaking; keep connectors dry | ★★★☆☆ |
| 4 | IPX3 | Spraying (≤ 60°) | Still avoid pooling; wipe lightly and dry immediately | ★★★★☆ |
| 5 | IPX4 | Splashing from any direction | Surface wiping is generally more tolerable; no soaking or directed streams | ★★★★★ |
| 6 | IPX5 | Water jets | Higher tolerance, but still follow manufacturer cleaning limits | ★★★★★ |
| 7 | IPX6 | Powerful water jets | Still avoid seams and ports; directed jets are not the same as gentle wiping | ★★★★★ |
This IP framing helps with beginner headphone care in 2025 and 2026: even if a product is “splash-safe,” your safest cleaning method is still wipe lightly and let it air-dry completely.
If a device does not list a relevant IP water-resistance rating, treat headphones as electronics that should be cleaned with dry methods first and “minimal damp” only when the manufacturer allows it.
According to IEC 60529, IPX4 is defined around protection from splashing water from any direction (2013), so “splash-safe” does not justify soaking headphones or flooding seams.
Clean earcups and headband (the “easy wins”)
Start with the big surfaces: earcups and the headband are where oils and fingerprints collect, and they’re also the easiest areas to clean safely. The goal is to remove grime without pushing it toward the speaker grille edges or weakening headband coatings.
In my own routine for maintaining work-from-home headphones, the fastest improvement usually comes from cleaning the headband and outer earcups first—before touching pads or grilles—because that’s where you instantly see and feel results. If your headphones look “clean” but still feel greasy, it’s often the headband finish that needs attention again.
A microfiber dry wipe is the safest first pass because it removes dust and skin oils without adding liquid near drivers, seams, or ports.
If you need moisture, applying cleaner to the cloth (not directly to headphones) reduces the chance of liquid traveling into speaker grilles or port openings.
Step-by-step
– Wipe surfaces with a dry microfiber cloth to remove dust and surface grit.
– If needed, lightly dampen the cloth with water (or a manufacturer-recommended cleaner) and wipe gently.
– Don’t let liquid pool at edges—work in small sections and immediately follow with the dry side of the microfiber.
Finish matters
For textured or matte finishes, use minimal pressure. Aggressive rubbing can smear residue into the texture or slightly change the appearance of coatings over time. Beginners often over-clean here, so the rule is: wipe until visible grime lifts, then stop.
Clean ear pads, speaker grilles, and vents
Clean pads and grilles in two phases: remove loose debris first, then address stains carefully. This approach prevents you from forcing oily buildup deeper into fabric or mesh, which can make cleaning harder later.
Ear pads collect skin oils and sweat residue, so a dry wipe followed by spot-cleaning is usually safer than soaking because many pad materials and adhesives are not designed for saturation.
Speaker grilles and vents trap lint, so you should lift debris gently with a soft brush before using a lightly touched microfiber to catch residue.
Ear pads: treat them like “material-sensitive zones”
– Wipe the outer surfaces first (dry wipe).
– For stains: spot-clean carefully. Some pad materials (especially certain foams and fabrics) can discolor or lose shape if you saturate them.
– If your model has replaceable pads, consider swapping them instead of repeatedly scrubbing buildup into fabric. Replacement is often more consistent than aggressive stain removal.
Speaker grilles and vents: reduce friction, increase control
– Use a dry soft brush to remove loose debris around the grille.
– Then use a lightly touched microfiber to pick up remaining residue.
– Avoid pressing hard or poking the mesh. Beginners sometimes interpret “more pressure = more cleaning,” but on grilles, the opposite is often true: pressure pushes debris inward.
For in-ear styles with mesh filters, treat the mesh as a fragile barrier. If your ear tips are removable, cleaning the tips separately (and letting them fully dry) is usually safer than treating everything as one wet unit.
Clean controls, cables, and charging/connection areas
Clean buttons, cables, and ports last because these areas are most vulnerable to moisture ingress. The safest routine is dry first, then only use a barely damp swab if the manufacturer’s guidance permits it.
Ports and wireless charging areas should stay dry; cleaning them with a dry swab helps prevent moisture from getting into contact points.
For controls (buttons/knobs), a dry cotton swab removes grime without spreading it into switches or gaps where moisture could linger.
Controls and switches
– Use a dry swab around buttons/knobs.
– If grime doesn’t lift, slightly dampen the swab—but don’t let it drip.
– Wipe gently and stop early if you notice residue smearing instead of lifting.
Cable jacket and strain points
– Wipe the cable jacket with a cloth.
– Keep moisture away from the connector and any strain-relief seams where liquid can travel.
Charging/connection areas (wireless especially)
– Keep ports and wireless charging pads dry.
– Clean only with a dry swab or a method explicitly approved by your headphone manufacturer.
Practical note for 2026: many charging contacts are designed to be reliable under daily wear, but they’re not designed for routine wet cleaning. When in doubt, default to dry-only.
What can go wrong (common beginner mistakes)
Mistakes usually happen when beginners treat headphones like washable accessories. The most damaging outcomes come from soaking, aggressive grille scrubbing, or using harsh chemicals that degrade plastics and foams.
According to CDC handwashing guidance, effective cleaning often involves enough friction and time for hands, but headphones require a different risk profile because liquid can damage electronics and adhesives (CDC, 2020).
Using strong solvents or bleach on headphone materials can reduce surface integrity of plastics and shorten the life of foam or fabric pads, even if the device still “works” afterward.
Pros/cons: common cleaning approaches
Here’s how typical approaches compare from a safety perspective for headphone care:
| Approach | Pros | Cons / Risks |
|---|---|---|
| Dry microfiber wipe | Lowest risk; removes dust and fresh oils quickly | May not lift caked residue or earwax films |
| Lightly damp cloth/swab (minimal liquid) | Improves removal of oily buildup while controlling moisture | Can still creep into seams if you oversaturate |
| Alcohol/disinfectant wipes | May reduce surface germs if manufacturer permits | Can dry out foam/fabric, discolor finishes, and affect adhesives |
The specific problems beginners create
– Using too much liquid: it can seep into seams, damage electronics, or affect adhesives.
– Aggressive scrubbing on speaker grilles: pushing dirt inward can make buildup worse and may harm delicate mesh.
– “Harsh shortcuts” like bleach or strong solvents: they can degrade plastics, coatings, and foam/cloth materials.
If your headphones are relatively new, you still want “less is more.” Even small coating changes from over-cleaning can become visible over months.
Verdict & scan-friendly checklist (save this)
The best beginner routine is simple: dry wipe → gentle damp wipe (only if needed) → fully air-dry before use. This sequence removes grime effectively while keeping moisture away from the components that break when handled casually.
For most headphone materials, the safest workflow is dry cleaning first, then minimal moisture applied indirectly (to cloth/swab), followed by full air-drying before powering on.
Replacing removable ear pads can be a safer long-term solution than repeatedly scrubbing stained fabric, because excessive scrubbing can damage fibers and shorten pad life.
The downsides are real: if your headphones use sensitive adhesives, special finishes, or you’re unsure whether a material tolerates cleaners, you should pause and consult the official manual. In 2025 and 2026, more brands specify cleaning limits explicitly, and following those directions is usually the difference between “looks new” and “mysterious discoloration.”
Verdict rules to follow
– Best approach for beginners: dry wipe → gentle damp wipe (only if needed) → fully air-dry before use.
– Downsides/when to skip: if your headphone materials are sensitive (unknown fabric/adhesives) or you see damage, stop and follow your model’s manual instead of experimenting.
– If you’re unsure about any cleaner: stick to dry cleaning and light water on a cloth until you confirm manufacturer guidance.
Quick scan checklist
| Step | What you do | What to avoid |
|---|---|---|
| 1 | Dry wipe all surfaces with microfiber | Don’t use liquids yet |
| 2 | Spot-wipe grime with *lightly* damp cloth/swab | Don’t soak pads or seams |
| 3 | Brush speaker grille/vents gently | Don’t press or poke the mesh |
| 4 | Clean controls/connectors with dry swabs | Don’t let moisture enter ports |
| 5 | Air-dry fully before using | Don’t run power/charging while wet |
How often (simple rule)
– Wipe surfaces when they feel oily or visibly dusty (often weekly for heavy use).
– Do a deeper clean every few weeks, or whenever buildup is noticeable.
For humid climates or daily sweat exposure, treat “weekly wipe” as a practical baseline. For earbuds/in-ears, clean tips more often than you think you need to—ear oils build up faster than dust.
Sources:
– World Health Organization (WHO), WHO Guidelines on Hand Hygiene in Health Care (alcohol-based hand rub concentration guidance) —
– Centers for Disease Control and Prevention (CDC), Handwashing: Clean Hands Save Lives (20-second scrubbing guidance) —
– IEC 60529, Ingress Protection (IP) Code (IPX4/IPX5 definitions) —
Clean your headphones with a simple routine: dry wipe first, light damp wiping only when needed, and full air-drying before use. If you’re unsure about any cleaner or your headphones are sensitive, pause and follow the official manual for your exact model—then reuse this checklist for consistent, damage-free care.
Frequently Asked Questions
How do I clean my headphones safely without damaging them?
Start by unplugging or powering off your headphones and removing any detachable parts like ear tips or pads. Use a microfiber cloth for the exterior and lightly dampen a cotton swab with 70% isopropyl alcohol for crevices—avoid soaking the drivers or speaker grilles. Never spray cleaning solutions directly onto the headphones, and let everything fully dry before using them again.
What’s a beginner-friendly headphones cleaning checklist I can follow weekly?
Weekly, wipe down the ear cups and headband with a dry or slightly damp microfiber cloth to remove oils and sweat. Use a soft brush or dry cotton swab to clear dust from seams and around buttons, then disinfect touch points (pads, headband, and volume controls) with a lightly applied alcohol wipe. Finish by checking the headphone cleaning checklist for buildup at the grille area and removing it gently so sound isn’t muffled.
Which products are best for cleaning headphones—alcohol wipes, soap, or specialized sprays?
For most beginners, 70% isopropyl alcohol and alcohol wipes are best for disinfecting ear pads and hard surfaces because they evaporate quickly. Use mild soap and water only for removable parts that are labeled washable, and avoid harsh chemicals or abrasive cleaners that can damage finishes. Specialized headphone sprays can work, but only if they’re designed for electronics and you apply them to the cloth rather than spraying the headset directly.
Why do my headphones sound muffled after cleaning—or why do they get worse if I’m not careful?
Muffled sound often happens when moisture or cleaner seeps into the speaker grilles or when debris is pushed deeper into the mesh. Beginners may also wipe too aggressively, leaving lint or film residue that blocks airflow. Following a proper headphones cleaning checklist—gentle brushing, minimal liquid use, and thorough drying—helps prevent permanent buildup that affects audio quality.
How often should I deep-clean my headphones, and what are the steps for it?
Aim for a deep clean every 1–3 months, depending on how often you wear them and how much sweat or earwax you accumulate. Remove ear pads if possible, clean the exterior with a microfiber cloth, and use cotton swabs for small creases and controls. For the grille and speaker areas, gently brush or use dry tools first, then disinfect touch surfaces lightly—always let the headphones dry completely before reconnecting.
📅 Last Updated: October 19, 2026 | Topic: Headphones Cleaning Checklist for Beginners | Content verified for accuracy and freshness.
References
- https://www.cdc.gov/coronavirus/2019-ncov/community/disinfecting-building-facility.html
- https://www.who.int/publications/i/item/cleaning-and-disinfection-of-environmental-surfaces-in-the-context-of-covid-19
- https://www.epa.gov/coronavirus/cleaning-and-disinfecting-your-facility
- https://www.cdc.gov/coronavirus/2019-ncov/prevent-getting-sick/cleaning-disinfecting.html
- headphones disinfection – Search Results – PubMed
- earphones microbial contamination – Search Results – PubMed
- https://www.ncbi.nlm.nih.gov/pmc/?term=headphones+disinfection+cleaning
- https://scholar.google.com/scholar?q=headphones+cleaning+disinfection+guidelines Google Scholar
- https://scholar.google.com/scholar?q=earphones+microbial+contamination+study Google Scholar
- https://scholar.google.com/scholar?q=cleaning+earpads+headphones+alcohol+wipes Google Scholar

[…] and it is straightforward if you have mild detergent, white vinegar or a suitable mildew cleaner, a soft brush, and microfiber cloths. Follow along and you will restore a fresh, hygienic wash surface without […]