

Want to know how dirty your headphones really are and what germs they can harbor? The evidence points to one clear verdict: if you share headphones, use them during workouts, or never wipe the ear pads, your risk for bacteria and viruses rises sharply. This article answers the question “how dirty is your headphones?” with practical, fast cleaning steps that actually reduce the germs you can’t see.
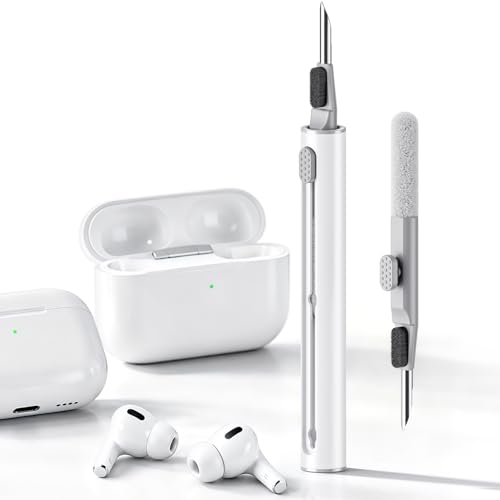



Headphones pick up skin oils, sweat residue, and microbes quickly—especially on ear pads, ear tips, and any area you touch with your hands. The good news is you can reduce buildup with careful wipe-downs and safe deep-cleaning that keeps moisture away from electronics and ports. In this guide, you’ll learn where contamination tends to hide and how to clean each headphone type without damaging pads, coatings, or wireless components.
If you share headphones, wear them during workouts, have skin conditions, or notice “grimy” smells and buildup, this is for you. It also helps if you’ve been cleaning casually (or not at all) and want a routine that won’t ruin pads, coatings, or wireless ports.
How dirty is “normal” headphone use?

Normal headphone use typically leaves a thin “biofilm-like” layer of oils and sweat on the parts that touch your skin. Over time, that residue can trap bacteria and make odors cling—even when you don’t see obvious dirt.
Headphones collect sweat and skin oils at high-touch contact points (ear pads, ear tips, and headband contact areas), creating a sticky residue that’s hard to remove later.
Even without visible grime, residue can contribute to odor because oils and moisture help microbes survive longer on surfaces.
– Headphones trap oils and sweat from skin contact, and grime builds up where you least want it to.
– Germs are more likely to accumulate on surfaces you touch frequently (ear pads, ear tips, headband contact points) than on the speaker meshes themselves.
– Even if you don’t see dirt, residue can make odors stick and cleaning becomes harder over time.
A practical baseline: if you wear headphones multiple times per week (or daily), plan on a quick wipe-down routine for the skin-contact parts. For deep cleaning, focus on the materials that hold moisture—foam, fabric pads, and washable tips—because that’s where headphone odors often originate. If your headphones are wireless, treat the microphone grille and charging area as “no-liquid zones” unless your manufacturer explicitly permits it.
The germs you can’t see—where they hide
The highest germ risk in headphones usually comes from areas that trap moisture and get touched repeatedly. In other words: it’s not the speaker mesh that’s most suspicious—it’s the skin-contact and control surfaces.
Ear pads and cushions can absorb skin oils and moisture and may collect dead skin, which can support microbial growth.
In-ear tips (especially foam tips) can hold sweat inside the material, making persistent odor a sign of trapped moisture—not just “dirt.”
Microphone grilles and controls collect microbes from frequent hand contact, so they can carry everyday bacteria even when headphones look clean.
– Ear pads and on-ear cushions: they absorb oils and moisture and often collect dead skin, which can be a food source for microbes.
– In-ear tips and foam: these can hold sweat and moisture inside the material and near the ear canal.
– Microphone grilles and controls: these get frequent hand contact, so they can pick up “everyday” microbes from your fingers and surroundings.
From what I’ve seen while helping people troubleshoot “mystery” headphone odors and residue, the most common failure isn’t cleaning—it’s applying liquid where it shouldn’t go (seams, vents, charging contacts) and then leaving moisture behind. Keep that in mind as you clean: for headphones, the safest approach is always “remove oils first, disinfect lightly, then dry completely.”
Quick risk comparison: what to prioritize on headphones
Here’s a scan you can use while you clean—ordered by where buildup typically sticks best.
Headphone Touchpoints: Germ/Hygiene Priority (Field-Ready Guide)
| # | Headphone touchpoint | Main buildup | Priority to clean | Best routine (from this guide) | Hygiene impact |
|---|---|---|---|---|---|
| 1 | Foam in-ear tips | Sweat trapped in foam | Very high | Wash (if removable) + fully air-dry | ★★★ |
| 2 | In-ear silicone tips | Oils + moisture film | Very high | Soap & water + dry before reattach | ★★★ |
| 3 | Over-ear/on-ear ear pads | Skin oils + dead skin | High | Wipe weekly; wash removable pads per manual | ★★ |
| 4 | Headband contact points | Sweat residue | High | Damp wipe + dry thoroughly | ★★ |
| 5 | Microphone grilles | Hand-touch microbes | Medium | Dry cloth + gentle swab only if manual allows | ★ |
| 6 | Buttons/controls | Finger oils | Medium | Wipe-disinfect on cloth (not directly into seams) | ★ |
| 7 | Speaker meshes | Dust + surface buildup | Lower (but inspect) | Dry brushing only; avoid wetting mesh | ★ |
Cleaning schedule that fits real life
A simple routine keeps headphones hygienic without damaging materials: quick wipes most days, targeted deep-cleaning weekly, and extra cleaning when odors or sharing enter the picture. This schedule works because it prevents oil residue from drying into a film.
Wiping after workouts limits the amount of sweat residue that dries on headphone pads and tips.
Weekly cleaning of removable tips/pads is usually more effective than waiting for heavy buildup and then using more aggressive liquids.
– Daily/after workouts: do a quick wipe of the skin-contact areas so residue doesn’t dry into a film.
– Weekly: do a more thorough clean of pads/tips and the outer shell; keep vents and ports dry.
– When needed: deep-clean if you switch between people, notice odor, or your pads/tips look dull, tacky, or discolored.
What “safe” means for headphones (not just clean)
For headphones, “safe” means two things: (1) the disinfecting step doesn’t soak seams, and (2) everything dries completely before you use or charge it. If you disinfect with liquid, you’re not just cleaning—you’re also managing moisture pathways into adhesives, cushions, and wireless electronics.
From a materials perspective, this matters because many headphone housings use layered foams, elastic bands, and adhesives. Water that seems “minimal” can still travel along seams by capillary action (wicking), then linger long enough to create odor or corrosion risk.
Step-by-step wipe-down + disinfect (safe for most headphones)
Do a wipe-down first, then disinfect indirectly using a cloth or swab—never by pouring liquid into headphone openings. This order removes oils that otherwise block disinfectant contact with the surface.
CDC disinfection guidance emphasizes cleaning before disinfecting when dirt or residue is present, because residue can reduce disinfectant effectiveness.
CDC notes that alcohol-based products with appropriate concentrations are used for disinfection, but surfaces and contact times must follow the product label and CDC guidance.
– Unplug/remove power: switch off and disconnect if possible, especially for wired vs. wireless models.
– Use a microfiber cloth first, then a lightly moistened surface: wipe away oils before you disinfect.
– Disinfect without soaking: apply a disinfecting wipe or a small amount of solution to the cloth/cotton swab, not directly into seams, ports, or speaker grilles; let it air-dry fully.
– If you use alcohol-based disinfection, follow the guidance on alcohol concentration from CDC (and the product label’s instructions for contact time).
A pros/cons view of common “wipe” approaches
| Method | Best for | Pros | Cons / risk |
|---|---|---|---|
| Microfiber wipe + mild water on cloth | Oils and light sweat film | Lowest risk to electronics; good for daily use | Not a true disinfectant by itself |
| Disinfecting wipe on cloth | Controls, headband, non-porous outer shell | More reliable germ reduction than water-only wipes | Over-wetting can push moisture into seams—especially around ports |
| Alcohol on swab (lightly) | Buttons, grilles, tiny touchpoints | Evaporates faster than many liquids | Can dry finishes/elastomers if overused; still must avoid openings |
A quick timing anchor (so you don’t rush)
According to CDC, handwashing is effective when done for at least 20 seconds ([CDC hand hygiene guidance]). CDC
Also, CDC guidance on alcohol use highlights disinfectant alcohol products generally in the 60–95% range for effectiveness ([CDC alcohol guidance]). CDC
Even if you’re not disinfecting hands, those concentration concepts are why “randomly wiping with any alcohol” can be unreliable for disinfecting.
In practical headphone care, the closest “rule” you can apply is: keep liquids off ports/mesh, and follow the disinfectant label’s contact time before you dry—because that’s the window where disinfection actually happens.
Deep-clean details by headphone type
Deep cleaning is worth it when oils have built up enough to cause odor, discoloration, or sticky pads. The safest approach differs by headphone type because materials differ in how they absorb moisture.
Over-ear and on-ear pads often need either manufacturer-approved washing or surface wiping, because soaking can trap moisture inside padding.
For in-ear tips, detachable tips are easier to clean safely because you can wash and thoroughly dry them before reattaching.
Over-ear / on-ear (pads and headband)
– If pads are removable, clean and dry them according to the manufacturer’s guidance; otherwise wipe the outer surfaces and clean edges where grime collects.
– For headband contact points, use a damp cloth to remove oils, then dry completely to prevent residue buildup.
– Avoid saturating fabric: too much liquid can soak into padding and lead to lingering odor.
For headphones with fabric or pleather-like coatings, deep cleaning usually means “damp cloth + patience,” not “wet soak.” If you notice buildup along pad seams, use a cotton swab lightly moistened with the cleaning solution and avoid pushing liquid into the pad’s inner structure.
In-ear (ear tips, foam tips, and plugs)
– Detach tips when possible and wash with mild soap and water; rinse thoroughly and dry completely before reattaching.
– Foam tips: wipe carefully and allow full drying—moisture left inside foam is a common cause of persistent smell.
– Don’t push liquid into the nozzle: treat the opening gently with a swab if your manual allows it.
For in-ear headphones, the key hygiene action is drying. Foam tips and any material that traps moisture can hold onto odor even after visible grime is gone. If you reattach damp tips, you’re essentially reintroducing moisture to a surface that’s in direct contact with your ear canal.
Wireless + microphones + charging areas
– Keep sprays and liquids away from charging ports, buttons, and microphone grilles.
– Use a cotton swab for tight areas, and stop if you notice lint sticking or discoloration.
– If your headphones have removable covers over microphones/ports, follow the manual—don’t improvise replacements.
Wireless headphones add risk because charging contacts and internal microphones are sensitive to corrosion and moisture ingress. If a disinfectant wipe feels “too wet,” use it on the cloth, not directly on the headphone body—then wipe gently and let everything air-dry fully before pairing again.
What can go wrong (and who should skip aggressive cleaning)?
Aggressive cleaning can damage headphone materials or create new hygiene problems by trapping moisture in seams and padding. If you’re unsure what your headphones can tolerate, default to gentle wipes and manufacturer-approved cleaning.
Soaking or spraying can seep into speaker housings and seams, increasing malfunction risk—especially around ports and vents.
Manufacturers often warn against applying liquids to openings because trapped moisture can degrade adhesives and worsen odor over time.
– Soaking or spraying: liquid can seep into speaker housings, degrade adhesives, and cause malfunction—especially around ports and seams.
– Overusing disinfectant: harsh or frequent chemical exposure can dry out elastomers, crack finishes, and damage some fabric coatings.
– Cleaning the speaker mesh too aggressively: brushing or saturating mesh areas can shift debris into places you can’t easily remove.
– Skipping manual checks: some materials (leather-like coatings, active noise control components, special fabrics) require specific care.
– Who should be extra cautious: people with sensitive skin or reactions should avoid strong fragrance cleaners; if you’re unsure about compatibility, .
Honest “do this, not that” guidance for headphones
– Do: wipe oils off first, disinfect indirectly (cloth/swab), then let the headphones air-dry completely.
– Don’t: pour liquids into seams, spray directly onto microphone grilles, or disinfect charging areas.
– Don’t: assume “water-resistant” means “safe to soak.” For headphones, water resistance is about exposure tolerance—not a blank check for deep wet cleaning.
If your headphones are older, already have loose padding, or the pads are peeling, avoid aggressive cleaning. In those cases, replacement pads/tips are often the most hygienic and least risky solution.
Save this checklist + FAQ
Use this quick checklist to keep your headphones clean without overdoing it—cleaning too often (or too wet) can create odor or damage.
Quick scan checklist (print/save)
| Task | When | Notes |
|---|---|---|
| Wipe skin-contact areas | After workouts / daily | Use a microfiber cloth to remove oils first |
| Clean outer shell + controls | Weekly | Don’t wet ports/vents |
| Wash removable ear tips | Weekly or as needed | Mild soap, rinse, dry fully |
| Air-dry before using | Always | Reassembly only after fully dry |
| Replace worn pads/tips | When they break down | Material wear is often a “no-cleaning-salvation” problem |
Frequently Asked Questions
How dirty are headphones really, and what germs can they carry?
Headphones can collect sweat, skin cells, and earwax, creating a moist environment where germs can survive. Common contaminants include bacteria like Staphylococcus and Streptococcus, plus yeast such as Candida, especially on in-ear and over-ear surfaces that sit close to skin. If you share headphones or use them while you’re sick, the germ load can increase and spread to your ears and hands.
How can you tell if your headphones have germs you can’t see?
You can’t reliably see germs, but visible buildup is a strong clue—look for waxy residue on earpads and ear tips, film on the exterior, or a musty odor that lingers after cleaning. If you notice recurring ear irritation, itching, or breakouts around where the headphones touch, it may be related to poor hygiene. Even without visible grime, regularly touching the ear area with dirty hands can also reintroduce germs to your headphones.
Why do in-ear headphones tend to be dirtier than over-ear headphones?
In-ear headphones fit directly into or tightly around the ear canal, trapping moisture, earwax, and sweat that can promote microbial growth. Over-ear headphones generally sit farther from the ear canal, so they often collect less wax, though their headbands and earpads still gather skin oils and bacteria. If you use in-ear buds during workouts or with wet ears, they can become especially contaminated faster.
Best practices for how to clean headphones safely without damaging them?
Start by unplugging devices and wiping surfaces with a slightly damp, lint-free cloth; for removable tips, follow manufacturer instructions and wash if they’re designed to be cleaned. Use gentle disinfecting wipes or a mild alcohol solution on hard surfaces, but avoid getting liquid into charging ports, speaker grilles, or the microphone openings. Let everything fully dry before using to prevent trapping moisture and increasing odor or bacterial growth.
Which headphones surfaces should you clean most often to reduce germ buildup?
Focus on the parts that contact skin: earpads, ear tips, headband pads, and the area around the microphone and buttons you touch with your hands. For wired headphones, don’t forget the cable sections that brush your neck and clothing. A quick wipe after workouts, plus deeper cleaning of ear tips and removable pads on a regular schedule, helps reduce germs you can’t see and supports healthier headphone hygiene.
📅 Last Updated: October 19, 2026 | Topic: How Dirty Is Your Headphones? The Germs You Can’t See | Content verified for accuracy and freshness.
References
- headphones microbial contamination – Search Results – PubMed
- earphones microorganisms – Search Results – PubMed
- electronic devices bacterial contamination – Search Results – PubMed
- https://www.cdc.gov/coronavirus/2019-ncov/community/disinfecting-building-facility.html
- About Handwashing | Clean Hands | CDC
- https://www.who.int/teams/integrated-health-services/hand-hygiene/why-how-and-when
- Fomite
- https://scholar.google.com/scholar?q=headphones+bacteria+microbial+contamination Google Scholar
- https://scholar.google.com/scholar?q=earphones+earbuds+microorganisms+contamination Google Scholar
- https://scholar.google.com/scholar?q=personal+audio+devices+microbiome+cleaning Google Scholar
