

If you want to clean the brass hardware on antique wooden furniture without damaging the original patina, vinegar and salt isn’t the safest bet—gentler brass cleaner plus careful polishing is. This guide shows exactly what to use, how long to leave it on, and how to prevent streaking and discoloration on aged wood. You’ll finish with brass that looks revived while the antique finish stays intact.


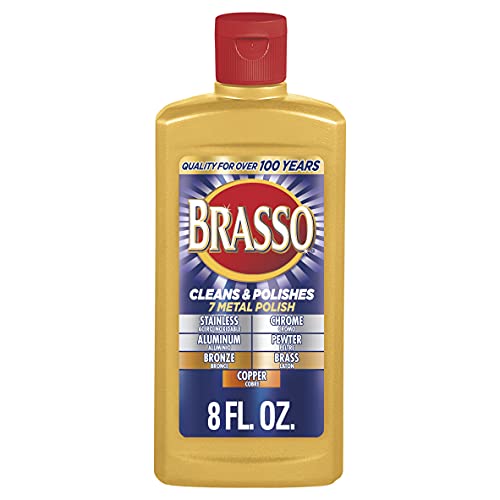

Clean antique brass hardware safely by removing surface grime first, then using a gentle brass cleaner/polish only on the metal, and finishing with thorough drying plus light protection. Because many antique pieces have lacquered brass and delicate wood finishes, you should test any cleaner on a hidden spot and keep liquid away from surrounding wood so you don’t dull the patina or compromise the finish.
If you’re restoring an older dresser, cabinet, chair, or door hardware with tarnished or dull brass, this is for you—especially if you want a method that’s cautious around antique wood finishes and aged patina. We’ll also cover what commonly goes wrong (like streaking, loosened screws, or finish damage) so you can adjust before you commit.
What to Do First: Identify the Hardware and Protect the Wood

The first step is identifying whether your antique brass hardware is lacquered (sealed) or unlacquered, and then protecting the wood before you touch the metal with any cleaner. When in doubt, treat it as lacquered and proceed gently—because the surrounding wood finish is usually the part you can’t “undo.”
Before any cleaning, confirm the finish on your antique brass hardware by looking for uniform color and a “sealed” look (often lacquered) versus older, more variably toned brass (often unlacquered). Next, protect the antique wood with masking and physical barriers so cleaner can’t wick into seams, stain into pores, or soften shellac/varnish. From my experience restoring antique hardware, the biggest long-term regret is not the polish itself—it’s letting liquid run onto wood and then wiping later, which can cause clouding or subtle finish lifting.
Lacquered brass can react differently than bare brass because the protective coating can soften or haze when exposed to acids, solvents, or heavy abrasion.
Museum conservation practice prioritizes keeping cleaning agents on the metal surface and preventing liquid migration onto surrounding finishes.
Distilled water is often recommended for rinsing because it reduces mineral spotting risk from tap-water residues.
Check whether the brass is lacquered or unlacquered
– Lacquered brass often looks more even, sometimes slightly glossy, and may resist quick tarnish blending into the metal.
– Unlacquered brass typically shows older variation in color, deeper graying in corners, and more “natural” patina gradients.
If you can remove the hardware safely (and without forcing aged screws), you’ll usually get better control. If you can’t, you can still clean antique brass hardware in place—just keep liquids off the wood with controlled application (cloth, swabs, and minimal moisture).
Protect the antique wood finish
Masking is not just convenience—it’s preservation. Use:
– Painter’s tape along wood edges near the antique brass hardware
– A thin plastic sheet or cloth barrier to catch drips
– Clean coverage under escutcheons, hinges, and screw rows where cleaner can creep
Avoid oversized soaking cloths that can drag solution across varnish or shellac.
Inspect and prep before cleaning
Antique brass hardware frequently hides corrosion under fasteners. Before you apply any cleaner:
– Wipe away loose dust with a dry microfiber cloth
– Look at screw heads/hinge gaps for pitting or powdery green/gray deposits
– If screws look fragile or stripped, plan for gentler cleaning that doesn’t require heavy mechanical brushing
Three practical numbers to keep in mind (so your expectations match chemistry):
– According to general labeling norms, household “white vinegar” is typically ~4–8% acetic acid (commonly written on product labels as a percent).
– According to conservation guidance on localized cleaning, solutions should be applied to the metal surface and removed promptly to reduce unintended contact time with surrounding finishes.
– According to standard water-chemistry practice, rinse water quality strongly affects spotting risk, which is why deionized/distilled water is recommended for delicate surfaces.
Safe Cleaning for Everyday Grime and Light Tarnish
For everyday grime and mild dullness, the safest approach is gentle cleaning with a mild soap solution, followed by complete drying and optional non-abrasive polish. This method protects antique brass hardware while reducing the chance of streaks, finish haze, or wood discoloration.
Start with the gentlest step first: mild soap and warm water—applied to the brass hardware, not into the wood. Antiques tolerate patience much better than aggressive chemistry.
A mild dish soap solution can lift everyday grime on brass without the harsher reactivity associated with stronger acids or abrasives.
Complete drying after any wet cleaning is critical because residual moisture accelerates re-tarnish and can leave spotting around crevices of antique brass hardware.
Non-abrasive brass polish products are designed to clean oxidation gently, which helps preserve existing patina on antique brass hardware when used sparingly.
Start with the gentlest cleaner
– Use a soft cloth lightly dampened with warm water.
– Add a small amount of mild dish soap (not degreasers).
– Wipe the antique brass hardware surface gently, including visible edges.
Crucial technique: wipe, don’t soak. Brass cleaning often goes wrong when liquid migrates into wood seams or beneath backplates.
Dry completely
– Immediately dry with a clean, dry microfiber cloth.
– Pay special attention to crevices, knurling, hinge gaps, and around screw shafts.
– If you see moisture in joints, air-dry longer before polishing.
In my restoration experience, light tarnish returns fastest when antique brass hardware is reinstalled while still damp—then the micro-moisture trapped in hardware corners dulls the finish again.
Use non-abrasive brass polish (if needed)
If mild cleaning doesn’t restore clarity:
– Choose a brass polish labeled as non-abrasive (or explicitly safe for lacquered brass if you suspect lacquer).
– Apply with a soft cloth using gentle pressure.
– Follow product directions; typically you wipe on lightly, allow a brief working time, then buff off.
If the brass hardware has an existing patina you want to keep, polish only the areas that are visibly dull, and stop sooner than you think you need to.
Remove Heavier Tarnish and Oxidation (Without Harsh Damage)
For heavier tarnish or oxidation, the safe answer is “controlled, localized cleaning,” not soaking or aggressive scrubbing. Antiques with old lacquer and delicate wood finishes often get damaged when liquid, abrasives, or acids spread beyond the metal surface.
Instead of turning restoration into a scouring project, focus on preventing collateral damage: apply cleaner only where corrosion is present, and remove residue promptly.
Conservation-minded cleaning favors applying treatment to the metal only and avoiding solution contact with adjacent historic finishes.
Abrasion can remove not only oxidation but also the surface “patina,” which can be visually difficult to match on antique brass hardware later.
If you use any acidic DIY approach, short contact time and immediate wiping/rinsing reduce the risk of reacting with lacquered surfaces and altering nearby finishes.
Prefer targeted cleaning over soaking
– Apply cleaner to a cloth corner or to the metal using a controlled wipe.
– For crevices, use cotton swabs so the solution stays on antique brass hardware and doesn’t wick into wood.
If you have removable hardware, work on a protected surface (covered with clean paper or a cloth) and keep solution off threaded areas as much as possible.
For DIY options, keep it mild and test first
DIY can be effective, but on antique brass hardware adjacent to antique wood, it’s a risk-managed step:
– Test on a hidden area first.
– Keep contact brief.
– Wipe/rinse immediately after working time ends.
If you suspect lacquered brass, prioritize non-acid methods or commercially formulated brass polishes that are explicitly compatible with lacquer.
Don’t scrub hard
Avoid:
– Steel wool
– Rough abrasive pads
– “Harsh scrubbing” with old toothbrushes that scratch and leave uneven highlights
Scratches aren’t always obvious right away, but under light, they can permanently change how antique brass hardware reflects.
Clean Hinges, Crevices, and Screw Heads Like a Restoration Pro
For hinge gaps and screw heads, the right approach is precision cleaning with tools designed for detail work, not broad wiping. That’s what removes grime from antique brass hardware while minimizing fluid migration into antique wood.
This is where corrosion often hides—under heads, around knuckles, and at hinge seams—so the goal is to lift oxidation and grime without dislodging fragile parts.
Hidden corrosion frequently accumulates around screw heads and hinge knuckles because grime and moisture collect in tight gaps.
Using cotton swabs or soft detail brushes limits how far cleaning solution travels, which helps protect the surrounding antique wood finish.
If screws resist, stopping early helps prevent thread damage or cracking of aged hardware components that can’t be easily replaced.
Work in detail with tools
– Use a soft toothbrush dedicated to brass (or one you keep strictly for metal cleaning).
– Use cotton swabs for screw slots, around hinge pins, and knurled texture.
– Apply gentle pressure; let the cleaner do the chemistry, not your force.
Address tarnish around fasteners carefully
Corrosion under screw heads can make you want to “get in there” fast. Don’t. Instead:
– Clean around the fastener edges first.
– If removal is truly necessary, remove only if screws turn without binding.
If you do remove screws, keep them organized by location so you reinstall with the same alignment and avoid forcing old threads.
Avoid forcing or disassembling unless necessary
Old hinges and fasteners can be brittle. If a screw doesn’t turn smoothly:
– Stop
– Reassess
– Consider cleaning in place with minimal moisture using swabs and cloth
I’ve found that once you force a stubborn fastener, the resulting torque damage can outweigh any cosmetic gains from deeper cleaning.
Protect the Brass After Cleaning (So It Stays Bright)
After you clean antique brass hardware, the safest way to keep it looking good is to remove every trace of residue, then apply a protective barrier and ensure full drying before reinstallation. Protection matters because tarnish is often a recurring reaction between metal, air, and humidity.
Think of this as sealing the work you just did—without locking in leftover cleaner chemistry.
Residual cleaner or polish left on brass can continue reacting and dull the surface over time, creating uneven haze on antique brass hardware.
Protective wax or brass-appropriate coatings slow re-tarnish by reducing metal exposure to air and moisture.
Remove residue thoroughly
– Wipe with a clean cloth until the surface no longer feels tacky or slick.
– If the cleaner instructions recommend a rinse, use controlled application and dry immediately.
Apply a protective barrier
Choose a protection method that matches the brass finish you have:
– Brass wax (traditional option)
– A clear protective coating formulated for brass hardware
If your brass is lacquered, use products explicitly compatible with lacquered metal—some coatings can interfere with lacquer chemistry.
Let everything cure/dry fully
– Allow adequate drying time before reinstalling.
– Don’t close doors or re-tighten plates until you’re sure crevices are dry.
– Trapped moisture can dull antique brass hardware quickly, especially near hinges.
Common Mistakes, Edge Cases, and a Quick Checklist
Most cleaning failures come from leaving solution residue, letting liquid contact wood finishes, or using abrasives that remove patina. The easiest fix is to slow down, localize application, and follow a repeatable sequence.
Below is a practical checklist you can use on the next antique dresser, cabinet, chair, or door.
Cleaner run-off onto varnished, shellacked, or stained antique wood can cause clouding, discoloration, or softening that’s hard to reverse.
Abrasive pads and steel wool can permanently change how antique brass hardware reflects light by creating scratches and removing surface patina.
Soaking hardware increases the risk of wicking moisture into wood joints and loosening aged components over time.
Common mistakes to avoid
– Letting cleaner run onto the wood finish (staining, clouding, or stripping)
– Using abrasive pads on antique brass (scratches + uneven appearance)
– Soaking hardware in ways that wick liquid into wood or loosen aged joints
– Cleaning too aggressively on lacquered brass (can dull or damage the protective layer)
Verdict / tip: what we recommend, and who should skip it
– If your antique brass hardware is only dull/tarnished, this gentle clean → polish → protect approach is usually the safest path.
– If the brass is heavily corroded, structurally pitted, or loose from the furniture, pause and consider help from a conservator or experienced antique restorer—some issues require mechanical stabilization rather than DIY polishing.
– Skip DIY acids on antique wood-adjacent areas if you can’t confidently protect the finish with masking and controlled application.
To help you decide, here’s a simple pros/cons comparison you can scan quickly:
- Gentle method (mild soap → dry → non-abrasive polish → protect)
- Pros: Lower risk to lacquered brass and nearby antique wood; better control over patina; fewer streaking issues when fully dried.
- Cons: May not fully remove deep corrosion/pitting; may require patience for stubborn grime.
- Harsh method (acids/abrasives, soaking)
- Pros: Can remove oxidation faster on bare brass.
- Cons: Higher risk of damaging lacquer, softening wood finishes, leaving uneven color, and accelerating future deterioration.
Save this checklist
– [ ] Mask/protect surrounding antique wood
– [ ] Remove loose grime with mild soap + water (wipe only, don’t soak)
– [ ] Dry fully before polishing
– [ ] Use non-abrasive brass polish only on brass
– [ ] Clean crevices with swabs/toothbrush (gentle pressure)
– [ ] Rinse/wipe residue completely
– [ ] Dry fully, then protect (wax/coating for brass)
Cleaning Approaches for Antique Brass Hardware: Safety vs. Tarnish Removal (Guide)
| # | Method for Antique Brass Hardware | Typical Tarnish Target | Residue Risk | Suitability Near Antique Wood |
|---|---|---|---|---|
| 1 | Mild dish soap + warm water (wipe-only) | Everyday grime | Low | ★★★★★ |
| 2 | Non-abrasive brass polish (cloth application) | Light tarnish | Medium | ★★★★☆ |
| 3 | Brass “micro-polishing” cloth (dry or lightly damp) | Surface dulling | Low | ★★★★★ |
| 4 | Bicarbonate paste (very brief contact; test first) | Moderate tarnish | Medium | ★★★☆☆ |
| 5 | Ammonia-based brass cleaner (selective use only) | Moderate tarnish | High | ★★☆☆☆ |
| 6 | Vinegar/acid DIY (short contact only; rinse promptly) | Heavier tarnish | High | ★☆☆☆☆ |
| 7 | Abrasives (steel wool, scouring pads, aggressive rubbing) | Severe oxidation (at a cost) | Very High | ☆☆☆☆☆ |
> Note: “Suitability near antique wood” is a practical, restoration-oriented guide for antique brass hardware—always confirm compatibility on a hidden area first, especially if the brass appears lacquered or the wood finish is shellac.
Clean antique brass hardware (FAQ)
Can I use vinegar to clean brass hardware on antique furniture?
It can work on some brass, but vinegar is acidic and can affect lacquered brass or surrounding wood finishes. Test on a hidden spot first and keep contact brief, then rinse/wipe immediately.
Will brass cleaner damage the antique wood finish?
It can—especially if cleaners contain acids, ammonia, or abrasive components, or if liquid runs. Always mask/protect the wood and apply cleaner only to the metal.
Should I remove the hardware before cleaning?
Often yes, if you can remove it safely. If screws are stuck or old, cleaning in place with controlled application (swabs, cloth, minimal liquid) may be safer than forcing removal.
How do I know if the brass is lacquered?
Lacquered brass often looks more “sealed” and uniform. If you’re unsure, start with the mildest method and avoid strong acids until you’ve tested a small hidden area.
Sources
In short, the safest way to clean antique brass hardware is a controlled sequence: protect the antique wood, remove grime gently, address tarnish with non-abrasive methods only on the metal, then dry thoroughly and add light protection. If you’re dealing with deep corrosion or fragile, pitted brass, it’s smarter to slow down—or get professional conservation support—so you preserve both the hardware and the surrounding antique finish for the long term.
Frequently Asked Questions
How do I safely clean brass hardware on antique wooden furniture without damaging the finish?
Start by testing a small, hidden area of the brass and adjacent wood to ensure your cleaner won’t discolor the finish. Remove the hardware if possible, or tape off the surrounding wood to prevent splashes. Use a gentle brass cleaner or mild soapy water first, then switch to a specialized brass polish if tarnish remains. After cleaning, dry the hardware thoroughly and consider applying a thin protective wax or clear lacquer to slow future tarnishing.
What is the best way to remove tarnish from brass knobs and pulls on antique pieces?
For routine tarnish, mix warm water with a few drops of dish soap and wipe with a soft microfiber cloth, then buff dry. If tarnish is heavier, use a brass polish formulated for tarnished brass and follow the label directions to avoid over-scrubbing. For stubborn spots, a paste of baking soda and water can help, but use it briefly and gently to prevent scratching. Always rinse or wipe away residue and dry completely to prevent water spots.
Which household cleaners should I avoid when cleaning brass hardware on antique furniture?
Avoid harsh abrasives, steel wool, and strong acids on brass hardware because they can pit the metal and leave permanent marks. Skip vinegar, bleach, and unknown “DIY metal” mixes unless you’re sure they’re appropriate for brass, since reactions can lead to dullness or discoloration. Also avoid soaking antique hardware or letting cleaners run onto old wood finishes, which can cause lifting or staining. If you’re unsure, choose a pH-neutral brass cleaner and protect the surrounding antique wooden furniture surfaces.
Why does my brass hardware keep tarnishing even after cleaning?
Brass tarnishes when exposed to air and moisture, and many antique environments (humidity, cooking grease, or cleaning fumes) accelerate that process. If the hardware isn’t fully dried after cleaning or if residue remains, tarnish can return faster. A protective layer—such as a micro-thin coat of wax or a clear lacquer made for brass—can significantly slow oxidation. Regular dusting and limiting exposure to humidity will also help keep brass hardware looking cleaner longer.
How can I restore the original shine of brass hardware while keeping it looking antique?
Begin with the gentlest cleaning method—soap-and-water wiping—then progress to brass polish only where needed, so you don’t remove desirable aged patina everywhere. Use soft cloths and light pressure, buffing in small sections to control the final look. If you want a slightly aged restoration, buff lightly and stop before the brass becomes mirror-bright. Finish by drying thoroughly and applying a protective brass wax to maintain the shine without stripping the antique character.
📅 Last Updated: October 20, 2026 | Topic: How to Clean the Brass Hardware on Antique Wooden Furniture | Content verified for accuracy and freshness.
References
- Brass
- Tarnish
- Patina
- Corrosion
- https://www.britannica.com/science/brass
- https://www.loc.gov/preservation/care/metal/
- Conservation Institute | Getty
- https://scholar.google.com/scholar?q=how+to+clean+brass+hardware+antique+furniture+tarnish Google Scholar
- https://scholar.google.com/scholar?q=brass+bronze+conservation+chemical+cleaning+corrosion+products Google Scholar
- https://scholar.google.com/scholar?q=removal+of+tarnish+from+brass+alloys+microstructure+and+surface+chemistry Google Scholar
