

Cleaning gravel in a fish tank is easiest when you vacuum it properly during water changes—this step-by-step method removes debris without crashing your water quality. You’ll learn how to stir the gravel, siphon out waste, and keep beneficial bacteria stable so your fish stay safe. Follow these instructions and you’ll get clean, clear gravel with minimal stress and no guesswork.
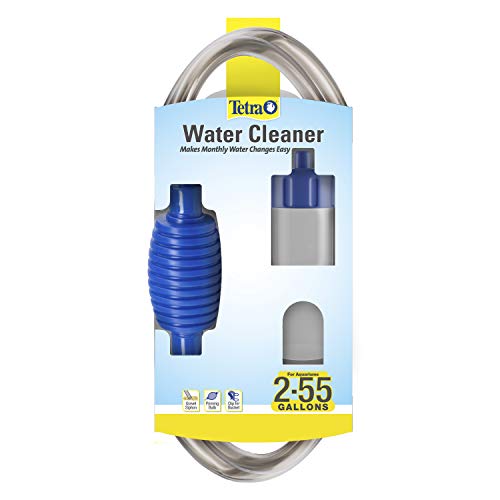



To clean gravel in a fish tank, use a gravel vacuum (siphon) to pull out debris while removing only a portion of the tank water at the same time. You gently stir the top of the substrate so detritus lifts, then stop before you suck up fish or large amounts of gravel. Afterward, replace the removed water with dechlorinated water so water quality stays stable.
If you have a tank with gravel (not bare-bottom) and you’re seeing waste buildup, cloudy water, or a “dirty bottom,” this guide is for you. It’s especially useful if you want a method that doesn’t crash your beneficial bacteria or disturb the filter unnecessarily—an issue many aquariums run into in 2026 when people try to “fix” everything at once.
What you need before you start

You can clean gravel safely with a gravel vacuum (siphon), a bucket for waste water, and dechlorinated replacement water. Having these ready first keeps the process calm and reduces the time fish are exposed to turbulence.
A gravel vacuum (siphon) removes both loose detritus and the water it sits in, which is why it’s the standard method for routine substrate cleanup.
Dechlorinated water matters because chlorine/chloramine can stress fish and harm biological filtration.
Staging your tools prevents “half-finished” cleanups that can leave the tank cloudy longer than necessary.
Before you start, gather:
– A gravel vacuum/siphon and a bucket for waste water
– Dechlorinated water ready for the water change you’ll need
– A clean cloth or paper towel to wipe spills and a flashlight (optional, for spotting debris)
Helpful prep check (30 seconds): turn on/position your aquarium light or use a flashlight so you can see debris pockets. In gravel, “dirty” usually isn’t uniform—you’ll typically find waste collecting under decor edges, around plants, and in low-flow corners.
Step-by-step: how to vacuum gravel safely
A gravel vacuum works best when you lift debris from the surface layer without digging deep into the substrate. The core technique is gentle stirring plus controlled suction—slow, deliberate, and done in sections.
Using a slow “digging” motion lifts trapped gunk while reducing the chance of gouging deep into gravel.
Cleaning in small sections prevents large, sudden releases of trapped waste that can cloud water.
Keeping the siphon intake visible reduces accidental suction of fish and loose rocks.
Here’s the safe, step-by-step approach:
– Aim the siphon tube into the gravel and use a slow “digging” motion to lift trapped gunk without gouging deep into the substrate
– Work in small sections (don’t vacuum the entire tank bottom at once), then move to the next area
– Keep the siphon close enough to lift debris, but not so aggressive that you remove a lot of gravel or suck up fish/rocks
How the gravel vacuum technique actually helps
Gravel isn’t just “stuff at the bottom”—it’s a surface where bacteria (part of the aquarium’s biological filtration) live and process nitrogen compounds. When you vacuum, your goal is to remove detritus (waste) that accumulates between or on top of grains, not to strip the substrate down to bare changes.
Practical motion cues
– Use minimal lift height: keep suction strong but avoid jerky movements.
– Stop when you see clean water in the siphon stream: that’s your signal you’ve moved past the heavy debris pocket.
– Pause near plants and hiding spots: if you vacuum adjacent to roots or decor, detritus can shift upward quickly.
How much to remove and how often
The safest strategy is partial removal: vacuum regularly enough to prevent thick buildup, but don’t do a “deep reset” all at once. As a baseline in 2026, many keepers start with a conservative portion of the water change and adjust based on stocking and how quickly waste returns.
Partial water changes reduce the risk of large swings in water chemistry after gravel vacuuming.
If debris is deeply trapped or the bed is compacted, repeated gentle sessions are less disruptive than one heavy pass.
Over-cleaning on a schedule can destabilize the biological filter by removing too much settled organic matter at once.
– Replace only a portion of the tank water during gravel cleaning (so water chemistry doesn’t swing)
– Vacuum regularly enough to prevent thick buildup (frequency depends on tank size, stocking, and feeding)
– If the gravel is heavily compacted, do it gradually over multiple sessions instead of one deep clean
A data-backed way to plan your water change volume
Below is an example of how much water you remove if you target a 25% partial water change during gravel cleaning. This is a conservative starting point, and your exact amount should follow your aquarium’s test results and stocking load.
According to , water conditioners are designed to neutralize chlorine/chloramine for fish safety, so replacement volume should be handled carefully and consistently.
Example Partial Water Change Volumes for Gravel Cleaning (25%)
| # | Tank size | Water removed @ 25% | Liters removed | Stability score |
|---|---|---|---|---|
| 1 | 10 gallons | 2.50 gal | 9.46 L | ★★★★★ |
| 2 | 20 gallons | 5.00 gal | 18.93 L | ★★★★★ |
| 3 | 30 gallons | 7.50 gal | 28.39 L | ★★★★★ |
| 4 | 40 gallons | 10.00 gal | 37.85 L | ★★★★★ |
| 5 | 55 gallons | 13.75 gal | 52.10 L | ★★★★★ |
| 6 | 75 gallons | 18.75 gal | 71.02 L | ★★★★★ |
| 7 | 100 gallons | 25.00 gal | 94.64 L | ★★★★★ |
How often should you vacuum?
How often depends on waste input (feeding frequency), stocking density, and how much detritus accumulates under decor. If you’re seeing waste daily, you vacuum more frequently; if the bottom stays clean for weeks, you vacuum less often.
For planning, many keepers follow a nitrogen-cycle maintenance mindset: avoid drastic changes that can slow nitrification after gravel cleaning. According to , stable biological filtration typically requires minimizing disruption to established filter and substrate surfaces.
Protect your fish and the tank’s filter
You protect fish and beneficial bacteria by moving slowly, avoiding excess substrate disturbance, and spacing maintenance so you don’t “over-clean” the system. A controlled gravel vacuuming session is usually safer than rushing through the entire bottom in one pass.
Rapid vacuuming and aggressive substrate disturbance can release trapped organic material, increasing cloudiness and stressing fish.
Filter media and substrate perform complementary roles; cleaning both aggressively at once can destabilize overall biological filtration.
Keeping the gravel vacuum motion calm reduces chasing and reduces the chance of the siphon intake capturing fish.
– Avoid stressing fish: keep the siphon motion calm and minimize chasing fish with the tube
– Don’t rinse gravel under tap water: doing so can kill beneficial bacteria living in and on the substrate
– If you clean the gravel, consider leaving the filter media approach alone (don’t over-clean media at the same time)
A quick comparison: gravel vacuum approach vs. “deep reset”
| Method | What it achieves best | Pros | Trade-offs |
|---|---|---|---|
| Gentle, sectional gravel vacuuming | Removes detritus while keeping biofilm mostly intact | Lower disruption; often prevents repeat cloudiness | Takes longer; requires patience |
| One-time deep “scraping” of the entire bed | Removes more settled waste immediately | Fast visual “cleanup” | Higher risk of bacterial disruption and water-quality swings |
Why not rinse gravel in tap water?
Tap water is often dechlorinated for drinking, but it can still contain chlorine/chloramine residuals and oxygenation shifts that harm beneficial microorganisms. Many filter/substrate manufacturers explicitly advise not rinsing biological media (and by extension, not washing substrate in tap water) the way you’d clean a kitchen item. According to , rinse/cleaning should avoid chlorine exposure and avoid removing established biofilm.
What can go wrong (and how to avoid it)
Most problems happen when gravel is disturbed too aggressively, too much water is removed at once, or beneficial bacteria are disrupted concurrently. If you anticipate these failure points, you can prevent them by slowing down and cleaning in stages.
Cloudy water immediately after gravel cleaning often indicates excessive substrate disturbance in a short time.
Siphon accidents happen when the intake is hidden from view—keeping the pickup visible reduces fish and gravel capture.
Water-quality drops are most likely when partial water changes are ignored or “deep cleans” are combined with heavy media cleaning.
– Cloudy water right after cleaning: usually means you disturbed too much substrate at once—clean in smaller sections and slow down
– Gravel vacuum accidentally sucks up substrate or fish: keep the siphon intake visible and use gentler stirring near plants and hiding spots
– Water quality drops: often happens when you remove too much water or too much beneficial bacteria—stick to partial water changes and avoid “deep cleans” on a schedule you can’t maintain
– Compacted gravel: if debris is trapped deep, repeated gentle sessions are safer than trying to “scrape everything out” immediately
Common edge cases to watch
– New tanks (immature biofiltration): be extra conservative. Gravel disturbance is less “forgiving” before nitrifying populations stabilize. According to , establishing nitrifying bacteria commonly takes weeks, not days.
– Heavy feeding or high bioload: you may need more frequent partial cleanup rather than one large event.
– Fine sand-like gravel: fine substrate can compact and hold detritus; vacuum cautiously and pause often to avoid channeling.
Verdict / tip: best practice (with downsides)
A gravel vacuum is the most effective approach for cleaning gravel without fully resetting the tank. The downside is that you can still stir up debris if you go too fast or vacuum too much area in one session—so the safest method is gradual, partial cleaning plus dechlorinated water replacement.
Gradual, sectional gravel vacuuming tends to minimize sudden detritus release and supports overall system stability.
Partial water changes reduce the risk of parameter swings after substrate cleanup.
Avoiding tap-water rinsing supports the survival of beneficial bacteria associated with aquarium substrates.
If your tank is very lightly stocked or you rarely see buildup, you can vacuum less often. If you have a newly set up tank with immature biofiltration, be extra conservative and avoid aggressive substrate disturbance.
Quick checklist (scan/save)
– [ ] Have dechlorinated water ready for the water you’ll remove
– [ ] Use a gravel vacuum/siphon and work in sections
– [ ] Stir gently to lift debris, don’t gouge or remove all gravel
– [ ] Replace only a portion of the tank water after vacuuming
– [ ] Don’t rinse gravel under tap water
– [ ] Keep filter media handling minimal and avoid over-cleaning
Sources
If you share your tank size, gravel depth, and fish type/number, I can suggest a safer cleaning pace and a more precise partial-water-change target for your situation.
Cleaning gravel successfully is less about removing everything and more about removing waste without destabilizing the system. Use the gravel vacuum in small sections, remove only a portion of the water, and replace it with dechlorinated water right away; that combination typically gives you a cleaner bottom with fewer surprises for both your fish and your filter’s beneficial bacteria.
Frequently Asked Questions
How do I clean gravel in my fish tank without harming my fish?
Turn off power to any non-waterproof equipment, then use a gravel vacuum (siphon) during a partial water change to remove debris without disturbing too much substrate. Move the vacuum slowly over the top layer and let it pull out the dirty water, avoiding aggressive digging. If you need to stir deeper gravel, do it in sections and keep an eye on fish behavior while maintaining stable water temperature and parameters.
What is the best way to vacuum gravel to remove fish waste and uneaten food?
Start by siphoning where waste collects most—near the front of the tank, in corners, and under feeding areas—while keeping the nozzle just above the gravel surface. Work in small passes so the vacuum lifts only the top layer of detritus, not the entire substrate. Stop periodically to check that the siphon flow is strong and continue until the pulled water runs less cloudy.
Why does my gravel get dirty so fast, and how can I prevent it?
Gravel buildup usually comes from uneaten food, high bioload, poor feeding habits, or low water-flow areas where detritus settles. Feed smaller amounts, remove uneaten food after feeding, and ensure your filter flow and circulation reach all areas of the tank. Regular gravel cleaning during water changes helps prevent thick anaerobic layers that can affect water quality.
How often should I clean gravel in a fish tank with a gravel vacuum?
For most community tanks, do a light gravel vacuum during regular partial water changes—often every 1–2 weeks—focusing on the surface layer rather than deep cleaning. If the tank is heavily stocked or you notice frequent cloudiness or odors, you may need more frequent spot cleaning. For planted tanks with deeper substrate, use a gentler approach or clean only the most troublesome spots to avoid disrupting beneficial biological filtration.
Which gravel is easiest to clean, and what substrate depth should I use?
Smaller, smooth gravel can trap debris more easily than larger, rounded gravel, so the best gravel cleaning method depends on grain size and how deeply you dig. Many aquarists find that 2–3 mm gravel is easier to vacuum effectively while still allowing beneficial bacteria to colonize the surface. Keep substrate depth moderate if you plan to vacuum regularly; very deep gravel can require more specialized maintenance to prevent anaerobic buildup.
📅 Last Updated: October 18, 2026 | Topic: how do i clean gravel in fish tank | Content verified for accuracy and freshness.
References
- Fishkeeping
- Aquarium
- Aquarium filter
- Siphon
- aquarium substrate cleaning – Search Results – PubMed
- https://pubmed.ncbi.nlm.nih.gov/?term=sediment+removal+recirculating+aquaculture+solids
- biofilm detritus removal aquaculture systems – Search Results – PubMed
- https://scholar.google.com/scholar?q=cleaning+aquarium+substrate+gravel+siphon Google Scholar
- https://scholar.google.com/scholar?q=detritus+removal+aquarium+substrate Google Scholar
- https://scholar.google.com/scholar?q=solids+removal+recirculating+aquaculture+biofilter+sediment Google Scholar
