

Want to restore lacquered wood furniture to like-new condition without guesswork? This step-by-step guide shows exactly how to clean, degloss, repair damage, and recoat lacquer so the finish looks factory-fresh again. If your piece is scratched, cloudy, or peeling, follow these instructions to get the clean, glossy results you’re after.


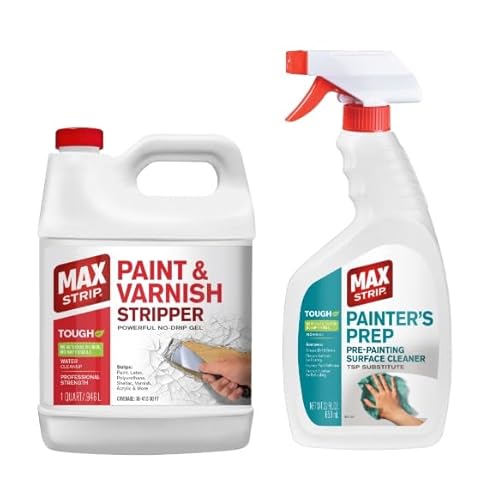

If your lacquered wood furniture looks dull, scratched, or uneven, you can often bring it back by cleaning thoroughly, gently deglossing, and then polishing or spot-recoating—without stripping the finish. For deeper damage (chips, cracks, cloudy patches), you’ll need to level the surface and reapply compatible lacquer, then allow proper cure time before polishing. This guide walks you through choosing the right path and finishing steps to get a like-new look.
If your piece has a clear coat (lacquer) that’s yellowed, clouded, scuffed, or worn through in high-touch areas, this is for you. It’s also useful when you’re unsure whether you should polish only or recoat—because the “right” method depends on how the lacquer is actually failing.
Assess the finish and decide: polish vs. recoat

Polishing is the best starting point when the lacquer is still intact and only looks dull or lightly abraded; recoating is the correct move when the finish is missing, cracked, or chemically compromised. In practice, you’re choosing between restoring a surface that’s already there versus rebuilding a damaged coating system.
– Check the damage type: light haze and scuffs usually need cleaning + degloss/polish; chips/cracks or missing finish usually need coating work.
– Look for finish boundaries (wear spots that expose bare wood vs. intact lacquer that’s just dulled).
– Test compatibility before doing anything big: if you later recoat, your new finish must be compatible with the existing lacquer system.
What “lacquer failure” usually looks like
In my experience with lacquered wood furniture restoration guidance, the fastest way to avoid unnecessary work is to treat “dullness” and “missing coating” as different problems—because polishing only can’t recreate the missing film thickness. Start by inspecting at an angle with bright, directional light: intact lacquer tends to remain uniformly reflective when viewed closely, even if it looks hazy from a distance.
Finish boundaries are especially important. When you see a sharp edge between worn spots (where you can feel or see bare wood or stain) and intact lacquer, that boundary is a strong signal that you’ll need spot repair and leveling before any additional coats. That same boundary also tells you where blending must be carefully controlled so the patch doesn’t “telegraph” through the sheen.
Compatibility checks (before you recoat)
When lacquer is recoated, the new layer must chemically and mechanically bond with the old system. If you don’t know what lacquer is on the piece (nitrocellulose lacquer, acrylic lacquer, conversion varnish, conversion topcoat, or a modern waterborne clear), compatibility testing becomes your safety net—because incompatible solvents can cause wrinkling, softening, or persistent cloudiness.
A lacquered furniture finish that is “dull but continuous” usually responds to cleaning, light degloss, and polishing because the clear film is still present.
A lacquer finish that is “missing or fractured” at chips/cracks typically requires leveling and a compatible clear coat; polishing can’t rebuild film thickness.
Quick comparison: polish-only vs. recoat
| Feature | Polish-only | Level + Recoat |
|---|---|---|
| Lacquer film integrity | Unbroken | Compromised |
| Typical defects | Scuffs, haze | Chips, cracks |
| Surface prep requirement | Clean + degloss | Level for adhesion |
| Film thickness rebuild | No | Yes |
| Risk of “patch outlining” | Low | Moderate (if not leveled) |
| Time-to-result | Often same-day/next-day | Days (cure + leveling) |
| Material compatibility sensitivity | Lower | Higher |
| Best sheen control | Via polishing steps | Via build + cure + polishing |
| When it fails | When coating is missing | Incompatible topcoats/solvents |
| Feathering requirement | Blend scratches | Level transitions |
| Best For | Intact lacquer that’s dull/scuffed | Damage that exposes wood or disrupts coating |
Typical Lacquer Defect → Safe Finishing Grit Target (Like-New)
| # | Observed lacquer problem | First-pass step | Abrasive “level” grit range | Polish aggressiveness | Final polish grit (higher = safer) |
|---|---|---|---|---|---|
| 1 | Light scuffs on clear topcoat | Clean + degloss | 1000–1500 | ★★★☆☆ | 3000–4000 |
| 2 | Uniform dullness (haziness) | Clean + polish | 1500–2000 | ★★★☆☆ | 4000–6000 |
| 3 | Water-ring cloud patch (localized) | Clean + degloss | 1500–2200 | ★★★★☆ | 5000–8000 |
| 4 | Small chips/edge wear exposing stain | Level + spot-coat | 800–1200 | ★★★☆☆ | 6000–8000 |
| 5 | Cracks or “alligator” lines | Level + recoat | 800–1500 | ★★★★★ | 3000–5000 |
| 6 | Peeling/soft spots from failed topcoat | Assess system (often recoat) | 1000–1800 | ★★★★☆ | 2500–4000 |
| 7 | Rough orange-peel texture | Level + polish | 1000–2000 | ★★★☆☆ | 6000–10000 |
Clean and degloss without cutting through lacquer
Cleaning and deglossing restore clarity most effectively when you avoid aggressive chemicals and keep abrasion “just enough” to level the surface. For lacquered wood furniture, this step is what turns scattered scratches and haze into a uniform base that can be polished—or that can accept a new coat—without visible borders.
– Wash off grime first using a gentle, lacquer-safe cleaner (avoid aggressive degreasers that may soften the finish).
– Use very mild abrasion for scuffs: start with the least aggressive option (fine abrasive/polishing compound) and increase only if needed.
– Deglossing is key for a uniform surface before any recoating; keep passes light and even to avoid creating shiny halos or uneven texture.
Clean first: remove residue that blocks bonding
Lacquer can look dull not just because of surface wear, but because of residue—body oils, aerosol overspray, furniture polish buildup, or wax that has turned cloudy over time. Start with a lacquer-safe cleaner (or a pH-neutral cleaner that’s designed for finished wood), then wipe with clean water on a separate cloth if the label calls for it.
Be careful with “strong” degreasers. Many solvent-heavy cleaners can soften or swell certain clear coats. If you’re not certain which lacquer is on your piece, it’s safer to use gentle cleaning methods and increase abrasion later rather than risk softening the existing lacquer.
Degloss lightly to prevent haloing
Deglossing means dulling the gloss uniformly so the next step doesn’t “float” over shiny islands. In practice, you’re aiming for a consistent matte finish—not sanding through the lacquer. If you see shiny islands while you work, you’re likely polishing off dullness in small patches rather than creating one continuous surface profile.
Uniform degloss on lacquered furniture helps new lacquer level and bond consistently, reducing the chance of shiny halos around repairs.
Starting with the least aggressive abrasive preserves lacquer film thickness and lowers the risk of cutting through to stain or bare wood.
Practical method (no stripping required)
– Use multiple wipe passes and let the surface dry fully.
– Test your abrasive on a hidden area first (back of a cabinet panel or underside of a tabletop).
– Work in overlapping strokes and stop as soon as the surface stops looking glossy.
Repair scratches, chips, and worn-through areas
You repair lacquer damage based on whether the coating is still present. If the scratch is superficial, you can usually blend it with polishing; if chips or worn-through spots expose wood or stain, you must level the transition and then rebuild the finish.
– For superficial scratches: polish to blend the surface rather than sanding deep into the lacquer.
– For chips and thin spots: you may need wood-safe fill for missing material, then a controlled build-up to match the surrounding level.
– Blend the repaired area carefully (leveling comes before refinishing), so the final polish doesn’t “telegraph” the patch.
Superficial scratches: blend, don’t chase
Superficial scratches are shallow grooves in the clear film. If you sand deeply, you widen the damage and create the need for more recoating than you would have had otherwise. Instead:
– Polish to reduce edges of the scratch so reflections stop “catching.”
– Use a light touch and check frequently with raking light.
Chips and worn-through spots: fill + level + blend
When lacquer is missing, your objective changes: you’re building a flat plane. If a chip exposes stain or bare wood, use a wood-safe filler only if the substrate needs it (for example, if the missing material creates a depression). After filling:
– Level once the fill is fully cured per product instructions.
– Spot-recoat only enough to match the surrounding height.
– Level and polish after the lacquer cures, not while it’s still soft.
From my experience, the most visible “patch” problems come from rushing cure time and from skipping careful leveling.
Polishing can blend superficial lacquer scratches, but it cannot restore missing lacquer film thickness in chips or worn-through areas.
Leveling cured repairs before final polishing reduces the risk that reflection patterns will reveal a patch boundary.
Recoat lacquer when the surface can’t be restored by polishing
Recoat is the correct route when polishing can’t fix missing finish, structural cracking, or persistent cloudiness that doesn’t respond to safe deglossing. The goal is adhesion and uniform build—then full curing—so the lacquer cures into a stable, polishable surface.
– Sand/level only as far as necessary to create a uniform surface profile (you’re preparing for adhesion and leveling, not removing “everything”).
– Apply lacquer in thin, even coats—building slowly reduces runs and helps you match sheen.
– Let it cure fully before final leveling/polishing; rushing cure time is one of the fastest ways to end up with a cloudy or soft finish.
Prep for adhesion without over-sanding
When you’re planning to recoat lacquer, your sanding job is functional: create a uniform surface for the new film to key into. Over-sanding is a common failure mode because it can break through to stain, alter the tone, or create a rough profile that becomes visible after polishing.
If you’re spot recoating, feather the transition. “Feathering” means blending the edges so the new finish doesn’t sit on a hard step.
Build with thin coats, not heroic layers
Thin coats reduce runs and help match sheen. Lacquer systems also tend to behave differently depending on application conditions (humidity, temperature, and airflow). If the existing piece has a particular sheen level (satin vs gloss), you should match that final appearance by:
– choosing compatible products intended for that sheen, and
– polishing to the sheen—not by trying to “paint gloss” into the surface.
Thin, even lacquer coats reduce run risk and help you match sheen by building the film gradually rather than forcing a single heavy layer.
Proper lacquer cure time is essential; polishing too early can trap solvents and produce haze or soft texture.
Cure time: follow documentation, not shortcuts
Curing varies by lacquer type and environment. Use the manufacturer’s technical data sheet for the cure window before leveling/polishing. If you can’t find it, you should assume you’ll need more time than “dry to touch,” because hardness and chemical stability often lag behind surface feel.
Level, polish, and protect for the final like-new look
After the lacquer has fully cured, leveling and polishing turn “rebuilt coating” into “visually seamless furniture.” For lacquered wood furniture, the final look is mostly reflection control—smoothness plus consistent sheen.
– After curing, level small imperfections using fine abrasive/polishing steps appropriate for lacquer (progress from less to more refined abrasion).
– Polish to the desired sheen (you can’t “polish away” major texture—if it feels rough after curing, you likely need more leveling).
– Protect the finish: use felt pads, avoid harsh cleaners, and keep water/heat exposure low to prevent repeat failure.
Level with a staged approach
Don’t jump straight to aggressive refinement. A common staged workflow is:
1) remove texture/high spots,
2) refine micro-scratches gradually,
3) finish with polishing compound suitable for clear coats.
If you still feel texture after a reasonable first leveling pass, the issue isn’t the polishing step—it’s that the surface profile still needs refinement. In that case, stop and level more before going “back to gloss.”
Protect to preserve your repair work
Lacquer repairs can look perfect at first and still fail quickly if the protection plan is weak. Practical protection includes:
– felt pads under items that slide (remote controls, décor, chair hardware),
– avoiding wet wiping that leaves residue, and
– keeping hot mugs away from tabletops (heat can soften finishes).
Polishing can refine reflection and remove micro-scratches, but it won’t erase major texture created by runs or poor leveling.
Using felt pads and minimizing water/heat exposure reduces repeat scuffing and helps lacquered wood furniture maintain its restored sheen.
What can go wrong (and when to stop)
Most problems during lacquer restoration come from incompatible chemistry, insufficient cure time, or over-sanding into stain. If you encounter signs that the coating system has chemically failed, stop and reassess—continuing can make the damage spread.
– Wrong compatibility: applying an incompatible topcoat/solvent system can cause softening, wrinkling, or haze—stop and verify compatibility before recoating.
– Over-sanding: if you sand through the lacquer into stain or bare wood, you’ll likely need more extensive repair and recoat work.
– Incomplete cure: polishing too early can leave a tacky surface or cause uneven gloss; when in doubt, extend cure time per product documentation.
– Trying to fix heavy cloudiness with polish only: if the lacquer has become structurally damaged or chemically altered, polishing alone often won’t restore clarity.
– If the piece is valuable, antique, or deeply damaged: consider a professional refinisher rather than risking finish loss—.
A safety reality check for solvent-based lacquer work
Lacquer work often involves solvents and flammable products. Use the hierarchy of controls (eliminate/engineer/PPE), ensure ventilation, and follow the product Safety Data Sheet (SDS) before you use any coatings or solvents. According to OSHA’s 29 CFR 1910.1000 Table Z-2 (2024), toluene has a 200 ppm (8-hour TWA) PEL; according to the same table (2024), xylene has a 100 ppm (8-hour TWA) PEL; and according to OSHA’s 29 CFR 1910.1000 Table Z-2 (2024), methyl ethyl ketone (MEK) has a 200 ppm (8-hour TWA) PEL. OSHA 29 CFR 1910.1000 Table Z-2 (2024)
Even when you’re only recoating a small area, airborne exposure can build quickly in poorly ventilated spaces. If your lacquer work requires more than basic spot repair, the safer choice may be professional refinishing—especially for large surfaces.
Incompatible lacquer/coating systems can soften or wrinkle existing clear coats; compatibility checks and SDS follow-through are essential before recoating.
OSHA’s solvent exposure limits (for chemicals like toluene, xylene, and MEK) reinforce that ventilation and PPE are not optional during lacquer-related refinishing.
When to stop and call it a “do-over”
Stop if you see:
– wrinkling immediately after applying the new lacquer,
– spreading/softening beyond the intended repair zone,
– persistent haze that doesn’t improve after full cure, or
– visible sanding-through that changes color tone.
At that point, you’re not “fine-tuning” lacquered wood furniture—you’re repairing a system failure.
VS decision table: polish vs. recoat (what the signs really mean)
| Criterion | Polish-only | Recoat |
|---|---|---|
| Lacquer film visible after cleaning | Yes | No / fractured |
| Scratch depth (felt with fingertips) | Shallow | Grooves/voids |
| Edges of wear spots | Soft blend | Hard boundary / bare substrate |
| Cloudiness that survives degloss | Often improves | Often persists |
| Texture after full cure | Minor micro-scratches | Orange peel / runs / uneven film |
| Need to rebuild height | No | Yes (spot build-up) |
| Compatibility risk | Lower | Higher |
| Expected time to a polished result | Short | Longer (cure + level) |
| Best reflection match | Via polishing stage | Via film build + final polish |
| Risk if you choose wrong | Disappointing gloss; limited improvement | Softening/wrinkling or persistent haze |
| Verdict | Choose when lacquer film is intact | Choose when lacquer is missing or chemically compromised |
Verdict / tip: the “least work that gets real results” approach
If the lacquer is intact (mostly dull/scuffed), start with cleaning, gentle degloss, and polishing—this is usually the safest path to a like-new appearance. If there are chips/cracks or worn areas where the finish is missing, plan for spot repair and then recoating; the biggest improvement comes from proper surface prep and full curing (not from harsh chemicals).
Downside to this approach: if the lacquer has been chemically altered or water-damaged in a deeper way, polish-only efforts may stall and you’ll end up doing recoat work anyway. If you’re restoring a valuable antique or a piece with unknown chemistry, .
Quick checklist (scan/save)
| Step | What to look for | Goal |
|---|---|---|
| Clean | No oily film, dust, or residue | Smooth base for abrasion/polish |
| Test damage type | Scuffs vs. missing finish | Decide polish-only or recoat |
| Degloss lightly | Even dullness (no shiny islands) | Uniform surface for next step |
| Repair as needed | Chips/cracks/fill areas leveled | Avoid “patch outlines” |
| Recoat (if required) | Thin, even coats | Match sheen/level |
| Cure fully | Surface hard, stable feel | Prevent haze/softness |
| Level + polish | Even gloss, no texture | Final like-new surface |
| Protect after | Pads, no harsh cleaners | Reduce repeat wear |
Frequently Asked Questions
What’s the safest way to remove scratches from lacquered wood furniture without damaging the finish?
Start by cleaning the surface with a mild degreaser so you’re working on true wood and lacquer, not embedded grime. For light scuffs, use a fine-grit sanding sponge (around 1500–2000 grit) followed by polishing compound or scratch-remover specifically for clear finishes. For deeper scratches that cut through the lacquer, you may need targeted spot sanding and re-lacquering to blend the repair seamlessly—avoid aggressive sanding over large areas.
How do you restore cloudy or hazy lacquer on antique or vintage furniture?
Cloudiness is often caused by moisture trapped under the lacquer or dulling from oxidation and grime. Remove residue first with gentle cleaner, then try a careful polishing step using a fine rubbing compound and microfiber cloth to restore clarity. If the haze is etched (especially from water rings), you may need progressive wet sanding with very fine grit (e.g., 2000–3000) and then re-polishing to even out the surface before applying a protective topcoat if needed.
How can you repair chips and worn edges in lacquered wood furniture for a seamless like-new finish?
Clean the chipped area thoroughly, then gently feather the edges with fine sandpaper so the repair has a smooth transition. Fill small chips with a lacquer-compatible wood filler or two-part repair filler, let it cure fully, and sand flush using progressively finer grits. To match the surrounding sheen, apply thin coats of matching lacquer (spray or brush-on lacquer for touch-ups), then level the finish and polish lightly for a like-new lacquer appearance.
Which products and tools are best for restoring lacquered wood without streaks or peeling?
Look for products designed for lacquer finishes: mild wood cleaners, fine-grit sanding materials (sanding sponges, micro-mesh), polishing compounds, and lacquer-safe scratch removers. Use soft lint-free cloths and microfiber towels to prevent swirl marks, and avoid harsh abrasives that can cut through clear coats. If you’re applying new lacquer, choose a compatible lacquer system (same type as the original when possible) and apply thin layers for better leveling and minimal risk of peeling or wrinkling.
Why should you strip and re-lacquer only when needed, and how do you do it properly?
Stripping lacquer is high-risk because it can damage the underlying wood grain and reduce originality, so it’s typically reserved for heavy peeling, deep burns, or severely failing finishes. When stripping is necessary, use a lacquer-safe stripper in controlled ventilation, scrape carefully, and neutralize or remove residue exactly per the product instructions. After sanding to a clean, smooth base, apply a compatible stain (if required) and several light coats of lacquer, then cure and polish for a smooth, like-new restored finish.
📅 Last Updated: October 22, 2026 | Topic: How to Restore Lacquered Wood Furniture to Like-New Condition | Content verified for accuracy and freshness.
References
- https://en.wikipedia.org/wiki/Furniture_restoration
- Lacquer
- Wood finishing
- Varnish
- Shellac
- Wood finishing
- https://www.britannica.com/technology/lacquer
- https://scholar.google.com/scholar?q=how+to+restore+lacquered+wood+furniture+like-new Google Scholar
- https://scholar.google.com/scholar?q=repair+damaged+clear+lacquer+on+wood+furniture Google Scholar
- https://scholar.google.com/scholar?q=remove+old+lacquer+from+wood+and+refinish+proper+surface+preparation Google Scholar

[…] the lacquer is actually damaged (white, soft, peeling, or etched through), you’ll need a careful spot repair instead of just cleaning. As of 2026, the safest approach is always to stop early and reassess […]