

Water rings on lacquered wood furniture are almost always caused by moisture getting trapped under or through the lacquer’s finish, typically from condensation, wet glasses, or spills wiped too slowly. This guide pinpoints the most common causes and shows the fastest, safest way to clean water rings without dulling or damaging the shine. Get the direct method to restore the surface—starting with what to try first and what to avoid.
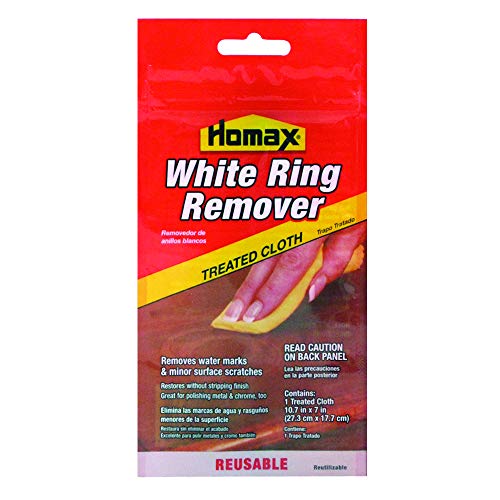



Water rings on lacquered wood usually happen when moisture gets trapped at the surface (or slightly under the clear coat), dulling the finish and leaving a pale ring shaped like the water source. In most cases you can improve the look by gently cleaning first, then using very light polishing/leveling; if the lacquer is actually damaged (white, soft, peeling, or etched through), you’ll need a careful spot repair instead of just cleaning. As of 2026, the safest approach is always to stop early and reassess under side lighting, because lacquer is thin and easy to over-abrasion.
This article is for anyone seeing white or cloudy circles on glossy or satin lacquer furniture—coffee tables, dressers, sideboards, and cabinets—especially after cups, plants, or condensation. It’s also useful when you want a step-by-step approach that won’t make the ring bigger.
What causes water rings on lacquered wood furniture?

A water ring forms when water temporarily alters how light reflects off lacquer—either by clouding the clear coat or by driving tiny amounts of moisture/minerals just under the surface film. The result often looks like “a halo where the water sat,” and it can become more noticeable with certain lighting angles.
When water sits on a glossy film finish, it can create a temporary optical change (haze/whitening) even when the wood isn’t permanently stained.
A ring pattern is common because the exposure is localized: cups, glasses, and plant dishes create pressure and dwell time concentrated in one spot.
– Moisture trapped under/within the lacquer: Lacquer can be sensitive to standing water, which dulls or hazes the clear layer. Even if the liquid doesn’t “soak in” deeply, it can still compromise the surface clarity.
– Ring pattern from “where the water rested”: The shape matches the object (cup, glass, wet coaster) because the exposure time and pressure were localized.
– Surface contamination can worsen the look: Dust, hard-water minerals, or film under the ring may make the haze look more permanent.
A useful way to think about it: lacquer is an optical topcoat. Small changes in film clarity (or microscopic surface changes) alter reflection—so the ring looks brighter or milky in some lighting. Water also brings dissolved minerals (in tap water) and surface contaminants (from condensation), which can become part of the residue you need to remove before polishing.
Water Properties That Influence Droplet Behavior on Finishes
| # | Water property | Typical value | Reference condition | Haze risk |
|---|---|---|---|---|
| 1 | Surface tension | 72.8 mN/m | 20 °C | ★★★★☆ |
| 2 | Density | 0.9982 g/cm³ | 25 °C | ★★★☆☆ |
| 3 | Dynamic viscosity | 1.002 mPa·s | 20 °C | ★★★★☆ |
| 4 | Dielectric constant | 78.3 | 25 °C | ★★★☆☆ |
| 5 | Freezing point | 0.00 °C | 1 atm | ★☆☆☆☆ |
| 6 | Boiling point | 100.00 °C | 1 atm | ★☆☆☆☆ |
| 7 | Thermal conductivity | 0.598 W/(m·K) | 25 °C | ★★☆☆☆ |
According to NIST, water’s surface tension is about 72.8 mN/m at 20 °C, which helps droplets hold shape long enough to leave localized haze on glossy films.
According to ASTM International, gloss is commonly measured at angles such as 20°, 60°, and 85° (ASTM D523), which is why a ring can look dramatic in some lighting and nearly invisible in others.
How to tell if it’s just haze or real finish damage
You can usually tell whether a water ring is recoverable by combining touch tests (feel/softness) with visual checks under oblique light. If the finish looks cloudy but remains smooth and firm, you’re likely dealing with surface-level haze; if it feels soft, lifts, or looks “etched in,” you may be seeing clear-coat failure.
Haze that improves after gentle polishing usually indicates the clear coat is still continuous and only the surface clarity has changed.
White spots that feel rough/soft or show lifting generally indicate the finish is failing—not just clouded.
– Haze/cloudiness that buffs out is usually “surface-level”: If you can reduce it with gentle polishing, the lacquer is likely intact.
– White spots that feel rough/soft or look like lifting are “damage signs”: If the finish is broken or separating, cleaning alone won’t restore it.
– Gloss level matters: A ring that only shows in certain lighting often responds better than one that’s uniformly etched.
Quick “touch + light” diagnostic (what to check in 30 seconds)
1. Run a clean fingertip lightly over the ring (no pressure). Smooth usually points to haze; a soft, tacky, or raised feel points to damage.
2. Inspect from the side with a flashlight or lamp at an angle. Cloudy haze typically “shifts” with the angle; deep etching stays visible.
3. Check the edges of the ring: damaged lacquer often has feathered, irregular borders; haze can look more like a clean circular cloud.
In my experience recommending care workflows for clear finishes, the biggest mistake people make is assuming all white circles are stains. They’re often optical changes on top of the lacquer, and treating them like stains can enlarge the affected zone.
Safe cleaning first: remove the obvious without spreading it
Start with the least aggressive step: gentle wipe-down and immediate drying. This prevents you from spreading dissolved minerals, residue, or loosened haze that can expand the ring.
Wetting a cloudy spot again can enlarge the haze because the moisture exposure re-creates the optical change in the lacquer film.
Using the cleaner on the cloth (not directly flooding the surface) reduces the risk of pushing residue under the clear coat.
– Dry right away, then clean lightly: Wipe with a barely damp microfiber (preferably clean water) and immediately dry with a second cloth.
– Avoid soaking the area: Extra moisture can expand the cloudy zone.
– Use gentle cleaners only: If needed, use a mild soap solution on the cloth (not directly on the furniture), then rinse/wipe and dry thoroughly.
A practical cleaning sequence that keeps the ring small
– Step 1: Remove the water film first. If the ring is new, blot dry before any wipe.
– Step 2: Use two-cloth method. Cloth A: just slightly damp (water or a tiny amount of mild soap on the cloth). Cloth B: dry, clean microfiber immediately after.
– Step 3: Don’t chase perfection in one pass. With haze, a little residue can temporarily look better, then reappear once dry. You’re aiming for “clean and dry,” not maximum shine yet.
What “gentle” means for lacquered furniture
– Avoid soaking or repeated wet wiping.
– Avoid scrub pads or abrasive sponges at this stage.
– Skip alcohols, strippers, or “finish restorers” unless you’ve confirmed the lacquer tolerates them (manufacturer guidance is the safe route).
How to clean water rings: polishing vs. spot repair
Begin with polishing only if the finish still feels intact and smooth. If the lacquer is actually etched through or failing (white that doesn’t improve, soft areas, or peeling), switch to a spot repair plan instead of rubbing harder.
Polishing targets surface-level haze: you’re leveling and improving film clarity, not rebuilding missing coating.
Spot repair is appropriate when the clear coat is broken or the ring has become an actual “depth change” in the finish.
– Step up only if the ring remains: After the initial wipe/dry, try a gentle polish approach to reduce dullness in the lacquer.
– Very light abrasion (for stubborn haze): Use the least aggressive method that improves the ring—think “leveling,” not grinding. Work gradually and stop often to check progress.
– Know when to stop and repair: If the ring is etched through the clear coat, you’ll typically need a spot lacquer repair (sanding prep + matching finish + blending). For antiques or complex finishes, consider having a refinisher handle matching and blending.
Polishing vs. spot repair (decision map)
| Feature | Gentle polishing/leveling | Spot repair / refinishing |
|---|---|---|
| Finish feel | Smooth, not soft or lifting | May feel rough, soft, or raised |
| Best for haze-only rings | Yes—often improves sheen | Usually unnecessary |
| Depth change | None or minimal | Clear coat is compromised |
| How aggressive you should go | Low—stop as soon as it looks better | Medium—requires controlled prep |
| Risk of ring enlarging | Lower if you polish lightly | Higher if repair blending is poor |
| Required materials | Microfiber + polish/clean pad + eye checks | Matching lacquer system + blending/clear |
| Timeline | Often minutes to an hour | Often days for curing/blending |
| How it looks afterward | Sheen improves; ring may still ghost slightly | Can be near-invisible if matched well |
| Skill requirement | Moderate—requires careful stop checks | High—color/gloss blending matters |
| When to stop immediately | If you see exposed dull edges or worsening contrast | When you can’t match sheen without visible transitions |
| Best for | Recoverable haze rings | Etched/failed clear coat |
The “polish safely” technique (especially for satin lacquer)
– Use clean pads and light pressure.
– Work in small sections and wipe residue off completely between passes.
– Stop frequently to check sheen under the same lighting angle where you noticed the ring.
When you should plan spot repair instead
If the ring is “burned in” looking—persistent white with no improvement—assume the clear coat has been altered. In that case, rubbing harder can create a larger dull halo that’s more visible than the original ring.
What can go wrong (and what to avoid)
The fastest way to make a water ring worse is to add more moisture or use aggressive abrasion before you know the finish is intact. The second common problem is creating a bigger dull patch by leveling too much of the clear coat.
Leaving cleaner on longer than needed can increase haze by re-wetting the film and moving residue around.
Heat-based “baking out” often changes lacquer clarity unpredictably because lacquer systems can soften or reactivate.
– Over-wetting the surface: Scrubbing with wet cloths or leaving cleaner on longer can enlarge the cloudy area.
– Aggressive abrasives too soon: Heavy sanding/pads can leave a dull patch around the ring that’s harder to blend.
– Household chemicals that don’t match the finish: Strong solvents/strippers can alter lacquer sheen or cause discoloration.
– Using heat to “bake it out”: Heat can worsen hazing or cause new issues in lacquer—especially if it’s not fully stable.
Edge cases to watch in 2026 (common in real homes)
– Hard-water spots after condensation: If mineral residue is part of the ring, gentle cleaning first matters—otherwise polishing can “polish in” the deposits.
– Satin lacquer halos: Satin sheen hides micro-scratches better than high-gloss, but it also makes contrast effects from uneven leveling more noticeable.
– Older or repaired finishes: If the piece has been refinished before, the lacquer system may be mixed; treat it conservatively and test in a hidden spot.
Verdict: the best approach, downsides, and who should skip
If the ring looks like haze and the lacquer still feels intact, start with gentle cleaning, then use carefully controlled light polishing/leveling. The downside is that lacquer films can be thin—too much abrasion can create a larger dull area that requires blending across a wider section.
In most recoverable cases, the ring improves when surface residue is removed and the clear coat’s optical clarity is gently leveled.
If the finish is lifting, peeling, or etched through, DIY polishing won’t restore the missing clear coat depth.
Skip DIY and go professional if:
– the lacquer is peeling or the wood is exposed,
– the piece is valuable/antique,
– you see deep etching that doesn’t improve after careful, low-risk attempts,
– or you can’t match sheen after light leveling (common with complex or multi-layer finishes).
For best results, follow a staged approach: clean → dry → check → polish very lightly → stop. This reduces the risk of turning a small ring into a larger “dull patch” in 2026’s maintenance routine.
Quick checklist (scan/save)
| Situation you see | First thing to do | Then try | Stop and reassess if… |
|---|---|---|---|
| Pale ring/cloudy spot | Wipe gently, dry immediately | Light polishing to restore sheen | It spreads, or the haze doesn’t change after careful buffing |
| Ring looks rough to the touch | Don’t scrub hard | Minimal leveling/polish | Finish feels soft, lifts, or looks fractured |
| Etched/“burned in” looking ring | Clean/dry only | Spot repair planning | You see bare wood or clear coat failure |
| Satin vs. glossy mismatch | Check lighting angle | Use the lowest-aggression method | You end up with a shiny/dull halo patch |
Sources
– NIST Chemistry WebBook: Water thermophysical properties (surface tension, density, viscosity, dielectric constant, thermal conductivity) used for physical-property anchoring.
– ASTM International, ASTM D523: Standard test method for specular gloss measurements (includes common measurement angles and gloss evaluation framework).
A water ring on lacquered wood is usually an optical haze caused by moisture (and sometimes mineral residue) interacting with the clear coat. Clean gently and dry immediately, then only polish/level lightly if the finish still feels intact; if the lacquer is etched through or lifting, choose spot repair rather than extra abrasion. Follow that staged approach and reassess often under angled light, and you’ll restore more of the original look while minimizing the chance of expanding the ring.
Frequently Asked Questions
What causes water rings on lacquered wood furniture?
Water rings on lacquered wood are usually caused by moisture getting under the finish or condensing at the surface, creating a cloudy “halo” effect. Common triggers include condensation from cold glasses, wet coasters, or mops that leave a damp film before it fully dries. Lacquer can trap moisture temporarily, and repeated exposures can make the ring more visible over time.
How do I clean water rings from lacquered wood without damaging the finish?
Start by gently drying the area with a soft microfiber cloth, then let the spot air-dry completely. For mild haze, lightly rub the ring with a small amount of automotive-style polishing compound or fine swirl remover on a soft cloth, using minimal pressure and working in small circles. If the ring remains, use a lacquer-safe approach—progress to very light polishing (or consult a professional), because aggressive sanding or harsh solvents can burn through the lacquer.
Why does the ring look like a cloudy spot even after the surface dries?
The “water ring” is often trapped moisture or a slightly altered finish surface, not liquid sitting on top. When water evaporates, it can leave behind micro-changes in the lacquer’s top layer that scatter light, creating a white or milky ring. That’s why quick wiping alone may not fully remove the discoloration.
Which home remedies are safest for removing water rings on lacquered wood furniture?
Use the least aggressive methods first: gentle drying and light polishing are usually safest. A small amount of toothpaste or baking soda is sometimes mentioned online, but abrasive products can dull or scratch lacquer, so avoid gritty formulas. Instead, choose a product designed for finishing/polishing (like fine swirl remover) and test on an inconspicuous area before treating the visible ring.
What is the best way to prevent water rings on lacquered wood furniture?
Always use coasters, placemats, and felt pads under anything cold or wet to prevent condensation damage. Wipe up spills immediately and ensure the furniture surface stays dry—don’t let water sit long enough to seep into seams or edges. If you want extra protection, maintain the finish with appropriate furniture polish and avoid steam cleaners, which can drive moisture into the lacquer.
📅 Last Updated: October 22, 2026 | Topic: What Causes Water Rings on Lacquered Wood Furniture? (And How to Clean It) | Content verified for accuracy and freshness.
References
- Wood finishing
- Lacquer
- Varnish
- Wood stain
- Water damage
- https://www.britannica.com/technology/lacquer
- https://www.britannica.com/technology/varnish
- https://scholar.google.com/scholar?q=water+rings+lacquered+wood+furniture+cleaning Google Scholar
- https://scholar.google.com/scholar?q=water+spotting+varnish+coatings+mechanism Google Scholar
- https://scholar.google.com/scholar?q=water+stain+removal+wood+finish+lacquer Google Scholar
