

After you’ve cleaned a wooden rocking chair, wax wins when you want a smooth, low-sheen protective finish that repels light moisture and dirt. Oil is the better choice only if the wood feels dry and you need deeper hydration to restore color and prevent future cracking. The real question—wax vs oil—gets answered here based on your chair’s condition and the finish you want to maintain.


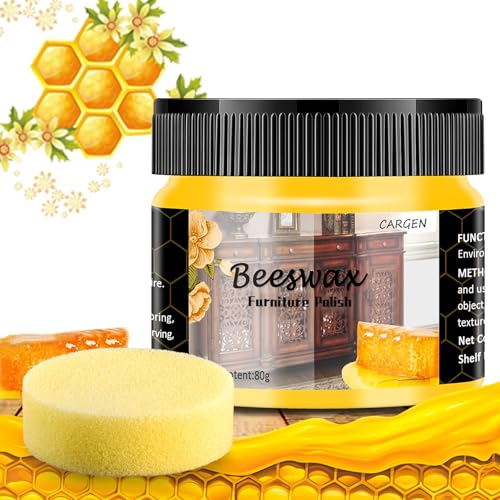

Wax or oil can both bring your wooden rocking chair back to a pleasant look after cleaning—but they do different jobs: oil conditions bare wood by soaking in, while wax builds a protective top layer for a smoother, lower-sheen finish. After cleaning, let the chair dry completely, then choose based on what the surface looks like (matte/dry vs already sealed/glossy); either way, apply thin coats and avoid flooding carved details.
If your wooden rocking chair is showing dryness, dullness, or minor roughness after you’ve cleaned it, this guide helps you pick the right finish and apply it safely. It’s aimed at everyday homeowners—not refinishing pros—who want the chair to look good and feel solid again. As of 2026, homeowners are increasingly choosing low-fuss maintenance routines, and the right “post-clean” finish is often the difference between an even, comfortable surface and one that looks patchy.
Wax vs Oil: which finish fits your rocking chair

Choosing between wax and oil is mainly about whether your chair’s wood is still absorbing conditioner (oil) or whether you need a surface film (wax). The quickest rule: oil is for conditioning the wood itself; wax is for protecting what’s already there.
Oil is designed to penetrate wood fibers and condition the substrate, which helps when the chair’s surface looks dry or porous.
Wax forms a protective top layer that can soften the feel and reduce everyday scuffing—especially when the chair already has a sealed or previously finished surface.
– Oil (conditioning): Best for bare or less-sealed wood that looks dry or drinks up cleaner.
– Wax (protective topcoat): Best when you want more surface protection and a gentler, low-sheen feel over already-finished surfaces.
– The “right” choice depends on what you started with: If the chair has an existing finish, wax may work better than a deep-penetrating oil (but always test first in a hidden spot).
To decide accurately, treat your rocking chair like a “finish system,” not just raw wood: oil changes how the substrate behaves, while wax changes how the surface behaves. According to ASTM standards, wood moisture content (MC) strongly influences how finishes absorb and cure—so starting with dry wood is part of choosing the right product. ASTM D4442 (wood moisture content method) describes oven-drying at 103 ± 2°C to determine MC. If the chair was damp in joints or crevices after cleaning, oil can look uneven and wax can haze.
Wood Moisture Content Before Finishing: Practical Readiness Guide
| # | Target wood MC (% wet basis) | How it tends to finish | Best next step | Finish-readiness |
|---|---|---|---|---|
| 1 | 6–8% | Even absorption; stable sheen | Proceed with oil or wax | ★★★★★ |
| 2 | 9–10% | Generally uniform results | Apply thin coat(s) | ★★★★☆ |
| 3 | 11–12% | Still workable; watch for blotch risk with oil | Prefer wax or test-spot | ★★★☆☆ |
| 4 | 13–15% | Uneven absorption likely | Dry longer before finishing | ★★☆☆☆ |
| 5 | 16–18% | High blotch/haze risk | Pause and re-check dryness | ★☆☆☆☆ |
| 6 | 19–21% | Finish may look patchy or fail to cure | Do not apply wax/oil yet | ☆☆☆☆☆ |
| 7 | >21% | Conditioning products often won’t behave predictably | Address moisture source first | ☆☆☆☆☆ |
Note: this table is a practical homeowner readiness model. For indoor wood, humidity swings matter; according to U.S. EPA moisture-control guidance, maintaining indoor relative humidity around 30–60% helps prevent excess moisture problems. U.S. EPA guidance on controlling indoor humidity. That’s why letting a rocking chair dry thoroughly after cleaning is not optional when you’re choosing between wax and oil.
Prep first: dry wood, check the finish, and spot-test
Your next step is simple: make sure the rocking chair is fully dry everywhere, then confirm what you’re working over (bare wood vs existing finish). If you skip prep, both wax and oil can look uneven—even when the product is good.
A wooden rocking chair can feel dry on top while joints, carved arms, and chair feet still hold moisture—uneven dryness is a common cause of patchy finishes.
A spot test in a hidden area is the fastest way to confirm whether oil darkens the wood or whether wax hazes over a sealed surface.
– Dry time matters: Let the chair dry completely after cleaning (no dampness in joints, crevices, or under arms/feet). If you rush this step, you can end up with hazy spots or uneven absorption.
– Inspect the surface: Look for peeling finish, sticky residue, or rough “fuzz” that cleaning may have raised.
– Do a small test: Apply your chosen product to a hidden area and wait for it to dry/cure per label instructions—then check color, tackiness, and sheen.
From a practical standpoint, treat your wooden rocking chair like it’s “three zones”: flat panels (where product evens out), high-touch areas (arms/rail edges), and carved or recessed details (where excess tends to collect). If a previous finish is failing (peeling, flaking, or gummy), don’t try to correct it with oil or wax—those maintenance products usually won’t stabilize unstable coatings.
Also pay attention to the room conditions in 2026: if your indoor humidity is running high, wood can stay closer to its equilibrium moisture content longer, making curing feel slow or incomplete. U.S. EPA indoor humidity guidance.
How to apply wax (for protection and a soft finish)
If your wooden rocking chair already looks sealed or glossy (or you want a gentle, lower-sheen feel), wax is usually the safer “topcoat” choice. The key is controlled application: thin coats, light working in, and buffing at the right stage.
Wax is meant to sit on the surface; over-application traps residue and increases streaks on chair arms and rail edges.
Buffing after wax sets improves uniformity and reduces haze, especially on smooth rails and seat backs.
– Start with a clean, dry surface (and ensure no cleaner film remains).
– Use thin layers: Apply a small amount with a lint-free cloth, then work it in lightly—especially on flat panels and rails.
– Buff after it sets: Once wax has reached the stage the product label describes, buff gently for an even sheen.
– If you’re unsure of timing, follow the specific wax directions on the container: .
Wax pros/cons for a homeowner rocking-chair refresh
- Pros (why wax works well)
- Better surface protection for everyday contact points; lower-sheen feel; often easier to maintain than deep-conditioning products when the chair is already finished.
- Cons (where wax can disappoint)
- If the chair is genuinely bare/dry wood, wax alone may not fix the underlying feel; heavy coats can get sticky or hazy in carved recesses.
Practical workflow tip: work in sections. Do not wax the entire rocking chair at once—capillary gaps around joints and carved edges can trap excess while you’re still applying to other areas.
How to apply oil (for deeper conditioning of wood)
If your wooden rocking chair’s wood looks dry, porous, or “drinks” the cleaner, oil is the more direct option. Oil conditioning works by penetrating the wood and reducing that raw, thirsty feel—but you must wipe off excess and allow time for proper curing.
Oil works best when the chair’s wood can actually absorb it; sealed or glossy existing finishes may leave oil sitting on top and looking patchy.
Wiping off excess is part of safe, even results—extra oil on chair edges and carvings is where tackiness usually shows up.
– Use oil when the wood looks dry or porous: Oil is designed to penetrate and condition, which helps restore comfort and reduce surface dryness.
– Wipe-on, then remove excess: Most oil routines involve applying enough to condition, then wiping off what doesn’t soak in—per the product’s instructions.
– Plan for multiple coats if needed: Depending on the oil and wood, you may need more than one pass. The exact recoat interval should come from the label: .
Oil application is where “thin and patient” beats “fast and thick.” In carved sections, oil can stay trapped longer, and homeowners often misread “dry to the touch” as “fully cured.” That distinction matters for the wooden rocking chair’s final feel and for how dust sticks over time.
One important safety note: if your chosen oil is a drying oil type, manufacturers often warn about oily rags and disposal due to heat buildup risks during curing. Follow the product’s safety instructions exactly. If you want, check the label’s section for “rags” or “storage/disposal” language.
What can go wrong (and how to avoid it)
Most failures after cleaning are predictable: moisture was still present, too much product was applied, or the chair had an incompatible existing finish. The fixes are less about scrubbing harder and more about diagnosing what your wooden rocking chair is doing.
Sticky or hazy spots often trace back to moisture trapped in joints or to applying wax/oil before the chair reaches a truly dry state.
If the existing finish is flaking, peeling, or gummy, topping with wax or oil usually won’t solve the underlying problem.
– Over-application: Too much wax or oil can leave sticky residue, streaking, or dull patches—especially on arms and edges where hands touch.
– Applying too soon after cleaning: Trapped moisture can prevent even absorption and can create blotches. Let the chair dry fully.
– Mixing incompatible finishes: Some oils/waxes aren’t meant to go over certain cured coatings. If your chair has an unknown finish, keep it conservative and test first.
– Skipping the “hidden spot” test: Wood tone can change, sometimes subtly. Test to confirm your chair won’t get darker or patchy.
– Not following curing instructions: Even when a surface “feels dry,” deeper curing may still be happening. Follow the label for safe handling.
If you’re unsure whether your wooden rocking chair has a film finish (like varnish or polyurethane) or is closer to bare wood, start with the least aggressive option: a small wax test can be easier to observe for haze and residue than oil, because oil can penetrate and darken more noticeably.
Practical note for homeowners: carved details are the “trap zone.” Excess product can collect in recesses and later smear onto clothing. Apply less there than you think you need, and wipe/buff out from recesses carefully.
Verdict / tip: choose based on your chair’s surface—and your tolerance for upkeep
For most everyday wooden rocking chair refreshes, wax is the low-mess protective choice when the surface is already sealed, while oil is the deeper conditioning choice when the wood itself is dry. If the finish is actively failing, skip both and address the coating problem first.
Choose wax when you want a protective surface film and a softer, lower-sheen look with minimal fuss—especially on already-finished wood.
Choose oil when the chair’s wood is dry and thirsty; expect reapplication as the conditioning layer gradually wears away.
– Choose wax if you want a cleaner topcoat look, easier maintenance, and protection on a chair that’s already fairly finished.
– Choose oil if the wood itself is dry and you want deeper conditioning, but be prepared for more follow-up over time.
– Skip both (and consider refinishing guidance) if the chair has flaking/peeling finish, unknown layered coatings that are failing, or areas that feel gummy after cleaning—those situations usually need a different repair approach.
If you’re deciding right now with only visual cues: a matte, dry, slightly rough look usually points toward oil conditioning; a visibly sealed or glossy look points toward wax protection. Either way, a hidden spot test prevents surprises—especially if you don’t know whether prior coatings are oil-modified, waxed, or varnished.
Quick scan checklist (save this)
| Step | Do this | Quick note |
|---|---|---|
| 1 | Let the chair fully dry after cleaning | Check joints/crevices too |
| 2 | Inspect for peeling/stickiness | Don’t apply over failing coatings |
| 3 | Test wax or oil in a hidden spot | Confirm sheen + color |
| 4 | Apply a thin coat | Less is usually better |
| 5 | Buff (wax) or wipe off excess (oil) | Follow label timing |
| 6 | Wait for curing per product directions | Safe handling depends on it |
Frequently Asked Questions
What’s the difference between wax and oil finish on a wooden rocking chair after cleaning?
Wax and oil both protect wood, but they behave differently. Wax typically sits more on the surface, giving a soft sheen and helping repel moisture, while oil penetrates deeper into the grain for conditioning and long-lasting hydration. Knowing which finish your rocking chair has helps you choose the right “wood care” product after cleaning and avoid dullness or sticky buildup.
How do I tell whether my wooden rocking chair is finished with wax or oil?
Look for signs like a slightly cloudy film or residue that can feel tacky when rubbed—wax finishes often leave a more noticeable surface coating. For a quick test, apply a small amount of denatured alcohol or mineral spirits to an inconspicuous spot with a clean cloth; if color transfers or the cloth picks up residue quickly, it may be oil-based, while wax may resist until wiped thoroughly. If you’re unsure, stick to gentle maintenance and test any product in a hidden area first.
How do I care for a waxed wooden rocking chair after cleaning?
After cleaning, let the chair dry completely and wipe off any remaining moisture so the wax doesn’t trap dampness. Apply a thin layer of furniture wax using a soft cloth, then buff to a uniform finish—avoid heavy coats that can build up in crevices and attract dust. For ongoing protection, re-wax periodically (often every few months to yearly, depending on use) and dust regularly with a microfiber cloth.
How do I care for an oiled wooden rocking chair after cleaning?
After cleaning, ensure the wood is fully dry before applying wood oil, since oil applied to residual moisture can interfere with absorption. Use a clean, lint-free cloth to apply a thin coat, working with the grain, and allow it to penetrate before wiping away excess oil to prevent tackiness. Re-oil based on dryness and wear—commonly when the surface looks slightly dry, feels rough, or loses its natural luster.
Which is better for long-term protection of a wooden rocking chair—wax or oil?
The “best” choice depends on your chair’s existing finish and how it’s used. Wax is great for adding a protective top layer and sheen, but it may need more frequent reapplication and can wear unevenly on high-contact areas. Oil is excellent for deep conditioning and protecting the wood from the inside out, though it typically requires more careful application (thin coats, proper drying, and wiping excess). If you’re maintaining an existing wax finish, stick with wax; if it’s already oiled, maintain it with oil for the smoothest, safest results.
📅 Last Updated: October 24, 2026 | Topic: Wax vs Oil: How to Care for a Wooden Rocking Chair After Cleaning | Content verified for accuracy and freshness.
References
- Wood finishing
- Wood finishing
- https://en.wikipedia.org/wiki/Paste_wax
- Linseed oil
- Tung oil
- Varnish
- https://www.fpl.fs.usda.gov/documnts/fplgtr/fpl_gtr190.pdf
- https://scholar.google.com/scholar?q=wooden+furniture+care+wax+vs+oil+after+cleaning Google Scholar
- https://scholar.google.com/scholar?q=paste+wax+vs+oil+wood+finish+durability+maintenance Google Scholar
- https://scholar.google.com/scholar?q=linseed+oil+tung+oil+penetrating+wood+finish+care+and+recoat+guidance Google Scholar
