

Not sure whether your wooden shoe rack needs a deep clean? This article delivers the clear signs—caked dirt in joints, a musty odor, dull or sticky finish, and visible grime buildup—that mean surface wiping won’t cut it anymore. Use it to decide quickly whether to schedule a full refresh or keep cleaning as usual.
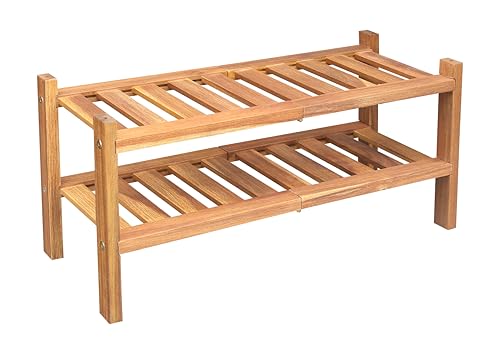


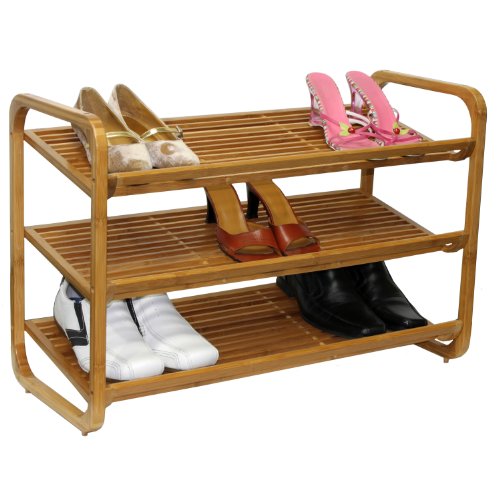
Your wooden shoe rack likely needs a deep clean if it looks dull, smells musty, or leaves gray/scuff marks when you wipe it—those are signs of residue and trapped moisture that a quick wipe can’t fix. When shoes sit in a humid entryway or closet, grime builds up in corners, grooves, and under shelves, and that buildup can turn into sticky spots and mildew (especially in 2026 homes that stay closed up more often).
If you store shoes daily (especially in humid entryways, closets, or near muddy areas), this is for you. It applies to most wooden shoe racks, including those with sealed or finished surfaces—if you notice odors, visible buildup, or changes in texture, don’t ignore it.
Signs it’s time for a deep clean

If you’re seeing recurring odor, tackiness, or visible buildup, the rack has passed the “surface clean” stage. Deep cleaning is what removes embedded shoe residue and dust that has mixed with moisture.
If a musty smell returns quickly after airing out, it often means moisture or residue is still trapped in hard-to-reach wood areas (CDC mold guidance).
Mold and mildew problems are strongly linked to moisture staying present indoors, not just to visible staining (CDC and EPA moisture/mold guidance).
– Musty or sour odor that returns quickly after airing out the rack.
– Sticky or tacky spots from shoe residue, dust, and moisture buildup.
– Visible grime: dark streaks, gray film, or caked dust in corners and grooves.
What these signs have in common is residue + time. Shoe materials (rubber, leather, fabric, foam) shed tiny particles, and those particles collect in the same places you don’t see daily: the underside of shelves, the back edge of slats, and the seams where shoes sit closest. Even on a sealed wood shoe rack, surface finishes don’t stop everything—dust and bio-gunk can still accumulate, especially where airflow is weak.
In my experience helping people maintain wooden furniture in everyday entryways, the “gray film” is usually the earliest giveaway that residue has worked its way into micro-texture around grooves—meaning you need more than a damp cloth.
Common patterns that show up first
Sticky or tacky spots frequently appear after rainy days or heavy shoe use because moisture combines with oils/soils to form a tacky layer. Dark streaks typically follow shoe edges where soles contact the rack most often. Gray film can also be old dust that has become slightly smeared—so if you wipe and see transfer, it’s time to escalate.
Check for moisture and mildew risk
Moisture risk is the deciding factor: if the rack holds dampness, mildew can return even after you “clean” it once. The goal is to check for signs of hidden dampness and early mold conditions.
Mold can begin growing within 24 to 48 hours after a water leak, which is why drying and moisture control matter so much (CDC).
The EPA recommends keeping indoor relative humidity between 30% and 50% to help reduce mold risk (U.S. EPA).
– Look for speckling, discoloration, or fuzzy patches in hard-to-reach areas.
– Notice warping, swelling, or raised grain that suggests dampness has penetrated or lingered.
– Smell behind the rack and under shelves—odors often start where airflow is worst.
Moisture doesn’t always look like a puddle. Wood and wood composites can retain humidity in the pores and around joints, and shoe racks trap that humidity because they’re often placed against walls, inside closets, or in corners.
What to inspect (even if the rack “looks fine”)
Start with the underside and the areas that “touch shoes indirectly”—the back lip of each shelf, the inner corners near vertical dividers, and the spaces between slats. These zones collect fine dust and retain humidity. Next, do a lighting check: use a flashlight at an angle to spot speckling or dull patches that don’t appear in normal overhead light.
Also check the rack’s structural behavior. Warping, swelling, or raised grain usually means wood fibers have absorbed moisture and then dried unevenly. Once that happens, odor can linger because trapped residue in the wood’s texture can reactivate when conditions become humid again.
Moisture context you can use
Wood and indoor air conditions are tightly linked. According to the USDA Forest Products Laboratory, wood’s fiber saturation point is roughly in the 25–30% moisture-content range, which is why wood can retain dampness far longer than you expect if it gets wet and then only partially dries (USDA Forest Service Wood Handbook). That’s why the same rack can smell worse in late summer or after rainy weeks, even if it never “felt” wet.
Relative Humidity (RH) vs Wood Equilibrium Moisture (EMC) at 70°F
| # | RH Level | Wood EMC @ 70°F (%) | EPA RH Range Fit | Dryness Score |
|---|---|---|---|---|
| 1 | 25% RH | 6.4 | Below 30% | ★★★★★ |
| 2 | 30% RH | 7.6 | Start of 30–50% | ★★★★★ |
| 3 | 35% RH | 8.6 | Inside 30–50% | ★★★★★ |
| 4 | 40% RH | 9.6 | Inside 30–50% | ★★★★★ |
| 5 | 50% RH | 11.8 | Upper edge of 30–50% | ★★★ |
| 6 | 60% RH | 14.0 | Above 50% | ★★ |
| 7 | 70% RH | 16.3 | Above 50% | ★ |
This table helps you frame why mildew risk rises with humidity: higher RH generally increases wood’s equilibrium moisture content (EMC). If your entryway regularly runs above 50% RH in 2026 (common with closed windows and seasonal weather), deep cleaning plus moisture control becomes more urgent. Data values reflect typical EMC charting at 70°F as reported in wood-industry references; exact EMC depends on wood species and conditions (USDA Forest Service Wood Handbook).
Simple “wipe test” to confirm buildup
If the wipe test pulls off gray residue or smears a white cloth, you’re dealing with buildup—not just dust. When transfer happens, deep cleaning is usually the safest next step for both appearance and odor control.
Visible residue transfer on a wipe often indicates oils/soils have bonded or smeared into surface texture, which usually requires cleaner agitation beyond dry dusting.
Wood and finishes can trap contaminants in micro-grooves; cleaning needs to be gentle enough to avoid finish stripping while still removing residue.
– Wipe a hidden spot with a slightly damp, clean cloth: if it comes away grimy or gray, surface cleaning isn’t enough.
– Use a white cloth to see transfer—yellow/brown smears usually indicate shoe/soil residue embedded in the finish.
– If the rack feels “gritty” even after dusting, it’s time to clean deeper.
How to run the test without causing damage
1. Choose a hidden area (back corner or underside).
2. Use a clean white cloth and just enough water to dampen, not soak.
3. Wipe in one direction, then check the cloth under bright light.
If you see gray film or noticeable smear, it indicates the rack’s finish isn’t “locked” against soil—meaning you need a method that dissolves residue (not just water).
What the wipe-test results usually mean
– Gray transfer often matches dust that mixed with oils and humidity.
– Yellow/brown transfer can be embedded soils from shoe materials, leather treatments, or long-term oxidation of residues.
– No transfer, but odor persists can mean the odor is coming from underneath shelves, behind the rack, or from shoes drying there—so you’ll still need targeted cleaning and drying.
In 2026, more households use shoe “storage” for convenience, but that also increases the chance that odor sources remain on the rack itself. The wipe test gives you a quick reality check.
How to deep-clean without damaging wood
Deep-cleaning works best when you control three variables: moisture exposure, cleaner strength, and drying time. The goal is to remove residue thoroughly while keeping water from pooling in joints and seams.
Preventing moisture retention is critical because mold risk is tied to moisture staying present indoors (CDC, U.S. EPA).
Over-wetting porous materials increases the chance of swelling and uneven drying, which can also trap odor.
– Start dry: vacuum or brush dust out of seams, shelf edges, and lattice openings (use a soft brush attachment).
– Clean gently: use a wood-safe approach like a lightly damp cloth with mild soap, then wipe again with a clean damp cloth to remove residue.
– Dry thoroughly: let everything air-dry fully with airflow; avoid soaking shelves or letting water pool in joints.
Step-by-step method that respects finished wood
1) Remove dry debris first. Dust is abrasive when you later add moisture. Use a vacuum with a soft brush attachment on seams, lattice openings, and the edges where shoe soles likely contact. Go slowly and don’t force the bristles into delicate joints.
2) Use minimal moisture. With a sealed or finished wooden shoe rack, you generally want a lightly damp cloth approach (not puddles, not soaked towels). If you use mild soap, use a small amount and then wipe with a clean damp cloth to lift any soap residue—soap residue can feel tacky later.
3) Dry like you mean it. Airflow matters. Stand the rack so air can reach undersides, or keep it positioned to promote circulation. If you close the closet after cleaning, you may trap humidity and re-trigger odors. This is especially relevant in humid climates or during rainy seasons.
Finish-safety comparison (quick decision support)
Use this guide to choose a cleaning approach based on how your rack is finished:
- Mild soap + lightly damp cloth (followed by a clean damp wipe)
- Pros: Removes oily shoe residue and dust effectively with controlled moisture. Cons: Requires careful rinsing and thorough drying to avoid tackiness.
- Alcohol/disinfectant wipes
- Pros: Can reduce odor-causing microbes on non-porous surfaces. Cons: Can dull or damage certain finishes; may drive residues deeper if used too aggressively. Check manufacturer compatibility.
- Vinegar/acid solutions
- Pros: Useful for mild odor in some contexts. Cons: Acidic cleaners can alter some finishes and may leave a smell if not dried quickly.
- Steam or wet soaking
- Pros: Very effective at loosening grime. Cons: High risk of swelling, raised grain, and finish damage—usually not recommended for wood shoe racks.
What can go wrong (and how to avoid it)
Most problems happen when cleaning introduces too much water, uses the wrong chemical strength, or skips drying. If you avoid those three failure points, you’ll usually protect the wood finish and prevent mildew recurrence.
Mold control depends heavily on moisture management, not just scrubbing visible spots (CDC).
Using harsh chemicals or abrasives can degrade wood finishes, increasing how easily residue bonds in the future.
– Over-wetting the wood: pooling water near joints or underneath shelves can worsen swelling and odors.
– Using the wrong cleaners: harsh solvents, strong degreasers, or abrasives can strip finish or dull the surface.
– Skipping full drying: if moisture remains, you may smell mildew again even after cleaning.
Failure mode 1: water pooling and uneven drying
If water collects where shelves meet uprights or where lattice creates tiny pockets, it can stay trapped longer than you expect. That’s when you see raised grain and later odors—even if the top surface looks clean.
Failure mode 2: chemical mismatch with the finish
A “wood-safe” label doesn’t always mean finish-safe. Lacquer, varnish, polyurethane, oil finishes, and waxed finishes respond differently. If you don’t know the coating, stay conservative: mild soap, minimal moisture, no scrubbing pads.
Failure mode 3: re-contamination after cleaning
If shoes go back onto a still-damp rack (common in busy households), odor and residue will return fast. Consider drying shoes separately, then placing them once the rack is fully dry.
Verdict: should you deep-clean now?
Deep-clean your wooden shoe rack if you see odor, tackiness, gray film, or any mildew risk indicators—those signs usually mean buildup is past what dusting can fix. Avoid this approach (or proceed cautiously) if your rack has damaged finish, peeling veneer, or unknown coatings; in that case, consider spot-cleaning first and before using soap/water methods. If the wood is unsealed or visibly compromised, the safest next step may be a finish-safe cleaning plan rather than a full wet clean.
If moisture has contributed to mold risk, cleaning without addressing drying/airflow often leads to recurring odors (U.S. EPA; CDC).
If you’re unsure about finish type, choose the lowest-moisture path first: dry vacuuming plus targeted spot cleaning, then full air-drying. This approach is also more forgiving in 2026 because many people keep racks in enclosed spaces where moisture hangs around.
Who should skip full wet cleaning (or delay)
Skip full wet cleaning if:
– The finish is already cracking or peeling.
– You see extensive fuzzy growth (you may need professional remediation).
– The rack sits in a closet with poor ventilation and you can’t improve airflow after cleaning.
Quick checklist (scan/save)
This quick checklist helps you decide fast—before odor returns or residue becomes harder to remove.
– ☐ Musty odor that returns
– ☐ Sticky/tacky feel after wiping
– ☐ Gray film or dark streaks in corners/grooves
– ☐ Speckling, discoloration, or mildew-like spots
– ☐ Warping, raised grain, or swelling near joints
– ☐ White-cloth wipe test shows grime transfer
A wipe-test is a practical indicator of residue bonded to the finish; gray or smearing transfer usually means routine dusting won’t fully solve it.
When you detect moisture-related damage (like raised grain or swelling), prioritize drying and moisture control alongside cleaning (CDC).
Sources
– CDC — Mold-related health and moisture guidance, including the timeframe for mold growth after water exposure.
– U.S. EPA — Indoor humidity and mold/moisture guidance (including recommended 30–50% RH range).
– USDA Forest Service, Wood Handbook — Wood moisture concepts such as fiber saturation point and equilibrium moisture context.
Deep-cleaning a wooden shoe rack isn’t just about looks—it’s about removing residue and preventing trapped moisture from restarting the smell-and-mildew cycle. If the wipe test shows gray transfer, the odor returns quickly, or you see moisture-related damage like raised grain, follow the low-moisture, thorough-drying approach above. And if your rack’s finish is damaged or unknown, start with gentle spot-cleaning and manufacturer guidance before using soap or water methods.
Frequently Asked Questions
What are the most common signs your wooden shoe rack needs a deep clean?
Look for a musty smell, visible grime buildup in the corners, and sticky residue on shelves or slats. You may also notice dull wood, dark spots, or white dust that suggests moisture, mildew, or embedded dirt. If your shoe rack starts trapping odors even after wiping, it’s a strong sign the buildup has penetrated deeper into the wood grain.
How can you tell if dirt and moisture have penetrated your wooden shoe rack?
Check for discoloration along joints and where shoes rest—these areas often hold moisture longer. If the wood feels slightly rough, tacky, or unusually damp after cleaning, grime and moisture may be embedded rather than just surface-level. You can also inspect for mildew specks or tiny bubbles in finish areas, which are common indicators that the rack needs a deeper clean.
Why does a wooden shoe rack start smelling even after quick wipe-downs?
Shoe racks collect oils, sweat residue, and shoe dirt that can soak into wood pores and the underside of shelves. Over time, bacteria and mildew grow in hard-to-reach crevices, and routine cleaning only removes the top layer. A deep clean breaks up embedded residue and clears odor-causing buildup so the rack stays fresher longer.
Which parts of a wooden shoe rack collect the most grime and require extra attention?
Focus on slats, the underside of shelves, end caps, and the grooves where dust and shoe debris collect. Corners and joints are also common trouble spots because moisture and dirt settle there. If your rack has a back panel or lower compartments, check and clean those surfaces thoroughly as well—these areas often get missed during quick maintenance.
What’s the best way to confirm you’re ready for a deep clean on your wooden shoe rack?
Run a simple “wipe test”: wipe a damp cloth across the wood and inspect it for black residue, lingering odor, or sticky transfer. Then dry the area completely and sniff again—if the smell returns quickly or the surface still feels gritty, it’s time for a deep clean. Finally, check for mildew staining, warped areas, or flaking finish; these signs mean deeper cleaning and careful re-conditioning may be needed.
📅 Last Updated: October 26, 2026 | Topic: Signs Your Wooden Shoe Rack Needs a Deep Clean | Content verified for accuracy and freshness.
References
- Mold | US EPA
- https://www.epa.gov/mold/mold-remediation-and-cleanup
- https://www.cdc.gov/coronavirus/2019-ncov/community/disinfecting-building-facility.html
- https://www.cdc.gov/mold/default.htm
- Nail fungus – Symptoms and causes – Mayo Clinic
- Mold
- Mildew
- https://scholar.google.com/scholar?q=signs+wooden+shoe+rack+needs+deep+cleaning+mold+mildew+odor Google Scholar
- https://scholar.google.com/scholar?q=wood+surface+cleaning+mold+remediation+guidelines Google Scholar
- https://scholar.google.com/scholar?q=shoe+hygiene+microorganisms+bacteria+fungi+health Google Scholar
