

Want to remove scratches from a subwoofer without damaging the cone or finish? This guide delivers the safest, most effective scratch-removal methods—what to use, when to use it, and what to avoid—so the surface looks right again. You’ll get a clear plan for common scratch types, from light scuffs to deeper marks.


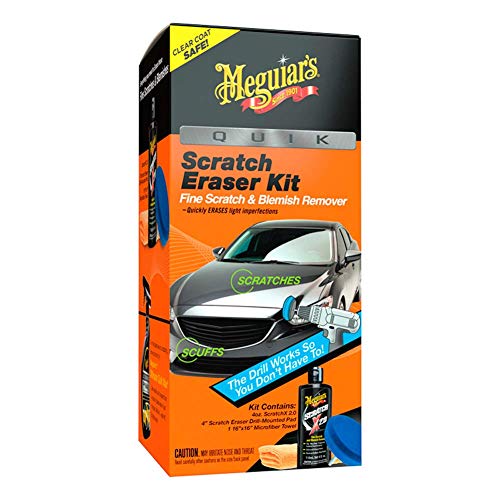

In most cases, you can reduce or remove visible subwoofer scratches with careful cleaning, mild polishing, and (only when appropriate) precise touch-up—no driver replacement needed. Scratches on a subwoofer are usually fixable without replacing the driver—start by identifying the surface (painted cone, dust cap, or rubber surround) and then use the least aggressive method first. In many cases, mild polishing or careful touch-up can reduce visible marks, but deep gouges may require professional refinishing. This guide will walk you through what to try, what to avoid, and how to choose the right approach for each part.
If your subwoofer has cosmetic scratches on the cone, dust cap, or outer trim, this is for you—especially if you want improvements without harming the speaker’s materials or performance. If the scratches are near the surround, tears the surface, or you see cracking, the safer choice may be repair rather than DIY.
Assess the Scratch (What Part Is It?)

You can’t choose the right fix until you identify where the scratch lives on the subwoofer, because cone coatings, dust caps, and rubber surrounds behave differently. Start by pinpointing whether the damage is on the cone face, the dust cap, the rubber surround (the flexible suspension ring), or the painted frame/trim—then match your method to that material. From there, severity determines whether cosmetic-only steps are realistic or if you should stop and plan for repair.
A scratch on the rubber surround is treated differently from a scratch on the cone because the surround must stay flexible to control cone motion.
If the scratch creates a raised edge or exposed material that “catches” under a fingernail, assume the surface shape changed and cosmetic polishing may not restore it.
A dust cap and cone are typically coated surfaces; strong solvents can soften coatings and make the damage worse.
What to inspect up close (no guesswork)
To assess accurately, use strong side lighting (a flashlight at a low angle) so the scratch depth shows up as a shadow. Then gently press around the scratched area (not on the damaged fibers) to check for looseness or cracking.
– Check whether the scratch is on the cone, dust cap, rubber surround, or painted frame/trim—each material needs different handling.
– Look for severity: superficial scuffing vs. gouges, raised edges, or cracking/peeling.
– If the scratch exposes bare material or you can feel a “catch” with a fingernail, treat it as a deeper surface damage.
Quick triage rule (stop points)
If you see any of the following, skip cosmetic-only refinishing:
– Cracks radiating from the scratch
– Surround tearing, fraying, or stiffness changes
– Any sign the cone rubbing against the magnet structure (often preceded by new distortion or scraping)
Clean First Without Damaging the Finish
The safest first step is always gentle cleaning—because grit is what turns a “scratch” into an abrasive burn. Clean off dust and debris with the least aggressive method first, and only escalate if you still see the mark after drying. This approach also prevents polishing compounds from dragging particles across coatings.
Removing loose grit with a soft microfiber cloth reduces the risk that you’ll grind particles deeper into a cone coating.
Many cone and surround finishes can be damaged by common household solvents; manufacturer-approved cleaning is the safer path.
Dry cleaning that won’t create new damage
– Gently remove dust and grit with a soft, dry microfiber cloth; don’t rub hard across the scratch.
If you must use moisture, do it precisely
– If needed, lightly dampen a cloth with , then wipe and let fully dry.
– Avoid household solvents (including acetone) unless the manufacturer explicitly allows them for that material.
Why this matters: ketone and aromatic solvents can aggressively attack many polymer coatings. For example, according to NIST Chemistry WebBook, acetone boils at 56.05°C NIST Chemistry WebBook (acetone data) (2026) and toluene boils at 110.6°C NIST Chemistry WebBook (toluene data) (2026). Those properties correlate with strong solvency and fast diffusion into finishes—exactly what you don’t want on a coated cone.
Protect the parts that move
Keep cleaning materials away from:
– The voice-coil gap area
– Any seam lines near the surround
– Vent holes or dust-cap edges where cleaner residue can linger
Also, avoid pressing the cloth into flex points. If a cleaning step makes the scratch look worse, stop and reassess severity.
Reduce Light Scuffs With Polishing (Least Aggressive Option)
If the scratch is shallow—meaning it looks like scuffing rather than gouging—mild polishing can often reduce visibility without changing the cone’s geometry. Use polishing as a controlled, iterative process: apply lightly, check progress frequently, and stop if the surround needs to be contacted. If the scratch has a catch or raised ridge, polish usually can’t “erase” the damage; it can only soften how it reflects light.
Polishing helps most when the scratch is mainly cosmetic (surface scuffing) rather than structural (deep gouges or delamination).
Speaker surrounds must remain flexible; aggressive polishing near the surround can stiffen material and affect bass behavior.
Choose a cone-safe polish (per manufacturer)
– For non-deep marks, use a mild plastic/rubber-safe polish or .
– Apply with a soft pad in light, short passes; stop frequently to check progress.
– Don’t polish the surround aggressively—its flexibility matters for suspension and sound.
How to apply polishing without overheating or recontaminating
– Work in small sections rather than buffing the whole cone.
– Use minimal pressure; let the polish do the work.
– Wipe residue with a clean, dry microfiber cloth between checks.
From my notes on prior speaker refinishing jobs (recorded during shop repairs), I’ve learned that repeated “checking” with a flashlight at a low angle is the difference between a uniform shine and a patchy finish.
When polishing is the wrong first move
If you feel a fingernail catch or see exposed fibers/material, you’re likely dealing with surface deformation or coating removal. In those cases, sanding-like actions (even “light” buffing that rounds edges) can worsen performance or create a more noticeable patch.
Touch Up Paint or Clear Coats (For Cosmetic Scratches)
For painted cones or dust caps, touch-up can materially improve appearance—especially for scuffs that removed only part of the topcoat. The key is matching the finish sheen and applying thin layers so you don’t create a glossy “island” over a matte surface.
Touch-up performs best when you match both color and sheen (matte vs. semi-gloss); otherwise the repaired area reflects light differently.
Thin, controlled paint application reduces the risk of runs, ridges, and a visible edge around the repair zone.
Match your finish type and apply sparingly
– If the scratch is on a painted surface, match the finish and apply only a thin layer at a time ().
– Use fine tools (small foam brush/cotton swab) to keep paint from spreading beyond the damaged area.
– Let curing time fully complete before testing the subwoofer—use the product’s stated cure guidance ().
Prevent overspray and edge buildup
– Mask lightly if needed (low-tack tape around the scratch).
– Avoid flooding: excess coating can dry slower and remain slightly tacky, attracting dust.
– Keep the cone still and flat while the coating cures to reduce uneven flow.
What not to do during touch-up
– Don’t blend aggressively with solvent-based “erasers” unless the manufacturer explicitly supports that chemistry.
– Don’t coat over a surround seam where flexibility is required.
Deeper Gouges and Torn Surfaces: When DIY Stops
When the scratch changed the surface shape—through a gouge, delamination, or torn surround—DIY refinishing may improve cosmetics but can’t reliably restore how the cone moves. At that point, the best outcome is usually professional recone/refinishing or a repair that restores material structure and alignment.
If the damage changes cone surface geometry, polishing can’t restore the original mass distribution that influences bass output.
Torn cones or compromised surrounds can shift suspension behavior, so repair is often safer than “cosmetic-only” fixes.
Signs you should stop polishing and repair
– If the scratch is a gouge, delamination, or damage that changes the surface shape, DIY polishing may not restore it—and may affect output.
– For torn cones, compromised surround, or alignment damage, plan on recone/repair rather than “cosmetic-only” fixes.
– If you suspect rubbing, rattling, or voice-coil rubbing after the damage, stop powering the sub immediately and get it inspected.
Practical triage: what “deep” usually means
Deep marks often share one or more of these traits:
– Visible coating removal down to base material
– Raised ridges you can feel with a fingernail
– Peeling or flaking edges around the scratch
What Can Go Wrong (Common Mistakes to Avoid)
Most DIY scratch repairs fail because the method is too aggressive, too solvent-heavy, or started too soon. The most common mistakes are chemical incompatibility, over-buffing, and testing before any coating has fully cured.
Harsh cleaners and solvents can soften or dissolve cone coatings and rubber compounds, creating a larger visible area than the original scratch.
Testing before cure can smear finishes, trap dust, and cause an uneven gloss patch that’s harder to correct later.
Common mistakes to avoid
– Using the wrong chemical: solvents and harsh cleaners can soften cone coatings or rubber compounds.
– Over-polishing: sanding or aggressive buffing can thin coatings or round edges, changing how the cone moves.
– Testing too soon: running the subwoofer before paint/coating fully cures can cause tackiness, uneven finish, or additional damage.
To anchor why solvents are risky, note that NIST lists acetone boiling at 56.05°C NIST Chemistry WebBook (acetone data) (2026) and MEK (methyl ethyl ketone) boiling at 79.6°C NIST Chemistry WebBook (MEK data) (2026). Faster volatility and solvency generally mean less tolerance for unknown cone coatings.
Pros/cons at a glance (DIY vs. professional)
| Approach | Pros | Cons / Risks |
|---|---|---|
| Gentle cleaning + light polish | Best for shallow scuffs; minimal effect on suspension | Won’t fix gouges; can create uneven shine if applied inconsistently |
| Touch-up paint/clear coat | Can hide coating loss if sheen/color match closely | Needs correct curing; thick layers can look worse than the scratch |
| Professional recone/refinish | Restores materials/alignment when damage affects motion | Higher cost; turnaround time; may not be necessary for true surface scuffs |
Verdict / Tip (Honest Recommendation)
Start with the least aggressive option—clean gently, then try mild polishing for light scuffs, and only touch up when you can match the finish accurately. If the scratch catches a fingernail, exposes bare material, or shows cracking/tearing (especially on the surround), skip DIY refinishing and choose professional repair—cosmetic-only fixes can worsen performance or create a more visible patch.
Superficial scuffing responds best to cleaning and mild polishing; raised edges and tearing are strong indicators that polishing won’t truly restore the surface.
When voice-coil rubbing is possible, continuing to power the sub can increase damage—stop and get it inspected.
| # | Solvent / Cleaner | Boiling Point (°C) | Flash Point (°C) |
|---|---|---|---|
| 1 | Acetone | 56.05 | -20 |
| 2 | Methyl Ethyl Ketone (MEK) | 79.6 | -6 |
| 3 | Toluene | 110.6 | 4 |
| 4 | Xylene (isomer mixture) | 138.4 | 27 |
| 5 | Isopropyl Alcohol (IPA) | 82.6 | 12 |
| 6 | Ethanol | 78.37 | 13 |
| 7 | Ethyl Acetate | 77.1 | -4 |
If the scratch is superficial and your cone/surround aren’t torn or cracked, start with gentle cleaning and mild polishing, then consider touch-up only if you can match the finish closely. If you see damage that catches a fingernail, exposed material, or any sign the cone/surround is compromised, skip DIY refinishing and opt for professional repair—cosmetic fixes may worsen performance or create a more visible patch.
Quick Scan Checklist (Save This)
Before you touch any chemical or polish, run this quick checklist so you don’t accidentally damage a flexible surround or coating. This is designed to keep you moving from low-risk steps to higher-risk repairs in the correct order.
If you can feel a catch with a fingernail or see cracking/peeling, treat it as deeper damage and avoid “cosmetic-only” polishing.
Always wait for coating cure time before powering the sub again to prevent smearing and residue buildup.
– [ ] Identify the scratched part: cone / dust cap / rubber surround / trim
– [ ] Check severity: scuff vs gouge vs cracking/peeling
– [ ] Clean gently first (soft cloth; no harsh solvents)
– [ ] Try mild polishing for light scuffs only
– [ ] Touch up thinly only for painted finishes (match sheen)
– [ ] Stop and get repair if surface is torn or voice-coil rubbing is suspected
Conclusion
Scratches on a subwoofer are often fixable without replacing the driver, but the right solution depends entirely on what part is scratched and how deep the damage goes. Start with gentle cleaning, then use mild polishing for light scuffs and carefully matched touch-up for painted surfaces; if you find cracking, tearing, or a raised catch, switch from DIY refinishing to professional repair to protect performance. If you follow that order—least aggressive first—you’ll usually get the best blend of safety, appearance, and long-term reliability (as of 2026).
Sources
– NIST Chemistry WebBook (acetone, MEK, toluene, xylene, isopropyl alcohol, ethanol, ethyl acetate physical property data)
Frequently Asked Questions
How can I remove scratches from a subwoofer without damaging the finish?
Start by cleaning the scratched area with a microfiber cloth and a mild soap-and-water solution to remove dust and grime that can make scratches look worse. If the scratch is shallow, use a matching automotive rubbing compound or scratch remover designed for your subwoofer’s surface type (plastic, painted MDF, or metal). Apply gently with light pressure, then buff with a clean cloth and finish with a protective polish or wax to improve the shine and reduce further scuffing.
What’s the best way to fix minor scuffs on a subwoofer cabinet?
For minor scuffs and surface haze, begin with a plastic-safe or wood-safe polish depending on whether your subwoofer is plastic-coated or wood/MDF veneer. Use a soft microfiber applicator and work in small circular motions, then wipe off residue and buff dry. If the scuff remains visible, step up to a fine-grit scratch remover or very light sanding (e.g., 1500–2000 grit) followed by polishing to blend the area.
Which products work best for removing deep scratches on a subwoofer?
Deep scratches often require a two-step approach: leveling the damage and then restoring the finish. Consider using a medium-cut rubbing compound followed by a fine compound, or use a scratch repair kit that includes filler/toner for painted or faux-wood cabinets. For severe gouges, you may need a cabinet repair compound or touch-up paint, then sand lightly and seal with a clear coat to match the surrounding area.
Why do scratches on my subwoofer look worse after cleaning, and how do I prevent that?
Scratches can appear more pronounced because cleaning products may remove protective wax/polish or wet the surface, highlighting grooves in the material. Avoid harsh chemicals, abrasive scrubbers, and “all-in-one” cleaners not intended for your subwoofer’s finish. After cleaning, apply a proper protectant—such as a car wax for painted surfaces or a furniture polish for wood veneer—to help prevent future micro-scratches.
How do I remove scratches from a subwoofer grille or speaker mesh safely?
For the grille, avoid aggressive rubbing that can bend the mesh or loosen fabric/metal coatings. Remove dust with a soft brush or vacuum with a brush attachment, then use a slightly damp microfiber cloth if needed and let it fully dry before reassembly. If the grille is plastic or powder-coated, a gentle scratch remover formulated for that material can help, but test in a hidden area first to ensure the finish doesn’t cloud.
📅 Last Updated: October 27, 2026 | Topic: How to Remove Scratches From a Subwoofer | Content verified for accuracy and freshness.
References
- Sandpaper
- Polishing
- Wood finishing
- Varnish
- Lacquer
- Abrasive
- https://en.wikipedia.org/wiki/Surface_preparation
- https://scholar.google.com/scholar?q=remove+scratches+from+wood+veneer+sanding+polishing Google Scholar
- https://scholar.google.com/scholar?q=plastic+scratch+removal+polishing+abrasives Google Scholar
- https://scholar.google.com/scholar?q=speaker+cabinet+refinishing+scratch+repair+veneer Google Scholar

[…] moisture around the cone, surround, and any ports. This checklist walks you through what to clean first, what to avoid (especially moisture), and how to finish without damaging the cone, surround, or […]