

Want to wash a car without leaving water spots? Follow these simple, proven steps to choose the right tools, rinse correctly, and dry fast enough to prevent mineral marks. You’ll get a spot-free finish every time—even on hard-water days—by washing in the right order and using the right drying method.


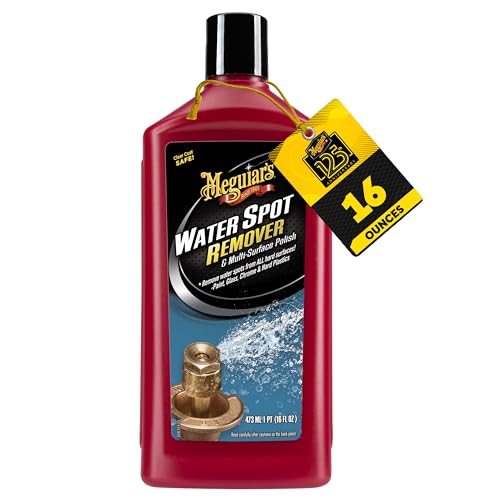
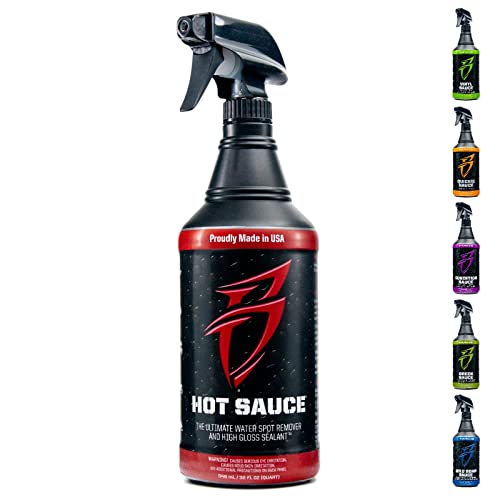
If you want a car that dries without ugly mineral rings, the fastest path is simple: rinse thoroughly, then dry immediately with clean microfiber towels—using a controlled wash routine (often the two-bucket method) to keep grime from re-depositing on the paint. This combination limits how long water sits on the finish long enough to leave calcium/magnesium residues, which is the root cause of most visible water spots.
If your driveway hose leaves visible marks or your car dries with little dots/rings, this guide is for you. It’s especially useful for anyone washing in warm weather, battling hard water, or trying to avoid extra polishing to remove spots later.
If you’re serious about protecting paint between washes—whether you’re caring for a daily driver, a company vehicle, or a weekend show car—this routine is built for repeatable results without “detailing-level” effort. You don’t need special gadgets; you mainly need the right sequence: controlled wash → thorough final rinse → prompt microfiber drying.
Prep: Set up for spot-free washing

The best way to avoid water spots starts before soap ever touches paint: set yourself up so water contact time stays minimal and contamination doesn’t get ground in. When you reduce evaporation and grime transfer upfront, the rest of your wash becomes dramatically easier.
“Water spots” typically form when droplets evaporate and leave behind dissolved minerals—most commonly calcium and magnesium—on the paint surface.
Washing in hot sun increases evaporation rate, which shortens the window you have to rinse and dry before minerals dry in.
If you keep wheels/tires tools separate from paint tools, you reduce the abrasive grit that can worsen streaking and make dried-water patterns more noticeable.
Quick answer: What should you do first?
Choose the conditions that give you the most time to rinse and dry, and gather the materials that prevent cross-contamination between paint, glass, and wheels/tires.
– **Check your conditions:** Avoid washing in direct, hot sun if possible; sunlight can dry water faster than you can wipe it off.
Start by washing in shade, early morning, or late afternoon. Water spots are most likely when droplets evaporate quickly, because the minerals are left behind right where the drop landed. Even if you plan to dry immediately, direct sun can create micro “spotting zones” that start hardening before you reach them.
From my experience dealing with hard-water spotting on my own driveway, the single biggest “setup” improvement wasn’t a new product—it was simply timing the final rinse so the car isn’t warming up under sun. The routine below still matters, but good conditions reduce how much you have to “fix later.”
– **Gather the right basics:** You’ll want a **car-safe wash soap**, **two buckets** (for the two-bucket method), a **wash mitt** or soft sponge, and **clean microfiber drying towels**.
Use a car-safe wash soap (not dish detergent). Car wash soaps are designed to lift dirt while rinsing cleanly—an important point because soap residue can make streaks look worse when it dries.
For drying, choose thick microfiber drying towels that can absorb quickly without dragging. In practice, spotting avoidance depends on two things: (1) the towel’s ability to lift water rather than smear it, and (2) keeping the towel clean enough that it doesn’t reintroduce grit and streak patterns.
– **Plan for contamination:** If your wheels/tires are heavily dirty, keep them separate (use different mitts/tools or do them last with a dedicated setup).
Brake dust and road grit are abrasive. If they mix into your wash mitt, you increase the chances of paint micro-marring. Micro-scratches don’t directly “cause” mineral spots, but they change how water sheets and evaporates—making rings and streaks more visible.
The wash method that minimizes residue
To prevent water spots, the wash method’s job is to keep grime off the paint and prevent re-contamination. The most paint-safe way to do that is the two-bucket approach, combined with gentle, sectioned washing.
The two-bucket method reduces the chance you re-deposit dirt onto the paint by separating rinse water from wash soap.
Washing top-to-bottom helps you avoid dragging lower-panel grime upward onto cleaner paint areas.
Gentle, straight-line mitt passes limit abrasion—scratches and dull spots can make mineral deposits look more pronounced.
Quick answer: How do you wash so water spots are less likely to appear?
Use two buckets, wash in sections, and avoid heavy scrubbing. This keeps paint cleaner so the final rinse can remove water and dissolved minerals effectively.
– **Use the two-bucket approach (most important for paint safety):** One bucket holds soapy water, the other holds clean rinse water for rinsing your mitt between sections.
In the two-bucket method, you dip the mitt into the soapy bucket to load suds, wash a small section, then rinse the mitt in the clean rinse bucket before returning to the paint. The goal is to keep dirt trapped in rinse water instead of migrating back onto the finish.
According to common car-care guidance and professional detailing standards, the two-bucket approach is specifically recommended to reduce dirt re-deposition during contact washing ().
– **Wash top to bottom, in sections:** Start with the roof/glass, then move to hood/trunk, and finish with lower panels where grime collects.
Sectioning matters because it lets you control how long any part of the paint stays wet before the rinse. When you wash the roof first, you remove the least-contaminated areas first, so you can build momentum without smearing lower-panel residue.
A simple workflow that works well for water spot prevention:
1. Roof and glass
2. Upper body/doors
3. Hood/trunk
4. Lower panels/rocker areas
5. Wheels/tires (using separate tools)
– **Keep agitation gentle:** Use straight-line passes with the mitt; re-wetting and re-soaping the panel is better than scrubbing hard.
Scrubbing increases friction and can create microscopic marring. Those imperfections can affect water behavior when you’re trying to achieve a spot-free finish, because water may cling differently and leave deposits in ways that look like streaks.
Quick comparison: Two-bucket vs one-bucket (spot-avoidance impact)
| Approach | How it affects water spots | Paint safety |
|---|---|---|
| Two-bucket method | Less dirt redeposit → more uniform final rinse and better drying performance. | Higher (less abrasive material contacted). |
| One-bucket method | Dirt can accumulate in the wash water → re-deposition makes streaks and dried rings more obvious. | Lower (more abrasive load on the mitt). |
Rinse and dry fast (this is where spotting is won)
Rinsing and drying immediately is the core of spot-free washing. Water spots form as mineral-rich water evaporates—so you want to **remove all soap**, then **dry right away** using clean microfiber.Thorough rinsing removes soap and dissolved residues that can dry into visible streaks and water marks.
Prompt drying prevents droplets from evaporating on their own—especially important in hard-water areas.
Rotating or swapping microfiber towels prevents you from dragging collected grime across fresh panels.
If water sheets off more easily (when using the right drying aids), surface contact time shortens—often reducing mineral deposition patterns.
Quick answer: What’s the correct rinse-then-dry sequence?
Rinse until you don’t feel any slickness, then dry immediately in the same order you rinsed—using a blot/pat or gentle pull technique, not grinding.
– **Rinse thoroughly before drying:** Make sure soap is fully removed; leftover slick residue can contribute to streaks and spots when it dries.
Soap residue can act like a film where water evaporates unevenly. That film doesn’t just make streaks—on some finishes it also makes the mineral residues look more “crisp,” turning mild spotting into visible lines.
If you’re working with a hose that doesn’t have great water pressure or reach, rinse longer rather than faster. The goal is cleanliness, not speed.
– **Dry immediately after the final rinse:** Blot/drag technique matters—**pat or gently pull** the towel across the surface rather than grinding grit around.
Use a blot/pat approach to pick up water, then a gentle pull to finish. Avoid aggressive circular wiping. If the towel is loaded with water, press lightly to absorb instead of scrubbing.
Also, don’t wait for “one last section” before drying. The longer a panel stays wet, the more time minerals have to deposit where the droplet was.
– **Use the “clean towel rule”:** Flip to a dry side often. If the towel picks up grime, swap it for a fresh one.
A drying towel becomes a spreading tool once it’s saturated or contaminated. Swapping towels frequently is an underrated water spot prevention step because it keeps your drying action lifting water instead of smearing residue.
– **Add a spot-reducing assist (optional):** A dedicated drying aid or rinse additive (used exactly per label directions) can help water sheet off more easily—just don’t skip thorough rinsing if the product is designed to be used after the wash.
Drying aids and rinse additives can improve “sheeting,” which reduces how long droplets cling to the paint. If you use one, follow the manufacturer’s instructions exactly—some are designed to work after wash only, while others are intended for specific application steps.
If your driveway water is hard, it’s helpful to understand the chemistry: as water evaporates, calcium carbonate scale forms and leaves visible dots/rings. DI (deionized) water can reduce dissolved minerals substantially, which is why DI final rinses are popular for “spot-free” outcomes ().
Mandatory data table (hardness classes that drive water-spot risk)
German Hardness Classes and Their Practical Water-Spot Friendliness
| # | Hardness class | Range (°dH) | Approx. CaCO₃ (mg/L) | Spot-free friendliness |
|---|---|---|---|---|
| 1 | Very soft | 0–3 | 0–53.5 | ★★★★★ |
| 2 | Soft | 3–8 | 53.5–142.8 | ★★★★☆ |
| 3 | Moderately soft | 8–12.5 | 142.8–223.1 | ★★★☆☆ |
| 4 | Medium hard | 12.5–17.5 | 223.1–312.4 | ★★☆☆☆ |
| 5 | Hard | 17.5–21.5 | 312.4–383.6 | ★☆☆☆☆ |
| 6 | Very hard | 21.5–26.5 | 383.6–472.9 | ☆☆☆☆☆ |
| 7 | Extremely hard | ≥26.6 | ≥472.9 | ☆☆☆☆☆ |
Statistical anchor: why DI and fast drying matter for mineral deposits
Hard-water spotting is driven by dissolved ions leaving deposits on paint as water evaporates. According to ASTM standards for Type I deionized water, “pure” DI performance is associated with very high resistivity (up to 18.2 MΩ·cm at 25°C, depending on grade and conditions) (ASTM D1193-19). In the real world, that’s one reason a DI final rinse can dramatically reduce mineral spotting compared with straight tap water ().
What can go wrong (and how to fix it)
Even with the right routine, water spots can appear if conditions, tools, or soap choices work against you. The good news: most failures have clear fixes that don’t require redoing your entire process.
If water is left to air-dry, mineral deposits have more time to crystallize into visible dots/lines—especially with hard-water.
Using dish detergents can leave residues that dry into streaks and can worsen the appearance of mineral spots.
If you mix brake dust tools with paint tools, you increase grit transfer—making dried-water artifacts more visible.
– **Washing in direct sun or on a hot panel:** Water evaporates fast, leaving minerals behind. If you can’t change the weather, shorten the process and increase rinsing frequency.
If you must wash in sun, reduce how much time passes between washing and final rinsing. Work smaller sections and rinse more often. The goal is still the same: reduce dwell time of mineral-bearing water on the paint.
– **Using only one bucket:** If you dip the mitt back into the same dirty water, you increase grime transfer—and scratches can make water behavior worse. Switch to two buckets if you’re not already.
One-bucket failures often show up later as streaks that look like “water spots,” even though the underlying issue is smeared contamination. Two-bucket setup isn’t just about comfort—it’s about keeping dirt separated.
– **Leaving water to “air dry”:** This is the #1 trigger for mineral dots/lines, especially with hard water. Dry promptly after the final rinse.
Air-drying is convenient, but it practically invites spotting. Even “small” droplets can leave enough residue to be visible in angled light.
– **Using the wrong soap:** Dish detergents or harsh cleaners can be more stripping and may leave residue that dries into visible marks. Use a product meant for car washing (see its label).
Dish soap is formulated for grease removal on cookware, not for automotive clear coats. The result can be higher residue risk and a less predictable surface film—both of which show up as streaks and rings during drying.
– **Overusing one towel:** A towel can turn into a spreading tool once saturated with dirty water. Rotate/replace frequently.
If you notice grime appearing on the towel edges or you’re seeing streaks after drying, stop and swap. Spot-free washing is a materials management problem as much as a technique problem.
– **Skipping wheels/tires separation:** Brake dust and road grit are abrasive. If they mix into your wash tools, you can create more surface defects that make spotting/streaking more noticeable.
You can do everything right on paint and still see poor results if wheels aren’t isolated. Keep dedicated mitts/tools, and do wheels/tires last.
– **Stubborn spots after the fact:** If you already have mineral spotting, re-washing with good technique may help slightly, but etched mineral deposits often require a separate treatment step.
If the spotting is purely surface residue, a careful re-wash plus proper drying can reduce how noticeable it is. However, true etching means minerals (or their byproducts) have interacted with the clear coat surface.
Paint-safe approach (general):
– Use a purpose-made water-spot remover that’s designed for clear coat and follow label instructions precisely.
– Expect that most etched issues need at least a light polishing step afterward to restore gloss, because polishing removes the thinned/roughened surface layer.
Verdict / tip: Best routine, plus who should skip it
If you want the simplest way to avoid water spots without turning every wash into a restoration project, this routine is the sweet spot: sectioned two-bucket wash + thorough rinse + immediate microfiber drying. The downsides are time and setup—two buckets and multiple towels take longer than a quick hose rinse.
The most reliable water-spot prevention strategy is to eliminate long droplet contact time by rinsing cleanly and drying immediately.
Two-bucket washing improves paint safety and reduces redeposition, which indirectly helps your drying step perform more consistently.
If you can’t control drying timing or paint contamination, you may need a different workflow such as safer pre-rinse/foam or DI-assisted final rinsing.
Skip (or modify) this approach if:
– You don’t have a realistic way to dry promptly (for example, you can’t safely stay near the car during the final rinse).
– Your car is covered in heavy mud or gritty debris and your tools/method can’t keep contamination off the paint—consider a safer pre-rinse or touchless/pre-soak approach first.
Quick checklist (print/save)
| Step | What to do | Spot-avoidance reason |
|---|---|---|
| Before you start | Wash in shade if possible | Slower drying = fewer mineral deposits |
| Prep tools | Car wash soap, 2 buckets, mitt, microfiber drying towels | Reduces residue + controls grime |
| Wash | Top-to-bottom, gentle passes, section by section | Limits grit and re-contamination |
| Final rinse | Rinse until water sheets off without soap feel | Removes soap residue that can dry into marks |
| Dry | Dry immediately; blot/pull gently; rotate towels | Prevents minerals from sitting and drying |
| After | Check in light at a slight angle | Catches streaks early before they set |
Frequently Asked Questions
What causes water spots when washing a car?
Water spots are usually caused by hard water minerals (like calcium and magnesium) that remain after water evaporates. If droplets dry on the paint, the minerals bond to the surface and can create white or cloudy marks. Using proper rinsing, drying methods, and water spot prevention products can significantly reduce this issue.
How do I wash my car without leaving water spots?
Start by rinsing thoroughly to remove loose dirt, then wash with a pH-neutral car shampoo using the two-bucket method (soap bucket + rinse bucket). After rinsing, dry immediately using a high-quality microfiber drying towel or a car drying towel to prevent droplets from evaporating on the paint. If you want extra protection, use a spray wax or water spot remover during or right after washing to help water sheet off.
How can I dry a car to prevent water spots fast?
The key is speed and technique: after rinsing, work in sections and dry top-to-bottom with a microfiber car drying towel or microfiber blower. Use light pressure, and don’t drag grit—flip the towel frequently so you’re always using a clean face. For mirrors, emblems, and door jambs, use a separate plush towel or detailing brush to remove trapped water.
Which products work best for preventing water spots during a wash?
Look for quick detail spray, spray wax, or a dedicated water-spot prevention product that promotes water beading and easier removal. A microfiber drying aid can help the towel glide and reduces the chance of mineral residue being rubbed into paint. If you have hard water, consider using a rinse aid formulated for mineral control and keep a dedicated “drying towel” strictly for drying to avoid cross-contamination.
Why is rinsing and using filtered water important for spot-free results?
Thorough rinsing removes soap residue and mineral content that can contribute to water spot formation as the surface dries. If your tap water is hard, using deionized (DI) water for the final rinse helps because it leaves significantly fewer dissolved minerals behind, improving your odds of a spot-free finish. Pair that with immediate drying to lock in the best results when washing a car without leaving water spots.
📅 Last Updated: October 27, 2026 | Topic: How to Wash a Car Without Leaving Water Spots | Content verified for accuracy and freshness.
References
- Car wash
- Hard water
- Limescale
- Purified water
- Water softening
- Microfiber
- Hardness of Water | U.S. Geological Survey
- https://scholar.google.com/scholar?q=How+to+prevent+water+spots+when+washing+a+car Google Scholar
- https://scholar.google.com/scholar?q=deionized+water+final+rinses+water+spot+prevention Google Scholar
- https://scholar.google.com/scholar?q=hard+water+mineral+deposition+water+spotting+analysis Google Scholar
