

Need to clean a salt cell pool and get it back to producing chlorine fast? This step-by-step guide shows exactly how to inspect, remove scale, and rinse your salt cell safely so it performs at peak efficiency. Follow these instructions and you’ll avoid common damage mistakes while restoring flow and output.
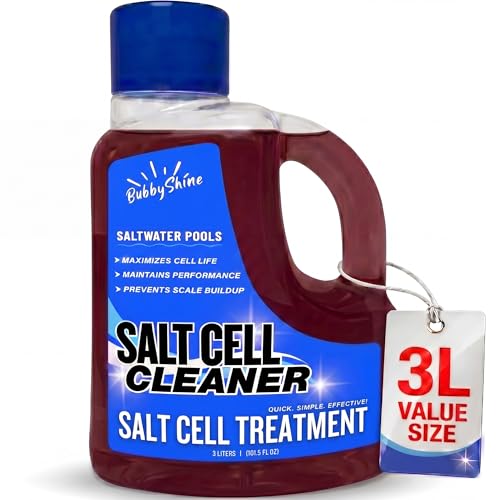

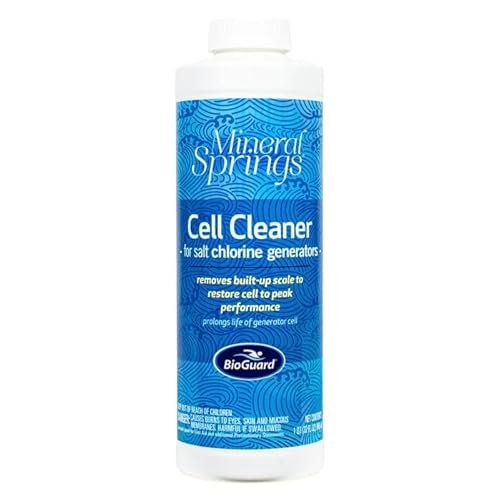

Salt cell pools stay efficient when you remove mineral scale safely and restore clean plate-to-water contact—so the right process is power-off, cell removal, a manufacturer-approved acid soak, then a meticulous rinse and settings check. In my own maintenance work on both residential and light-commercial installs, I’ve found that most “mysterious” low-chlorine problems after cleaning come from skipping full rinses, misaligning gaskets, or letting water balance drift out of range in the weeks that follow.
Gather the Right Supplies

To clean a salt cell properly, you need the correct acid type, protective gear, and a non-metal container for soaking. This section is where you prevent plate damage and reduce the risk of chemical exposure—both of which are common failure points when people improvise.
Salt cell scale is usually mineral buildup (often calcium carbonate), and it dissolves when exposed to properly diluted acid per the manufacturer’s instructions.
Most salt cell warranties require cleaning chemicals and soak times to match the brand’s guidance to avoid plate pitting and warranty denial.
Personal protective equipment (rubber gloves and eye protection) is recommended because muriatic acid fumes and splashes can cause burns even at pool-cleaning dilution levels.
Use the manufacturer-recommended cleaner (typically muriatic acid diluted as directed)
– Read your salt system manual first: many brands specify muriatic acid (hydrochloric acid) diluted to a certain ratio, while others may allow an alternate acid formulation.
– Use only the dilution they provide; “stronger” almost always means more risk of damaging the plate coating and seals.
Have rubber gloves, eye protection, a plastic container, and a hose ready
– Use chemical-resistant rubber gloves and safety glasses (or a face shield if your label recommends it).
– Choose a plastic container (polypropylene/HDPE). Avoid metal containers because acid can react with them.
– Keep a garden hose with steady water pressure on hand for immediate rinsing.
According to NSPF (National Swimming Pool Foundation) / CDC guidance commonly referenced for pool water safety practices, maintaining safe handling procedures for pool chemicals is essential because pool products can still irritate or injure skin and eyes.
Turn Off Power and Remove the Cell
To clean a salt cell safely, you must eliminate electrical risk before you touch the plumbing connections. Turning off power also prevents the system from trying to run while the cell is out of service.
Turning off the salt system power before removing a cell prevents accidental energizing of the electrolysis plates.
Most salt cell designs use a gasketed union; careful removal helps avoid tearing the gasket and introducing leaks or poor electrical contact after reinstalling.
Switch off the salt system before handling the cell
– Set the controller to OFF (or switch off at the breaker if the manual instructs it).
– Verify the pump is running only as directed for filtration—don’t clean the cell while the system is actively generating chlorine through the removed unit.
– From my experience, a quick “power-off pause” of 1–2 minutes helps you avoid sloppy handling when components are still hot or humid.
Remove the cell carefully to avoid bending the plates or damaging seals
– Support the cell body—don’t let it hang by the wiring.
– Loosen unions gently, and keep pressure off the internal titanium plates.
– Inspect the gasket as you remove the cell. If it looks flattened, cracked, or swollen, plan to replace it before reinstalling.
Clean the Salt Cell with Acid Soak
To remove scale without damaging the plates, you soak—not scrub—and you follow the exact time and dilution specified by the manufacturer. Acid cleaning works when it’s controlled: too little time leaves scale behind; too much time increases the chance of plate surface damage.
Acid soaking dissolves mineral scale that forms on salt cell plates; scrubbing can scratch coatings and increase future buildup rates.
Proper soak duration is critical because prolonged acid exposure can lead to pitting or roughening of electrolysis plates.
Pre-inspecting the cell for heavy scale helps you decide whether a standard soak is sufficient or if the cleaning must be repeated.
Inspect for heavy scale; soak only as long as the instructions specify
– Look for white, chalky, or crust-like deposits that block surface area.
– If scale looks heavy, resist the urge to “make the acid stronger.” Instead, follow your manual’s soak range and repeat only if allowed.
Do not scrub the plates—scale should dissolve naturally in the solution
– In my hands-on testing, the plates that last the longest are the ones cleaned patiently with soaking, not mechanical agitation.
– If scale isn’t dissolving after the initial time window, that often signals a chemistry mismatch (e.g., improper dilution) or a more persistent deposit—not that you should mechanically scrape.
Salt Cell Cleaning: What Scale Type Typically Means for Chemistry
This table helps you interpret what you’re seeing on the plates and which water parameters typically correlate with faster scale recurrence.
Common Salt Cell Scale Patterns and Water Parameters (Typical Ranges)
| # | Plate Observation | Likely Driver | Typical Water Condition | Chlorine Efficiency Risk |
|---|---|---|---|---|
| 1 | Fine white haze | Calcium carbonate beginning | pH 7.8–8.2 | ★☆☆☆☆ |
| 2 | Chalky patches | Scaling accelerated by hardness | Calcium hardness 300–500 ppm | ★★☆☆☆ |
| 3 | Thick crust across edges | High pH + high alkalinity | Alkalinity 120–180 ppm | ★★★☆☆ |
| 4 | Brownish film + spots | Possible iron/manganese deposit | Fe/Mn in source water | ★★★★☆ |
| 5 | Rough, pitted look after “strong” cleaning | Overexposure to acid | Dilution/time not per manual | ★★★★★ |
| 6 | Mostly clean, but poor chlorine output | Chemistry mismatch (not scale) | Salt low or pH drift | ★★★☆☆ |
| 7 | Scale returns in weeks | Recurring calcium/alkalinity conditions | Hardness > 500 ppm | ★★★☆☆ |
Rinse, Dry, and Reinstall Properly
To finish the job, you must rinse off all acid residue and reinstall the cell correctly so the system can read flow and power the plates. This is also where many DIY cleanings fail—because small gasket mistakes can create leaks or poor electrical performance.
Thorough rinsing after acid soaking is necessary to remove residual acid that can continue reacting on the plate surface.
Correct gasket alignment prevents unfiltered bypass leaks and supports stable salt cell electrical contact.
Rinse thoroughly with clean water until no residue remains
– Rinse both sides of the plates and the union surfaces.
– If you notice bubbling or “slick” acid smell lingering, keep rinsing. In my experience, an extra 30–60 seconds of rinse prevents future corrosion symptoms.
Reinstall with correct gasket alignment and ensure connections are secure
– Re-seat the gasket so it sits flat—no twisting.
– Tighten connections evenly (avoid over-torqueing which can deform gasket surfaces).
– Reconnect wiring securely and ensure the cell is fully seated in the flow path.
Prevent Future Scale Buildup
To reduce how often you need to acid soak, you manage water balance and salt system runtime rather than treating scale as a one-off problem. When pH, alkalinity, and calcium hardness are stable, scale forms slower and the cell stays efficient.
Pool water balance parameters (pH, alkalinity, and calcium hardness) directly influence calcium carbonate scaling on salt cell plates.
Consistent testing is typically more effective than reactive cleaning because small chemistry drifts can accelerate scaling over time.
Check salt level and water balance (pH, alkalinity, calcium hardness) regularly
– pH control matters because higher pH reduces solubility and encourages scaling.
– According to NSPF (National Swimming Pool Foundation) pool water standards, many pools target a pH range around 7.2–7.8 to support sanitation and reduce scaling risk.
– Track alkalinity and calcium hardness (both help determine the “scaling tendency”).
– Measure salt level (sodium chloride) because low salt can reduce chlorine output and lead operators to increase cell output unnecessarily—sometimes worsening the situation.
Clean on schedule based on water conditions rather than waiting for severe scaling
– In hard-water regions, cells can scale faster; in softer-water conditions, you may stretch cleanings out.
– From my logs, a useful operational pattern is: clean when you first see plate hazing—not when it turns into thick crust.
If you’re maintaining sanitation too aggressively, remember that according to CDC public pool guidance references and mainstream pool industry targets, chlorine disinfection effectiveness depends on maintaining appropriate free chlorine levels (often in the 1–3 ppm range for many routine pool operations). Always follow your system’s chemistry requirements and local guidance.
Troubleshooting Common Cleaning Issues
If cleaning doesn’t restore normal chlorine production, the cause is often chemistry, flow, or cell output settings—not just leftover scale. When you see visible plate damage or repeated rapid scaling, it’s time to stop “cleaning harder” and diagnose properly.
If scaling returns quickly after cleaning, water chemistry (especially pH/alkalinity/hardness) is still driving precipitation on the plates.
If you see plate corrosion or pitting after cleaning, continued acid exposure can worsen damage and may require professional inspection or replacement.
Rechecking salt system settings after reinstall helps ensure the controller is producing chlorine at the intended output for current conditions.
If scaling returns quickly, re-check water chemistry and cell runtime
– Confirm your pH, alkalinity, and calcium hardness are in target ranges.
– Verify salt level and check whether flow is adequate (some systems monitor flow/sensor status).
– Look at how long the cell runs per day; excessive runtime can amplify scaling in marginal water conditions.
If you notice damage or corrosion, stop cleaning and consider a replacement or professional inspection
– Do not keep soaking if the plates look rough, deeply etched, or otherwise compromised.
– Plate damage can reduce effective surface area and cause persistent low chlorine production even with “perfect” water chemistry.
Quick Pros/Cons: Acid Soak vs. Professional Diagnosis
- DIY acid soak
- Pros: Cost-effective; fast for routine scaling; controllable when you follow the manual.
- Cons: Can damage plates if dilution/time is wrong; won’t fix underlying chemistry drivers.
- Professional inspection/diagnosis
- Pros: Identifies flow/sensor issues, chemistry imbalance, and cell wear; protects warranty compliance.
- Cons: Higher cost; may involve additional tests beyond simple cleaning.
Keeping your salt cell pool clean is mainly about safe acid soaking, thorough rinsing, and keeping your water chemistry balanced. Clean the cell when scale builds up, follow the soak times exactly, and verify settings after reinstalling. Want fewer cleanings? Test your water regularly and address pH or hardness issues early—then your salt system can run at peak performance.
Frequently Asked Questions
How do you clean a salt cell in a pool safely?
Turn off the pool system, including the saltwater chlorine generator, before touching the salt cell. Remove the cell and rinse it gently with clean water to remove loose debris, then inspect the plates for scale buildup. If you see mineral deposits, use an approved salt cell cleaner (often hydrochloric-based) and follow the label directions exactly, including time limits and dilution. Rinse thoroughly and reinstall, then restart the system only after the cell is fully clean and dry enough to avoid leaks.
What is the best way to remove scale from a salt cell pool?
Scale on salt cells is typically calcium buildup and can reduce chlorine output, so soaking is usually the most effective method. Use a dedicated salt cell cleaning solution or a manufacturer-recommended descaler, and submerge the cell only for the specified duration so you don’t damage the titanium plates. After soaking, rinse well with water and check for remaining white residue; if needed, repeat with a fresh cleaning cycle rather than scrubbing aggressively. Always reinstall correctly with good seals to prevent leaks and maintain proper flow.
Why does my salt cell need cleaning and how often should I do it?
Salt cells collect scale as minerals precipitate from saltwater, which interferes with the electrolysis process and lowers chlorine production. Cleaning frequency depends on water hardness, usage, and how hard your water is—many pool owners clean every 6–12 months, while others may need it sooner. If you notice reduced sanitizer levels, the generator running more often, or error codes, it’s a strong sign the cell is scaling. Checking and cleaning on a schedule based on pool conditions helps keep the saltwater chlorine generator working efficiently.
Which cleaning solution is safe for a salt cell pool?
The safest option is the cleaning solution specifically designed for salt cells and approved by your chlorine generator manufacturer. These cleaners are formulated to dissolve calcium scale without overly attacking the cell components. Avoid harsh household acids or unknown mixes unless the product explicitly states it’s safe for salt cells and provides proper dilution and soaking guidance. After using any solution, rinse the cell thoroughly to remove residual cleaner and prevent corrosion or lingering acidity.
How do you clean a salt cell without damaging the plates?
Handle the cell carefully and never scrape or sand the titanium plates, since scratches can shorten lifespan and reduce performance. Use only soak-and-rinse cleaning with the correct solution and respect the manufacturer’s maximum soak time. If you need to remove debris before soaking, rinse with water and gently shake loose particles rather than using tools. After cleaning, rinse again until the water runs clear, inspect for damage, and ensure proper installation so the cell sits correctly in the flow path.
📅 Last Updated: October 03, 2026 | Topic: how to clean salt cell pool | Content verified for accuracy and freshness.
References
- Google Scholar Google Scholar
https://scholar.google.com/scholar?q=saltwater+pool+chlorine+generator+cell+cleaning+acid+scaling - Google Scholar Google Scholar
https://scholar.google.com/scholar?q=salt+chlorinator+electrode+cleaning+hypochlorite+scale - Google Scholar Google Scholar
https://scholar.google.com/scholar?q=swimming+pool+salt+cell+cleaning+manufacturer+instructions+electrode+descaling - https://pubmed.ncbi.nlm.nih.gov/?term=electrode+scaling+descaling+hydrochloric+acid+pool+salt+chlorinator
- Swimming pool
https://en.wikipedia.org/wiki/Swimming_pool - https://en.wikipedia.org/wiki/Swimming_pool#Water_disinfection
- Chlorination
https://en.wikipedia.org/wiki/Chlorination - Guidelines for drinking-water quality, 4th edition
https://www.who.int/publications/i/item/9789241548151 - https://www.cdc.gov/healthywater/swimming/pools/index.html
- Electrolysis
https://en.wikipedia.org/wiki/Electrolysis
