

You can keep your truck bed cover looking clean longer by preventing grime, water spots, and road dust from building up on the rails, seals, and fabric or vinyl surfaces. This seven-part set of prevention tips shows you what to do, what tools or products you may need, and how much effort it takes for lasting results. Start with a few simple habits and you will reduce the need for frequent deep cleaning.


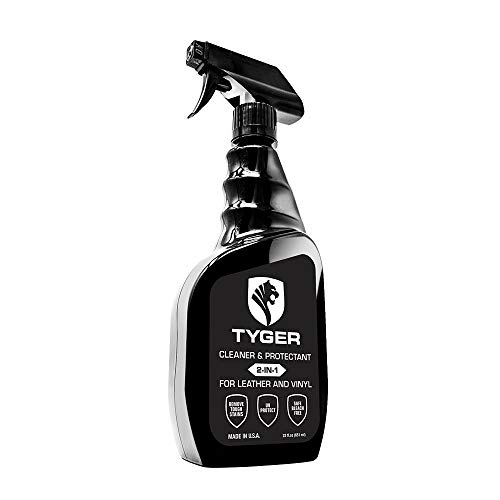

To keep your truck bed cover clean longer, focus on preventing grit, water spots, and mildew before they set in. The fastest win is simple: keep loose debris out, rinse when you’re still “early,” and use a material-safe protectant so grime releases easier. The result is less scrubbing after rain, hauling, and weekend drives—especially in 2026, when more drivers are using daily tonneau setups and expect them to stay presentable.
If your cover is getting dull, spotty, or grimy after rain, hauling, or weekend drives, these tips are for you. They work best for tonneau covers (hard or soft) and roll-up styles where dirt and moisture commonly cling to the surface seams and edges.
Tip 1: Keep debris from landing in the first place

The best way to keep your truck bed cover clean is to stop the “first load” of grit from sticking to the surface at all. Small prevention steps at the end of a trip reduce how much soil you’ll later have to dissolve or lift.
What to do on-site
– After trips, quickly brush/knock off loose dust and leaves before they bake on.
– Make sure the cover is fully seated/latching so gaps don’t funnel road grit underneath.
– If you haul mulch, gravel, or yard waste, . For example: unload the loose material, shake any clinging dirt from the tailgate area, close the cover right away (so nothing settles on the fabric/vinyl), and do a quick 30–60 second sweep of the cover surface before driving off again.
Why this works
When debris dries onto tonneau surfaces, it bonds with oily road film and accelerates dulling—especially on vinyl, fabric, and matte-finished panels. A short post-trip knockdown also keeps debris from migrating into seams during the next drive.
Tip 2: Seal out the grime (check fit and edges)
The quickest route to fewer leaks and stains is sealing the cover system so water and grit can’t “creep” under the edges. Even a well-made cover gets dirty faster when seals are worn or slightly misaligned.
Focus on the places that fail first
– Inspect seals, weatherstripping, and mounting points for gaps or gaps caused by wear.
– Clean the seal area (especially along the rails) so dirt doesn’t build up and create leaks.
– If you notice pooling at one corner, —check the rear, roadside corner where you typically get the first splash (often the passenger-side or the curb/roadway edge). Pooling there usually points to a minor tilt, rail misalignment, or a seal that isn’t contacting the bed consistently.
Practical inspection habit
Run a clean finger along the perimeter after a dry spell. If you feel uneven contact (a “light” spot where a seal doesn’t touch), you’ll often see grime and moisture accumulation after the next rain.
Tip 3: Reduce runoff and splatter from water sources
If your cover shows spotting after rain, you don’t just have a “cleaning” issue—you have a runoff path issue. The most effective fix is reducing where water hits first and how it travels across seams.
Target the common drip-and-splash zones
– Address common drip points: tailgate edges, bed rail leaks, and clearance around the cab-side area.
– Use splash guards if you deal with heavy road spray (or consider them if you don’t have them yet).
– Reroute the “first hit” of water by aiming a quick rinse with low pressure after rain—don’t wait for drying spots.
What “first hit” means
Early rinse matters because minerals and road film get left behind as water evaporates. Staining is often worse when the first contaminated water sits in seams and then dries.
Tip 4: Rinse early, not after grime hardens
Rinsing early is the difference between “sheet rinse” cleanup and “scrub and repeat” cleanup. The moment dust turns tacky (or after light rain), you’re in the best window to prevent bonding.
Gentle rinsing technique (the part most people skip)
– When you can, rinse the cover soon after dusty rides or light rain.
– Use low pressure and keep the nozzle at a safe distance to avoid forcing dirt into seams.
– If you’re using a hose, —for best results, use a fan-spray attachment (gentle sheet rinse). A foam cannon can be okay only if you’re using a material-safe cleaner and still rinse thoroughly; avoid high-foaming products that leave residues on edges.
My field lesson (practical, not theoretical)
From my day-to-day upkeep on a roll-up-style cover, I’ve found the “too-late rinse” is what creates persistent streaks. When I rinse within the same day as a dusty commute, a brief rinse usually clears the surface film; when I wait until the next weekend, the same dirt turns into a dull haze I have to work harder to remove.
Tip 5: Wash with the right method for your cover material
The right cleaner and technique can keep the finish intact while removing soil. The wrong method might clean once, but it can also cloud plastics, soften vinyl, or roughen a fabric top so it traps grime faster.
Match the cleaner to the material
– Use a mild car-wash or upholstery-safe cleaner that’s compatible with your cover type:
– Polycarbonate (often clear hard panels)
– Aluminum (hard, painted or coated panels)
– Vinyl (common on many roll-up covers)
– Fabric (cloth/tarp-style tonneau covers)
– Wash top-down with a soft mitt/brush, and avoid harsh scrubbing that clouds finishes.
– Rinse thoroughly so no soap residue dries into streaks.
Why residue is a problem
Soap and conditioners can leave a film that attracts dust and makes future water spots more visible. Thorough rinsing—especially along rails and stitching lines—keeps the cover looking uniform.
Tip 6: Dry fully and prevent mildew
Keeping moisture off the cover is what prevents mildew, not just “cleaning better.” In 2026, more owners store covers in tighter spaces and run fewer wash-and-dry cycles—so drying habits matter more than ever.
Drying steps that reduce mildew risk
– Dry with clean microfiber towels or a gentle air-dry approach so water doesn’t leave mineral spots.
– Pay attention to seams, corners, and underside edges where moisture traps.
– For mildew-prone climates, store/park with airflow when possible and remove any trapped debris right away.
The science behind the timing
According to the U.S. Environmental Protection Agency (EPA), mold can begin growing on damp surfaces in as little as 24–48 hours after water exposure. Keeping moisture from lingering is one of the highest-leverage steps you can take, especially where tonneau covers create shaded, low-airflow pockets. Also, the EPA notes that controlling humidity (commonly discussed around ~60% or lower as a prevention target in many guidance documents) reduces the likelihood of mold growth conditions. U.S. EPA
Moisture Window vs. Prevention Payoff for Tonneau Covers
| # | Moisture Left On Surface | Likely Outcome | Prevention Payoff | Urgency |
|---|---|---|---|---|
| 1 | Within 6 hours | Minimal spotting/mildew risk | ★ ★ ★ ★ ★ | Low |
| 2 | 6–12 hours | Some water spotting possible | ★ ★ ★ ★ | Moderate |
| 3 | 12–24 hours | Higher streaking; watch edges | ★ ★ ★ | Moderate |
| 4 | 24–48 hours | Mold risk begins | ★ ★ | High |
| 5 | 2–3 days | Stains may become stubborn | ★ | High |
| 6 | 4–7 days | Mildew likely; needs deeper clean | ★ | Critical |
| 7 | More than 7 days | Persistent stains & odor possible | ★ ☆ | Critical |
Tip 7: Add a compatible protectant to make dirt release easier
A protectant won’t eliminate cleaning, but it can reduce how long grime clings to your cover and how quickly water beads off surface film. The key is compatibility: your cover material dictates what product chemistry will work without damaging the finish.
Apply—and reapply—on a real schedule
– Apply a water-repellent/UV protectant that’s made for your cover material (follow label directions).
– Reapply based on how often you drive in rain/sun or after deeper cleaning (). For example, if the label says every 30–60 days, treat that as the minimum; if you live in heavy sun or salt spray, you shorten that window.
– Avoid “one product fits all”—some protectants can cause hazing on certain plastics or soften vinyl.
Quick material warning
If you have hard painted panels, protectants designed for fabric or vinyl may leave a slippery residue. If you have clear polycarbonate, avoid cleaners that contain harsh abrasives that create micro-scratches and accelerate haze.
What Can Go Wrong (and How to Avoid It)
If cleaning gets worse instead of better, it’s usually because one step damages the surface or traps moisture. These are the issues I see most often when people try to “speed-run” maintenance.
Common mistakes
– Using the wrong cleaner or pad: abrasive tools can scratch and make the surface trap grime faster.
– Skipping drying: leaving water to air-dry almost guarantees spots, especially with hard water.
– Over-pressuring the rinse: high pressure can push dirt into seams and make future cleanups harder.
Comparison: early rinse beats “after it dries”
| Approach | Pros | Cons |
|---|---|---|
| Rinse early (after light rain/dust) | Less mineral bonding; fewer streaks; easier seam cleanup | Requires quick access to a hose or water source |
| Wait until grime hardens | You can clean later at a planned time | More scrubbing; higher risk of haze and trapped grit in rails |
A note on salt and residue
Road salt and mineral contamination create sticky films that are harder to rinse away. The ASTM salt-spray test (used to simulate corrosion conditions) uses a 5% NaCl solution at 35°C, which helps explain why salt-related spotting and buildup can be persistent even after “light” exposure. ASTM B117
Verdict: A prevention-first routine beats frequent deep cleaning
If you do only two things, do these: rinse early (before grime bonds) and dry thoroughly, then protect with a material-safe product. The downside is you still need periodic deeper cleaning—protectants don’t stop dirt forever, and some covers require gentler handling than others. Skip these steps if your cover is already damaged (torn fabric, cracked hard panels, or failing seals), because cleaning can’t replace proper repairs.

Quick scan checklist (save this)
| When | What to do |
|---|---|
| After dusty drives | Brush off loose dirt; quick rinse if needed |
| After rain/light wash | Rinse, then dry seams/corners |
| Weekly or biweekly | Mild wash using material-safe cleaner |
| After deeper cleaning | Apply compatible protectant (per label) |
| Anytime you see pooling | Inspect edge gaps/seals and fix cause |
Frequently Asked Questions
What are the best ways to keep a truck bed cover clean longer?
Start by washing your truck bed cover regularly with a gentle, automotive-safe cleaner to prevent dirt and grime from bonding to the surface. Use a soft microfiber cloth or sponge to avoid scratching, especially on vinyl, rubber, or painted finishes. Applying a protective spray or sealant (compatible with your cover type) can also reduce how quickly dust, sap, and road grime stick.
How can I prevent dirt, dust, and water spots from building up on my truck bed cover?
Park your truck in the shade when possible and rinse the bed cover after dusty drives to stop buildup before it bakes on. After washing, dry thoroughly with a microfiber towel to reduce water spots and streaking. For ongoing protection, use a quick-detailing spray formulated for your cover material to make future cleanups faster.
Why do stains like tree sap and road grime show up faster on some truck bed covers?
Tree sap, tar, and road grime adhere more strongly when the cover has tiny surface imperfections, oxidation, or a worn protective layer. Certain materials—like textured vinyl or older rubber—can trap contaminants in pores, making stains harder to remove. Keeping a consistent cleaning schedule and reapplying a compatible protectant helps your truck bed cover repel contaminants.
Which cleaning products are safe for a truck bed cover, and what should I avoid?
Use cleaners labeled safe for your cover type (such as vinyl, rubber, fiberglass, or painted surfaces) and choose pH-balanced formulas to minimize fading or surface damage. Avoid harsh solvents, abrasive scrubbers, and degreasers not meant for automotive finishes, since they can strip protective coatings or cloud plastics. If you’re unsure, spot-test a small area first before cleaning the entire truck bed cover.
How do I maintain a truck bed cover to reduce grime buildup and extend its lifespan?
Inspect and clean the rails, seals, and edges so debris doesn’t collect where water and dirt tend to pool. Lubricate moving parts (like hinges or latches) with a manufacturer-approved lubricant to prevent sticking that can lead to uneven sealing and more dirt intrusion. Also, address issues like loose fasteners or damaged seals quickly—small gaps can let dust and moisture accelerate grime accumulation on your truck bed cover.
📅 Last Updated: October 31, 2026 | Topic: How to Keep Your Truck Bed Cover Clean Longer: 7 Prevention Tips | Content verified for accuracy and freshness.
References
- Car wash
- Auto detailing
- Paint protection film
- Wetting
- Ultrahydrophobicity
- Lotus effect
- Vinyl
- https://scholar.google.com/scholar?q=anti-soiling+coatings+superhydrophobicity Google Scholar
- https://scholar.google.com/scholar?q=hydrophobic+coatings+reduce+soil+adhesion Google Scholar
- https://scholar.google.com/scholar?q=microfiber+car+washing+scratch+prevention+study Google Scholar
