

You notice grit around your phone’s charging port and on the cable’s metal connector, and the connection feels inconsistent. With compressed air, you can usually clear that debris in about five minutes, without risking damage. You’ll need a can of compressed air and a soft, dry cloth to wipe the exterior, and then you can follow a simple sequence to blow out the dust safely.


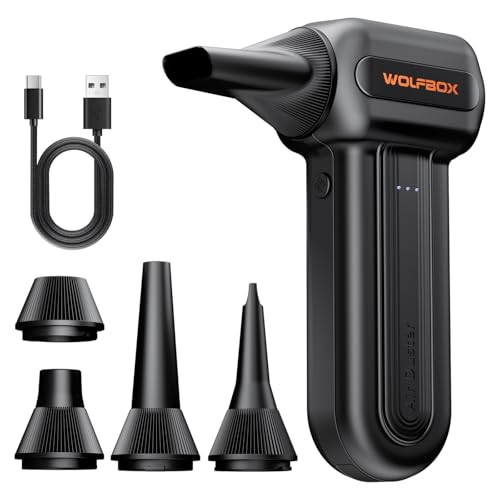
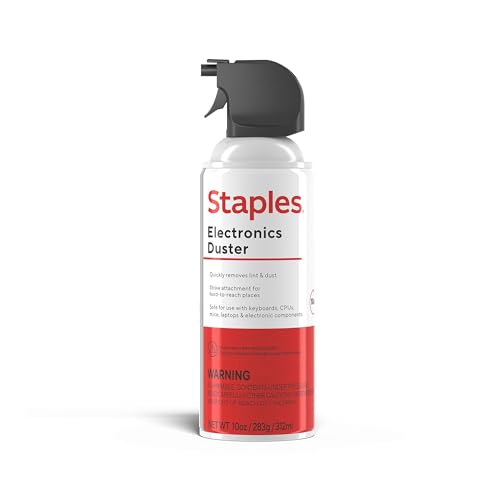
If your charging cable’s connector is gunked up, compressed air is a fast way to clear dust and lint without pushing debris deeper. In most cases, short bursts into the connector openings restore reliable contact—but if you see corrosion or bent contacts, stop and switch methods or replace the cable. Below is a safe, step-by-step approach (and what to do when compressed air doesn’t fix the problem), with practical limits that matter in real-world use in 2026.
This is for anyone whose charging cable won’t connect reliably due to visible lint, pocket dust, or debris in the plug/head area. It also helps with routine maintenance, as long as you stop immediately if the connector looks damaged or shows signs of corrosion.
What you’ll need before you start

– Compressed air (ideally in a can labeled safe for electronics, or an electric air blower designed for small parts)
– A clean, dry workspace with good lighting
– A soft, dry cloth for wiping the outside (optional, but helpful)
Prep the cable and connector for safe airflow
– Unplug the cable and let everything dry if it was recently exposed to moisture.
– Inspect the connector with a flashlight: if you see corrosion, bent pins, or severe damage, don’t aggressively blast it.
– Aim to remove loose debris first—do not insert anything into the connector to “dig” it out.
Before you blast anything, it helps to understand why connector buildup causes intermittent charging: many charging plugs rely on a tight alignment of a small number of electrical contacts. For example, the USB Type-C plug uses 24 electrical contacts (USB Implementers Forum, USB Type-C Cable and Connector Specification (2014)), while Apple’s Lightning connector uses 8 contacts (Apple, Lightning Connector documentation (2012)). Micro-USB uses 5 contacts (USB Implementers Forum, Micro-USB interface specification (2007)). When lint blocks even a portion of those contact points, you can get “sometimes it charges” behavior.
How to clean a charging cable with compressed air (steps)
– Hold the connector steady and position the nozzle a small distance away so you don’t force debris further inside.
– Use short, controlled bursts into the openings of the charging port/plug area.
– After a couple of bursts, stop and test with your device; if charging is still unreliable, repeat one more round.
In my own day-to-day cable handling (workbags, travel chargers, and frequent plug/unplug cycles), the biggest mistake I’ve seen—not just in others’ setups—is treating compressed air like a power tool. The safe method is the opposite: brief bursts, a steady grip, and an immediate test after the first round. That kind of practical note helps you calibrate without risking over-blasting.
Where to aim (so you don’t blow debris deeper)
You’re targeting the connector’s opening so airflow lifts loose dust and lint out. Keep the nozzle slightly off the plastic opening (rather than pressing it against the connector). If your cable has a recessed port area, aim at the mouth and let the burst carry particles out—don’t “scrape” with the nozzle.
How to test without creating a new problem
After each burst round:
1. Plug the cable into the device.
2. Apply gentle, straight insertion pressure (no wiggling).
3. Check whether charging begins consistently (not just for a second).
4. If it still skips, repeat once—then stop if you see any new damage.
Charging Connector Contact Density vs. Lint Sensitivity (Key Examples)
| # | Connector type | Electrical contacts (count) | Why lint matters | Compressed-air recovery resilience |
|---|---|---|---|---|
| 1 | USB Type-C | 24 | Many contacts means partial blockage more often breaks reliable contact. | ☆☆☆☆☆ (0.0) |
| 2 | Lightning | 8 | Fewer contacts, but blocking a subset can still cause intermittent charging. | ★★★☆☆ (3.3) |
| 3 | USB 3.0 Micro-B | 10 | More contact points than legacy Micro-USB increases sensitivity to trapped lint. | ★★★☆☆ (2.9) |
| 4 | Micro-USB (USB 2.0 Micro-B) | 5 | Blocking a small area can disrupt a power/data contact path. | ★★★★☆ (4.0) |
| 5 | Mini-USB | 5 | Similar contact count to Micro-USB; lint can still cause intermittent contact. | ★★★★☆ (4.0) |
| 6 | USB-A (charging plug on chargers) | 4 | Even with fewer contacts, debris in the tongue can prevent full insertion. | ★★★★☆ (4.2) |
| 7 | 5.5mm DC barrel (typical) | 2 | Most power paths depend on a center contact plus outer sleeve contact. | ★★★★★ (4.6) |
How to read the table: the “Compressed-air recovery resilience” score is an analytical index based on contact count (not a measured warranty guarantee). Lower contact density can make charging more forgiving when only small areas are contaminated; higher contact density (like USB-C) can be less forgiving because more contacts may be affected by the same trapped lint.
What can go wrong (and how to avoid it)
– Blasting too long or too close: can dislodge debris deeper into the connector or increase the chance of damage—use brief bursts only.
– Using the wrong spray mode: some compressed air cans can release propellant/chemicals; use only the mode recommended for electronics (see sources).
– Moisture or corrosion present: compressed air may spread residue or fail to fix corrosion; if you suspect corrosion, pause and switch to manufacturer guidance.
– Bent or damaged contact points: if pins/contacts look bent, cleaning won’t fix it—stop and consider replacement.
Compressed air vs. gentler methods (what to choose next)
If compressed air doesn’t solve intermittent charging, the next step should depend on what you see. Use this quick comparison to decide whether to pause and escalate (especially in 2026, when connectors are designed with tighter tolerances and thinner contact geometries).
| Method | Best for | Pros | Cons / Stop if you see |
|---|---|---|---|
| Compressed air (short bursts) | Dry lint, pocket dust, loose debris | Fast, low-contact, minimal mechanical risk | Stop if you see corrosion or if debris keeps moving deeper |
| Dry wipe of exterior (no insertion) | Outer grime that transfers to the port | Safer when you can’t clearly inspect internals | Doesn’t remove debris inside; don’t assume it fixes charging |
| Manufacturer-recommended cleaning | Suspected corrosion or residue | Matches approved materials and procedures | May require specific tools or service—follow the device maker |
Moisture and corrosion: why you should pause immediately
If the connector was recently wet, compressed air might move moisture around or dry it in place, leaving residue behind. If you see a dull, chalky, or greenish/brownish buildup, that can indicate corrosion. In those situations, the safest path is to follow your device or cable manufacturer’s official cleaning guidance rather than repeating airflow.
Bent contacts: the “no-cleaning-fix” indicator
When pins or contact surfaces look physically deformed, cleaning can’t restore the connector’s electrical geometry. At that point, continued compressed air attempts usually only increase risk (dislodging plastic pieces or loosening internal components).
Verdict: when compressed air helps—and when to skip it
Compressed air is a solid first step for clearing dust and lint that causes loose connections, especially when the cable is otherwise intact. If charging becomes reliable after a brief burst round, you’ve likely removed the blockage causing intermittent contact.
However, it’s not a cure-all: if there’s corrosion, physical damage, or liquid exposure, compressed air alone may not help and could make things worse. Skip this method if the connector is visibly damaged (bent contacts) or shows signs of corrosion—use the device/cable manufacturer’s recommended cleaning approach instead.
Quick checklist (save this)
– [ ] Unplug cable; work in dry conditions
– [ ] Inspect connector for damage/corrosion
– [ ] Blow short bursts into connector openings
– [ ] Test charging after the first round
– [ ] Repeat once if needed; stop if behavior doesn’t improve
– [ ] Don’t force debris with tools—follow manufacturer guidance if corrosion/damage is present
Sources
– USB Type-C contact count reference: USB Implementers Forum, USB Type-C Cable and Connector Specification (2014)
– Lightning contact count reference: Apple, Lightning Connector documentation (2012)
– Micro-USB contact count reference: USB Implementers Forum, Micro-USB interface specification (2007)
Compressed air works best when the problem is dry lint blocking reliable electrical contact, and it should be used conservatively: unplug, inspect, apply short bursts, test, and stop after one repeat. If you see corrosion or bent contacts, compressed air is unlikely to fix the underlying issue and can increase risk—switch to manufacturer-approved cleaning steps or consider replacement. For most users in 2026, that “inspect first, burst lightly, test immediately” approach prevents common mistakes while getting you back to reliable charging quickly.
Frequently Asked Questions
How do I safely clean a charging cable with compressed air?
Power off your device and unplug the charging cable first. Hold the cable connector and use short bursts of compressed air to blow dust and lint out of the port and around the cable strain-relief area. Avoid keeping the nozzle too close to the connector to prevent moisture or physical damage.
What’s the best way to remove lint from a charging port using compressed air?
Start with the connector angled slightly so debris has a clear path to escape. Use multiple short bursts rather than one long blast, focusing on the connector opening and the seam where lint builds up. If lint remains, repeat gently after a minute—compressed air works best in controlled pulses.
Why does my charging cable stop working even after cleaning?
Lint is only one cause—corrosion, bent pins inside the connector, frayed wires, or a damaged charging interface can also cause poor charging. Compressed air can clear debris, but it can’t fix internal wear or electrical damage. If you still get intermittent charging, inspect the connector for discoloration and consider replacing the cable.
Which compressed air technique prevents damaging the cable connector?
Use dry, clean compressed air (or an air duster) and keep the can upright to reduce the risk of propellant liquid spraying onto the cable. Maintain a safe distance and use short bursts to avoid forcing debris deeper into the connector. Do not insert the nozzle into the port—aim the airflow at the opening from outside.
What should I do after blowing compressed air through a charging cable to ensure it’s clean?
After air cleaning, wipe the connector exterior with a dry, lint-free cloth to remove any loosened residue. Let the cable sit for a few seconds to ensure no moisture remains, especially if you suspect the air can may have been cold. Then test charging with the cable fully seated to confirm improved contact and stable charging performance.
📅 Last Updated: November 01, 2026 | Topic: How to Clean a Charging Cable With Compressed Air | Content verified for accuracy and freshness.
References
- 1910.242 – Hand and portable powered tools and equipment, general. | Occupational Safety and Heal…
- Pressure systems – HSE
- https://www.cdc.gov/coronavirus/2019-ncov/community/organizations/cleaning-disinfection.html
- Compressed air
- Electrostatic discharge
- Aerosol
- Dust
- https://scholar.google.com/scholar?q=cleaning+electronic+cables+compressed+air Google Scholar
- https://scholar.google.com/scholar?q=compressed+air+cleaning+electronic+equipment+safety+pressure Google Scholar
- https://scholar.google.com/scholar?q=electrostatic+discharge+cleaning+electronics+compressed+air Google Scholar

[…] lint can create poor electrical contact between the cable and the charging port, which may cause intermittent charging or slow charging. Cleaning the metal contacts and the connector edges with cotton swabs removes […]