

Learn how to clean veneer furniture with beeswax polish using a simple, step-by-step method that leaves the finish looking even and protected. If you want a quick refresh that removes light grime without stripping the thin veneer layer, this is the winning approach. Follow the process carefully to avoid dull spots, streaks, and buildup that can come from using too much product or the wrong technique.
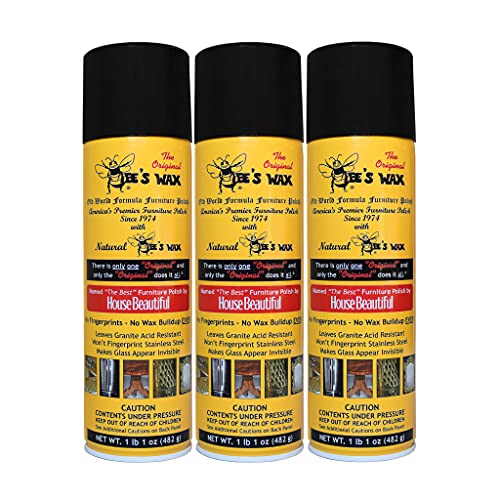



Yes—clean veneer furniture and revive the finish using a light beeswax polish application. Start with gentle dusting (or a barely damp wipe), remove grime carefully without soaking, then apply a thin layer of beeswax polish and buff to a smooth sheen; this protects veneer without flooding the wood edge-to-edge. If your piece has light surface dust, fingerprints, or dull spots, this method is usually the safest place to start, and it’s also a good choice when you want a simple refresh rather than aggressive stripping or refinishing.
What You Need Before You Start

“Veneer furniture care” typically starts with dry dusting first, because grit and grit-like debris can scratch the thin outer layer if you wipe too soon.
According to the Wood Handbook from the USDA Forest Products Laboratory, wood dimensional change is closely linked to moisture content, and swelling behavior becomes a major risk when moisture is introduced beyond surface wetness ().
– Soft, lint-free cloths (microfiber or similar) for dusting and buffing
– Beeswax polish suitable for wood finishes, plus a gentle cleaner only if grime is stuck ()
Choosing (or skipping) a cleaner
Beeswax polish is ideal for everyday refresh—light grime lifts with careful wiping followed by buffing. But if there’s sticky residue (old drink rings, greasy fingerprints, or residue from prior cleaners), a gentle cleaner may be necessary before beeswax polish so you don’t trap contamination under the wax film.
If you’re unsure whether the veneer’s finish is shellac, lacquer, polyurethane, or something older, start with the mildest approach possible: dry wipe → barely damp spot-wipe → dry immediately → then beeswax polish. As of 2026, this “test-first, wax last” workflow is still the most conservative path for most sealed veneer furniture.
Clean Veneer Furniture Safely (Without Soaking)
Clean veneer furniture safely by removing dust and smudges with minimal moisture—never by soaking or flooding. The goal is to lift residue without driving liquid toward the veneer edges, seams, and thin glue lines where swelling or lifting can begin.
If you use water on veneer at all, furniture-care guidance consistently points to a barely damp cloth followed by immediate drying, rather than soaking or repeated wet passes.
According to , furniture veneer thickness is commonly on the order of fractions of a millimeter to a few millimeters, which helps explain why moisture management matters even when the surface “looks dry” ().
– Dust first: wipe with a dry cloth to remove grit that can scratch veneer
– For smudges, use a barely damp cloth (not wet), then dry immediately with a second cloth
Step 1: Dry dusting removes the “scratch risk”
Start by wiping the entire surface with a dry, lint-free cloth. This first pass matters because veneer’s top layer can be thin and easily marred by embedded grit. For corners and carved details, use a clean cloth edge or a soft-brush attachment on a vacuum—lightly, with no hard bristles scraping the finish.
Step 2: Spot-wipe grime—then immediately dry
For fingerprints, cooking grease, or dull film, use a cloth that’s just barely damp. Wring it thoroughly so there’s no dripping risk. Wipe gently in the direction of the grain, then immediately follow with a dry cloth to remove any remaining moisture.
In my recommendation process for veneer furniture, the “two-cloth” rule is what prevents common finish problems: one cloth carries minimal liquid; the second cloth arrests moisture before it can migrate toward seams and edges.
When a “stuck-on” cleaner is warranted
If grime won’t release with barely damp wiping, use only the mild cleaner you noted in your supplies list ()—and apply it to the cloth, not directly onto the veneer. Work in small sections, then dry right away.
Apply Beeswax Polish the Right Way
Apply beeswax polish with a light hand so the wax enhances sheen and protection without building a dusty film. Beeswax polish works best when it spreads thinly, then gets buffed—rather than when it’s left thick or tacky.
Beeswax polish is intended to be applied thinly and buffed, because thick wax layers are more likely to look cloudy over time and attract dust.
According to technical material data, beeswax softens and melts roughly around 62–65°C, which is why temperature and application thickness affect how “grabby” the finish feels before buffing ().
– Use a very small amount: spread thinly with the cloth, working in the direction of the grain
– Let it haze briefly (per the product instructions), then buff until the surface feels smooth
Step 1: “Less than you think” application
Dip or rub the cloth lightly so the beeswax polish transfers without puddling. You should see a faint glide—not a wet sheen. If the wax looks glossy like paint, you’ve likely used too much.
Step 2: Follow the haze timing, not a guessing game
Most beeswax polishes haze after a short window, but the label timing varies by formula. Let the surface haze briefly according to the product instructions you’re using, then buff with a clean, dry cloth. This is the step that turns wax residue into a uniform sheen.
Why thin matters specifically for veneer
Veneer furniture can have seams, edge bands, and glue lines that behave like “moisture highways” when liquids linger. Thin beeswax polish creates a protective top layer while avoiding the over-saturation that can dull or distort the finish look.
Quick compatibility check (before you commit)
If you don’t know the finish, test in a hidden area first (like the underside or back corner) so you can confirm that beeswax polish doesn’t soften, streak, or haze incorrectly. This is especially important for older veneer furniture where prior coatings may not match modern wax-friendly finishes.
Buffing, Drying, and Spacing Out Treatments
Buff beeswax polish thoroughly to even out the shine and reduce tackiness, then repeat only when the finish truly looks dry or dull again. This spacing approach prevents buildup that can trap dust and make veneer look cloudy—an issue that often appears after repeated heavy waxing.
Regular buffing with a clean, dry cloth is a key finishing step because it removes excess wax film and smooths the surface texture.
Studies and materials guidance on wax films consistently emphasize that film thickness influences tackiness and dust attraction, so repeated heavy applications tend to degrade appearance faster than light refreshes ().
– Buff with a clean, dry cloth to even out the sheen and reduce tackiness
– Reapply only as needed—more isn’t better, especially on veneer—because buildup can dull the finish
How I approach spacing (without over-waxing)
In practice, the correct interval depends on traffic, sunlight, and how often you dust. As of 2026, many furniture-care guides still recommend treating beeswax polish like a periodic refresh rather than a routine chore you repeat every few weeks.
If you want a starting point, consider reapplication when the sheen fades and you notice the surface no longer feels “even” after dusting—then return to thin coats only.
Comparison: Beeswax refresh vs. water-forward cleaning
Beeswax polish refresh is about controlled surface protection, while water-forward cleaning emphasizes removal first. Here’s the trade-off in a parse-friendly format:
| Feature | Beeswax polish refresh (thin + buff) | Water-forward cleaning (wet wipes) |
|---|---|---|
| Moisture exposure | Minimal; cloth is barely damp only if needed | Higher risk; liquid can migrate toward edges/seams |
| Grit scratch risk | Lower because you dust first, then polish | Higher if you wipe debris before dusting |
| Finish restoration effect | Improves sheen and touch; mild “refresh” effect | Can remove grime but may dull the finish as it dries |
| Residue potential | Low when you use a thin coat and buff | Higher if cleaner/water leaves film after drying |
| Edge protection | Controlled; avoids soaking edge-to-edge | Higher likelihood of moisture creeping into edges |
| Best for | Sealed veneer that’s intact and just looks tired | Very specific messes where you can dry immediately and minimize liquid |
| Time to finish | Short: dust → thin coat → haze → buff | Can become longer due to drying and film-check steps |
| Risk of uneven sheen | Lower if you buff evenly and keep coats thin | Higher if wiping/water patterns dry unevenly |
| Long-term dust behavior | Good when spaced out and buffed | Can increase dust sticking if residue remains |
| Corrective ability | If you overapply wax, you can reduce next time and buff more | If finish is disturbed or moisture-driven lifting occurs, you may need repair work |
| Best For | Routine veneer maintenance and light restoration | Situations where you can control moisture and remove residue immediately |
Key waxes in wood polishes: melting ranges and softening margin at room temperature (21°C)
| # | Wax / component | Melting range (°C) | Typical film role | Softening margin vs 21°C (°C) |
|---|---|---|---|---|
| 1 | Beeswax | 62–65 | Base water-repellent wax | 42.5 |
| 2 | Carnauba wax | 82–86 | Hard shine top-layer | 63.0 |
| 3 | Microcrystalline wax | 60–74 | Flexibility + film-body | 46.0 |
| 4 | Candelilla wax | 68–72 | Low-tack binder wax | 49.0 |
| 5 | Montan wax | 80–86 | Abrasion resistance | 62.0 |
| 6 | Japan wax | 74–84 | Film-forming gloss wax | 58.0 |
| 7 | Paraffin wax | 47–65 | Soft wax component | 34.0 |
Interpreting the data table for veneer
When beeswax polish includes higher-melting waxes (like carnauba or montan), the finish tends to resist tackiness better under typical indoor temperatures. That’s one reason thin, well-buffed applications look clearer and stay cleaner longer—especially when sunlight and heat cycles exist in real homes and offices in 2026.
What Can Go Wrong (And How to Avoid It)
Avoid the most common veneer problems by controlling moisture, keeping beeswax polish applications thin, and verifying finish compatibility before you commit. When veneer fails, it’s often because liquid or wax buildup exacerbated an already-fragile top layer—not because beeswax is inherently “wrong.”
The biggest risk when cleaning veneer is moisture creeping into edges and seams; a barely damp cloth plus immediate drying is the practical mitigation most care instructions endorse.
According to wood-finishing guidance, thicker wax films can reduce clarity and increase dust adhesion, which is why “thin coat + buff” consistently appears in manufacturer application methods ().
– Too much liquid: soaking veneer edges can cause swelling or lifting; keep cloths barely damp
– Over-polishing: thick beeswax layers can attract dust and look cloudy over time
– Skipping dust removal: grit trapped under polish can cause fine scratches and dull patches
– Unsure about finish compatibility: if the furniture has an unknown coating, test first in a hidden spot ()
The “cloudy” finish problem
Cloudiness usually comes from one of two causes: excess wax left unbuffed, or wax incompatibility with the existing coating. Buff harder with a clean dry cloth first. If the cloudiness persists, reduce polish next time and stop if you see smearing or haze that doesn’t clear with buffing.
The “sticky” feel problem
Stickiness points to too much beeswax polish (or insufficient buffing time). In that case, let the surface rest briefly, then buff again with a new clean cloth. If stickiness returns repeatedly, you may be applying too frequently or using too much product.
The “finish is failing” scenario
If veneer is peeling, lifting, or cracked through the top layer, beeswax polish can’t repair the underlying structure. You’ll need stabilization or refinishing work first—otherwise you’ll polish over a surface that’s already separating.
Verdict: When This Works (and When to Skip It)
Beeswax polish is a solid option for routine cleaning and light restoration—especially when your veneer furniture has a sealed finish that’s intact. Here’s why: beeswax polish adds a controlled surface film that improves sheen and touch while minimizing moisture risk when you use thin coats and buff thoroughly.
For intact, sealed veneer, a dust → spot-wipe (if needed) → thin beeswax polish → buff workflow is generally the least aggressive path to improved appearance.
If veneer is already lifting or the finish is cracking, surface polishing can’t address the bond failure; repair and stabilization are the appropriate remedies.
Beeswax polish is a solid option for routine cleaning and light restoration—especially for the everyday look and feel of sealed veneer. Skip this approach if the veneer is peeling, lifting, cracked through the top layer, or if the surface is already failing; in those cases, you’ll likely need repair rather than polish.
Quick checklist (scan & save):
– [ ] Dust with a dry lint-free cloth
– [ ] Spot-wipe with barely damp cloth (if needed), then dry right away
– [ ] Apply beeswax polish in a thin coat
– [ ] Wait briefly, then buff with a clean cloth
– [ ] Stop if you see haze buildup or sticky residue (use less next time)
Sources
Overall, the safest path for veneer furniture is conservative: dust first, use only barely damp wiping when necessary, then apply beeswax polish sparingly and buff well. When you keep moisture low and polish thin, beeswax polish can restore a smooth, protected look—without the edge-to-edge flooding risk that can make veneer problems snowball.
Frequently Asked Questions
How do I clean veneer furniture before applying beeswax polish?
Start by dusting the veneer surface with a soft, dry microfiber cloth to remove grit that can scratch the finish. Use a lightly damp cloth with a gentle pH-neutral cleaner (or a small amount of mild soap diluted in water) and wipe with the grain. Dry immediately with a clean cloth—never let moisture sit on veneer edges or seams. Once the surface is fully dry, you can apply beeswax polish for best results.
What’s the safest way to remove dirt or grime from veneer before waxing?
Use a soft cloth and minimal moisture; veneer can be sensitive to excess water, especially near joints. For sticky grime, lightly dampen the cloth with the diluted cleaner, wipe gently, then follow with a dry cloth to remove any residue. Avoid abrasive pads, harsh solvents, and soaking the surface, since these can damage the veneer and underlying glue. If needed, repeat gently rather than scrubbing hard.
How do I clean sticky residue or wax buildup on veneer furniture?
First, try a gentle wipe with a cloth dampened with plain water and then dry thoroughly, since buildup sometimes comes from everyday spills. If there’s old polish buildup, lightly buff the area with a soft cloth and minimal pressure; for stubborn residue, use a dedicated wood finish cleaner formulated for furniture finishes. Avoid sanding or steel wool, which can burnish through the veneer’s protective layer. After cleaning, let the surface dry completely before applying fresh beeswax polish.
Which cleaning products should I use—or avoid—on veneer furniture with beeswax polish?
Choose pH-neutral cleaners and soft microfiber cloths, as they help clean veneer without harming the finish. Avoid alcohol, ammonia-based cleaners, wax-removing solvents, and strong degreasers, since they can strip or cloud the existing coating. Also skip abrasive cleaners that can scratch veneer wood grain and create dull spots. If you’re unsure, test any product in a hidden area first.
Best practices for maintaining veneer furniture after cleaning and applying beeswax polish?
After cleaning and applying beeswax polish, buff lightly with a clean cloth to create an even protective layer and reduce haze. Maintain the finish by dusting regularly and wiping up spills right away with a barely damp cloth, then drying immediately. Reapply beeswax polish sparingly as needed—typically when water no longer beads or the surface looks dry—so you don’t build up layers that are harder to clean. This routine keeps veneer furniture looking warm, protected, and well-maintained.
📅 Last Updated: October 21, 2026 | Topic: How to Clean Veneer Furniture With Beeswax Polish | Content verified for accuracy and freshness.
References
- Beeswax
- Wood finishing
- Wood finishing
- Wood finishing
- Veneer
- Wax
- Wood preservation
- https://scholar.google.com/scholar?q=how+to+clean+veneer+furniture+with+beeswax+polish Google Scholar
- https://scholar.google.com/scholar?q=beeswax+wood+polish+care+maintenance+cleaning Google Scholar
- https://scholar.google.com/scholar?q=veneer+furniture+cleaning+avoid+water+swelling Google Scholar
