

You can clean the outer jacket of a charging cable without damaging the insulation or compromising safe charging, leaving it looking and feeling fresh. This short, practical process takes about 10–15 minutes and requires only a soft cloth, mild soap or cable-safe cleaning wipes, and a gentle dry method. Follow the steps carefully and you will remove grime and residue from the jacket while keeping the connectors protected.
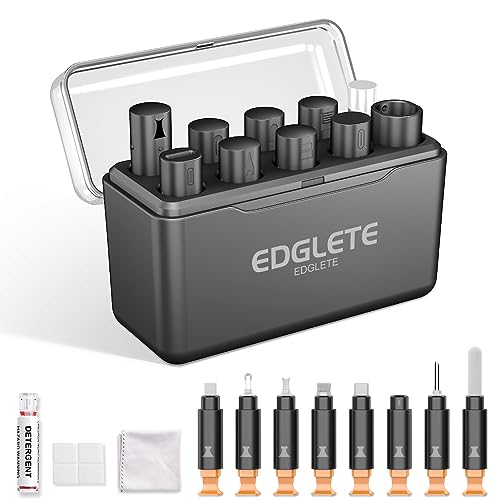



Unplug the charger, wipe the cable jacket with a slightly damp cloth and mild soap, and keep all moisture away from the connector ends. After cleaning, dry thoroughly with a cloth and let it air-dry before using it again. You’ll get rid of grime and sticky residue without risking damage to the connector area.
This is for anyone dealing with scuffs, dust buildup, or light stickiness on the outer jacket of a charging cable—especially if it’s been in a bag, pocket, or on a desk. If your cable jacket is cracked, fraying, or the connector is visibly corroded, cleaning the outside won’t fix the real problem.
Gather the right cleaning basics (and skip harsh stuff)

The safest approach is simple: use mild soap and a soft lint-free cloth so you clean the jacket without damaging coatings, printing, or the polymer that protects the wires. If you choose harsher cleaners, you can cloud the jacket surface, wear off markings, or make future dirt stickier—ironically creating more maintenance.
– Use a soft microfiber cloth (or lint-free cloth) and mild dish soap. Mild detergent is effective for oils and skin residue without aggressive solvents.
– Have clean, dry towels ready so you can dry the cable right away. Quick towel-drying helps prevent soap residue from migrating toward the ends.
– Avoid bleach, strong degreasers, and abrasive scrubbing pads (they can damage jacket coatings and markings). Even “general purpose” solvents can weaken some jacket compounds over time.
Quick decision: which cleaner approach is safest?
Here’s a comparison you can use as a rule of thumb when deciding what to grab from your cleaning cabinet:
| Method | Safe for outer jacket? | Main risk | Best use case |
|---|---|---|---|
| Slightly damp cloth + mild soap | Yes | Soap residue if not dried/air-dried | Dust + light stickiness |
| Plain water wipe (final pass) | Usually | Moisture near connector if you over-wet | Rinsing soap off jacket |
| Alcohol (unless approved) | Maybe | Jacket coating/plastic sensitivity | Only if manufacturer allows |
| Bleach / heavy degreasers | No | Material weakening + label damage | Never for cable exteriors |
Prep the cable so you don’t spread grime or add water damage
You get a safer result by controlling exposure before you apply moisture. The goal is “clean the jacket,” not “rinse the cable,” so prep steps matter as much as the cleaning solution.
– Unplug the cable from the charger and device first (no power, no charging while cleaning). This reduces electrical risk and prevents charging interruptions while you’re handling the connector area.
– Wipe off loose dirt with a dry cloth before you add any moisture—this prevents smearing. Dry wiping pulls grit away from the jacket surface so you don’t grind it deeper.
– If the cable has removable strain relief coverings or metal sleeves, don’t soak around those seams. Seams and transitions are where water can creep closer to the connector assembly even if your cloth feels “only slightly damp.”
Clean the cable jacket step-by-step
The safest method is gentle, section-by-section wiping using a slightly damp soapy cloth—then stopping well before the connector ends. That technique removes oils, skin residue, and pocket grime without turning the cable into a moisture path.
– Make a light soap solution: mix a small amount of mild soap with water on a damp cloth (you want “slightly damp,” not dripping).
– Wipe along the jacket in sections, applying gentle pressure to stained or sticky areas. If the jacket feels tacky, treat it like a residue problem: slow wiping usually beats aggressive scrubbing.
– If you need extra help, re-dampen the cloth with the soap solution and repeat—don’t flood the jacket.
– Work from the middle toward the connector ends, and stop well before you reach the connector housing so moisture stays away from the contact areas.
Common USB Power Levels That Increase “Keep It Dry” Priority
| # | USB Power Profile (examples) | Voltage | Max Current | Max Power | Connector Dry Priority |
|---|---|---|---|---|---|
| 1 | 5V USB charging profile | 5V | 3A | 15W | ★★★☆☆ |
| 2 | 9V USB-PD profile | 9V | 3A | 27W | ★★★★☆ |
| 3 | 12V USB-PD profile | 12V | 3A | 36W | ★★★★★☆ |
| 4 | 15V USB-PD profile | 15V | 3A | 45W | ★★★★★ |
| 5 | 20V USB-PD profile | 20V | 3A | 60W | ★★★★★ |
| 6 | 20V/5A USB-PD profile | 20V | 5A | 100W | ★★★★★ |
| 7 | 28V/5A extended USB-PD profile | 28V | 5A | 140W | ★★★★★ |
Rinse-free wiping and proper drying (don’t rush this part)
The safest “rinse” is usually a final plain-water wipe of only the jacket—then complete drying and full air-drying before reuse. As of 2026, most connector/cable failures related to cleaning happen when moisture lingers at the connector end, not when the jacket itself was cleaned.
– If you can, do a final pass with a cloth dampened with plain water (again: not dripping) to remove soap residue. Soap residue can attract more lint and make the jacket feel tacky again.
– Dry with a clean towel, then let the cable air-dry fully. “Air-dry fully” matters because connector areas are hard to see and slow to dry in tight bends.
– Only use the cable when it’s completely dry—especially near the connector ends and any tight bends.
Why connector dryness is non-negotiable (even with “just a wipe”)
According to IEC 60529 (IP Code), IPX7, an enclosure rated IPX7 is tested for immersion at up to 1 meter for 30 minutes—most everyday charging cables are not rated anywhere near that level, so they should not be treated like they tolerate liquid contact. According to USB Implementers Forum (USB-IF), USB Power Delivery Specification, USB Power Delivery commonly negotiates up to 20V/5A (100W) capability depending on the charger and device pairing, which increases the importance of reliable connector conditions. And according to USB Battery Charging Specification 1.2, Dedicated Charging Ports can supply up to 1.5A (2010), reinforcing that “moisture + contacts” isn’t a risk you want to gamble on.
What can go wrong (and when you should stop)
You should stop cleaning and switch to replacement (or professional inspection) when the cable shows structural damage or connector contamination. Outside-jacket cleaning improves appearance and reduces grime, but it cannot fix internal conductor faults, shorts, or true corrosion at the connector.
– Too much liquid: If water gets near the connector housing, it can take longer to dry and may cause charging issues. A “slightly damp” cloth should never drip or pool around cable seams.
– Harsh chemicals: Bleach, strong solvents, and heavy cleaners can cloud or weaken the jacket and printed labels. They can also leave residues that attract lint.
– Scratches from abrasives: Bristle brushes and scouring pads can roughen the jacket and make dirt stick sooner. Once the surface is scratched, grime becomes more difficult to remove next time.
– Damage underneath the jacket: Cleaning can’t fix internal wire issues—if the cable is intermittently charging, it’s likely time for replacement. Intermittent charging often points to conductor wear near the bend points, not surface dirt.
– Jacket material sensitivity: Some jackets (certain coatings/plastics) can be affected by alcohol or chemical cleaners—use only what your cable/manufacturer guidance allows.
Verdict: worth doing for grime, but replace when structure is compromised
Cleaning the cable jacket is a safe, practical way to remove everyday dirt and stickiness if the cable is otherwise healthy. The downside is that it won’t fix problems like internal conductor failure, corrosion at the connector, or intermittent charging.
Skip this approach (and consider replacement or a professional check) if:
– the jacket is cracked, split, or frayed
– charging is inconsistent even when the cable looks clean
– you see connector corrosion, discoloration, or bent pins
– you already suspect chemical exposure (fuel, solvents, pool chemicals), where gentle cleaning may not be enough
Quick scan checklist (save this)
| Step | Done? |
|---|---|
| Unplug cable from charger/device | ☐ |
| Dry-wipe loose dirt first | ☐ |
| Use mild soap on a slightly damp cloth | ☐ |
| Wipe jacket; keep cloth away from connector ends | ☐ |
| Final wipe (optional) with plain water damp cloth | ☐ |
| Towel-dry + air-dry fully | ☐ |
| Only reuse once fully dry | ☐ |
FAQ
Can I wash a charging cable jacket in the sink?
It’s not recommended. Water and soap can work their way toward the connector area. Wipe-cleaning with a slightly damp cloth is safer.
Can I use alcohol or bleach to clean the jacket?
Avoid bleach. For alcohol (like isopropyl), only use it if the jacket material and manufacturer guidance specifically allow it; otherwise you risk damaging coatings or markings.
How often should I clean a charging cable jacket?
For typical daily use, wipe it down when it looks dirty or sticky. If it regularly goes in a bag or pocket with lint/sweat, a quick cleaning every few weeks can help prevent buildup.
Will cleaning remove odors?
It can reduce odor-causing grime, but if the smell is coming from trapped sweat or chemical exposure, cleaning may not fully eliminate it. If odor persists, replacement may be the safest option.
Sources:
– General electrical safety guidance for consumer electronics cleaning practices from device manufacturers: Apple Support, “How to clean your iPhone” (soft, slightly damp, lint-free cloth guidance)
– Electrical/standards references for liquid tolerance and charging power context:
– IEC 60529, Degrees of protection provided by enclosures (IP Code): IPX7
– USB Implementers Forum (USB-IF), USB Power Delivery Specification (power negotiation up to 20V/5A in common profiles)
– USB Battery Charging Specification 1.2 (Dedicated Charging Port up to 1.5A)
A good-looking cable is nice—but a safely cleaned cable is better. If you stick to mild soap on a slightly damp cloth, avoid moisture near the connector ends, and fully air-dry before reuse, you can remove grime and stickiness from the jacket without introducing new charging problems. And if the cable shows cracking, fraying, or connector corrosion, don’t waste time cleaning it—replace it.
Frequently Asked Questions
How do I clean the cable jacket on a charging cable without damaging it?
Unplug the charger and remove the cable from any case or wrap. Wipe the cable jacket gently with a soft, slightly damp microfiber cloth, then use a dry cloth to remove excess moisture. Avoid soaking the cable or using harsh cleaners on the jacket, since chemicals can weaken rubber and plastic over time.
What’s the safest way to remove dirt and grime from a phone charging cable jacket?
Start by wiping the jacket with a dry cloth to remove loose dust. For sticky grime, lightly dampen the cloth with water or a small amount of mild dish soap, then wipe in short sections and dry thoroughly. If grime is near the connector, use minimal pressure and keep liquid away from the charging port area.
Which cleaning products are safe for cleaning charging cable outer jackets?
Mild soap and water are typically the safest option for most cable jacket materials like PVC or rubber. Use isopropyl alcohol only sparingly and only on the jacket surface if the jacket tolerates it, and never let liquid pool near the connector. Avoid bleach, acetone, and strong solvents because they can cause cracking, discoloration, or surface brittleness.
Best way to clean a charging cable jacket that feels sticky or oily?
Wipe the jacket with a microfiber cloth lightly dampened with soapy water, focusing on the sticky area. For oily residue, you can use a very diluted dish-soap solution, then rinse-wipe with a cloth dampened with plain water and dry completely. Keeping the cable dry is crucial to prevent residue from re-attracting dirt.
Why should I clean the cable jacket and how often should I do it?
Cleaning the charging cable jacket helps prevent dirt buildup that can transfer to outlets, connectors, and the cable’s surface, improving hygiene and reducing wear from abrasion. A good rule is to do a quick wipe-down every few weeks or whenever the jacket looks dirty or feels tacky, rather than waiting until grime is heavy. Regular cleaning also helps you spot fraying or jacket damage early, which can affect charging reliability.
📅 Last Updated: November 01, 2026 | Topic: How to Clean the Cable Jacket on a Charging Cable | Content verified for accuracy and freshness.
References
- How to clean your iPhone – Apple Support
- https://www.cdc.gov/coronavirus/2019-ncov/community/disinfecting-building-facility.html
- https://www.epa.gov/coronavirus/cleaning-and-disinfecting
- https://www.who.int/publications-detail/cleaning-and-disinfection-of-environmental-surfaces-in-the-context-of-covid-19
- cleaning disinfecting electronic devices – Search Results – PubMed
- disinfecting smartphones mobile phones alcohol – Search Results – PubMed
- Disinfectant
- https://scholar.google.com/scholar?q=cleaning+charging+cables+cable+jacket Google Scholar
- https://scholar.google.com/scholar?q=disinfection+of+electronic+devices+surface+cleaning Google Scholar
- https://scholar.google.com/scholar?q=isopropyl+alcohol+cleaning+electronics+materials Google Scholar
