

Bugs on a drone usually build up on the propellers, camera housing, and vents, and the common mistake is trying to wipe them off dry or with the wrong cleaner, which can scratch surfaces or damage sensors. The good news is you can remove them safely and restore airflow and visibility with a few careful steps that take about 10–20 minutes. You will need a soft microfiber cloth, gentle cleaning solution, and basic tools like a blower—then you can get back to confident flights.


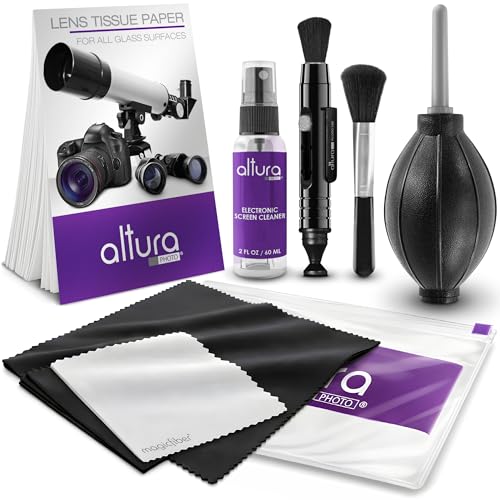

Bug splatter happens because many insects are drawn to your drone’s light and warm airflow, then their proteins and oils bond to plastic, carbon fiber, and lens/gimbal coatings on impact. Clean it by powering down, removing the battery, gently rinsing and wiping with mild soap and water (never forcing moisture into vents/ports), and fully air-drying before your next flight.
If you fly in wooded areas, near water, or during dusk/night, you’ve probably seen bug splatter on props, arms, and the camera. This guide walks you through the most common causes and a safer cleaning method that won’t accidentally damage finishes or optical parts.
What causes bugs on a drone?

Bugs show up on drones mainly because the drone’s light, heat, and airflow attract insects, and the impact residue bonds to surfaces quickly. The result is more than cosmetic—hardened bug residue can degrade prop performance and leave haze on camera and gimbal areas.
– Attraction to light and heat: Many insects are drawn to light sources and warm airflow around motors/ESCs and the battery area. Even if your drone’s LEDs aren’t “bright,” they can still be enough to trigger phototaxis (insects moving toward light).
– Airflow concentrates insects: Rotor wash can pull insects toward the drone and break them against front-facing surfaces first (usually the nose/forward arms and camera area). On a multirotor, airflow is not uniform—areas directly in the flight path tend to collect more impacts.
– Residue “glues” itself on impact: Bug bodies leave oils and proteins that can smear and harden, especially on glossy plastics and prop edges. From a materials perspective, water alone often doesn’t lift oily/biological films effectively because water has relatively high surface tension (about 72.8 mN/m at 20°C), so it may bead instead of fully wetting the residue (NIST Chemistry WebBook). Mild surfactants in soap help it spread and lift.
How to clean a bug-covered drone
You can clean bug splatter safely by removing power first, loosening debris with gentle water, and protecting the camera/gimbal from moisture. The goal is to lift residue without introducing liquid into electronics or scratching optical coatings.
– Start with safety first (before touching anything):
– Power the drone off and remove the battery.
– Avoid rotating props by hand if they’re still fouled with residue (you don’t want to spread debris around or nick prop surfaces).
– Clear the loose debris without grinding it in:
– Rinse gently with clean water (preferably mild/treated water like distilled if you have it) to lift splatter.
– If chunks are stuck, soften them first rather than scraping aggressively.
– Use the gentlest cleaner that works:
– Clean body/arms with mild soap diluted in water, then wipe with a soft microfiber or lint-free cloth.
– Don’t spray cleaner directly at the camera lens, vents, or openings—apply to the cloth first if needed.
– For optical surfaces (camera/gimbal lens), use only a lens-safe approach per your drone manufacturer’s care instructions.
– Dry properly before powering back on:
– Pat/wipe surfaces carefully, then let the drone fully air-dry with airflow from a safe distance.
– Only reassemble/boot once you’re confident everything is dry around seams and in/near any ports.
A practical way to choose cleaning intensity is to match the method to the risk it creates. Below is a simple comparison based on how each method interacts with oily residue and how it can affect openings/ports.
Bug-Residue Cleaning Actions: Practical Strength vs Safety (Multirotors)
| # | Cleaning action | Residue lift strength (1–5) | Moisture risk (1–5) | Overall safety★ |
|---|---|---|---|---|
| 1 | Gentle rinse with clean water (no soap) | 2 | 1 | ★★★★★ |
| 2 | Distilled-water rinse (for beading/oily films) | 3 | 1 | ★★★★☆ |
| 3 | Mild soap diluted in water (body/arms only) | 4 | 2 | ★★★★☆ |
| 4 | Soften with water first, then wipe (microfiber) | 4 | 2 | ★★★★☆ |
| 5 | Compressed-air dry from distance (external surfaces) | 2 | 3 | ★★★☆☆ |
| 6 | Isopropyl alcohol on cloth only (lens-safe *if approved*) | 3 | 4 | ★★☆☆☆ |
| 7 | Spraying liquids directly into vents/ports | 5 | 5 | ★☆☆☆☆ |
A note on why “water vs. solvents” matters: distilled water often helps reduce leftover minerals because fully pure water has extremely high resistivity (about 18.2 MΩ·cm at 25°C) (NIST Chemistry WebBook), which can reduce spotting. However, if you go the solvent route, be aware that isopropyl alcohol evaporates fast (boiling point about 82.6°C) (NIST Chemistry WebBook), which is useful for drying—but it can also wick into openings and interact with coatings if your drone manual doesn’t explicitly approve it. So the safest “default” is mild soap + water on non-optical surfaces and manufacturer-approved lens care on optics.
How to prevent bugs from landing (or sticking) next time
Prevention is mostly about reducing exposure time at peak insect activity and minimizing “sticky residue” buildup between sessions. If you change when/where you fly and build a quick post-flight wipe into your routine, you’ll spend less time scrubbing and more time flying.
– Change when/where you fly: Bugs are typically heavier around dusk, near lights, and in certain weather/season conditions; adjusting the time and location often reduces impact.
– Use better flight habits for “front-facing” exposure:
– If you notice repeated hits on the front arms or camera side, consider adjusting your approach path (e.g., flying slightly higher or altering how you cross open areas).
– Keep surfaces clean between sessions:
– A quick wipe after a bug-heavy flight can stop residue from baking on and turning into a harder-to-remove film. Even a 60-second “initial clean” can be the difference between easy removal and a longer softening step later.
From a systems viewpoint, this prevention approach also protects performance: props run cooler and smoother when leading edges are free of dried residue, and camera clarity improves when you avoid repeated scrubbing after proteins harden.
What can go wrong (common mistakes and limits)
Most cleaning damage happens when liquid gets into electronics, coatings are scratched, or residue is forced around instead of softened first. The safest method is conservative: loosen, wipe, and dry—especially around the gimbal and any ports.
– Getting liquid into electronics: Spraying (or flooding) near vents, motor housings, seams, or the gimbal can cause moisture issues. If you see liquid pooling, stop and dry thoroughly.
– Scratching camera/gimbal surfaces: Hard scrubbing pads or using household glass cleaners can damage coatings. Optical parts need gentler materials and manufacturer-approved guidance.
– Using strong solvents on plastics/finishes: Bug splatter can look like “grease,” but strong chemicals may haze plastics, weaken coatings, or harm adhesives.
– Flying while not fully dry: Even small droplets around sensors/ports can create intermittent errors. If the drone won’t power cleanly after cleaning, pause and re-check for moisture.
– Prop safety edge case: If residue made it into prop edges or the prop is nicked, cleaning won’t fix structural damage—inspect for chips or bends before the next flight.
Practical limit: even perfect cleaning can’t correct impact deformation. If a prop has chips, a leading edge looks peeled, or the camera window shows persistent haze after cleaning, the safest next step is inspection/support rather than more aggressive cleaning.
Verdict: clean it gently, but don’t ignore damage
Gentle cleaning (power off, battery out, mild soap + water, soft cloth, then full drying) is the safest general approach for bug splatter. The downside: if you let residue harden for long periods, it may take more careful softening and wiping to avoid smearing or scratching—and if optical coatings or prop edges are damaged, cleaning alone won’t restore them.
Skip this “DIY-clean first” approach if:
– your drone manufacturer says a specific cleaner/approach is required and you’re not following it,
– you suspect internal moisture got inside,
– or you see prop deformation/chips after the bug impact.
Quick scan checklist (save this)
| Area | Do this | Avoid this |
|---|---|---|
| Props & arms | Rinse gently, wipe with mild soapy water | Scraping hard residue dry; harsh chemicals |
| Camera/gimbal lens | Use lens-safe method from your manual; wipe gently with proper cloth | Spraying liquid directly at the lens/openings |
| Motors/vents/ports | Keep moisture out; wipe only external areas | Spraying, soaking, or flooding |
| After cleaning | Air-dry fully before powering | Rebooting while any droplets may remain |
| If damage is visible | Inspect props and lens/coatings | Assuming cleaning fixes structural issues |
Frequently Asked Questions
What causes bugs to stick to a drone and affect flight performance?
Bugs are drawn to drones by bright lights, heat from motors/esc, and the drone’s vibration and airflow, which can pull insects into propellers and onto the camera lens. Once they land, their body oils and proteins dry quickly, creating sticky residue that can reduce propeller efficiency and cause vibrations. Over time, bug splatter can also blur the camera lens and degrade sensor performance, leading to poor footage and potential autofocus or image issues.
How do I clean bug splatter off my drone without damaging the propellers or camera?
Start by powering down and letting the drone cool, then gently rinse loose debris with clean water or a damp microfiber cloth—avoid blasting with high-pressure water. Use a mild lens-safe cleaner or a small amount of isopropyl alcohol on a microfiber cloth for stubborn residue, and never apply liquids directly into ports, motors, or seams. Clean propellers carefully around the blades, checking for nicks or balance issues afterward. Finish by air-drying fully before flying to prevent moisture from affecting electronics.
Why does bug residue cause camera blur or overheating on drones?
Bug splatter spreads across the camera lens and, when dried, forms a film that scatters light and reduces image sharpness and contrast. Sticky insect residue can also attract additional dirt and dust, making the camera problem worse over multiple flights. In some cases, clogged vents or residue buildup near hot components can trap heat, which may push the drone toward thermal throttling. Regular cleaning helps maintain optimal camera clarity and prevents performance drops.
Best way to prevent bugs on a drone during night flights or in summer?
Use bug-repellent strategies that don’t interfere with flight safety—reduce brightness where possible, avoid unnecessary external lights, and consider adjusting light angles to minimize attraction. Flying at times with lower insect activity and choosing altitudes or routes away from swarms can reduce contact. After each flight, inspect props and the camera lens early so dried bug splatter doesn’t become harder to remove. If your drone supports it, protective lens covers designed for cameras can reduce direct splatter.
Which cleaning supplies are safest for removing insects from a drone?
Use microfiber cloths, lens-safe cleaning solutions, and gentle isopropyl alcohol (typically 70% or less) applied to the cloth—not sprayed directly on the drone. A soft-bristle brush can help dislodge debris around propellers and body panels, while clean water works well for initial rinse-off. Avoid harsh chemicals, abrasive pads, and petroleum-based cleaners that can damage coatings, prop materials, or seals. Always keep cleaning liquids away from battery contacts, ports, and motor openings, and verify everything is dry before powering up.
📅 Last Updated: November 01, 2026 | Topic: What Causes Bugs on a Drone? (And How to Clean It) | Content verified for accuracy and freshness.
References
- Phototaxis
- Mosquito
- insects attracted to light emitting diodes – Search Results – PubMed
- mosquito host seeking CO2 heat odor – Search Results – PubMed
- Cleaning and Disinfecting | Water, Sanitation, and Environmentally Related Hygiene (WASH) | CDC
- Isopropyl alcohol
- How to clean your iPhone – Apple Support
- https://scholar.google.com/scholar?q=insect+phototaxis+LED+attraction Google Scholar
- https://scholar.google.com/scholar?q=mosquito+host+seeking+CO2+heat+odors+review Google Scholar
- https://scholar.google.com/scholar?q=cleaning+electronics+isopropyl+alcohol+guidelines Google Scholar
