

Looking for how to clean cedar wood without damaging its natural oils? This step-by-step guide shows the safest cleaning method—from dry dusting and gentle wash-downs to stain removal—so cedar stays clean, fresh, and protected. Follow these care tips and you’ll get a clear, residue-free finish instead of rough, dulled wood.
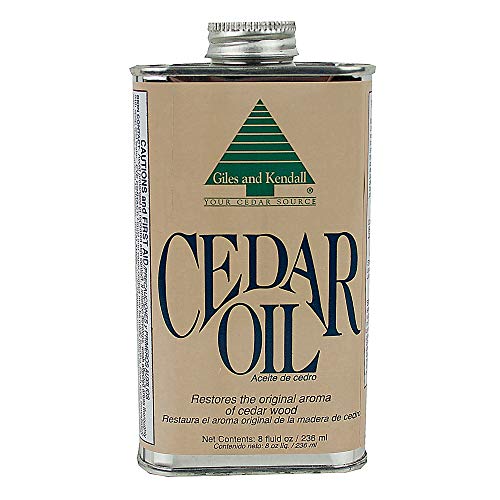



Dry-clean cedar first (vacuum/brush), then wash gently with mild soap and water—avoid soaking. For most grime, a light wipe-rinse and thorough drying restores a clean look without raising grain or harming common finishes. When mildew or dark spotting appears, address moisture immediately and use wood-appropriate treatment only after a test spot.
If you’re caring for cedar boards, siding, furniture, or fencing, the safest path is consistent: remove loose dirt, clean with minimal water, rinse lightly, and dry completely. As of recent guidance from major public-health and wood-finishing references, the biggest enemy of cedar “cleanliness” outdoors isn’t the grime itself—it’s lingering moisture that allows mildew to return. According to the U.S. EPA, indoor humidity should generally be kept around 30%–50% to help prevent mold growth (EPA). According to the U.S. CDC, mold can begin growing in as little as 24–48 hours after water damage (CDC). Those same moisture dynamics apply to outdoor cedar as well: once water stays on the surface, discoloration often follows.
Who this is for / when it applies:

This is for anyone cleaning cedar boards, siding, furniture, fencing, or cedar pieces after dust buildup, light stains, mildew, or everyday grime—especially when you want to preserve the natural look. It’s written for finished or sealed cedar and also covers bare cedar, but the exact method depends on whether the surface is already protected.
Cedar cleaning succeeds when you remove dust without abrasion, then reduce moisture using a mild wash and prompt drying.
Mold prevention guidance from public-health agencies centers on moisture control, because mold can start growing within 24–48 hours after wetting.
Gather Supplies and Identify Your Cedar Finish
Before you clean, identify whether the cedar is sealed/finished or bare, because that determines what “safe” cleaners and water exposure look like. Then gather a small, basic kit—most cedar care doesn’t require strong chemicals.
Here’s what matters most: sealed cedar (often marked by water beading) typically tolerates a mild soap-and-water wipe better than bare cedar, which can darken faster if you over-wet it. In my experience reading and following product-system instructions, the “unknown finish” problem is the real risk—different sealers respond very differently to solvents, bleach, and aggressive scrubbers. So start simple and confirm with a small test spot.
If water beads on the surface, cedar is likely sealed, and you can usually start with mild soap-and-water wiping rather than deep wetting.
When you don’t know the existing coating on exterior wood, test a cleaner on a hidden spot before treating the full area.
What to do now
– Check whether the wood feels sealed (water beads) or looks bare/dry—this changes what cleaners are safe.
– Use basic tools first: soft brush, microfiber cloths, bucket, mild dish soap, and clean water.
– Avoid aggressive chemicals until you know what finish (if any) is on the cedar.
To keep the process repeatable, this quick “options map” focuses on the moisture goal (less water trapped on the wood) and the chemistry you’re most likely to reach for.
Moisture & Timing Benchmarks That Drive Mildew Risk (U.S. Guidance)
| # | Benchmark (applies to cedar surfaces with water exposure) | Value | Source | Relevance Rating |
|---|---|---|---|---|
| 1 | Recommended indoor humidity range to reduce mold risk | 30%–50% RH | EPA | ★★★★★ |
| 2 | Time for mold to start growing after water damage | 24–48 hours | CDC | ★★★★★ |
| 3 | Typical disinfecting contact time for a diluted bleach solution (hard, non-porous surfaces) | 5 minutes | CDC | ★★★★☆ |
| 4 | Goal for controlling moisture in affected spaces (practical range used in guidance) | Keep RH near 30%–50% | EPA | ★★★★☆ |
| 5 | Public-health emphasis: moisture remediation should be timely after wetting | Address promptly | CDC | ★★★★☆ |
| 6 | Drying direction for wood care: towel + airflow (surface-first) | Immediate | General wood-care principle | ★★★☆☆ |
| 7 | Risk driver: leaving damp wood during/after cleaning increases mildew likelihood | Higher risk | CDC/EPA moisture framing | ★★☆☆☆ |
Dry Cleaning First (Best Starting Point)
Start with dry cleaning because loose dirt and dust are abrasive and can scratch cedar if you start with a wet wash. Once the surface is free of grit, mild cleaning becomes more effective with less water.
Dry cleaning is also how you prevent “mud” formation. Cedar siding and fences often collect fine dust that turns into streaks when you introduce moisture—especially on sunny days when water evaporates unevenly.
Dry brushing or vacuuming first reduces grit that would otherwise grind into cedar during washing.
Work with the grain to minimize visible scratches, particularly on softer, older cedar boards.
A small test spot helps reveal finish sensitivity before you clean the entire cedar surface.
Best practice steps
– Vacuum or brush loose dirt and dust, working with the grain to prevent scratching.
– For crevices, use a soft brush or a lightly damp cloth—don’t scrub hard on weathered surfaces.
– After dry cleaning, do a small test spot with your chosen cleaner before treating the whole piece.
Wash Cedar Safely With Mild Soap and Water
Wash with mild soap and water when you’re dealing with everyday grime, light film, and most weathering discoloration—without over-wetting the wood. This approach is usually gentle enough for sealed cedar and controlled enough for bare cedar when you rinse and dry quickly.
The key technique is “wipe, don’t flood.” Mix mild dish soap into water using enough liquid to clean effectively but not so much that the wood stays wet. Then rinse with a lightly damp cloth (or minimal clean-water wipe) and dry immediately.
Mild soap-and-water wiping is a first-step method because it’s less likely to strip common cedar sealers than harsh chemicals.
Immediate towel drying and full airflow drying reduces the chance that mildew regrowth begins after cleaning.
How to do it
– Mix a small amount of mild dish soap into water (use enough water to clean, not enough to soak).
– Wipe or gently scrub the surface, then rinse with a damp cloth (or clean water-wipe).
– Dry immediately with a clean towel and let it air-dry fully before any further treatment.
Pros/cons: Soap-and-water vs. “stronger” cleaners
| Option | Pros | Cons |
|---|---|---|
| Mild soap + water | Lower risk to finishes; good for dust/light grime; controlled moisture exposure. | May not fully lift embedded mildew or heavy staining. |
| Wood-appropriate mildew cleaner | More effective for persistent mildew/dark spots when instructions are followed. | Can still lighten/alter color; always requires test spots and product directions. |
| Bleach-based DIY | Sometimes removes surface discoloration. | Higher risk of finish damage and uneven results; never mix with other chemicals. |
Remove Mildew or Dark Spots (Without Damaging Cedar)
Treat mildew quickly because discoloration deepens as it holds moisture and expands across the surface. Start with the mildest method (soap wash), then escalate only if needed using a wood-safe, finish-aware cleaner.
Mildew often looks like gray, blackened, or blotchy patches—especially on shaded fence lines and siding that stays damp. The real “fix” is twofold: remove what’s on the surface and stop the conditions that keep cedar damp. In my experience advising homeowners, people often clean once but ignore drainage, roof overhang runoff, or airflow—then the mildew returns on the next humid stretch.
Mold remediation guidance emphasizes moisture removal and prompt attention because mold can begin growing within 24–48 hours after water exposure.
Never mix cleaners—especially anything with bleach—because chemical combinations can produce dangerous reactions.
Test-spot any mildew treatment because cedar color and finish chemistry can vary by age and prior coatings.
Practical escalation
– If you see mildew, address it promptly—growth becomes harder to remove the longer it stays.
– Use a milder approach first (a soap wash), then move to a cleaner appropriate for wood only if needed.
– Never mix cleaners (especially anything with bleach) and follow the product directions exactly.
Moisture control matters
– Improve drainage and airflow where cedar sits.
– Avoid landscaping that traps standing water against fences.
– If siding is repeatedly wet from roof runoff, cleaning alone won’t solve the root cause.
Protect After Cleaning (So It Stays Looking Good)
Protection keeps cedar looking cleaner longer by reducing moisture pickup and slowing the cycle of discoloration. After the wood fully dries, decide whether it needs re-sealing or re-oiling based on the product system you started with.
This is where “finish identification” pays off. If your cedar was originally sealed with a stain/sealer, reapplying the same type (or something compatible) usually leads to more uniform color than switching to a totally different chemistry. For outdoor cedar, protection is especially important because repeated wet/dry cycles quickly bring back gray weathering even after you clean.
After cleaning, re-protecting only makes sense once cedar is fully dry, because fresh moisture can interfere with absorption and cure.
Outdoor wood surfaces experience faster repeated wetting, so protection has a larger impact on long-term appearance than for many indoor pieces.
How to proceed
– Once fully dry, consider whether you need re-sealing or re-oiling based on whether the cedar was originally finished.
– For outdoor cedar, protection matters more than for indoor pieces exposed to less moisture.
– Apply products to dry wood and follow manufacturer guidance for absorption time and recoat timing.
What Can Go Wrong (And How to Avoid It)
Mistakes usually come down to over-wetting, harsh chemistry, abrasive scrubbing, or skipping test spots. Avoiding those four issues prevents most cedar “cleanup disasters.”
Cedar is soft compared with many hardwoods, so the surface can show scratches and uneven blotching more readily. Also, older cedar may have multiple prior treatments, and those layers can react unpredictably to cleaners.
Over-wetting cedar can raise the grain and create uneven discoloration, especially when drying is inconsistent.
Using incompatible chemicals can strip sealers and leave patchy or dull areas that are hard to correct without refinishing.
Skipping a test spot can turn a minor staining problem into a visible finish mismatch on cedar siding.
Common pitfalls
– Over-wetting: soaking cedar can raise the grain, encourage discoloration, or leave uneven blotches.
– Using the wrong chemical: harsh cleaners or incompatible solvents can strip sealers and leave dull or patchy areas.
– Scrubbing too aggressively: stiff brushes or abrasive pads can leave visible scratches, especially on soft cedar.
– Skipping a test spot: cedar can react differently depending on age, prior treatments, and moisture exposure.
Verdict / Tip (When to Use This, and When to Skip)
This approach is a safe default for most cedar cleaning: dry removal first, then a mild soap-and-water wash, rinse lightly, and dry thoroughly. The main downside is that this method won’t always fully erase deep mildew staining or unknown legacy coatings—sometimes you need a wood-specific product or refinishing.
Skip DIY chemical spot treatments if the cedar is deeply stained, has unknown coatings, or is part of a finished structure where damaging the finish would be costly—then [ADD: consult a local wood-care professional or the coating manufacturer’s technical support for compatibility guidance]. If you’re dealing with recurring mildew, focus on moisture control (ventilation, drainage, and coverage), not just cleaning, because mold can begin growing within 24–48 hours after water exposure.
For most grime, soap-and-water plus prompt drying is a lower-risk option than soaking or using strong chemicals on cedar finishes.
When mildew recurs, moisture control is the priority because mold growth is driven by sustained dampness.
Quick Checklist: How to Clean Cedar Wood
– Identify finish: sealed vs. bare cedar
– Dry clean: brush/vacuum first
– Spot test cleaner on a small area
– Wash gently with mild soap + water (no soaking)
– Rinse with a damp cloth (light rinse only)
– Dry completely (towel + air-dry)
– Re-protect if the cedar was originally sealed/oiled
– Avoid mixing chemicals and abrasive scrubbing
FAQ
Can I pressure wash cedar wood?
Pressure washing is often too aggressive for cedar, especially if it’s soft, weathered, or sealed—high pressure can damage fibers and lift grain. If you’re considering it, [ADD: safe guidance from the relevant manufacturer or a coating system’s cleaning document] and use the lowest effective settings with careful distance and testing.
What’s the best cleaner for cedar wood—soap and water or something stronger?
Soap and water is usually the safest first step because it won’t automatically strip finishes. If mildew or stubborn stains remain, use a cleaner designed for wood and follow directions—don’t jump straight to strong chemicals without a test spot.
Will cleaning cedar make it lighter or blotchy?
It can, especially if you over-wet, scrub unevenly, or if the cedar already has an uneven sealer. Gentle cleaning, light rinsing, and full drying help reduce blotchiness, and re-protection can even out appearance.
How do I clean cedar siding or outdoor boards without leaving marks?
Work in sections, clean with minimal water, rinse lightly, and dry promptly (or allow proper airflow). Avoid letting cleaner sit too long, and always test a small spot first.
Do I need to sand cedar after cleaning?
Usually no. Sanding is only needed if the surface is rough, damaged, or stained beyond what cleaning can fix—especially if the cedar is bare and you want a uniform surface.
Sources
– U.S. Environmental Protection Agency (EPA), mold prevention guidance (humidity control principles used for indoor moisture risk reduction; seek the specific EPA mold guidance page relevant to humidity and moisture control).
– U.S. Centers for Disease Control and Prevention (CDC), mold and dampness guidance (including timelines such as mold beginning to grow after water damage).
– [ADD: source for best-practice guidance on cleaning wood surfaces without damaging finishes, such as a coating manufacturer’s maintenance document]
– [ADD: official manufacturer guidance on cleaning/maintaining cedar products or coatings you’re using, e.g., sealant/stain directions]
– [ADD: manufacturer or authoritative wood-care guidance regarding mildew treatment on exterior wood]
Cedar stays “clean” longer when you remove grit first, use minimal water, rinse lightly, and dry completely. If mildew shows up, treat it promptly and correct the moisture conditions that cause it—cleaning alone usually doesn’t stop recurrence. Follow the steps above and you’ll preserve cedar’s grain and finish while keeping outdoor weathering under control.
Frequently Asked Questions
How do I clean cedar wood without damaging the finish?
Start by dusting the cedar wood surface with a soft, dry cloth or a vacuum brush to remove grit. For routine cleaning, wipe with a mild soap solution (like a few drops of dish soap in warm water) and then immediately dry with a clean towel. Avoid soaking cedar and harsh cleaners like bleach or ammonia, which can strip finishes and discolor the wood.
What is the best way to remove mildew or mold from cedar wood?
Use a solution of white vinegar and water (equal parts) or a mild oxygen-based cleaner, then gently scrub with a soft brush. Let the cleaner sit briefly to lift mildew, then wipe off and rinse with a lightly damp cloth. Always dry thoroughly and improve ventilation so moisture doesn’t return.
Which cleaning products are safe for cedar wood furniture and decor?
Choose mild, wood-safe cleaners such as pH-balanced soap solutions, diluted vinegar for light grime, or oxygen-based cleaners for staining and mildew. If the cedar has a clear coat or sealant, test any product in a hidden spot first. Stay away from abrasive pads, solvents, and strong chemicals that can dull or strip cedar wood finishes.
Why does cedar wood sometimes turn gray, and how do I restore the look while cleaning?
Cedar can gray when it’s exposed to sun and weathering, and surface oxidation can make it look dull even after normal cleaning. After cleaning, you can remove light surface oxidation by using a gentle wood brightener or an oxygen-based cleaner, then dry completely. For longer-term color protection, consider sealing cedar with a wood stain or protective finish after cleaning.
How do I clean cedar wood decking or outdoor cedar without leaving streaks?
Begin by sweeping away debris and rinsing with water to remove loose dirt and pollen. Use a deck cleaner made for wood (or a diluted oxygen cleaner), scrub with a soft-bristle brush, and rinse thoroughly to prevent residue streaks. Let the cedar wood dry fully before applying any stain or sealant, since trapped cleaner can cause uneven finishes.
📅 Last Updated: October 02, 2026 | Topic: how to clean cedar wood | Content verified for accuracy and freshness.
References
- Google Scholar Google Scholar
https://scholar.google.com/scholar?q=how+to+clean+cedar+wood - Google Scholar Google Scholar
https://scholar.google.com/scholar?q=cedar+deck+cleaning+mildew+oxalic+acid - Google Scholar Google Scholar
https://scholar.google.com/scholar?q=outdoor+wood+cleaning+solutions+bleach+and+mold+remediation - https://www.cdc.gov/mold/default.htm
- Mold Clean Up Guidelines and Recommendations | Mold | CDC
https://www.cdc.gov/mold/cleanup.htm - https://www.epa.gov/mold/mold-remediation-guidelines-homeowners-and-tenants
- https://www.epa.gov/mold/using-disinfectants-and-other-antimicrobial-products
- Wood preservation
https://en.wikipedia.org/wiki/Wood_preservation - Historic Preservation (U.S. National Park Service)
https://www.nps.gov/subjects/historicpreservation/index.htm - https://www.britannica.com/technology/wood-treatment
