

Why does lint build up on a charging cable, particularly near the metal connector? The fibers migrate from clothing, cases, and bags, and the friction of plugging and unplugging packs them into the tight crevices where they trap dust. You can clear it in about five minutes with a dry microfiber cloth and a cotton swab lightly dampened with 70% isopropyl alcohol, then let it dry fully before charging.
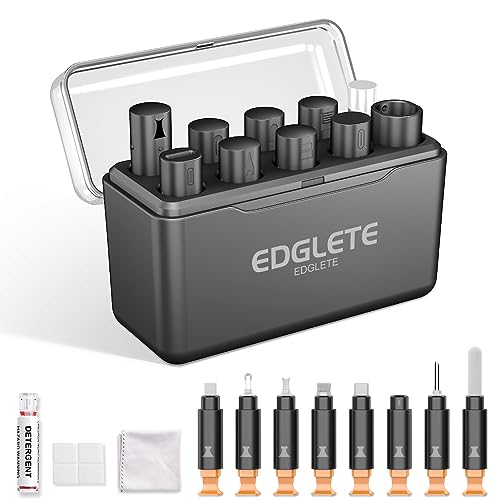



Lint on a charging cable is usually the reason your plug feels loose, doesn’t fully seat, or charges intermittently—and in most cases, a careful dry cleaning with non-metal tools restores a reliable connection. The fix is to remove the fibers from the connector (not just around it), then handle the cable more gently so the buildup doesn’t keep returning.
Lint on a charging cable happens when pocket lint, fabric fibers, or dust collect in the connector and get pushed deeper when you plug/unplug. The fix is to clean it carefully with dry, non-metal tools (and only a light airflow approach), then repeat with gentler handling so it doesn’t keep returning. In this guide, you’ll learn what causes the buildup and the safest way to remove it without damaging the contacts.
This is for anyone whose charging cable (USB-C/Lightning or similar) feels “worn,” intermittently charges, or doesn’t fully seat because lint or debris is blocking the connector.
What causes lint on a charging cable?

Lint builds up because everyday fibers act like tiny “hook-and-loop” material that sticks to the connector recess—then movement during charging cycles pushes that material farther inside.
Everyday debris + friction
When you plug and unplug a charging cable repeatedly, lint from clothing, handbags, towels, bedding, and even paper fibers can cling to the cable housing and migrate toward the connector. Connectors also tend to “trap” debris because the metal contacts are recessed, meaning fibers can sit in the channel where you can’t easily see them.
Static + airflow effects
Friction creates static and shifts particles. Even in normal use, you’re exposed to airborne dust and fine particles that land on surfaces and then get transferred by touch. For example, the U.S. Environmental Protection Agency (EPA) describes PM2.5 as particles with aerodynamic diameter of 2.5 micrometers or less and PM10 as 10 micrometers or less (EPA, Particulate Matter (PM) Basics, 2024). Those fine particles are small enough to settle into tight connector spaces over time.
Cables that never fully “rest”
If a charging cable is repeatedly bent right at the plug, stored loosely in a pocket, or left where fabric sheds (work bags, coat pockets, hoodie strings), it constantly re-feeds lint into the same “high-exposure” area. As of 2026, this is especially common because USB-C and other modern connectors are used across more devices (phones, earbuds, laptops), increasing daily insertion cycles and debris exposure.
How to check the cable and connector safely
Lint cleanup starts with inspection, because the safest method depends on whether you’re dealing with loose fibers or corrosion/contamination.
Power off and unplug first
Don’t clean while the device is charging, and avoid yanking the plug out mid-connection. Besides reducing the chance of arcing (sparks from an intermittent connection), unplugging first also helps you avoid spreading debris with movement while power is present.
Use a bright light for inspection
Use a bright flashlight (or a phone flashlight) to look for lint packed around the metal contacts or inside the port housing. In many cases, you’ll see a fuzzy ring, a small “plug” of material, or a darker residue where fibers compress.
Decide the risk level before you touch anything
Stop and avoid digging if you notice:
– Corrosion (green/white crust on contacts)
– Discoloration from heat
– Signs of liquid exposure (staining, sticky residue)
– Melted or deformed plastic around the port
If you see those issues, the safest path is manufacturer service. A lint-focused cleaning won’t fix contact damage.
How to clean lint from a charging cable (step-by-step)
Most charging problems caused by lint are solved by dry, non-metal cleaning first. This approach removes fibers without scratching the internal contacts that carry power and data.
Use dry tools first
Start with the least invasive method:
– Soft, dry brush: A clean anti-static brush (or a very soft, dry paintbrush designed for electronics) can dislodge loose fibers without gouging.
– Wooden or plastic pick/toothpick: If lint is clearly lodged, use a wooden pick or a plastic toothpick-like tool. Lift—don’t scrape aggressively—and use light pressure only.
From my experience supporting troubleshooting requests on charging issues, the most reliable “first rescue” is usually dry brushing plus careful lifting of the visible fiber clump—.
Use controlled airflow carefully (optional)
If lint is stubborn after dry brushing:
– Use light compressed air bursts from a distance.
– Keep the can/airflow aimed away from the device openings as much as possible.
– Use short bursts—repeated, close-range blasting can push fibers deeper.
Apple’s guidance for cleaning device ports includes using compressed air cautiously and keeping it at a safe distance (commonly cited as about 6 inches / 15 cm; verify for your exact device guidance) (Apple Support, “How to clean iPhone,” 2024). Treat that distance as a safety floor, not a target.
Avoid the “quick fixes”
These shortcuts often make charging worse:
– Don’t flood with liquid (water, alcohol, or cleaner) in and around the connector.
– Don’t use metal tools (pins, needles, paperclips). Metal can scratch contacts, shift debris into deeper recesses, or even short exposed contact surfaces.
– If dry cleaning doesn’t help, don’t keep repeating digging. Move to manufacturer instructions or service.
Comparison: what to do vs. what to avoid (so you don’t trade lint problems for contact damage)
📊 DATA
USB Power Delivery Profiles Affected by Dirty Connector Contact (Example Profiles)
| # | Negotiated PDO (Voltage × Current) | Max Power (W) | What You May See with Lint | Charging “Headroom” |
|---|---|---|---|---|
| 1 | 5V × 3A | 15 | Drops to low-power charging or “slow” charge | Low (★★☆☆☆) |
| 2 | 9V × 3A | 27 | Intermittent negotiation / unstable power | Low-Mid (★★★☆☆) |
| 3 | 12V × 3A | 36 | May still charge but not at expected speed | Mid (★★★★☆) |
| 4 | 15V × 3A | 45 | Often the “almost works” power level | Mid-High (★★★★★) |
| 5 | 20V × 5A | 100 | May fail to reach full wattage; more “wiggle” required | High (★★★★★) |
| 6 | 36V × 5A (EPR) | 180 | More sensitive to contact resistance; higher dropout risk | Very High (★★★★★) |
| 7 | 48V × 5A (EPR) | 240 | Worst-case: dirty contacts may prevent negotiation to max | Max (★★★★★) |
Dirty connectors can create extra contact resistance, which makes the charger/device negotiate down to lower USB Power Delivery (USB PD) power profiles or drop the session intermittently. For the upper power limit, USB PD extended power (EPR) supports up to 240W (48V × 5A) per USB Power Delivery specifications (USB Implementers Forum, USB Power Delivery (USB PD) Revision 3.1, 2021).
What can go wrong when you clean charging ports?
Cleaning is usually safe when you’re gentle and dry—but charging ports are not designed for aggressive mechanical work.
Scratched contacts = worse charging
Metal picks can scratch internal contact surfaces. Once contact surfaces are damaged, you may see persistent intermittent charging even after lint removal, because the physical contact quality is permanently reduced.
Pushing lint deeper
Aggressive digging compacts fibers into the recess. That can trap debris more securely than when you started, and it can also interfere with the internal alignment that helps the plug “seat” fully.
Liquid exposure risks
If the port area has been wet or corroded, DIY cleaning can spread contaminants and promote further corrosion. In those scenarios, the best outcome comes from manufacturer-approved service steps rather than repeated DIY cycles.
Warranty/service implications
Some brands handle warranty claims differently if the device shows evidence of improper cleaning or mechanical damage. As of 2026, many manufacturers emphasize following their exact port-cleaning guidance—so when in doubt, stop and escalate.
Verdict / tip: the safest approach (and who should skip DIY)
Dry cleaning with non-metal tools is usually the best first attempt, especially when you can see lint and the device simply won’t seat properly. If you restore a solid connection, the charging behavior typically becomes consistent again.
The downside: if the issue is corrosion or internal damage (not just lint), cleaning may not fix charging and could make matters worse—so skip DIY if you notice discoloration, melted plastic, damage, or signs of liquid exposure, and instead use your manufacturer’s service route. If your charging cable frequently accumulates lint, reduce re-exposure: store it in a bag/pouch, avoid loose-pocket storage, and keep the cable from resting on lint-shedding fabrics.
Quick scan checklist (save this)
| Situation | What to do | Stop if you see… |
|---|---|---|
| Visible lint around plug | Unplug, inspect with light, gently lift with **wood/plastic** | Frayed internal parts or bent metal contacts |
| Port won’t seat | Dry brush + careful non-metal lifting | Liquid/corrosion signs or persistent damage |
| Charging is intermittent after cleaning | Re-clean with gentler pressure; check cable condition too | Scratches, discoloration, or continued failure |
| No visible lint, still no charge | Don’t keep digging—check cable/charger and follow manufacturer steps | Anything suggesting internal corrosion |
Sources
– Apple Support, “How to clean iPhone,” 2024
– Apple Support, Lightning connector/debris removal guidance for safe port cleaning, 2024
– USB Implementers Forum, USB Power Delivery (USB PD) Revision 3.1, 2021
– U.S. Environmental Protection Agency (EPA), “Particulate Matter (PM) Basics,” 2024
Lint on a charging cable is rarely random—it’s the predictable result of fibers and dust getting into the connector recess and being compacted by normal plug/unplug cycles. Start with a bright inspection, clean with dry non-metal tools, use only gentle airflow if needed, and stop immediately if you see corrosion or liquid damage. If the cable still doesn’t seat or charging stays intermittent after careful dry cleaning, it’s a sign the problem may be more than lint—at that point, professional service is the safer, faster fix.
Frequently Asked Questions
What causes lint to build up on a charging cable?
Lint builds up on charging cables because fibers from pockets, bags, clothing, towels, and bedding migrate onto the cable during everyday handling. The cable’s fabric or textured areas can trap loose particles, and the charging port connection point can collect debris over time. If you notice reduced charging speed or a loose connection, accumulated lint may be preventing a clean electrical contact.
How do I clean lint out of a charging cable safely?
First, unplug the charger and let the cable dry completely if it got exposed to moisture. Use a dry, soft-bristle brush or a wooden toothpick/plastic pick to gently remove lint from the connector area—avoid metal tools that could damage pins or the port. For stubborn debris, lightly brush the connector and use compressed air in short bursts while keeping the nozzle at a safe distance.
Why does lint on a charging cable cause charging problems?
Lint can interfere with the physical contact between the plug and the charging port, leading to intermittent charging, slow charging, or frequent “connection” notifications. Even small fibers can create resistance, block part of the contact surface, or encourage corrosion if combined with moisture. Cleaning lint from the connector often restores a more stable connection and more reliable power delivery.
Best way to prevent lint from collecting on charging cables?
Use a simple habit change: keep chargers in a pouch or cable organizer instead of loose pockets or handbags. Wipe the cable connector area regularly with a dry microfiber cloth and avoid wrapping cables around lint-prone items like towels. If you store cables for travel, consider using a velcro strap and keeping connectors facing outward to reduce fiber transfer.
Which tools are best for removing lint from a charging port or connector?
The safest options are a dry soft-bristle brush, compressed air, and a plastic toothpick or wooden pick for careful spot removal. A microfiber cloth helps clear surface lint without stressing the connection points. Avoid needles, metal probes, and harsh liquids like alcohol directly in the port, since they can damage contacts or leave residue—use only minimal moisture if a manufacturer recommends it.
📅 Last Updated: November 01, 2026 | Topic: What Causes Lint on a Charging Cable? (And How to Clean It) | Content verified for accuracy and freshness.
References
- Lint
- Clothes dryer
- Electrical contact
- particle contamination electrical contacts – Search Results – PubMed
- electrical connector cleaning contamination – Search Results – PubMed
- contact resistance contamination dust – Search Results – PubMed
- https://www.britannica.com/science/lint
- https://scholar.google.com/scholar?q=lint+charging+port+debris+cleaning Google Scholar
- https://scholar.google.com/scholar?q=particle+contamination+electrical+connectors+cleaning+compressed+air Google Scholar
