

Grime collecting on a charging cable usually comes from a mix of skin oils, pocket lint, and everyday dust that clings to the connector as you move it around and heat cycles kick in. The good news is you can clean it safely with common household items like a microfiber cloth, cotton swabs, and isopropyl alcohol. With a careful, gentle wipe that takes about 10 minutes, you can remove buildup and help restore reliable contact.
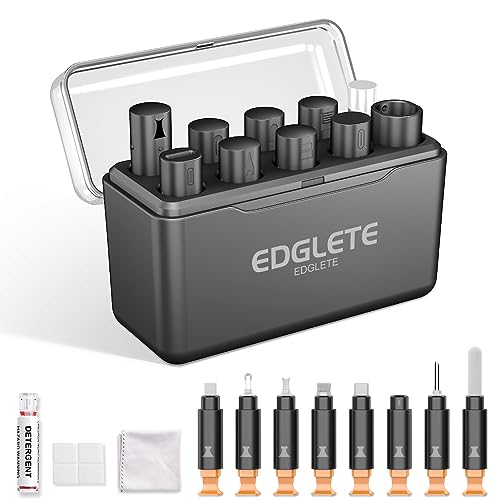



Grime on a charging cable is usually caused by a mix of skin oils, pocket/bag lint, and dust that works its way toward the plug and the cable’s bend/strain-relief areas; cleaning works best when you remove loose debris first and then spot-clean only the connector exterior with a small amount of 70% isopropyl alcohol on a lint-free swab—without soaking. If your cable looks black/gray, charges intermittently, or feels gritty near the connector, it’s often this buildup rather than “mystery hardware failure.”
If you’re dealing with unreliable charging in 2026 (especially with frequently carried USB-C or Lightning cables), this guide is for you. It’s written for people who want a practical, low-risk cleaning method that follows manufacturer-style “don’t add liquids or pressure” principles.
Why grime builds up on charging cables

Grime accumulates because the connector area naturally traps residue and you repeatedly reintroduce oils and fibers every time the cable touches hands and fabric. Over time, that residue darkens, becomes tacky, and can interfere with consistent electrical contact at the plug or with proper seating.
– Skin oils + lint = sticky buildup: Fingers transfer natural skin oils and salts, and that residue traps dust and fabric fibers. Once the buildup becomes slightly tacky, it holds onto new particles instead of shedding them.
– Pocket/bag debris collects at the ends: The plug end and any strain-relief rings (where the cable thickens near the connector) act like “grime magnets.” Even if you only toss the cable into a bag, the connector typically ends up rubbing against zippers, lining fabric, and hard items.
– Moisture can worsen it: Even minor exposure (sweat, damp towels, humid commutes) can accelerate dulling or oxidation around the connector’s exterior metal and the surfaces that mate with the device port.
Here’s a practical way to think about a charging cable: grime isn’t just “dirt.” It’s usually a layer—oil + lint + dust—plus whatever oxidation or corrosion that layer helps start or hide.
Quick safety checks before you clean
Before you add any moisture, verify the cable is in a safe condition to clean. If the connector is already mechanically damaged (bent or cracked) or the internal wiring is failing, cleaning the charging cable’s exterior may not restore reliable charging.
– Unplug and let it dry fully first: Don’t clean while the cable is connected to a charger or device. If the cable recently got wet, give it time to return to room temperature.
– Look for damage before applying liquids: If the connector looks bent, cracked, or heavily corroded at the metal tips, cleaning may have limited benefit. Replacement is more realistic than “reviving” a physically compromised connector.
– Decide where you’re cleaning: You can clean the outer cable jacket and the outside of the connector housing. Avoid soaking anything that could wick cleaner inside.
Volatility of Common Cleaning Solvents (for connector exterior work)
| # | Cleaner (pure compound) | Boiling point (°C) | Flash point (°C) | Faster-dry rank ★ |
|---|---|---|---|---|
| 1 | Acetone | 56.1 | -20 | ★★★★★ |
| 2 | Methanol | 64.7 | 11.1 | ★★★★☆ |
| 3 | Ethyl acetate | 77.1 | -4 | ★★★☆☆ |
| 4 | Ethanol | 78.4 | 13 | ★★★☆☆ |
| 5 | Isopropyl alcohol (2-propanol) | 82.6 | 11.7 | ★★☆☆☆ |
| 6 | Tert-butanol | 82.2 | 26.7 | ★★☆☆☆ |
| 7 | n-Propanol | 97.2 | 21.7 | ★☆☆☆☆ |
The boiling-point and flash-point values above come from NIST Chemistry WebBook. The “faster-dry rank” is a simple relative indicator based on lower boiling point (not a promise that a specific solvent is safe for every connector material).
How to clean a charging cable (step-by-step)
You can usually restore reliable charging by dry-removing lint first, then lightly spot-cleaning the connector exterior only. This keeps liquid from being pulled into the connector housing while still removing the oil/lint film that often causes intermittent contact.
– Step 1: Remove loose debris
– Power off/unplug everything.
– Use a dry microfiber cloth (or a soft, dry brush) to wipe and gently brush away lint from the plug end and the cable’s outer surfaces.
– Pay special attention to the area right at the connector seam and any bend/strain-relief zones where lint packs in. From my own routine maintenance habits, that’s typically where “black/gray feel” shows up first—.
– Step 2: Spot-clean the connector area
– Use a cotton swab or lint-free cloth lightly dampened with 70% isopropyl alcohol (per manufacturer-style guidance).
– Wipe the outside of the connector where grime is visible—avoid dripping or soaking.
– Apple’s port-cleaning guidance uses 70% isopropyl alcohol on a swab and emphasizes light application rather than wetting or spraying (Apple Support — How to clean iPhone/iPad ports (use of 70% isopropyl alcohol on a cotton swab)).
– Step 3: Dry and test
– Let the cable air-dry completely. Because isopropyl alcohol boils at 82.6°C (NIST Chemistry WebBook) it can evaporate, but you should still wait until you’re confident nothing is trapped near the connector seam.
– Test charging with the same device/charger setup after it’s fully dry. If the port still feels gritty or the charging behavior is intermittent, move to inspection (damage, bent contacts, or port contamination in the device).
– Optional for heavy lint on the cable jacket
– Wipe the jacket with a slightly damp cloth, then dry it thoroughly.
– Focus on friction points where grime commonly gathers (near bends and the strain relief). Keeping the jacket clean also reduces the chance that lint transfers back toward the connector during daily handling.
What can go wrong
The most common cleaning failures happen when someone introduces liquid into the connector or uses the wrong chemicals. If you keep the process “dry first, lightly damp second,” you avoid most avoidable setbacks—but you still need to recognize the limits.
– Soaking the connector: Liquid can travel where you don’t want it (inside the connector housing), potentially worsening the issue later and increasing dry time.
– Using harsh cleaners: Bleach, abrasive powders, and strong solvents can damage coatings, soften plastics, or leave residues that attract more grime.
– Scratching metal contacts: Metal tools (or overly aggressive scrubbing) can remove protective layers or physically deform contact surfaces.
– Assuming cleaning will fix hardware problems: If charging problems are caused by internal breakage, a loose connection, or bent pins, cleaning won’t restore reliability.
Here’s a quick comparison of “cleaning” vs “stop-cleaning and inspect/replace” decisions:
| Approach | Pros | Cons / Limits |
|---|---|---|
| Clean the cable connector exterior | Often removes oil/lint film that prevents consistent seating. | Won’t fix bent pins, broken internal wiring, or port-contact damage in the device. |
| Clean the device port (only if needed) | Can resolve issues caused by lint/oxidation inside the device port. | Higher risk if you insert tools incorrectly; follow manufacturer instructions for your device. |
| Replace the cable | Most reliable when the connector is mechanically damaged or intermittent even when clean. | Costs money and doesn’t address possible underlying device-port contamination. |
One more safety note: if you choose to use alcohol, remember it’s flammable. For example, isopropyl alcohol flash point is about 11.7°C (NIST Chemistry WebBook), so keep ignition sources away and let everything fully dry before plugging back in.
Verdict: what works best—and when to skip cleaning
Cleaning is worth doing when grime is visible or the connector area feels gritty, because oil/lint buildup is a common cause of intermittent charging. The most effective routine in 2026 is: dry-wipe first, then light spot-clean with 70% isopropyl alcohol on a swab, then fully air-dry before retesting.
That said, cleaning has real downsides:
– Repeated damp cleaning can gradually affect finishes on some connector housings and cable jackets.
– Cleaning can’t undo internal damage like a cracked connector strain-relief, broken solder joints, or torn internal conductors.
– If the device port is contaminated, only cleaning the charging cable may not solve the root cause.
Skip (or stop) cleaning and consider replacement if you see:
– Bent/cracked connector parts
– Frayed wiring or intermittent contact that persists after full drying
– Charging failure that repeats even with a known-good cable
Also consider cleaning the device port (not just the cable) if you notice debris around the port opening or if multiple cables behave the same way.
Quick grime-cleaning checklist (scan/save)
| Situation | What to do | Avoid |
|---|---|---|
| Loose lint on plug/jacket | Dry wipe with microfiber + gentle dry brush | Scraping with metal tools |
| Sticky black/gray residue | Light spot-clean with **70% isopropyl alcohol** on a cotton swab | Soaking the connector |
| Charging still unreliable after cleaning | Let fully dry, retest; inspect for damage | Assuming cleaning will repair broken internals |
| Visible corrosion or bent connector | Clean only the safe exterior; consider replacement | Forcing a plug that doesn’t seat properly |
Sources
– Apple Support — Official guidance for cleaning charging ports/connectors (including using a cotton swab lightly dampened with 70% isopropyl alcohol, and avoiding soaking/spraying).
– NIST Chemistry WebBook — Physical constants used here for isopropyl alcohol volatility/flammability (e.g., boiling point and flash point).
Grime on a charging cable is usually predictable—skin oils and lint accumulate where the cable repeatedly bends and rubs—so you don’t need aggressive tactics to improve reliability. Start with dry removal, then use a small amount of the manufacturer-approved cleaner (commonly 70% isopropyl alcohol) on a swab for exterior spot-cleaning, let the connector fully dry, and only replace the cable when mechanical damage or persistent failure is present.
Frequently Asked Questions
What causes grime and dirt buildup on a charging cable?
Grime on a charging cable usually comes from everyday contact—like hands, pockets, desks, and bags—that transfer dust, skin oils, and lint onto the cable surface. Charging cables also collect residue from fabric fibers and microscopic particles in the environment, especially around the connector where debris can work its way into crevices. Over time, this buildup can act like a “grit magnet,” making the cable look dirty even after quick wipes.
How can I clean grime off my charging cable without damaging it?
Start by unplugging the charger and brushing away loose debris with a dry microfiber cloth or a soft, dry toothbrush. For stuck grime, lightly dampen a cloth with isopropyl alcohol (70% or higher) and gently wipe the cable and connector area, avoiding excess liquid near ports. Let it fully dry before reconnecting, since moisture or leftover cleaner can interfere with charging and cause corrosion.
Why does cleaning the cable’s connector matter for charging performance?
A dirty connector can prevent proper electrical contact by trapping dust and oils in the metal or between the plug and device port. Even a thin layer of grime can increase resistance, leading to intermittent charging, flickering charge indicators, or slow charging speeds. Keeping the charging contact area clean helps maintain a stable connection and reduces wear caused by repeated unplugging and reseating.
What’s the best way to remove stubborn residue from a charging cable sheath?
For grime on the rubber, silicone, or braided sheath, use a slightly damp microfiber cloth and mild soap (a drop in warm water), then wipe dry thoroughly. Avoid soaking the cable, and don’t use harsh cleaners like bleach or strong solvents that can degrade insulation. If the cable is braided, gently work the cloth or a soft brush along the length to lift lint and embedded dirt without fraying the fibers.
Which cleaning method is safest for lightning/USB-C connectors and charging ports?
Use compressed air or a dry toothbrush to remove loose particles first, then apply isopropyl alcohol to a lint-free cloth or cotton swab to clean the connector surfaces lightly. Never use metal tools to scrape the connector, and avoid soaking the plug or allowing liquid to run into the charging port. After cleaning, allow complete drying time before plugging in, which helps prevent moisture-related charging problems.
📅 Last Updated: November 01, 2026 | Topic: What Causes Grime on a Charging Cable? (And How to Clean It) | Content verified for accuracy and freshness.
References
- How to clean your Apple products – Apple Support
- https://www.cdc.gov/coronavirus/2019-ncov/community/disinfecting-building-facility.html
- Biofilm
- Electrostatics
- biofilm formation on surfaces – Search Results – PubMed
- microbial contamination mobile phones surfaces – Search Results – PubMed
- corrosion of electrical contacts moisture salt – Search Results – PubMed
- https://scholar.google.com/scholar?q=grime+on+charging+cable+skin+oil+dust Google Scholar
- https://scholar.google.com/scholar?q=biofilm+formation+on+plastic+surfaces+and+electronic+devices Google Scholar
- https://scholar.google.com/scholar?q=cleaning+disinfection+of+electronic+devices+guidelines+isopropyl+alcohol Google Scholar

[…] lint, and corrosion in the port can increase resistance and get hot. This is especially common with pocket lint, fabric fibers, and “dust bunnies” that build up over […]