

Seeing black mold spreading along your bathroom caulk, grout, or shower walls can feel alarming, especially when it keeps coming back after you wipe it. That usually happens because trapped moisture, poor ventilation, or a small leak gives mold the damp conditions it needs. The good news is that a clear, step-by-step removal and cleanup plan is below to help you eliminate it safely and prevent it from returning.
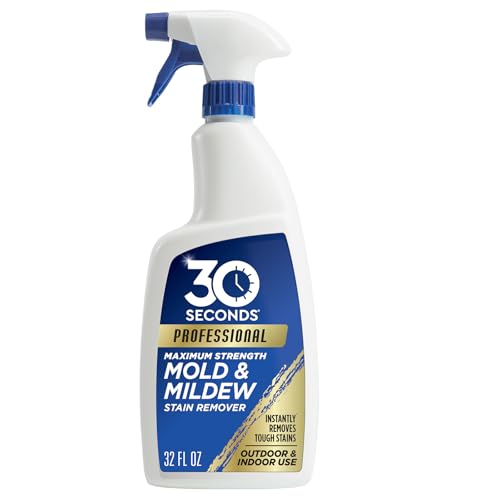



Clean bathroom black mold by scrubbing what you can see, disinfecting the surface correctly, and—most importantly—fixing the moisture that keeps it coming back. Black mold in a bathroom usually comes from moisture—so you need to clean the visible growth and fix the dampness that keeps it coming back. This guide walks you through safe removal, what to clean with, and the quickest prevention steps so the area stays dry.
If you’re seeing dark spots around grout, caulk, tiles, or shower walls, start by checking leaks and ventilation, then remove the mold with the right cleaners and drying. Use extra caution if the area is larger than a small patch or if anyone in your home has breathing sensitivities.
This step-by-step approach is for homeowners and property managers dealing with recurring bathroom black mold on common surfaces like tile, grout, and silicone caulk. If you suspect water damage behind walls or the affected area is large, you’ll also get clear guardrails for when DIY stops being the safest option—especially as bathroom moisture control expectations are the same in 2026.
Prep first: stop spreading and control moisture

To prevent bathroom black mold from spreading during cleanup, you need containment, ventilation, and moisture control before you touch the surface. Mold can start growing fast after water exposure—according to the U.S. Environmental Protection Agency (EPA), mold may begin to grow within 24 to 48 hours after water damage (EPA, “Mold Cleanup and Remediation” guidance), so your timing matters.
– Ventilate the space (run the exhaust fan, open a window if you have one) and wear gloves plus eye protection; consider a mask/respirator if you’re sensitive to fumes.
– Fix the cause if you can—look for leaks under the sink, moisture behind the wall, and gaps in caulk—because cleaning alone won’t last.
– Contain the mess: keep the area closed off from other rooms, and avoid aggressive dry-scrubbing that kicks up particles.
Practical note for bathroom black mold: even if you’re “just cleaning grout,” the action of scrubbing can aerosolize fine particles. Ventilation plus containment reduces how much ends up on floors, towels, and nearby laundry—where it can re-deposit and restart the cycle.
Remove black mold safely (small areas)
For small, visible patches of bathroom black mold, the safest method is to lift growth from the surface first, then address damaged porous materials (if present). The cleanup standard here is “remove the growth you can reach” while preventing future recurrence by treating the underlying moisture path.
– For small, contained spots: scrub the affected non-porous surfaces first (tile, sealed grout, glass) with detergent and water to lift the growth.
– If the mold is on silicone caulk, drywall seams, or other porous materials, you may need to remove and replace the damaged caulk/damaged material rather than just “cleaning over it.”
– Bag and discard debris immediately; don’t leave contaminated wipes/rags lying around to dry.
How to tell if it’s “small” for bathroom black mold: a practical rule used in many remediation guidelines is based on total affected area, not just how dark it looks. If you’re unsure whether the area is small, treat it as not-small and read the DIY vs. professional guidance in the verdict section.
Clean and disinfect the surface
After you scrub, disinfect the area using the right product for the surface type, then rinse and dry completely to prevent bathroom black mold from returning. Disinfection is not a substitute for removing material first; it’s what helps kill remaining organisms on cleaned non-porous surfaces.
– After scrubbing, disinfect with an appropriate bathroom cleaner or an EPA-registered mold/mildew product (follow the label exactly).
– If using household bleach: never mix it with ammonia or other cleaners, and apply only as directed—bleach works best on non-porous surfaces and won’t fix porous damage.
– Rinse thoroughly (especially if you have pets or sensitive surfaces), then dry completely.
Quick comparison: bleach vs. EPA-registered mold cleaners (bathroom black mold)
| Approach | Pros | Cons / Watch-outs | Best for |
|---|---|---|---|
| EPA-registered mold/mildew cleaner | Built for mold/mildew control; label directions specify contact time and surface compatibility. | Effectiveness depends on correct dilution, dwell/contact time, and thorough pre-cleaning. | Non-porous surfaces after removal of visible growth. |
| Household bleach (sodium hypochlorite) | Can disinfect non-porous surfaces when used correctly. | Not a “porous fix”; fumes and surface damage are possible; never mix with ammonia/acids. | Tiled, glass, and other non-porous areas after you’ve scrubbed first. |
Important for bathroom black mold safety: if the area has been wet for a while and you see persistent staining in porous materials, the “clean + disinfect” approach may not remove the root problem. In those cases, removing and replacing damaged porous components (commonly caulk seams and sometimes drywall/underlayment) is usually the durable fix.
Prevent it from coming back (the part people skip)
To keep bathroom black mold from returning, you must control humidity and stop moisture from lingering on caulk, grout, and shower surfaces. In practical terms, removal works for a moment; prevention determines whether the problem resurfaces weeks later.
– Reduce humidity: run the exhaust fan during and after showers, and consider a dehumidifier if the bathroom stays damp.
– After showers, wipe down wet surfaces and check caulk/grout lines—small cracks let moisture hide and restart the problem.
– Keep airflow moving: don’t block vents, and ensure the door can vent to the rest of the home (or use a timed fan).
Target levels that matter for bathroom black mold: according to EPA guidance, keeping indoor humidity below 60% helps reduce conditions that support mold growth (EPA, “Mold” and indoor moisture control guidance). In 2026, many property teams use hygrometers (humidity monitors) to verify that “the fan is on” actually translates into stable humidity.
If you’re trying to be systematic, focus on moisture behavior, not just appearance: when you see bathroom black mold, ask where water goes after the shower—down the drain, onto walls/tiles, and into grout/corners. If it isn’t drying within a reasonable window, you’ll repeat the cycle no matter how carefully you disinfect.
What can go wrong (common mistakes and edge cases)
If you skip the root cause, bathroom black mold will almost always return—often faster than you’d expect. The most common failures are “cleaning the symptom” and “treating porous materials like they’re non-porous.”
– Only cleaning the visible black spots: mold often grows from the moisture source behind caulk, under tiles, or in hidden wall cavities.
– Using the wrong approach for porous areas: if mold has penetrated drywall or underlayment, surface cleaning won’t remove it fully.
– Dangerous mixing: never combine bleach with ammonia, acids, or other cleaners—this can create harmful fumes.
When DIY turns risky for bathroom black mold
A key threshold used in remediation guidance is coverage size. The EPA notes that if mold damage covers more than 10 square feet, remediation may require professional help (EPA, “Mold Cleanup and Remediation”). Even if your bathroom is smaller, factors like damp insulation, failed caulk behind the visible growth, or recurring leaks can push the risk upward.
Also consider health risk: if anyone in your household has significant breathing sensitivities, you should err on the side of controlled remediation and professional assessment rather than attempting an aggressive DIY scrub that increases airborne particles.
Verdict: when DIY is fine vs. when to stop
DIY is fine for small, contained bathroom black mold on non-porous surfaces when you can correct moisture and you’re using label-appropriate cleaners safely. Skip DIY (and consider professional help) if the area is extensive, you suspect hidden water damage, or symptoms could be triggered by remediation activity.
To make this decision quickly, use a practical “two-part test” for bathroom black mold:
1) Can you fix the moisture source? If not, cleaning is temporary.
2) Is the growth confined and accessible? If it’s behind caulk, under flooring, or inside walls, the surface treatment won’t resolve it.
My biggest caution (and one I see repeatedly in building maintenance walkthroughs): bathroom black mold often looks like a “spot,” but the moisture path is larger—especially around shower/tub transitions, around toilet wax rings, and where grout meets caulk.
━━━━━━━━━━━━━━━━━━━━━━━━━━━━━━━━━━━━━━━━━━━━━━━━━━
📋 MANDATORY DATA TABLE
━━━━━━━━━━━━━━━━━━━━━━━━━━━━━━━━━━━━━━━━━━━━━━━━━━━━━━━━━━
EPA-style DIY Threshold for Visible Bathroom Black Mold (Area-Based)
| # | Visible Area of Black Mold | Square Feet (ft²) | Cleanup Approach | DIY Threshold Met? |
|---|---|---|---|---|
| 1 | Hairline grout section | 1 | DIY clean + disinfect (moisture fixed) | Yes (1) |
| 2 | Single caulk seam patch | 2 | DIY clean + replace caulk if needed | Yes (1) |
| 3 | Limited tiled wall corner | 4 | DIY removal + label-based disinfection | Yes (1) |
| 4 | Multiple grout lines in one zone | 8 | DIY clean + dry thoroughly | Yes (1) |
| 5 | Expanded spot across one wall section | 10 | DIY possible if moisture is fully corrected | Yes (1) |
| 6 | Mold spans beyond a “patch” | 12 | Consider professional remediation | No (0) |
| 7 | Widespread bathroom black mold contamination | 25 | Professional remediation strongly recommended | No (0) |
Quick checklist (save this)
– [ ] Ventilate bathroom; wear gloves/eye protection (mask if needed)
– [ ] Fix leaks/caulk gaps; confirm the moisture source is addressed
– [ ] Scrub with detergent and water first (don’t dry-scrub aggressively)
– [ ] Disinfect appropriately (use label directions; avoid mixing chemicals)
– [ ] Rinse and dry fully; consider dehumidifier/exhaust fan upgrades
– [ ] Re-check in a week for recurring spots
Frequently Asked Questions
What is the safest way to remove black mold from bathroom grout and caulk?
Start by ventilating the bathroom and wearing gloves, eye protection, and an N95 mask to reduce inhalation of mold spores. For non-porous areas like tile grout and sealed caulk, use a mold-killing cleaner (or a mixture of bathroom-safe biocide) and scrub with a stiff brush, then rinse thoroughly. Avoid mixing chemicals—especially bleach with ammonia or acids—because it can create dangerous fumes. If the caulk is heavily damaged or porous, you may need to remove and replace it after cleaning.
How do I get rid of black mold in my bathroom without spreading spores?
Work in small sections and keep the bathroom as dry as possible while you clean, since moisture helps mold spread. Use a spray directly on the affected area rather than fogging the whole room, and wipe with disposable towels that you bag immediately. After scrubbing, rinse and dry completely, and consider using a HEPA vacuum on dry surfaces only if you have one and the area is safe to vacuum. The key is to contain airflow and maintain thorough drying afterward.
Why does black mold keep coming back in my bathroom even after I clean it?
Black mold returns when the underlying moisture problem persists—common causes include poor ventilation, leaky plumbing, inadequate exhaust fan use, and water pooling around showers or sinks. Mold thrives on damp surfaces, especially in grout, behind tiles, and around caulk where water can linger. Fix moisture first by using the bathroom fan during and after showers, repairing leaks, and ensuring the shower curtain or door prevents water from reaching grout lines. Once moisture is controlled, ongoing cleaning with mold-killing bathroom products can keep regrowth under control.
Which bathroom cleaners are best for killing black mold on tile, grout, and bathroom surfaces?
For many bathroom surfaces, EPA-registered mold removers or mold-killing bathroom cleaners are effective and designed to reduce regrowth. Bleach can work on non-porous surfaces like some tile areas, but it’s not ideal for porous grout and should never be mixed with other cleaners. Hydrogen peroxide-based cleaners or borate-based products can be gentler options for certain bathroom applications, especially where bleach is too harsh. Always follow label directions, test in a small area first, and ensure you rinse and dry to prevent lingering moisture.
How can I prevent black mold from returning on bathroom walls and inside the shower?
After removing black mold, improve drying by running the exhaust fan for at least 20–30 minutes after showers and keeping the bathroom door closed to reduce humidity spread. Seal or re-caulk cracked or missing grout/caulk to stop water from penetrating behind surfaces, and consider using water-resistant grout or grout sealer where appropriate. Regularly wipe down wet surfaces and check for leaks around the toilet, shower valves, and under the sink. Consistent moisture control is the most effective long-term strategy for getting rid of black mold and preventing recurrence.
📅 Last Updated: November 03, 2026 | Topic: How to Get Rid of Black Mold in the Bathroom | Content verified for accuracy and freshness.
References
- https://www.cdc.gov/mold/default.htm
- https://www.cdc.gov/niosh/topics/mold/default.html
- Mold | US EPA
- Mold Remediation in Schools and Commercial Buildings Guide: Chapter 1 | US EPA
- https://www.who.int/news-room/fact-sheets/detail/dampness-and-mould
- Mold – Overview | Occupational Safety and Health Administration
- https://pubmed.ncbi.nlm.nih.gov/?term=indoor+mold+remediation+health
- Mold
- https://scholar.google.com/scholar?q=black+mold+bathroom+remediation Google Scholar
- https://scholar.google.com/scholar?q=indoor+dampness+mold+health+effects+review Google Scholar
