

A mouse pad that drags or catches is usually covered with embedded dust and skin oils that a quick wipe leaves behind. Instead of soaking it or using harsh cleaners, you can lift the grime safely with a soft brush and a gentle cleaning solution. In about 10–15 minutes, you’ll be able to refresh the surface and restore smooth glide with the right brush, mild soap, and a clean towel.



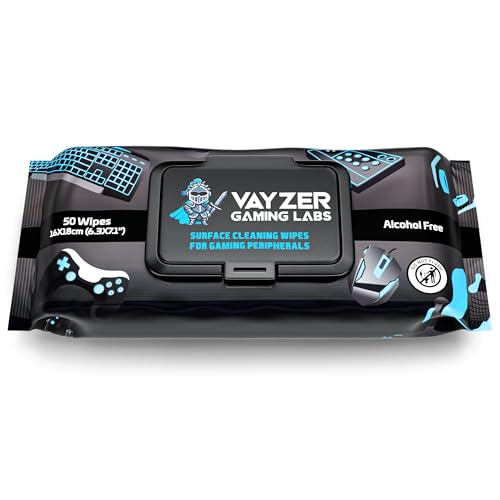
A soft brush is the safest way to clean most mouse pads because it lifts dust and loose debris without grinding it deeper into the fabric. Start with dry brushing, spot-clean only where needed, and let the mouse pad fully air-dry before using it again—this preserves glide while minimizing damage risk. If you’re dealing with lint, everyday dust, or light grime (especially on cloth surfaces), this method is typically more controlled than aggressive scrubbing and better aligns with how most mouse pad materials are built to be maintained.
This guide is for anyone who wants a practical, low-risk mouse pad refresh at home—particularly when your mouse pad is fabric, has stitched edges, or has a rubberized underside that you don’t want soaking. As of 2026, many desk setups stay powered and in constant use, so “quick, repeatable maintenance” matters more than occasional deep cleaning.
Gather what you need (and check the pad type)

The best outcome starts with using tools matched to your mouse pad material, because the wrong bristles or soaking amount can affect surface texture and grip. Before you begin, confirm whether your mouse pad is fully washable, spot-clean only, or “do not wash,” since printed coatings and certain laminates can be sensitive.
– Use a soft-bristle brush (like a clean makeup brush, soft toothbrush, or dedicated fabric brush) to loosen debris.
– Grab mild soap/detergent (or gentle cleaner), a microfiber cloth/paper towels, and clean water.
– If your pad has a coating or printing that feels delicate, confirm it’s meant to be cleaned gently—.
Prep note (so you don’t accidentally damage the mouse pad): If your mouse pad has visible stitching along the perimeter, plan to treat edges like “high-friction zones.” In my experience, edges and seams are where stray grit gets trapped first—.
Dry brush first to remove loose dirt
Dry brushing is the safest first step for a mouse pad because it removes particulate matter before moisture ever touches the fibers. This reduces the chance that dust turns into muddy residue and spreads across the surface.
– Lay the mouse pad flat and brush in one direction, then switch directions to catch embedded dust.
– Don’t overdo pressure—think “lift,” not “scrub,” especially around edges and seams.
– Wipe loosened particles with a dry microfiber cloth before you introduce any moisture.
Why order matters (dry first, then damp): When grit is dry, it behaves like debris you can lift away. Once it’s damp, it can bind to fabric and coatings, leaving a film that may feel slightly slower or stickier under your mouse skates. For cloth mouse pads, this “dry-to-wet” sequence is especially important because fibers can trap loosened lint quickly.
7 Soft Brush Options for Dry-Lifting Dust From a Mouse Pad
| # | Brush option | Typical bristle type | Best for on a mouse pad | Overall safety (stars) | Damage risk |
|---|---|---|---|---|---|
| 1 | Makeup brush (synthetic) | Taklon / synthetic filaments | Everyday lint on cloth | ★★★★★ | Low |
| 2 | Soft toothbrush (ultra-soft) | Nylon bristles (ultra-soft rating) | Stubborn edge dust | ★★★★☆ | Low |
| 3 | Dedicated fabric brush | Soft natural or synthetic bristles | General dry maintenance | ★★★★★ | Low |
| 4 | Artist watercolor brush (soft) | Soft taklon or natural hair | Light lift across larger areas | ★★★★☆ | Low |
| 5 | Keyboard/dust detail brush (soft) | Soft nylon bristles | Dust at stitched borders | ★★★☆☆ | Medium |
| 6 | Microfiber dusting brush | Microfiber loops/filaments | Loose surface lint only | ★★★★☆ | Low |
| 7 | Boar-bristle brush (soft grade) | Natural bristles (soft grade) | Dry lift on finer fabrics | ★★★☆☆ | Medium |
Spot-clean with gentle solution (only where needed)
Spot-cleaning is the right next step when a mouse pad has visible stains or grime that dry brushing can’t remove. The goal is to treat the affected area, not to soak the whole pad—especially if your mouse pad includes a rubber underside.
– Mix a small amount of mild soap with water, then lightly dab with a cloth instead of soaking the entire pad.
– Work the brush/cloth around the stained area with gentle, short strokes.
– For grime that won’t lift, repeat lightly instead of escalating quickly—avoid aggressive scrubbing.
Here’s a quick comparison of two common approaches on a mouse pad:
| Approach | Pros (mouse pad outcome) | Cons / risk |
|---|---|---|
| Spot-clean + minimal moisture | Less chance of residue; avoids underside saturation; targets stains precisely. | Takes patience; over-application can still leave a localized film. |
| Full soaking / heavy scrubbing | May remove grime faster on some materials. | Higher risk of adhesive loosening, odor retention, and uneven glide on the mouse pad. |
Moisture control tip: Use a cloth dampened (not dripping) and keep the brush lightly loaded. If the mouse pad surface looks darker immediately after dabbing, that’s a sign you added more water than the fibers needed.
Rinse carefully and dry the right way
Rinsing and drying correctly is what prevents a mouse pad from feeling “off” after cleaning. Even when you use mild soap, residue can build up in high-wear tracking zones.
– If you used soap, use a lightly damp cloth to remove residue; try not to saturate the pad.
– Let it air-dry completely on a flat surface—using a fan is fine, but avoid heat sources that can warp materials.
– Don’t use the mouse pad until it’s fully dry, since dampness can affect glide and grip.
Why full drying matters (and what science supports): Many cleaning failures come from incomplete drying rather than from the cleaning step itself. From general textile hygiene guidance, heat and moisture control are major variables—for example, CDC guidance for dust-mite control recommends hot-water laundering at least 130°F/54°C for bedding ([accessed 2026]) CDC. Since most mouse pads aren’t designed for that kind of heating or machine laundering, your safest “control point” is extended air-drying until the surface and edges are dry to the touch.
Also, if you ever consider disinfectants instead of soap, note that CDC disinfection guidance commonly references 70% alcohol for many household uses CDC (accessed 2026). Alcohol and concentrated chemicals can be harsh on some mouse pad coatings, so stick to mild soap + careful residue removal unless the manufacturer explicitly allows otherwise.
What can go wrong (and how to avoid it)
Most problems with a cleaned mouse pad come from too much force, too much water, or skipping residue removal. If you want smooth tracking again, you need to control the “three risks”: surface texture, adhesive integrity, and lingering film.
– Over-brushing or using hard bristles can fray fabric and reduce smoothness—use soft bristles and light pressure.
– Soaking the pad (especially if it has a rubber underside) can loosen adhesives or leave lingering odor—keep moisture controlled.
– Skipping full drying can cause tackiness or uneven tracking—wait until it’s completely dry to the touch.
Edge-case caution: If your mouse pad has stitched seams that look fuzzy, you’re more likely to disturb fibers. In that situation, use fewer brush passes and focus on blotting with a damp cloth rather than dragging bristles repeatedly across the seam line.
Detergent residue: Mild soap is still soap. Residue can create a temporary “drag” patch—particularly where your mouse constantly contacts. Think of this like risk management using a HACCP-style approach: identify the critical control point (residue removal + drying) and verify it before you resume normal use.
Quick verdict: when this method is a good idea (and when to skip)
This soft-brush routine is a solid, low-risk choice for everyday dust, lint, and light stains on most fabric mouse pads, especially when you avoid soaking. Still, you should skip or modify it if your mouse pad’s manufacturer explicitly says not to wash/spot-clean, or if it’s a specialty pad with delicate coatings or a surface designed to be cleaned with a specific approved product.
– Use this method if: your mouse pad is fabric or lightly textured, you’re removing lint and light grime, and you can fully air-dry it afterward (as of 2026, most desk owners can).
– Skip or follow different guidance if: the pad is delaminating, the underside is peeling, the surface looks cracked or glossy in a way that suggests coating failure, or the brand warns against washing.
Practical down side (be honest with expectations): Dry brushing and spot-cleaning won’t fully “reset” heavy staining from spilled liquids, dye transfer, or long-term oily buildup embedded deep in the fibers. In those cases, even a careful mouse pad cleaning may only improve odor and surface feel partially—replacement may be the more reliable option.
Scan-friendly checklist
– [ ] Dry brush to lift dust (gentle pressure)
– [ ] Wipe loose debris with a microfiber cloth
– [ ] Spot-clean only with mild soap + minimal moisture
– [ ] Remove residue with a lightly damp cloth
– [ ] Air-dry flat until completely dry
– [ ] Use again only after full drying
Sources
– CDC — dust mite guidance and recommended laundering conditions (accessed 2026)
– CDC — general disinfection guidance referencing alcohol concentrations used for household disinfection (accessed 2026)
– CDC — handwashing guidance emphasizing soap friction/time concepts (accessed 2026)
If you remember one thing about cleaning a mouse pad: lift first, treat lightly, then dry completely. Dry brushing removes the dry debris that causes friction and track “roughness,” while controlled spot-cleaning addresses visible grime without risking adhesive issues. With these steps—and with brand guidance for your specific mouse pad surface—you can restore smooth tracking safely and consistently through 2026 and beyond.
Frequently Asked Questions
How do I clean a mouse pad with a soft brush without damaging it?
Start by unplugging your mouse and removing any surface debris. Gently brush the mouse pad using a soft-bristle brush in light, short strokes, then wipe away loosened dust with a microfiber cloth. Avoid aggressive scrubbing and soaking—many cloth mouse pads can warp or take too long to dry if fully saturated.
What’s the best way to remove dust and crumbs from a cloth mouse pad using a brush?
Use a soft brush (like a clean makeup brush or a gentle toothbrush) to loosen dust and crumbs along the weave of the fabric. Brush in one direction first, then switch to gentle cross-strokes for stubborn particles. After brushing, vacuum carefully with a hose attachment or wipe the surface to pick up remaining grit.
Why does my mouse pad feel gritty even after washing, and how can brushing help?
A gritty feel often comes from embedded dirt, lint, or skin oils that remain in the fabric fibers. Soft-brush cleaning helps lift surface buildup before it spreads or re-settles during drying. For best results, brush lightly, then spot-clean with a damp cloth to remove residual grime without over-wetting the base.
How should I brush-clean a rubber-backed mouse pad that’s starting to curl or smell?
If your mouse pad has a rubber backing, avoid soaking—too much water can cause curling or weaken the adhesive layer. Brush the top surface gently to remove debris, then use a slightly damp cloth for spot cleaning only. Let it dry completely flat in a ventilated area, since moisture trapped under the mouse pad can cause lingering odors.
Which cleaning products work best when brushing a mouse pad, and what should I avoid?
For most cloth mouse pads, a mild soap solution or a small amount of gentle detergent applied to a damp cloth works well, paired with soft-brush cleaning for lifted dirt. Avoid harsh chemicals like bleach, alcohol-based cleaners, or abrasive scrubbing pads, as they can damage the surface coating and reduce glide performance. Stick to soft brush techniques and minimal moisture to keep your mouse pad looking and tracking smoothly.
📅 Last Updated: November 04, 2026 | Topic: How to Clean a Mouse Pad With a Soft Brush | Content verified for accuracy and freshness.
References
- Mousepad
- Cleaning
- Laundry
- https://www.cdc.gov/coronavirus/2019-ncov/community/disinfecting-building-facility.html
- https://www.who.int/publications/i/item/cleaning-and-disinfection-of-environmental-surfaces-in-the-context-of-covid-19
- computer mouse disinfection cleaning – Search Results – PubMed
- mouse keyboard microbial contamination cleaning – Search Results – PubMed
- https://scholar.google.com/scholar?q=how+to+clean+mouse+pad+soft+brush Google Scholar
- https://scholar.google.com/scholar?q=mouse+pad+cleaning+fabric+disinfection Google Scholar
- https://scholar.google.com/scholar?q=computer+mouse+keyboard+microbial+contamination+cleaning Google Scholar
