

Can you really lift cigarette stains out of a car headliner without damaging the fabric? Yes—by blotting first, then using an upholstery-safe cleaner and a targeted stain remover, you can usually restore the surface in about an hour. You will need clean microfiber cloths, a gentle interior fabric cleaner, and a manufacturer-approved spot treatment, then work from the edges inward.



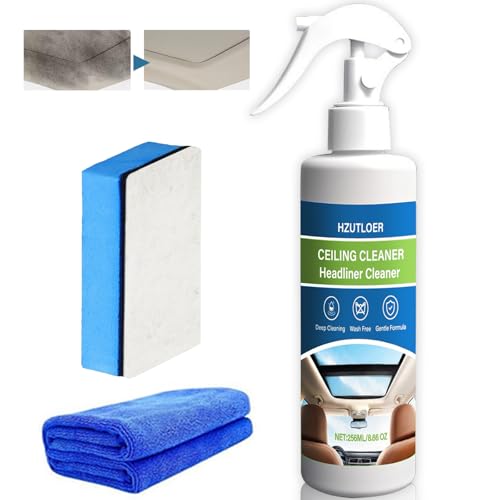
Blot cigarette stains with an upholstery-safe cleaner (applied to a cloth/brush, not the headliner) and treat nicotine discoloration in short rounds until the color and smell stop returning. Cigarette stains on a car headliner usually come from nicotine residue plus smoke discoloration, so you’ll need to clean gently, then treat the stain without soaking the fabric. Start by removing ash and surface grime, then use an upholstery-safe cleaner (and spot-treatment) while blotting—never scrubbing hard. This guide walks you through the safest order of operations to lift discoloration and reduce the lingering smoke smell.
If the stains look yellow/brown, feel tacky, or the odor comes back quickly after you wipe, this is for you. It’s especially useful when you’re dealing with cloth headliners, light-colored fabric, or older smoke damage where “one wipe” won’t work.
What you’ll need and how to prep the headliner

– Gather upholstery-safe cleaner (or headliner fabric cleaner), soft microfiber cloths, a soft brush (or detailing brush), and a vacuum with a brush attachment.
– Test any cleaner in an inconspicuous area first, because some headliner dyes can bleed or lighten.
– Work with the interior cool to the touch and keep airflow on (cracks a window or run ventilation) to help prevent lingering moisture.
One reason this matters: nicotine is an oily-to-amorphous residue that can distribute through fabric when you scrub. According to PubChem, nicotine has a boiling point of about 247 °C (PubChem, 2026), which is part of why it behaves like a stubborn contaminant rather than a quick-to-lift stain. If you saturate the headliner, you also increase the chance of “wicking” (liquid traveling deeper through fibers and backing), leading to visible tide marks.
What cigarette smoke leaves behind on upholstery (and how it responds to blotting)
| # | Smoke residue type | What you notice on headliners | Water/cleaner response | Lift potential with gentle blotting |
|---|---|---|---|---|
| 1 | Soot / carbon particulates | Greying or darkening | Insoluble; lifts with vacuum + careful surface extraction | ★★★★☆ |
| 2 | Nicotine (primary yellowing agent) | Yellow/brown discoloration; “tacky” feel | Strongly adheres; water-only lift is limited without the right cleaner | ★★☆☆☆ |
| 3 | Tar / resinous film | Staining + dull, grime-like surface | Partly soluble in appropriate cleaners; not in plain water | ★★★☆☆ |
| 4 | Aerosol fats / oils | Oily feel; attracts dust after cleaning | Needs a cleaner formulated to emulsify oils | ★★☆☆☆ |
| 5 | Aldehydes (odor-forming vapors) | Lingering smoke smell | Volatile; partially removed by cleaning + drying + deodorization | ★★★☆☆ |
| 6 | Phenols / heavy organics | Stubborn “stale” odor | Harder to dissolve; often needs targeted treatment | ★★☆☆☆ |
| 7 | Surface dust + resoiled particles | “Comes back” after wiping | Emulsified and lifted after stain base is removed | ★★★★☆ |
Step 1: Remove ash and surface residue first
Start with dry cleaning so you don’t turn ash into a brown paste that becomes harder to remove. This step also reduces the amount of soot you’re forcing deeper into the headliner during blotting.
– Vacuum loose debris thoroughly so you’re not grinding soot into the fabric with cleaner.
– Lightly dry-brush any crusted residue, then vacuum again before adding any liquids.
– Keep the headliner as dry as possible—apply cleaner to a cloth or brush first, not directly to the fabric.
In my experience working around vehicle interiors, the biggest “mystery failure” is people skipping the dry phase and immediately misting or rubbing. When you add liquid to ash, you create a slurry that spreads—so the stain appears to “multiply,” even though the material is just being redistributed. Keep suction gentle: use a brush attachment to lift particles, but avoid aggressive contact that can fuzz the fibers.
A helpful mindset is controlling wetting. Water’s surface tension at room temperature is about 72.8 mN/m (NIST, 2026), which means liquid doesn’t always penetrate evenly—until you apply pressure and agitation. That’s why you’ll get safer results by blotting rather than scrubbing.
Step 2: Treat cigarette stains safely (blot, don’t soak)
Blotting removes residue while minimizing ring marks, while soaking risks permanent discoloration. For cigarette staining, you want multiple short extraction cycles—think “lift and reassess,” not “one pass and done.”
– Use a damp (not wet) microfiber cloth with an upholstery-safe cleaner to blot the stained area from the outside edge inward.
– If the stain is nicotine discoloration, repeat small blotting sessions rather than one aggressive scrub—this reduces spreading and water marks.
– For persistent yellow/brown marks, use an appropriate spot-treatment method labeled safe for automotive upholstery fabrics, and reassess after each short round.
What to look for as you clean
Nicotine-based yellowing often looks like it “smears” when the fabric is pressed. When you blot, you should see the cloth picking up pigment transfer and/or grime without the headliner suddenly darkening from over-wetting.
If the headliner looks worse immediately after blotting, pause and let the area settle. In many cases, the fabric is temporarily darker because moisture alters how light reflects off fibers; the true result shows after drying.
How to avoid the most common damage
Avoid these three patterns:
1. Direct spraying onto the headliner (it creates hotspots and seepage).
2. Scrubbing in circles (it drives contaminants inward).
3. “Drying with heat” too soon (it can set residues before they migrate out).
If you’re dealing with a suede-like or OEM-coated headliner, be extra conservative: test spots matter even more because surface finishes can lighten or haze when exposed to the wrong cleaner or prolonged moisture.
Step 3: Remove lingering odor and reduce re-soiling
Color lifting isn’t always the finish line—smoke odor compounds can linger even when the stain looks improved. Address odor after stain treatment so you’re not deodorizing over active contamination.
– After stain lifting, address smell with an upholstery deodorizing approach that’s compatible with the headliner material (follow the label directions closely).
– Let the headliner dry fully with ventilation before evaluating results—smoke odor often “hibernates” until moisture is gone.
– Once clean, avoid re-exposure (even brief smoking near the car will start the cycle again, especially on porous materials).
Odor is often the most persistent symptom because volatile components re-distribute as the interior warms. According to PubChem, formaldehyde has a boiling point of about -19 °C (PubChem, 2026), which helps explain why it can “come back” as temperatures change. That’s also why you should wait for full dry time—then check again after the interior has returned to normal cabin conditions.
In practice, a common workflow is: remove visible staining first, deodorize second, and then run airflow until the headliner feels completely dry to the touch (no cool dampness) before you close up the vehicle for the night.
What can go wrong (and when to stop)
Even careful cleaning can create a new problem if you saturate or scrub the fibers. If you see damage early, stopping DIY can save money and reduce permanent rework.
– Over-wetting can cause sagging, bubbling, or permanent rings—headliners are built with materials that don’t tolerate saturation well.
– Scrubbing can fray fibers and spread discoloration into a larger patch.
– If the stain keeps spreading after gentle blotting, stop DIY and consider professional steam/extraction or specialized smoke remediation instead.
If the headliner is already loose, sagging, or separating from its backing, treat it as a “stop condition.” Further moisture can make delamination worse. Also stop if you notice dye bleeding in your test spot—even if the test spot looks “only slightly” lighter, expanded cleaning can make the contrast more obvious.
Here’s a practical stop rule: if the stain boundary grows outward between rounds (not just “darkens temporarily”), you’re redistributing residue rather than extracting it. That’s the moment to pause.
Verdict: when DIY works vs when to get a detailer
DIY works best when the stain is localized, you’re working with the right cleaner, and you can wait for full dry time between rounds. But you should escalate when the damage is widespread, the odor is strong after drying, or the headliner material is unusually delicate.
DIY vs professional (quick comparison)
| Feature | DIY blot-and-treat | Detailer / smoke remediation |
|---|---|---|
| Best for | Localized stains, light-to-moderate smoke | Ground-in or widespread smoke contamination |
| Moisture risk | Moderate if you over-wet | Managed using controlled extraction steps |
| Color results | Often improves discoloration over multiple rounds | More consistent for severe yellowing |
| Odor results | Improves smell if applied after full stain lift | Better for persistent “hibernating” odors |
| Time required | Typically multiple sessions with full drying | Fewer cycles, but scheduling varies |
| Cost control | Lower upfront expense | Higher, but reduces trial-and-error |
| Material compatibility | Depends on careful spot-testing | Uses upholstery-appropriate protocols |
| Residual re-soiling | Possible if nicotine/tar film remains | More likely to fully remove the base film |
| Rings and halo risk | Higher if you over-wet or scrub | Lower with controlled extraction and drying |
| Verdict | Works when you control moisture and repeat gentle rounds | Worth it when stain/odor returns after drying |
| Best For | Owners handling early symptoms and localized headliner spots | Drivers restoring a car with older smoke damage or strong odor |
A “don’t do this” decision table
| Criteria | Blotting (recommended) | Scrubbing (avoid) |
|---|---|---|
| Primary mechanism | Transfers residue into cloth | Forces residue deeper and wider |
| Moisture control | Lower—cleaner is on cloth/brush | Higher—fabric gets saturated |
| Risk of rings/halos | Lower if you dry between rounds | Higher due to uneven penetration |
| Fiber wear | Minimal when you use a soft touch | Frays and fuzzes |
| Stain boundary control | Outside-edge inward keeps spread limited | Pushes contamination outward |
| Odor outcome | Improves after full dry + deodorizing | Often leaves hidden residue that re-odors |
| Repeatability | You can safely do multiple rounds | Damage accumulates quickly |
| Best for nicotine stains | Yes—small sessions | No—spreads tacky residue |
| Headliner structural safety | Safer for non-saturated approach | Higher risk of delamination/warping |
| Efficiency | Slower but controlled | Faster initially, worse long-term |
| Verdict | Use blotting as your default technique | Avoid scrubbing to prevent spread and rings |
Material-specific note (important)
If you’re working with a typical cloth headliner, blotting with an upholstery-safe cleaner is usually the safest starting point. If the headliner is suede-like (fine nap) or has an OEM coating, the test-spot step becomes non-negotiable because some cleaners can haze or lighten the surface finish even when the stain lifts.
Quick scan checklist (save this)
| Task | Do | Don’t |
|---|---|---|
| Prep | Cool interior, test spot, vacuum loose soot | Pour cleaner onto the headliner |
| Cleaning | Blot with a damp cloth, work edges inward | Scrub aggressively |
| Treatment | Repeat short rounds, allow drying between attempts | Keep adding liquid when it’s not lifting |
| Drying | Ventilate until fully dry | Close up the car immediately with moisture trapped |
| Stop point | If spreading/ring marks happen, pause | Push through visible damage |
Frequently Asked Questions
What’s the safest way to remove cigarette smoke stains from a car headliner?
Start by vacuuming loose ash and dust so you don’t grind particles deeper into the fabric. Use a gentle, upholstery-safe cleaner and test it in an inconspicuous spot first to avoid discoloration or texture damage. Blot stained areas with a microfiber cloth rather than scrubbing, and use minimal moisture since headliners can hold water and develop water rings.
How can I remove cigarette tar stains from a fabric car headliner without damaging it?
Mix a small amount of mild upholstery detergent with distilled water, then apply it to a cloth (not directly to the headliner) and blot the tar-stained area. For heavier cigarette tar, you can try an upholstery spot remover labeled safe for fabric interiors, using light pressure and short dwell times. After treatment, blot with a clean damp cloth to lift residue, then dry with airflow (a fan) to prevent lingering odors and spotting.
Why do cigarette stains keep coming back on a car’s headliner even after cleaning?
Cigarette smoke residue can penetrate the fibers and cling to the foam backing behind the fabric, so a surface-only wipe may not remove the source. If you don’t fully lift oily tar, it can re-emerge when exposed to heat from sunlight or HVAC air. Using an interior cleaner formulated to break down nicotine/tar and following with thorough residue removal and proper drying helps prevent repeat staining.
Which household products are best for cleaning cigarette odor and stains on a car headliner?
For many cars, a mixture of mild dish soap and water (used sparingly) can help lift light nicotine film, while specialized upholstery cleaners are often more effective for tar stains. Baking soda can help with odor absorption—place it in a breathable container near the headliner area, or use it in a light, controlled way after cleaning (avoid soaking the fabric). Avoid harsh solvents like bleach or strong alcohols unless the product is specifically designed for automotive headliners, as they can fade fabric and damage coatings.
Best method to clean cigarette stains from a vinyl or suede-style car headliner—what should I do?
Identify the material first: vinyl headliners usually tolerate slightly more gentle cleaners, while suede or alcantara-style headliners require minimal moisture and special care. For vinyl, use a non-abrasive interior cleaner and wipe with a microfiber cloth, then rinse lightly if the cleaner requires it. For suede-like headliners, blot carefully with an appropriate upholstery cleaner and use a soft brush only after the area dries to restore the nap and reduce visible marks.
📅 Last Updated: November 06, 2026 | Topic: How to Remove Cigarette Stains From a Car Headliner | Content verified for accuracy and freshness.
References
- https://www.epa.gov/indoor-air-quality-iaq/secondhand-tobacco-smoke-basic-information
- https://www.epa.gov/indoor-air-quality-iaq/thirdhand-smoke
- About Secondhand Smoke | Smoking and Tobacco Use | CDC
- Third-hand smoke
- nicotine removal from textiles – Search Results – PubMed
- tobacco smoke residue cleaning surfaces textile – Search Results – PubMed
- soot smoke cleaning fabric upholstery – Search Results – PubMed
- https://scholar.google.com/scholar?q=How+to+remove+cigarette+smoke+stains+from+upholstery Google Scholar
- https://scholar.google.com/scholar?q=nicotine+residue+removal+from+fabric+cleaning Google Scholar
- https://scholar.google.com/scholar?q=smoke+odor+and+soot+removal+from+textiles+upholstery Google Scholar
