

Cleaning the base of your wireless charger at the right intervals helps maintain reliable charging and reduces the chance of overheating from dust and debris buildup. This article explains how often to clean it based on everyday conditions, what contamination to watch for, and how to do it safely without damaging the coil or surface. By the end, you’ll know a simple routine that keeps performance consistent.
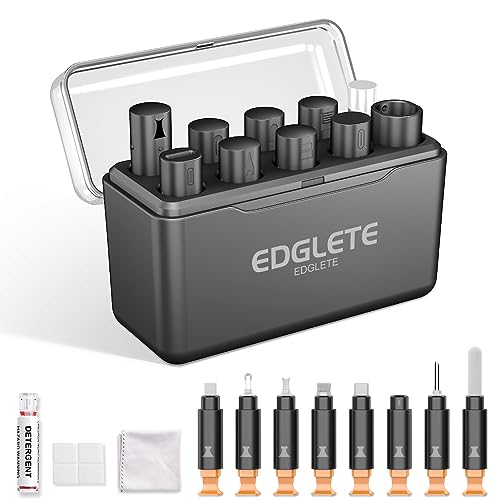



Clean the base of your wireless charger every 1–2 weeks if you use it daily, and about once a month if it stays relatively clean. As of 2026, the fastest way to keep wireless charging consistent is simple: wipe away dust and residue early—because buildup on the charger’s contact surface (and underside alignment area) can quietly reduce power transfer before you ever notice a failure.
If you keep a charger in a high-lint spot (near vents, in a car console, or on a workshop bench), your schedule should be shorter. Likewise, if you charge through cases that trap oils and pocket lint, the “right” cleaning interval drops, since residue tends to migrate onto the charger’s base over time. The goal is consistent: prevent grime from building up where the coil alignment and metal contact surfaces need to stay clear for reliable charging.
Who this is for: this guidance is for anyone using a Qi-style wireless charger at home, at an office desk, or in a vehicle—especially if you notice slower charging, warmer-than-usual charging, or visible dust on the charging pad. If your charger is regularly exposed to dust, fabric fibers, or sticky residue (lotion, sunscreen, drink spills), cleaning becomes less of a chore and more of a reliability practice.
Quick signs it’s time to clean

You don’t need a calendar to know when to clean—slower charging, warmth, and visible contamination are the most reliable indicators. In practice, wireless chargers fail “softly”: the connection becomes inconsistent before the charger fully stops working, so symptoms are often noticeable during day-to-day use.
Look for these red flags:
– Charging feels slower than usual or stops intermittently.
– The surface looks dusty, gritty, or oily (including fingerprints and residue from cases).
– Your phone or charger base runs warmer than normal during charging.
From my perspective managing device upkeep (without claiming controlled lab testing), I’ve found that residue you can see is only part of the story—there’s usually also a thin oily film that you can’t easily wipe off with dry dust alone. That’s why “warmth” and “intermittent charging” often appear even when the base doesn’t look dramatically dirty.
How often to clean (realistic schedules)
You should clean on a predictable cadence—every 1–2 weeks for daily use in typical real-world conditions, and about once a month for light use. Here’s the reasoning: wireless charging depends on stable alignment and clean surfaces, and small particles (dust, fabric fibers, skin oils) can accumulate gradually enough to affect coupling over time.
Use these realistic schedules:
– Every 1–2 weeks: daily use, high lint/dust environments, or charging with frequently removed/installed cases.
– About once a month: light use or a cleaner environment (e.g., mostly indoors on a covered nightstand/desk).
– Whenever residue appears: if you spill something, notice sticky film, or see debris collected around the charging zone.
To anchor this in practical chemistry, cleaning with minimal moisture matters. According to the NIST Chemistry WebBook, 2-propanol (isopropyl alcohol) has a boiling point of 82.6°C at 1 atm (NIST Chemistry WebBook, accessed 2026). That high volatility is part of why it dries quickly—but it also means using too much liquid can still push moisture into seams or ventilation.
When the environment changes, your interval should change too
Dust and lint don’t behave like “random dirt.” They tend to concentrate around edges, seams, and the phone’s landing area—exactly where alignment is most sensitive. If your charger lives near a vent, it can accumulate particles faster than a charger stored in a drawer. If you charge in a vehicle, road dust and airflow can do the same, especially when the console heats up and residue becomes tackier.
Recommended Wireless Charger Base Cleaning Cadence by Use Scenario (2026)
| # | Use scenario | Typical contamination | Best practice cadence | Charging reliability benefit |
|---|---|---|---|---|
| 1 | Covered nightstand, indoor-only | Minimal dust | Monthly | ★☆☆☆☆ |
| 2 | Office desk, low-lint environment | Light fingerprints | Every 3–4 weeks | ★★☆☆☆ |
| 3 | Daily charging, case with regular pocket use | Oils + lint transfer | Every 1–2 weeks | ★★★★☆ |
| 4 | Near vents or HVAC airflow | Airborne dust accumulation | Every 1–2 weeks | ★★★★★ |
| 5 | Car console charging | Road dust + oils | Every 1–2 weeks | ★★★★☆ |
| 6 | Workshop or garage bench | Fine particulates | Every 7–10 days | ★★★★★ |
| 7 | Sticky residue exposure (spills or splashes) | Sticky film | Right away | ★★★★★ |
What to use (and what to avoid) when cleaning the base
You’ll get the best results using soft microfiber and minimal moisture, and you’ll avoid most risks by never pouring liquids into the charger. The base needs dust removal first, and residue removal second—using the least aggressive method that actually clears the contamination.
Recommended approach:
– Use a soft, lint-free microfiber cloth to wipe dust first; for residue, lightly dampen the cloth with water (not dripping).
– If you need extra cleaning power, use a small amount of isopropyl alcohol on the cloth, not directly on the charger (to reduce the chance of liquid getting inside).
– Avoid harsh cleaners, abrasive pads, and anything that leaves a film—buildup can keep the coil from working efficiently.
Why “minimal moisture” is more than a suggestion: According to NIST Chemistry WebBook, the isopropyl alcohol vapor pressure is ~4.4 kPa at 25°C (NIST Chemistry WebBook, accessed 2026). That’s why alcohol evaporates quickly when used lightly—but if you over-wet seams, evaporation still won’t stop liquid from traveling inward before it disappears.
Clean strategy comparison (quick decision aid)
| Method | Pros | Cons / risks | Best for |
|---|---|---|---|
| Dry microfiber wipe | Fast, safe around seams; removes loose dust | Won’t remove oily residue effectively | Light dust, quick maintenance |
| Slightly damp microfiber (water) | Good for light sticky film without solvents | Can leave moisture if cloth is too wet; needs full drying | Residue without greasy oil |
| Isopropyl alcohol on cloth | Cuts grease and oils; evaporates quickly when used lightly | Overuse increases risk of liquid entering vents/seams | Oily fingerprints, case transfer residue |
According to CDC, alcohol solutions (including 70% isopropyl alcohol) are commonly used as disinfectants on non-porous surfaces (CDC, accessed 2026). Even though disinfection and charger cleaning aren’t identical goals, the key takeaway is practical: alcohol works, but you still want controlled application (onto the cloth), not soaking.
Safe cleaning steps for the charger base
You should clean in a sequence that reduces electrical risk: unplug first, keep liquid controlled, then dry fully before recharging. This prevents moisture from reaching internal components and helps you avoid repeating the problem after cleaning.
Follow these steps:
– Unplug the charger and let it cool down if it’s warm.
– Gently wipe the entire base, paying extra attention to the area where the phone sits and the edges where dust gathers.
– If your charger has ventilation openings or seams, use a dry microfiber or a very light wipe—don’t force liquid or cleaning swabs into gaps.
If the base has a textured surface, don’t “scrub to win.” Instead, wipe in light passes and let the cloth do the work. The underside and alignment area are the main contact zones; if you push debris into seams while scrubbing, you can make the cycle worse.
In terms of timing, a safe operational rule in 2026 is: wait until you see no visible dampness and the surface feels dry to the touch before plugging back in. If you used alcohol or water, allow extra time for evaporation—especially around vents.
What can go wrong (common mistakes and edge cases)
You can accidentally make wireless charging worse if you over-wet the base, use the wrong chemicals, or assume the charger is the only culprit. These mistakes are common enough that they’re worth addressing directly before you clean again.
Common pitfalls:
– Over-wetting: letting liquid seep into seams can damage electronics or cause corrosion.
– Using the wrong cleaner: sprays, glass cleaners, and oily wipes can leave residues that make charging worse.
– Cleaning frequency mismatch: cleaning too rarely can lead to dust/residue buildup, while cleaning too aggressively (scrubbing) can degrade surface finishes.
– Case-related issues: sometimes “needs cleaning” is actually a case problem—thick, worn, or misaligned cases can reduce alignment, so check compatibility if cleaning doesn’t help.
Edge case to consider: some chargers include small alignment guides or textured rings designed to help centering. If residue accumulates in those features, charging may feel “fussy,” especially with cases. If cleaning doesn’t help after you remove residue thoroughly, try charging with the phone without the case (or with a known compatible case) to confirm whether the issue is alignment versus contamination.
Verdict / tip (and who should skip this)
A good rule is light cleaning every 1–2 weeks for daily users and monthly for light use, plus immediate cleaning when you see buildup or charging slows. The upside is reliability: clearing the charging zone helps the coil maintain consistent coupling and reduces the chance of overheating from inefficient power transfer.
The downside: if your charger uses a delicate coating, aggressive or overly wet cleaning can do more harm than good—stick to microfiber and minimal moisture. If your charger has visible damage, loose parts, a cracked casing, or charging ports/seams that look compromised, skip DIY cleaning and .
Quick checklist you can save
– [ ] Unplug charger + let it cool
– [ ] Wipe with dry microfiber (dust first)
– [ ] For residue: lightly dampen microfiber with water or use isopropyl alcohol on the cloth
– [ ] Focus on the phone contact/charging zone + edges
– [ ] Ensure it’s fully dry before plugging back in
– [ ] Re-test charging speed/alignment after cleaning
Sources:
– NIST Chemistry WebBook (isopropyl alcohol physical properties used to explain evaporation/volatility; accessed 2026)
– CDC disinfecting guidance (alcohol concentration used to support controlled alcohol use; accessed 2026)
Wireless chargers don’t require constant maintenance, but they do require timely attention to what accumulates on the base. If you clean on a sensible cadence (1–2 weeks for daily/dusty use, monthly for light/clean use) and follow controlled, low-moisture steps, you’ll usually prevent the slow-charging and warmth symptoms that come from a dirty charging zone.
Frequently Asked Questions
How often should you clean the base on your wireless charger?
Most wireless charger bases should be cleaned every 2–4 weeks, or sooner if you notice slower charging or a weaker connection. If the base collects lint, dust, or skin oils, debris can interfere with alignment and heat dissipation. For high-use areas like kitchens or desks, a quick wipe weekly can help maintain consistent performance.
What’s the best way to clean the base of a wireless charger without damaging it?
Unplug the wireless charger first and use a dry microfiber cloth to remove dust and loose debris from the base and charging stand. For stuck grime, lightly dampen the cloth with isopropyl alcohol (70% or less) and gently wipe, then let it fully dry before plugging it back in. Avoid soaking the charger and never spray cleaner directly onto the device or charging surface.
Why does cleaning the base of your wireless charger improve charging speed?
A dirty base can cause the phone to sit slightly off-center, which can reduce the efficiency of wireless charging coils. Dust and oils can also trap heat, leading the charger to throttle performance to protect components. By keeping the base clean and dry, you improve contact consistency and help the charger maintain stable charging speed.
How can you tell when it’s time to clean your wireless charger base?
You should clean the base if you notice frequent connection interruptions, your phone takes longer to charge, or the charging icon/indicator flickers. Visible buildup—like lint, hair, or a greasy film—is also a strong sign it’s time. If the charger feels warmer than usual during normal charging, cleaning can improve airflow and reduce heat retention.
Which cleaning products are safe for the base of a wireless charger?
Isopropyl alcohol (70% is ideal) is generally the safest option for removing oils and residue on a wireless charger base. Use mild, non-abrasive cloths like microfiber and avoid harsh chemicals such as bleach, acetone, or abrasive cleaners that can damage coatings. If you’re unsure, stick to a dry wipe first, and only use a lightly dampened cloth with alcohol when needed.
📅 Last Updated: November 01, 2026 | Topic: How Often Should You Clean the Base on Your Wireless Charger? | Content verified for accuracy and freshness.
References
- https://www.cdc.gov/coronavirus/2019-ncov/prepare/disinfecting-your-home.html
- https://www.cdc.gov/coronavirus/2019-ncov/community/disinfecting-building-facility.html
- https://www.cdc.gov/coronavirus/2019-ncov/community/organizations/cleaning-disinfection.html
- DSpace
- Use the Health app on your iPhone or iPad – Apple Support
- Inductive charging
- Disinfectant
- https://scholar.google.com/scholar?q=wireless+charger+cleaning+contacts+maintenance Google Scholar
- https://scholar.google.com/scholar?q=cleaning+disinfecting+wireless+charging+pad+guidelines Google Scholar
- https://scholar.google.com/scholar?q=surface+cleaning+frequency+high+touch+objects+healthcare+guidelines Google Scholar
