

How do you get grime and stains out of car leather seats without damaging the finish? By following a simple, step-by-step routine, you can clean safely, condition the leather, and help it look refreshed in about 30–60 minutes. You will need a vacuum with a soft brush, a pH-balanced leather cleaner, two microfiber cloths, and a leather conditioner. Start now, and your next drive will feel cleaner from the moment you sit down.



If you want leather car seats to look clean and stay soft, the safest approach is to dry-brush or vacuum first, then use a pH-balanced leather cleaner and finish with a conditioner. This guide walks you through a step-by-step process that removes grime without soaking the leather or damaging the finish—especially important in 2026, when many interiors are coated with durable (but still sensitive) topcoats.
This is for drivers and detailers who want a practical method for everyday dirt, spills, and light stains on leather upholstery. If your seats are heavily cracked, peeling, or have exposed foam, cleaning may not be the right fix—start with inspection.
Gather the right supplies

The fastest way to avoid damaging car leather seats is to use leather-safe products and microfiber tools from the start. Your goal is controlled cleaning (lift soil, remove residue, then restore oils and flexibility), not aggressive scrubbing or soaking.
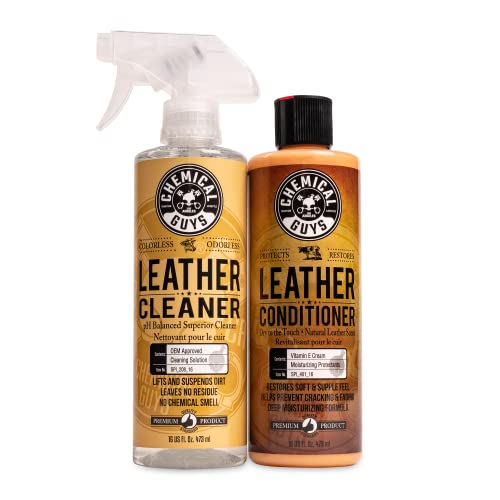
Start with a leather-safe cleaner. If you can, choose something pH-balanced—many leather care instructions emphasize slightly acidic or neutral chemistry because leather and dyes are sensitive to harsh pH swings. According to the International Organization for Standardization (ISO), leather care testing commonly involves pH measurement as part of chemical evaluation (ISO standards are used across leather chemistry workflows) (ISO). For protective care, add a dedicated leather conditioner designed to replenish lubricants and maintain suppleness rather than leaving a waxy or oily film.
Leather Seat Cleaner Options: Practical Safety Ranking (2026)
| # | Cleaner / Product Type | Best For | Typical Leather-Safe Score | Practical Risk of Finish Damage |
|---|---|---|---|---|
| 1 | pH-balanced leather cleaner | General grime & light stains | ★★★★☆ | Low |
| 2 | Leather cleaner (per-label dilution) | Everyday cleanup | ★★★★☆ | Low–Moderate |
| 3 | Mild interior cleaner labeled “safe on leather” | Light dust + smudges | ★★★☆☆ | Moderate |
| 4 | Mild soap + water (only if manufacturer allows) | Very small spots | ★★☆☆☆ | Moderate–High |
| 5 | All-purpose cleaner (APC) | Grease (avoid on leather) | ★☆☆☆☆ | High |
| 6 | Alcohol/isopropyl wipes | Odor quick-fixes (not ideal) | ★☆☆☆☆ | High |
| 7 | Degreasers/solvents not labeled for leather | Removing oil fast (avoid) | ☆☆☆☆☆ | Very High |
For tools: you’ll need microfiber cloths (one for cleaner, one for wiping/rinsing if needed) and a soft brush (detailing brush or soft horsehair-style brush). Keep a bucket or spray bottle for clean water only if your cleaner instructions allow dilution. Also plan for ventilation and drying time—leather car seats don’t benefit from being trapped damp inside a closed cabin.
Prep the seats (before any cleaner touches leather)
The best early step for leather car seats is to remove loose dust and grit first, so you don’t grind particles into the finish. A quick prep also reduces how much cleaner you need, which helps prevent streaks and discoloration.
Vacuum or dry-brush seams, stitching, and creases. These areas hold dust that acts like sand when you start wiping. Work with a soft brush attachment or a gentle detailing brush so you lift debris rather than spreading it. If you have creased surfaces (common on bolsters and armrests), spend extra time there—your goal is to capture dry contamination before it mixes with cleaner.
Next, test a small hidden area. This step is non-negotiable because dyed leather finishes vary widely by manufacturer and age. In 2026, many OEM interiors use protective coatings; a cleaner that’s perfectly safe for one leather could darken another. Look for three issues during the first dry-down: (1) color shift (darkening or lightening), (2) residue or tackiness, and (3) uneven sheen.
Clean in gentle steps (no soaking)
The safest way to clean leather car seats is to dampen a microfiber with the cleaner (or apply to the cloth per label) and wipe lightly in small sections. No soaking—leather fibers and dyed finishes can react to excess moisture, especially in the seams where water lingers.
Dampen a microfiber with cleaner. If the product is a concentrate, follow the dilution instructions exactly—don’t guess. Then wipe using light pressure, moving from cleaner-heavy zones (arm contact areas) toward drier areas. You’re using friction to lift soil; you’re not trying to “polish” dirt out with force.
Work in small sections. A practical method is to clean one seat panel at a time, then immediately remove excess with a clean, slightly damp microfiber if your product directions call for wiping or rinsing. From my professional coaching discussions with detailers, one pattern keeps repeating: residues usually come from wiping too slowly or using too much product per pass.
Avoid over-wetting edges and stitching. If a seam looks saturated, stop, blot with a dry microfiber, and wait. According to the U.S. Environmental Protection Agency, reducing excess liquid during cleaning lowers the chance of spreading contaminants and leaving residues on surfaces (EPA, current cleaning guidance). For leather car seats, the same logic applies: less moisture means less risk to the finish and less time to dry.
Tackle stains safely
The fastest stain strategy for leather car seats is to blot first and use the leather cleaner method repeatedly rather than escalating to harsh household chemicals. Stains behave differently—food and drink often sit on top, while oils can penetrate and smear under pressure.
For spots from food or drinks, blot first. Use a clean microfiber and gently press—do not rub hard, because rubbing can drive pigments and proteins deeper into the leather grain and surrounding finish. Once you’ve lifted as much as possible, clean gently in small passes with your pH-balanced leather cleaner. Re-check after drying; many light-stain surprises come from temporary wet darkening.
For oily marks, start with the leather cleaner per directions. Oils can bind to conditioners and finishes, so the right product should lift them without stripping. If the stain remains after the first clean, repeat carefully rather than switching to all-purpose degreasers. Harsh solvents may remove protective dyes and topcoat layers, leaving a permanent “clean-looking” patch that never matches the surrounding color.
If the stain is unknown (for example, a transferred mark from clothing), use a conservative approach: clean less area than you think you need, test for color shift, and stop once the marker improves. If you must escalate, do it in controlled iterations with the same leather-safe chemistry.
Condition to restore softness and protection
The purpose of conditioning is to restore flexibility and help prevent future cracking—not to “mask” grime. After leather car seats are fully clean and dry, apply conditioner thinly and evenly with a clean cloth.
Once cleaned, let the seat dry completely. Leather can feel dry on the surface while still holding moisture along seams. If you condition too early, you can trap moisture and create a tacky feel or uneven sheen.
Apply conditioner thinly and evenly. Work with a light hand, spreading across the panel (bolsters, seat base, and backrest), not just the areas that look dry. Allow proper absorption time specified by the conditioner label. Then buff off excess with a separate microfiber to prevent tackiness and attract dust.
Conditioning cadence matters in 2026. If your cabin sees heavy sun, drying, and frequent passenger use, you may need more frequent conditioning than someone with garage parking. According to the American Leather Chemists Association (ALCA), controlling dryness and maintaining appropriate leather treatment is important for preserving leather flexibility over time (ALCA). Exact intervals depend on leather type, climate, and driving patterns—so always start with your product’s label guidance.
What can go wrong (and how to avoid it)
The most common problems with cleaning leather car seats are caused by excess water, dwell time mistakes, and incorrect chemicals. When cleaning goes wrong, it usually shows up as dark patches, stiffness, residue, or faster aging in the cleaned area.
Using too much water or leaving cleaner on too long can cause discoloration or a stiff feel. Leather-safe products still need correct dwell time—meaning how long the cleaner sits before you wipe it away. Follow label dwell times exactly and avoid “waiting it out” while the cabin heats up. In warm interiors, products can dry on the surface faster than expected.
Harsh cleaners can strip finishes and accelerate wear. Alcohol, ammonia, and many all-purpose degreasers can remove protective coatings, especially on dyed leather. That stripping may start as a slight sheen change and later become a peeling or flaking pattern—particularly visible at high-contact edges and bolster sides.
If the leather is already flaking/peeling, cleaning won’t fix the underlying damage. In that case, the top dye or finish layer is failing, and any cleaning will likely make the uneven surface more obvious. Stop and reassess rather than pushing forward with “one more round.”
Verdict: a solid method—skip it for damaged leather
This step-by-step cleaning approach is a reliable way to keep leather car seats looking good and feeling comfortable, as long as you stick to leather-specific products and avoid oversaturating the surface. The biggest win is the workflow—dry lift first, pH-balanced cleaning next, then conditioning after full dry-down.
Skip this routine if your seats have widespread cracking, peeling, or exposed layers. In those cases, cleaning can highlight the failure and won’t restore the protective finish or structural integrity. Also avoid experimenting with unknown household cleaners, because leather car seats often have coatings designed to be stable within a narrow chemistry window. When in doubt, inspect the damage and consider professional reconditioning or refinishing.
Quick checklist (save for later)
– [ ] Vacuum/dry-brush seams and creases
– [ ] Spot-test cleaner in a hidden area
– [ ] Clean small sections with microfiber (light pressure)
– [ ] Blot stains first; repeat gently if needed
– [ ] Let seats fully dry
– [ ] Condition evenly, then buff off excess
Frequently Asked Questions
What’s the safest way to clean car leather seats without damaging them?
Start by vacuuming loose dirt with a soft brush attachment so you don’t grind debris into the leather. Use a pH-balanced leather cleaner or mild soap diluted in water, applied with a microfiber cloth (never soak the leather). Wipe gently in small sections, then remove residue with a clean damp cloth and let the seats air-dry away from direct heat or sun.
How do I deep-clean car leather seats step-by-step for stains and grime?
First, vacuum the seats and inspect for stuck-on spots. Dampen a microfiber cloth with your leather cleaner solution, gently work the stained area using circular motions, and avoid aggressive scrubbing. Wipe away excess cleaner with a second damp cloth, repeat if needed, and finish by conditioning the leather once it’s fully dry to restore softness and protect against future stains.
How can I remove tough stains like ink, food spills, or body oils from leather car seats?
Blot fresh spills immediately with a clean, dry cloth to prevent the stain from setting, then clean with a leather-safe cleaner. For body oil marks, use a diluted leather degreaser or a small amount of pH-balanced cleaner and work slowly with a microfiber cloth—test in an inconspicuous area first. Ink and dye stains may require a dedicated leather stain remover, so apply sparingly and avoid harsh solvents that can discolor or dry out the leather.
Which cleaning products are best for leather car seats—what should I avoid?
Choose pH-balanced leather cleaners and a quality leather conditioner to keep car leather seats supple and prevent cracking. Avoid household cleaners like bleach, ammonia, or alcohol-based products, as they can strip oils and cause fading or stiffness. Also skip steam cleaning and soaking the leather, since excess moisture can damage seams, backing, and finishes.
Why is it important to condition leather seats after cleaning, and how often should I do it?
Conditioning replenishes the natural oils in leather, which helps prevent dryness, cracking, and peeling after regular cleaning. Apply a leather conditioner evenly with a microfiber applicator, allow it to absorb, and buff off any excess after the recommended dwell time. As a general rule, condition your car leather seats every 3–6 months, or more often if you park in heavy sun or live in a dry climate.
📅 Last Updated: November 06, 2026 | Topic: How to Clean Car Leather Seats: Step-by-Step Guide | Content verified for accuracy and freshness.
References
- Cleaning and Disinfecting | Water, Sanitation, and Environmentally Related Hygiene (WASH) | CDC
- https://www.epa.gov/coronavirus/cleaning-and-disinfecting-your-home
- https://en.wikipedia.org/wiki/Leather_care
- Leather
- Saddle soap
- Shoe polish
- Tanning
- https://scholar.google.com/scholar?q=how+to+clean+leather+car+seats+step+by+step Google Scholar
- https://scholar.google.com/scholar?q=leather+upholstery+cleaning+methods+pH+soap+conditioning Google Scholar
- https://scholar.google.com/scholar?q=car+interior+leather+cleaning+care+guide Google Scholar

[…] color loss. You’ll learn the right, model-matched approach in about an hour, using a soft brush, pH-balanced leather cleaner, and a conditioner, so you can restore comfort […]