

In just five minutes, you can refresh a dull, grimy bathtub so it looks clean, feels smooth underfoot, and is ready for your next shower. You will follow a simple sequence of quick-prep, targeted scrubbing, and fast rinsing using supplies you likely already have or can grab easily—no complicated techniques required. Start now and you will be able to finish with a noticeably cleaner tub in one focused pass.



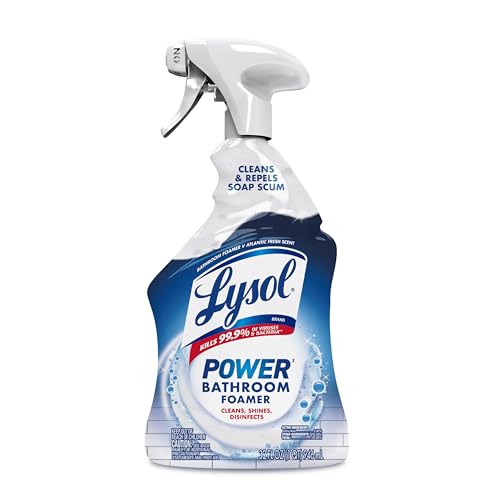
Clean a bathtub fast by loosening soap scum first, scrubbing only the dirtiest spots, and then finishing with a rinse and quick dry so buildup doesn’t rebound. With the right supplies and a simple order of steps, you can usually get a noticeably cleaner tub in about 5 minutes—especially for everyday soap film and light grime.
This approach is best for routine cleaning (light to moderate buildup) when you don’t have time for a deep scrub. If your bathtub has heavy mildew, mineral scale, or long-standing stains, you’ll likely need more time or a stronger approach.
What You Need Before You Start (2-Minute Prep)

Yes—you can keep a bathtub cleaning session to ~5 minutes by prepping correctly so you’re not “hunt-and-searching” mid-clean. The fastest bathtub results usually come from having the right tools and respecting the cleaner’s label instructions (including dwell time).
Start by assembling basics that won’t damage common tub finishes (especially acrylic and fiberglass):
– Gather a spray cleaner (or baking soda + mild cleaner), a non-scratch sponge/brush, and a microfiber cloth
– Ventilate the bathroom and protect your skin (gloves help, especially with stronger cleaners)
– Clear hair and loose debris so you’re not just spreading it around
Before you pick a cleaner, quick reality check: many “bathroom cleaners” are either alkaline (good for organic grime) or acidic (good for mineral scale). For example, household chlorine bleach is commonly labeled around 5–6% sodium hypochlorite in consumer products (U.S. EPA). Hydrogen peroxide products for home use are often 3% (CDC). And white vinegar is typically about 4–7% acetic acid (most bottles are near 5%)—so it’s great for mineral-light spotting but not a universal fix for deep stains (FDA). Those concentration differences matter for safety and how aggressively a cleaner can work on a bathtub surface.
Bathtub-Friendly Cleaner Types: What They Target (Typical Chemistry Fit)
| # | Cleaner type | Best for | Typical form | Soap-scum fit |
|---|---|---|---|---|
| 1 | Enzyme + surfactant bathroom cleaner | Soap film + everyday grime | Spray gel/foam | ★★★★☆ |
| 2 | Baking soda paste (bicarbonate) | Light scum + spot scrubbing | Paste | ★★★☆☆ |
| 3 | Oxygen bleach cleaner (percarbonate) | Organic mildew staining | Powder or spray | ★★★★☆ |
| 4 | Mild alkaline degreaser | Body oils + grime film | Spray concentrate | ★★★★☆ |
| 5 | Acid cleaner (descaler / vinegar-style) | Hard water rings + scale | Spray | ★★★☆☆ |
| 6 | Chlorine bleach (sodium hypochlorite) | Active mildew whitening (with caution) | Diluted liquid | ★☆☆☆☆ |
| 7 | Hydrogen peroxide spot cleaner | Gentle stain lifting + odor control | Ready-to-use | ★★★☆☆ |
Do the 5-Minute Clean: Fast Order That Works
The fastest path to a cleaner bathtub is applying cleaner to buildup first, then scrubbing only where it’s hardest (soap scum lines, corners), and finishing with a full rinse and dry. This “dwell → agitation → rinse → wipe” sequence reduces scrubbing time because the chemistry gets a head start on bathtub grime.
Follow the exact order below so you don’t waste minutes:
– Step 1: Spray cleaner on walls and the tub surface, focusing on soap scum lines
– Step 2: Wait briefly so the cleaner can dissolve buildup, then scrub only the worst areas
– Step 3: Rinse thoroughly and wipe dry to prevent quick re-soiling
Why this order works on a bathtub: soap scum is a mix of soap residues, body oils, and minerals that bond to the tub surface. Cleaner dwell time is what turns stubborn film into something you can lift with light pressure. In professional surface cleaning, this same logic is used—apply, let dwell, then use mechanical action only where needed. If you scrub first, you often smear residue outward, which makes the bathtub look dirtier even after you “cleaned.”
Practical timing tip: treat the 5 minutes like three phases rather than one. You’re aiming for (1) coverage, (2) short agitation in hotspots, and (3) a rinse-and-wipe finish.
Target Soap Scum and Grime Where It Hides
To clean a bathtub efficiently, aim your scrubbing energy at the zones where dulling and buildup always return. Instead of a full-surface scrub, use targeted circular motions and work small areas at a time.
Use these rules for soap scum and grime hotspots:
– Use gentle circular scrubbing on the areas that always get dull (drain surround, corners, and faucet backsplash)
– For textured surfaces, press the sponge lightly and work in small sections so you don’t miss grooves
– Don’t over-scrub with abrasive tools—save that effort for problem spots only
Acrylic and fiberglass bathtub surfaces can look “clean” but still feel rough after aggressive scrubbing, because micro-scratches trap residue. That’s why a non-scratch sponge or brush matters: it removes film without creating additional points for soap scum to cling.
If you’re dealing with light buildup, you usually see results faster when you focus on the thin soap ring lines near the drain and the vertical scum band around the faucet area. Those are the areas where water carries soap residue as it runs down the bathtub—so they’re also the areas where quick cleaning delivers the biggest visual payoff.
Drain, Caulk, and Edges: Quick Finishing Touches
The difference between “looks better” and “stays clean longer” is the final edge work: drain, caulk lines, and the border where water collects. Finishing correctly helps reduce residue that can dry back into soap film on your bathtub.
Use these finishing steps:
– Wipe around the drain and along the tub edges to remove loosened residue
– Check caulk lines for lingering grime; give those spots a quick scrub and rinse
– Dry the surface afterward to slow down water spots and soap film
Edges are a common bathtub-cleaning failure point because they’re not smooth. Caulk joints collect a thin, persistent layer of soap scum and hair. If you skip those areas, the tub can look clean on the flat areas while the corners still look hazy the next day.
Also check the drain area even if you can’t see much at first. Small residue clogs can also contribute to lingering odors, because organic matter stays trapped under film. A quick wipe plus a thorough rinse helps keep bathtub maintenance realistic—especially in a busy household.
What Can Go Wrong (and How to Avoid It)
The main risks with fast bathtub cleaning are chemical damage, ineffective cleaning, and leaving buildup behind at seams. Avoid harsh overuse, never mix incompatible chemicals, and recognize when 5 minutes can only be a surface clean.
Watch for these common mistakes:
– Overusing harsh cleaners can damage finishes over time—test a small, hidden area first
– Mixing chemicals can create dangerous reactions—never combine cleaner types unless the label explicitly allows it
– If mildew or mineral deposits are deeply set, 5 minutes may only “surface clean,” not fully remove the issue
Chemical compatibility matters. For example, chlorine bleach should not be mixed with acids (including many descalers) or ammonia-based cleaners because labels warn against generating hazardous fumes or reactions. If a bathtub cleaner’s label says “do not mix,” treat it like a hard stop.
Here’s a comparison view that often clarifies when to extend beyond 5 minutes:
| Approach | Best for | Pros | Cons / Limitations |
|---|---|---|---|
| 5-minute method (spray → dwell → spot scrub → rinse/wipe) | Light soap scum + everyday grime | Fast, good for routine maintenance, minimal effort | May not fully remove old mildew, rust, or heavy mineral rings |
| Deeper clean (longer dwell + targeted treatments) | Mildew growth, mineral scale buildup, stubborn stains | More complete removal, longer-lasting results | Takes more time; may require product-specific steps and extra rinsing |
If your bathtub has mineral scale rings, acidic cleaners can help—but the label and your tub finish type dictate whether it’s safe. A “works on tile” approach is not automatically safe for acrylic, cultured marble, or coated finishes.
Verdict: When This 5-Minute Method Is Worth It
This 5-minute bathtub cleaning method is worth it for routine maintenance because it focuses time where it matters: soap-scum loosening, hotspot scrubbing, and rinse-and-dry prevention. The tradeoff is that it’s not designed to erase deep mildew, thick mineral scale, or embedded stains in one pass.
It’s ideal for quick, regular maintenance and for tubs that aren’t heavily stained. Skip the 5-minute method (and consider a deeper clean) if you see widespread mildew, stubborn rust/mineral rings, or if the tub surface is delicate (e.g., certain coatings) and you’re unsure what products are safe to use. Use a non-scratch, bathroom-safe cleaner labeled for your tub finish.
If you need to stretch the outcome: treat the first day as “clean and stabilize,” then keep it from returning by drying after showers and doing a quick weekly reset. That’s how the bathtub stays visually clean without needing major labor every time.
5-Minute Bathtub Checklist (Save This)
– ☐ Spray cleaner on tub walls and the dirtiest soap-scum lines
– ☐ Wait briefly (per product label) so grime loosens
– ☐ Scrub only problem areas with a non-scratch sponge/brush
– ☐ Rinse thoroughly
– ☐ Wipe dry to reduce water spots and film
If you follow this checklist for your bathtub consistently, you’ll typically spend the longest part of the job only once—on the rinse and dry—rather than repeatedly scrubbing the same hazy zones.
Frequently Asked Questions
How can I clean a bathtub in 5 minutes without harsh chemicals?
Start by wetting the tub with hot water to loosen soap scum and grime. Spray a diluted all-purpose cleaner or a baking soda + vinegar paste in the worst spots, then let it sit for about 1 minute while you scrub with a non-scratch sponge. Rinse thoroughly and finish by wiping dry to prevent water spots and quick re-soiling.
What’s the fastest way to remove soap scum and limescale from a bathtub?
Focus your time on the buildup areas—usually around the faucet, tub edges, and drain. Use a cleaner designed for soap scum/limescale, apply it directly, wait 30–60 seconds, then scrub using a soft brush or sponge in short strokes. Rinse well and do one quick wipe-down so the bathtub looks clean right away.
Which tools and products work best for a 5-minute bathtub clean?
Use a non-scratch scrub sponge, a small scrub brush for corners, and a microfiber cloth for final wipe. For products, choose a fast-acting bathroom cleaner (spray works best for speed) and optionally an anti-limescale spray if hard water is an issue. Avoid abrasive pads on acrylic or fiberglass tubs to prevent scratches that make cleaning harder next time.
Why does my bathtub still look dirty after I scrub it quickly, and how do I fix it?
The most common reason is residue—soap scum and cleaning product left behind can dull the surface and look like “leftover grime.” Rinse with warm water longer than you think, then wipe with a microfiber cloth to remove any remaining film. For stubborn ring marks, target them directly with cleaner for 30–60 seconds before scrubbing again.
Best way to clean a bathtub drain and edges in 5 minutes?
Pour a small amount of cleaner directly around the drain and along the tub edges where grime collects, then scrub those lines quickly with a corner brush or old toothbrush. Let it sit briefly (about 1 minute), then rinse thoroughly so water carries away loosened buildup. Finish by wiping the edges dry to stop mineral deposits and keep the tub looking fresh.
📅 Last Updated: November 08, 2026 | Topic: How to Clean a Bathtub in 5 Minutes | Content verified for accuracy and freshness.
References
- https://www.cdc.gov/coronavirus/2019-ncov/community/disinfecting-building-facility.html
- Mold Clean Up Guidelines and Recommendations | Mold | CDC
- https://www.epa.gov/coronavirus/cleaning-and-disinfecting-your-home
- https://www.who.int/publications/i/item/cleaning-and-disinfection-of-environmental-surfaces-in-the-context-of-covid-19
- Cleaning
- Disinfectant
- cleaning and disinfecting bathtubs – Search Results – PubMed
- https://scholar.google.com/scholar?q=bathtub+cleaning+disinfection Google Scholar
- https://scholar.google.com/scholar?q=household+bathroom+cleaning+mildew+effectiveness Google Scholar
- https://scholar.google.com/scholar?q=environmental+surface+disinfection+contact+time Google Scholar

[…] option and a soft brush. You can finish the whole process in about 20–30 minutes, with a microfiber cloth, old toothbrush, cotton swabs, and a few non-scratch […]