

When you twist your faucet handles and the edges feel tacky or look dull with soap scum, you are seeing grime that can be cleaned without replacing parts. You can restore a smooth, neat finish in about 15–20 minutes with a soft cloth, warm water, mild dish soap, a toothbrush or cotton swabs, and either white vinegar or a gentle bathroom cleaner. Follow the steps, and your handles will look and feel clean again.
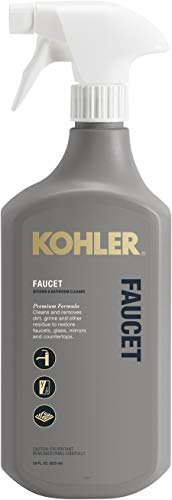



You can clean faucet handles safely by removing grime and mineral buildup with a gentle cleaner and the right soft cloth or brush—without damaging finishes. Start by identifying the handle type (metal, chrome, plastic) and using a non-abrasive method first; if buildup remains, step up to a mild vinegar solution for limited areas. In this guide, you’ll learn the safest way to clean, what to avoid, and how to keep handles looking fresh.
If your faucet handles are sticky, discolored, or leaving residue on your hands, this is for you. It works for most common household faucets, but you’ll want to check your manufacturer’s care instructions if you know your handle finish is special (like brushed nickel or plated surfaces).
Gather What You Need

Have the right tools ready before you start, because the wrong brush or cleaner can dull the finish quickly. For faucet handles, the best combination is soft microfiber cloths plus a gentle detergent, with vinegar saved only for stubborn mineral spots.
– Use a soft microfiber cloth and a soft toothbrush or small non-scratch brush for crevices.
– Choose a gentle cleaner (dish soap) and, if needed, vinegar for mineral spots—avoid harsh abrasives.
– Prepare clean water for rinsing and a dry towel to prevent streaking and water spots.
What each tool does (and why it matters for faucet handles)
Microfiber lifts oils and surface film without the “grit” effect you get from paper towels or rough shop cloths. A soft toothbrush is useful because it reaches around handle seams, button edges, and the curved underside where fingerprints and soap residue tend to gather. Clean water rinsing removes detergent and dissolved minerals so they don’t redeposit as the faucet dries. Finally, a dry towel helps reduce spotting—especially on chrome and polished finishes that show water marks fast.
Choose cleaners based on what you’re seeing on faucet handles
– If the residue feels oily, soapy, or tacky, start with dish soap and water.
– If the problem looks chalky, crusty, or “whitish,” mineral buildup is likely—then vinegar can help.
– If your faucet handles have discoloration that looks like corrosion, pitting, or peeling plating, stop and reassess—aggressive cleaning can worsen visible damage.
According to the U.S. Centers for Disease Control and Prevention (CDC), household “regular” bleach is commonly around 5–6% sodium hypochlorite (2024) CDC (2024): guidance on disinfecting with bleach. That’s precisely why you should avoid bleach on finished faucet handles: it’s both strongly alkaline/oxidizing and far too harsh for plated or lacquered surfaces.
Identify Your Handle Type (and Finish)
Match your cleaning approach to the handle material and finish, because faucet handles don’t all tolerate the same chemicals or scrubbing. When you know whether you have chrome, brushed metal, plastic, or painted finishes, you can clean effectively while minimizing dulling and wear.
– Look for clues like plastic vs. metal, or finishes such as chrome, brushed nickel, or painted surfaces.
– Treat plated or painted finishes more carefully: non-abrasive cleaners and minimal scrubbing are safest.
– If the handle has decorative parts or a visible logo, plan to clean around it gently rather than soaking or forcing cleaner into seams.
Quick identification tips for faucet handles
1. Chrome and polished metal: bright reflection, smooth surface, often shows scratches quickly.
2. Brushed nickel / satin finishes: less reflective; directional “grain” can be affected by rubbing.
3. Plastic or composite handles: usually matte, but can discolor if cleaned with strong solvents.
4. Painted or specialty finishes: often have a uniform color layer that can lift if you scrub too hard or use acidic cleaners broadly.
Why finish identification changes the method
Plated and painted faucet handles are protected by thin top layers. When you scrub aggressively—or use strong acids repeatedly—those layers can fade or lose their gloss. Brushed metal finishes are also “directional”: scrubbing across the grain can create uneven-looking streaks that are hard to reverse.
Clean the Handles: Basic Method (Safe First Pass)
Use a gentle soap-and-water pass first, because it removes most everyday film without stressing the finish. This is the best baseline for faucet handles: start mild, rinse well, then only target special spots if needed.
– Wipe off loose dirt with a damp cloth, then wash the handles with a mild dish-soap solution.
– Scrub only the textured areas and creases using the soft toothbrush—stop if the finish starts to look dull.
– Rinse with clean water and dry thoroughly, especially around buttons, caps, or where the handle meets the stem.
Step-by-step: the safest first pass on faucet handles
1. Remove surface dust. Dampen a microfiber cloth with warm water and wipe the handles to pick up loose grit. This matters because grit left on the surface can act like sandpaper during scrubbing.
2. Wash with mild dish soap. Mix a small amount of dish soap into warm water. Using the cloth, gently clean the entire visible handle surface.
3. Reach creases carefully. Use the soft toothbrush to clean around edges, knurling, and underside curves. Light pressure is enough—if you see the finish changing (dulling, whitening, or streaking), stop scrubbing immediately.
4. Rinse thoroughly. Wipe away soap with clean water on a fresh cloth. Avoid “soap haze,” which can make handles feel sticky later.
5. Dry completely. Buff with a dry towel, paying extra attention where the handle meets the stem (the joint area collects residue and water).
What “gentle” looks like (for faucet handles)
Gentle cleaning is about friction control, not just cleaner choice. If you can smell strong cleaner fumes, apply more technique (cloth and water) and less product. If you’re seeing new dull patches after brushing, you’re likely overworking the surface layer.
Remove Sticky Grime and Mineral Buildup
Target the cause—sticky residue usually needs degreasing, while mineral buildup needs a brief acid spot treatment. For faucet handles, the key is limiting exposure: keep liquids off openings and avoid soaking the faucet body.
– For sticky residue (soap scum or hand oils), repeat the gentle soap clean and pay extra attention to underside edges.
– For mineral deposits, dab a vinegar solution on affected spots and let it sit briefly, then wipe and rinse.
– Avoid soaking the entire faucet area; keep liquids away from openings where they could seep deeper.
Sticky residue on faucet handles (soap film and oils)
If the handle feels tacky even after you rinse, residue may be trapped in small creases:
1. Repeat the mild dish soap method.
2. Spend extra time on the underside and any “thumb ledges” where oils build up.
3. Rinse again and dry immediately.
Mineral deposits on faucet handles (chalky spots and scale)
If you see whitish or crusty spots:
1. Dab, don’t flood. Apply vinegar (or vinegar diluted with water) directly onto the mineral area using a cloth corner or cotton swab.
2. Let it sit briefly. Short dwell time is safer than long soaking—aim for a “brief soften,” then check.
3. Wipe and rinse. Remove loosened scale with a damp cloth and rinse with clean water.
4. Dry. This prevents mineral residue from re-hardening.
According to the U.S. National Institute of Standards and Technology (NIST), acetic acid (the main active in vinegar) has a pKa of ~4.76, which helps explain why it dissolves many carbonate mineral deposits (2024) NIST Chemistry WebBook (acetic acid properties). In practical terms for faucet handles, that chemistry is why vinegar can cut through scale—but it’s also why you should treat it as a short spot method, not an all-over soak.
How to prevent vinegar from traveling into faucet internals
Modern faucet stems can have openings and seams where liquids migrate. To protect faucet handles and valve components:
– Keep the cloth damp, not dripping.
– Avoid pooling around the handle base.
– Rinse promptly after spot treatment.
What Can Go Wrong (Common Mistakes)
Avoid finish-damaging cleaners and overexposure, because faucet handles can look worse before they look better. Most “failed cleanings” come from abrasives, long vinegar dwell times, or skipping drying.
– Using abrasive pads, powdered cleaners, or harsh chemicals can scratch or strip finishes.
– Letting vinegar sit too long can dull certain metals or damage seals if it migrates into joints.
– Skipping drying can leave water spots and make mineral buildup come back faster.
Common mistakes that affect faucet handles (and what to do instead)
Abrasive pads and powders can remove surface coatings faster than they remove mineral spots. Powder cleaners are especially risky on brushed finishes because micro-scratches can create permanent dull patches.
Too much vinegar is another frequent issue. Acids are helpful for scale, but prolonged exposure can soften certain protective finishes and encourage dulling—particularly on plated or lacquered surfaces. Also, if vinegar migrates into seams near the stem, it can stress seals over time (or simply accelerate residue build-up around the joint).
Comparison: cleaning approach vs. risk for faucet handles
Verdict: Best Approach, Downsides, and Who Should Skip It
For most faucets, the safest path is gentle cleaning first, then targeted vinegar only where minerals are visible. The downside is that stubborn buildup may take more than one round, and delicate finishes may require extra patience and lighter scrubbing.
Skip DIY cleaning or proceed more cautiously if your faucet has an unusual finish, visible damage, or frequent leaks—when in doubt, follow the manufacturer’s care guidance or .
Gather What You Need
Quick Checklist (Scan This Before You Start)
– [ ] Check handle material/finish (chrome, brushed metal, plastic, painted)
– [ ] Start with mild dish soap + soft cloth
– [ ] Use a soft toothbrush for crevices only
– [ ] Rinse with clean water
– [ ] Dry completely
– [ ] If mineral spots remain: dab vinegar briefly, then wipe + rinse
– [ ] Avoid abrasives and harsh chemicals
Finish Compatibility Guide for Cleaning Faucet Handles (2026)
| # | Method | Best for faucet handles | Typical contact | Finish safety |
|---|---|---|---|---|
| 1 | Mild dish soap + warm water | Everyday film & tackiness | 2–5 min | ★★★★★ |
| 2 | Microfiber wipe only (no scrubbing) | Light fingerprints | <2 min | ★★★★☆ |
| 3 | Vinegar dab on mineral spots | Chalky scale & spotting | 1–3 min | ★★★★☆ |
| 4 | Soft toothbrush + dish soap (crevices) | Seams, edges, underside curves | 2–5 min | ★★★★☆ |
| 5 | Baking soda paste (targeted) | Light scale only | 1–2 min | ★★★☆☆ |
| 6 | Melamine sponge (Magic Eraser-style) | Hard-to-remove film | 30–90 sec | ★★☆☆☆ |
| 7 | Bleach or strong oxidizers | Do not use on finishes | — | ☆☆☆☆☆ |
Frequently Asked Questions
How do I clean faucet handles without damaging the finish?
Start by wiping away loose grime with a damp microfiber cloth, then use a mild dish soap solution (warm water + a few drops of soap) to clean the handles. If your faucet is chrome, stainless steel, or brushed nickel, avoid abrasive scrubbers and harsh chemicals that can dull or strip the finish. Rinse thoroughly and dry with a soft towel to prevent water spots.
What’s the best way to remove hard water spots and soap scum from faucet handles?
For mineral buildup, apply a non-abrasive cleaner or a vinegar-based solution to a cloth, then let it sit on the handle for a few minutes before wiping. For stubborn hard water deposits, you can gently rub with a soft brush (like an old toothbrush) using the same non-scratching product. After removal, rinse well and dry to reduce the chance of spots returning.
Why do my faucet handles feel sticky even after regular cleaning?
Sticky faucet handles are often caused by residue from hand soap, lotion, cooking oils, or cleaning products that weren’t fully rinsed away. Clean the handles with warm water and a degreasing dish soap solution, then rinse thoroughly to remove any film. If the stickiness persists, check around the handle seams for trapped grime and wipe those areas carefully.
How can I clean around the faucet handle base and seams where grime collects?
Use a cotton swab or a soft toothbrush to reach the tight gaps between the handle and the escutcheon (the plate around the handle). Apply your cleaning solution to the swab, gently scrub, and then wipe away residue with a damp cloth. Dry the area afterward, because moisture trapped in seams can encourage scale and grime buildup.
Which cleaning products are safest for different faucet handle materials?
For most metal finishes, use mild soap and water or a pH-neutral bathroom cleaner to avoid damaging coatings. For chrome and stainless steel, non-abrasive cleaners and vinegar can help with mineral stains, but avoid scouring pads. For plated finishes or specialty coatings, test any product on a small hidden area first and steer clear of bleach, strong acids, and harsh abrasive powders.
📅 Last Updated: November 08, 2026 | Topic: How to Clean the Handles on a Faucet | Content verified for accuracy and freshness.
References
- https://www.cdc.gov/cleaning/index.html
- https://www.epa.gov/coronavirus/cleaning-and-disinfecting-your-facility-home
- https://www.who.int/publications/i/item/cleaning-and-disinfection-of-environmental-surfaces-in-the-context-of-covid-19
- Descaling agent
- Tap (valve)
- cleaning disinfection high touch surfaces – Search Results – PubMed
- https://scholar.google.com/scholar?q=how+to+clean+faucet+handles Google Scholar
- https://scholar.google.com/scholar?q=bathroom+surface+disinfection+high+touch+surfaces Google Scholar
- https://scholar.google.com/scholar?q=limescale+removal+faucet+chrome+handle Google Scholar

[…] mineral buildup, grime, or limescale dulls the flow at your faucet’s spout, it can feel like you have to live […]