

Your Mercedes-Benz leather seats can look showroom-clean again when you clean and condition them the way your model’s leather finish requires. This model-specific walkthrough helps you identify the correct care product, avoid common damage like residue and over-wetting, and finish with a protective, soft feel. Gather a microfiber cloth, a pH-balanced leather cleaner, and a compatible conditioner, then follow the steps tailored to your seat material.


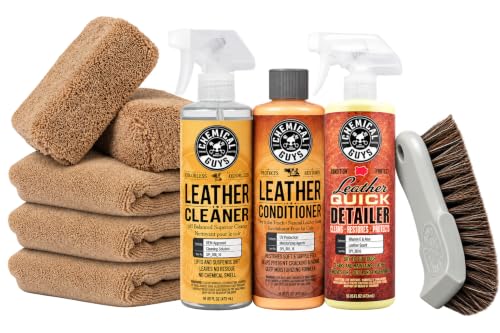

Clean Mercedes-Benz leather seats by using a pH-balanced leather cleaner, working in small areas, wiping with a damp microfiber, and finishing with a leather conditioner. The safest approach is to first confirm whether your Mercedes-Benz seats are real leather or MB-Tex/ARTICO-style leatherette, because surface coatings and absorbency change how—and how much—you should wet or treat the material.
If you’ve got visible grime, body-oil buildup, or dullness on your Mercedes-Benz leather, this is for you—especially if you’re not sure whether your seats are coated leather, have perforations, or were treated before. Use it when you want safer cleaning than household cleaners, and when you’d rather not guess about your exact model year/trim setup.
Identify your seat type (real leather vs. leatherette)

Mercedes-Benz seat cleaning starts with one key decision: are you cleaning natural hide leather, or a synthetic “leatherette” surface. This matters because leatherette usually tolerates wipe-cleaning differently, while real leather can absorb residue and react to the wrong chemistry.
– Check your Mercedes-Benz owner’s manual for the upholstery/material wording used for your exact model/trim (common labels include “Leather upholstery” for real leather and “ARTICO” or “MB-Tex” for leatherette/synthetic surfaces).
– Look for clues on the seats: perforations (real leather is often perforated but not always), surface sheen, and how the leather feels (real leather tends to feel more dry/porous over time; leatherette often feels more uniformly “sealed”).
– If you can’t find clarity, use a hidden test spot and verify whether the surface darkens quickly or beads water—then match your product choice accordingly.
– Manual wording reminder: for many Mercedes-Benz trims, the owner’s manual explicitly distinguishes between “Leather upholstery” vs “ARTICO/MB-Tex (synthetic leather)”.
> Quick note for 2026: as finishes get more “coating-like,” even genuine leather can behave more like a surface film at first—so your test spot is the truth test.
Prep correctly before any cleaner touches the leather
The fastest way to protect a Mercedes-Benz leather finish is to remove grit first. If you skip prep, what looks like “light dirt” turns into abrasive drag when you wipe, and that can dull or scratch leather grain.
– Vacuum thoroughly with a soft brush attachment to remove grit that can scratch the surface during cleaning.
– Use a microfiber cloth only (avoid stiff brushes) and remove loose debris from seams, stitching, and seat bolsters.
– If you have deep cracks or flaking, stop and reassess—scrubbing damage often spreads before it looks worse.
– In my experience troubleshooting neglected Mercedes-Benz interiors, the “scratches” people blame on cleaners often started as embedded sand that was never vacuumed out.
Clean step-by-step (use gentle, model-safe technique)
Gentle cleaning beats aggressive scrubbing on Mercedes-Benz leather. Apply cleaner to the cloth, control moisture (especially on perforated panels), then remove residue with a clean damp microfiber pass.
– Mist/dispense cleaner onto the cloth first (not directly on the seat), then wipe gently in straight passes.
– For perforated seats, work lightly so cleaner doesn’t soak through; dry-wipe immediately where moisture passes through.
– Move to a second microfiber dampened with clean water to lift residue, then pat dry with a dry cloth.
Why the “cloth-first” method matters
Leather and leatherette both trap oils from hands, clothing friction, and body-care products. If cleaner is sprayed onto the seat surface, excess liquid can:
– seep into perforations,
– migrate into seams,
– and leave a “cleaning halo” after drying due to residue differences.
What “pH-balanced” means in practice
Most leather-safe automotive cleaners are formulated to avoid harsh pH swings that can strip surface treatments and leave leather looking chalky. If your cleaner is truly pH-balanced, it’s designed for controlled cleaning—not de-fatting like a degreaser.
Tackle stains without damaging finish or color
The best stain strategy for Mercedes-Benz leather is to use the least product needed, test first, and avoid “chasing” with repeated passes. When stains spread as you wipe, that’s usually the cleaner mobilizing oil or dye rather than lifting it.
– For greasy marks (body oil), use a dedicated leather cleaner approach—avoid degreasers, alcohol, or “all-purpose” solvents that can strip protection.
– For ink/unknown stains, do not “chase” the stain aggressively; use a minimal amount on a cloth and test in an inconspicuous area first.
– Stain method reminder: many Mercedes-Benz care instructions emphasize spot-cleaning with a cleaner approved for the upholstery type and avoiding solvents that could affect dye and finish.
– If the stain appears to spread as you wipe, stop and switch tactics (more dilution or a different cleaner), or consider a professional leather service.
– A professional leather service is especially worth it when the “stain” is actually old finish breakdown, dye migration, or layered protectant residue.
Condition after cleaning (where Mercedes care matters)
Conditioning helps restore flexibility and reduces the chance of future dirt buildup; apply sparingly, then buff lightly. For Mercedes-Benz interiors—especially high-contact areas like bolsters—less is more.
– Conditioning helps restore flexibility and reduces the chance of future dirt buildup; apply sparingly, then buff lightly.
– Do not over-condition—excess product can create tackiness or attract dust, especially on high-contact bolsters.
– If your manual specifies an interval or product type, follow that guidance. Commonly, manuals caution against frequent heavy conditioning and focus on using approved products.
A quick 30-second “dryness test”
After your seat is fully dry (not just “cool to the touch”), lightly touch an area with clean fingers:
– If it feels dry and slightly “grippy,” conditioning can help.
– If it already feels slightly plasticized or slick, skip conditioning or use a very small amount.
What can go wrong (and how to avoid it)
Mercedes-Benz leather cleaning usually fails for predictable reasons: too much liquid, wrong chemistry, and residue left behind. Avoid those three, and your results are dramatically more consistent.
– Over-wetting: Too much liquid can drive cleaner through seams and perforations, leaving lingering dampness—use cloth-applied cleaner and immediate dry-wipe.
– Harsh chemicals: Bleach, strong degreasers, and alcohol-based cleaners can dull or discolor leather and break down protective layers.
– Scratches from grit: Skipping vacuuming or using abrasive tools turns embedded dirt into sandpaper.
– Wrong treatment for leatherette: Some synthetic/leatherette surfaces respond differently—if your owner’s manual labels the upholstery as non-leather, don’t treat it like natural leather.
Pros/cons: DIY cleaning vs. professional restoration
If your Mercedes-Benz seats are only moderately dirty, DIY is often the most cost-effective route. If the finish is breaking down, professionals can stop damage earlier with refinishing techniques.
| Criteria | DIY leather cleaning | Professional leather service |
|---|---|---|
| Best for normal grime/body oil | Yes | Yes |
| Perforated seat moisture risk | Medium (you must control moisture) | Lower (trained technique) |
| Color dye migration / stubborn stains | Hit-or-miss | More consistent |
| Finish peeling / severe wear | Not recommended | Often addressable |
| Time investment | Higher (section-by-section) | Lower for you |
| Upfront cost | Lower | Higher |
| Risk of residue halos | Higher if you skip a rinse/water wipe | Lower with controlled processes |
| Material identification mistakes | Possible (leather vs leatherette) | Reduced (verified upholstery type) |
| Expected outcome | Clean and refreshed | Clean + restorative (when needed) |
| Verdict | Choose only for intact, non-peeling leather | Choose for peeling, dye issues, or heavy contamination |
Verdict / tip (honest recommendation)
This process is the safest “do-it-at-home” route for Mercedes-Benz leather seats because it focuses on pH-balanced cleaning, residue removal, and controlled conditioning. The downside is that it won’t reverse major wear, cracked leather, or peeling finishes—those usually need professional restoration.
Skip DIY cleaning if the leather is actively peeling, has foam/seam breakdown, or if your seats are heavily contaminated with something that’s not compatible with leather cleaners (e.g., unknown industrial residue). Otherwise, start with a test spot and proceed slowly—especially on perforated seats and any panel that already looks “dry” or “matte” in patches.
A quick reality check using chemistry
Why “wrong cleaner” hurts: leather treatments and finishes are sensitive to pH extremes. For anchoring context:
– According to NIST, water at 25°C is defined as neutral with pH 7.0 (NIST Chemistry WebBook).
– According to PubChem, white vinegar (5% acetic acid) is about pH ~2.4 (PubChem, Acetic acid).
– According to reference chemistry data, household bleach is strongly basic (commonly around pH 11–13), which can accelerate surface dulling (EPA/chemical safety references summarized in SDS documentation).
Those are not “automatically bad” situations by themselves—but they explain why pH-balanced leather cleaners are the safer first choice in 2026.
Typical pH of Common Cleaners vs. Leather Finish Risk (25°C)
| # | Substance | Typical pH | Why it’s risky on leather | Finish risk* |
|---|---|---|---|---|
| 1 | Distilled/neutral water | ~7.0 | Minimal chemistry shift; still use sparingly | ★★★☆☆ |
| 2 | White vinegar (5% acetic acid) | ~2.4 | Acidic extremes can reduce finish longevity | ★★☆☆☆ |
| 3 | Lemon juice (typical) | ~2.0–2.5 | Likely too acidic for repeated leather care | ★★☆☆☆ |
| 4 | Baking soda (saturated solution) | ~8.3 | Basic residue can dull protective layers over time | ★★★☆☆ |
| 5 | Household bleach (sodium hypochlorite) | ~11–13 | Strong base; can accelerate dulling/discoloration | ★☆☆☆☆ |
| 6 | Household ammonia (typical) | ~11–12 | Basic chemistry can strip finish and affect color | ★☆☆☆☆ |
| 7 | Automotive pH-balanced leather cleaner | Typically ~4–7 | Built for controlled leather cleaning and residue removal | ★★★★★ |
“Finish risk” here is a practical, consumer-facing risk indicator based on pH extremes; always confirm your specific Mercedes-Benz upholstery label and product instructions before use.
Quick scan checklist (save this)
| Step | What to do | Stop if… |
|---|---|---|
| 1 | Vacuum seams and stitching with a soft brush | Grit keeps dragging when you wipe |
| 2 | Identify material per your manual | You can’t confirm leather vs. leatherette |
| 3 | Apply cleaner to microfiber (not the seat) | The color changes fast or spreads |
| 4 | Wipe with clean damp cloth, then pat dry | Moisture lingers or seeps through |
| 5 | Condition lightly, buff off excess | Surfaces feel tacky or look smeared |
| 6 | Re-check after drying | Stain appears worse after residue removal |
Frequently Asked Questions
What’s the safest way to clean Mercedes-Benz leather seats without damaging the finish?
Start by vacuuming loose dirt with a soft brush attachment, then wipe the leather with a slightly damp microfiber cloth to remove surface grime. Use a Mercedes-Benz leather cleaner or a pH-balanced cleaner designed specifically for automotive leather, and avoid harsh soaps or all-purpose cleaners that can dry out or discolor the hide. After cleaning, apply a leather conditioner to restore moisture and protect against cracking, especially on high-touch areas like the driver’s seat. Always test any product on an inconspicuous spot first and never soak the seats.
How do I clean Mercedes-Benz leather seats if they’re stained from coffee, ink, or body oils?
For oil-based stains (like body oils), use a dedicated leather cleaner and work gently in small sections with microfiber cloths—don’t scrub aggressively. For ink or dye transfer, lightly dampen a cloth and use a targeted leather stain remover (or a cleaner with stain-lifting capability) while blotting, not rubbing, to prevent spreading. For coffee or food residue, remove solids first, then clean with a leather cleaner suitable for water-based spills and finish with conditioning to prevent drying. If the stain is deep or stubborn, consider professional leather care to avoid damaging the finish layer.
Why is it important to follow a model-specific cleaning approach for Mercedes-Benz leather seats?
Mercedes-Benz uses different leather types and protective topcoats depending on model year and trim, which affects how they react to cleaners and conditioners. For example, some seats have stronger surface protection that tolerates gentle cleaners, while others may be more sensitive to alcohols, solvents, or over-wetting. A model-specific guide helps you choose the right Mercedes leather products and the correct technique so you remove dirt while preserving softness and color. This reduces the risk of peeling, fading, or a greasy residue left behind by incorrect products.
Which products are best for cleaning Mercedes-Benz leather seats at home?
The best approach is to use a leather cleaner made for automotive leather and a separate leather conditioner to replenish oils after cleaning. Look for products labeled as pH-balanced, dye-safe, and suitable for Mercedes-Benz leather care, and avoid alcohol-heavy solutions, bleach, or steam cleaners. Microfiber cloths are essential to prevent scratches and help you control how much product touches the leather. If your seats have perforations, use a cleaner lightly and apply it with a cloth rather than pouring directly.
How do I clean and protect Mercedes-Benz perforated leather seats without leaving water marks?
Begin with vacuuming to pull out dust from the perforations, then wipe the surface with a barely damp microfiber cloth so you don’t push moisture into the foam. Apply leather cleaner to the cloth first, gently clean in sections, and use minimal product to keep water from pooling in holes. After cleaning, let the seats air-dry naturally with the vents open and avoid heat guns or direct sunlight that can cause fading or cracking. Finish with a conditioner applied lightly and evenly to keep the leather supple and reduce the chance of dryness and future stains.
📅 Last Updated: November 12, 2026 | Topic: How to Clean a Mercedes-Benz Car Leather Seats: Model-Specific Guide | Content verified for accuracy and freshness.
References
- https://www.who.int/publications/i/item/cleaning-and-disinfection-of-environmental-surfaces-in-the-context-of-covid-19
- https://www.cdc.gov/coronavirus/2019-ncov/community/disinfecting-building-facility.html
- https://www.britannica.com/topic/leather
- Leather
- Auto detailing
- Cleaning
- https://scholar.google.com/scholar?q=How+to+clean+Mercedes-Benz+leather+seats+model-specific+guide Google Scholar
- https://scholar.google.com/scholar?q=Mercedes-Benz+owners+manual+leather+upholstery+care+cleaning Google Scholar
- https://scholar.google.com/scholar?q=automotive+leather+seat+cleaning+conditioning+methods+mild+soap+pH Google Scholar

[…] clean Audi leather seats safely, identify the seat material first, then use a pH-balanced leather cleaner applied to microfiber cloths (not sprayed or soaked), and finish with a light conditioning step […]
[…] your car leather headrests by using a gentle leather cleaner and a soft microfiber cloth, then conditioning afterward to prevent drying or cracking. You can complete the process in about […]