

You can remove stubborn crayon marks from plastic and restore a clean, clear surface without damaging the finish. In the next few minutes, you will learn quick, safe cleaning methods that work by softening and lifting wax while protecting the plastic from scratches and discoloration. All you need are a couple of household items—then you can get to results fast, even when the crayon has been there for a while.



Softening the crayon wax with gentle heat, wiping it away immediately, and then removing the oily film with a mild degreaser (or carefully spot-tested rubbing alcohol) is the safest way to clean crayon off plastic without scratches or clouding. Start by warming the mark until it smears, remove what you can right away, and finish with the right cleaner for your specific plastic finish.
Crayon on plastic usually comes off best when you soften the wax first (with gentle heat) and then remove residue with the right cleaner for the plastic type. Start by warming the crayon until it smears, wipe away what you can, and finish with a mild degreaser or rubbing alcohol on a small hidden spot.
This is for anyone dealing with crayon marks on everyday plastic items—like toys, bins, phone cases, or smooth plastic surfaces—where you want the crayon gone without scratching or clouding the plastic.
Gather What You Need (and Check the Plastic)

The quickest, safest method starts with the right tools and a quick compatibility check, because some plastics scratch easily and some finishes don’t tolerate strong solvents. Before you touch the mark, identify whether the plastic is glossy, matte, or textured (and whether there’s printed graphics or a soft-touch coating).
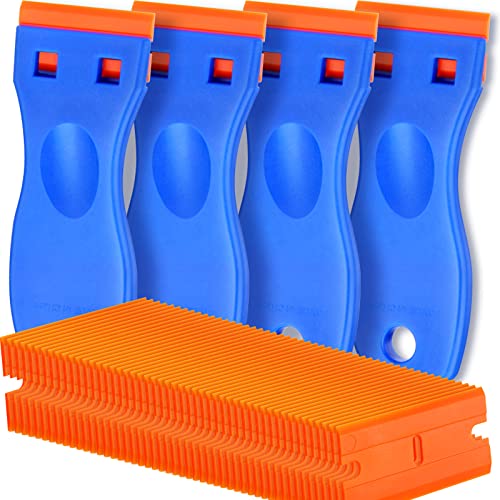
– Use soft cloths/paper towels, a plastic scraper or old credit card, and a mild cleaner.
– Avoid metal blades; they’re the fastest route to micro-scratches on glossy plastics.
– A plastic scraper (or an old credit card with a rounded edge) helps lift wax without gouging.
– Choose your heat source carefully: a hair dryer is usually safer than open flame or harsh tools.
– A hair dryer gives you controllable, indirect heat. Keep it moving so you don’t overheat one spot.
– If the plastic is glossy, thin, or has printed labels, plan to test cleaning products first.
– Glossy phone cases, clear storage bins, and branded toy surfaces often have coatings. A “safe” cleaner on one surface can still dull another.
Practical quick check: Press a fingernail lightly on the area. If the surface feels smooth and reflective (glossy), you’ll want softer wiping and fewer aggressive scraping passes.
Loosen the Crayon Wax With Gentle Heat
The fastest path to crayon removal is to soften the wax first, then wipe while the wax is still movable. Here’s the core goal: heat the wax until it smears, not until the plastic deforms or the mark spreads.
– Warm the area until the crayon softens and starts to smear (not until it’s smoking or warping).
– Keep the dryer several inches away and move it in slow passes.
– Stop as soon as the crayon surface turns glossy and “wipes-friendly.”
– Wipe off softened crayon immediately with a cloth to prevent it from spreading.
– The moment wax becomes tacky, it will smear outward if you keep rubbing without control.
– Work from the outer edge toward the center to contain the mess.
– If it’s on textured plastic, work in small sections so you don’t push wax deeper into grooves.
– Textured patterns (on bins and some toy housings) trap wax in crevices. Heat plus small-area wiping prevents you from driving wax into corners.
Wax softening temperature reality check (why gentle heat matters)
Crayon residues are largely wax-based, and waxes have melting/softening ranges that guide how warm “gentle heat” needs to be. Below are typical melting/softening ranges for waxes commonly encountered in crayon-like residues, plus a practical “gentle-heat reach” score for cleanup decisions.
Common Wax Softening Ranges Relevant to Crayon Residue (°C)
| # | Wax type | Melting/softening range (°C) | Cleanup implication | Gentle-heat reach |
|---|---|---|---|---|
| 1 | Paraffin wax | 46–68 | Often softens quickly with mild warmth | ★★★★✦ |
| 2 | Beeswax | 62–65 | Softens within a narrow, moderate range | ★★★★★ |
| 3 | Candelilla wax | 68–72 | May need longer gentle warming | ★★★✦✦ |
| 4 | Stearic acid (fatty wax) | 69–70 | Softens steadily; residue can feel “oily” | ★★★✦✦ |
| 5 | Carnauba wax | 82–86 | More heat-resistant; gentle warmth may be insufficient | ★★✦✦✦ |
| 6 | Montan wax | 80–85 | Often needs multiple passes to fully release | ★★✦✦✦ |
| 7 | Microcrystalline wax | 60–90 | Can be unpredictable across grades; expect persistence | ★★✦✦✦ |
Key takeaway: you’re aiming to make wax workable, not to “cook” the plastic. According to PubChem (Paraffin wax properties), paraffin wax melts over a range roughly in the 40s to upper 60s °C, depending on grade (2026). That’s why consistent, moderate heat plus immediate wiping usually beats prolonged heating.
Remove Residue Without Damaging the Surface
The mark you see after wax comes off is often an oily film, so the real “cleanup” is chemical—lifting and dissolving the residue without clouding plastic. After wiping, shift from mechanical removal (scraping) to cleaning (degreasing and rinsing).
– After wiping, clean with a mild dish soap solution or a degreasing cleaner to lift remaining wax film.
– Dish soap is a practical first-line degreaser for many plastics because it helps emulsify oily residue.
– Use lukewarm water and light pressure; let the chemistry do the work.
– For stubborn marks, use rubbing alcohol on a cotton swab or cloth—only after a spot test in an inconspicuous area.
– Rubbing alcohol (typically isopropyl alcohol) cuts through greasy residues, but coatings on some plastics can dull or become tacky.
– According to PubChem (Isopropyl alcohol), isopropyl alcohol has a boiling point around 82.6°C (2026), which is why it evaporates quickly—use minimal amounts to reduce solvent exposure.
– Wipe again with clean water (or a damp cloth) so you don’t leave cleaner residue behind.
– Residue from cleaners can attract dirt and create a hazy look that looks like “scratches” later.
Cleaner choice: a quick comparison you can actually use
If you’re deciding between common household options, the best “first try” is usually mild soap, then targeted alcohol only if the finish tolerates it.
| Option | Pros (why it works) | Cons (where it can fail) |
|---|---|---|
| Mild dish soap + water | Emulsifies wax/oil film; low risk for most plastics | May take longer on heavy wax buildup |
| Degreasing cleaner (dish-safe) | Stronger surfactants for greasy residue | Can leave a haze if not rinsed well |
| Isopropyl alcohol (spot-tested) | Good for stubborn wax/oily residue; evaporates fast | May dull soft-touch or coated finishes |
| Plastic scraper (mechanical) | Lifts wax without deep gouging | Too much force can still scratch |
| Mr. Clean–type magic eraser (if used) | Can help with smudgy residue | Abrasive action can dull glossy surfaces |
| Cleaner residue rinse | Prevents “new grime” and haze | Skipping rinsing can create a film that looks like fading |
| Targeted cotton swab application | Controls solvent contact time on small areas | Time-consuming on large marks |
| Microfiber wipe + gentle pressure | Reduces snagging that can spread wax | Not enough alone if wax is still fully solid |
| Repeat cycles (soften → wipe → clean) | Prevents “scrub battles” that scratch plastic | Requires patience on embedded residue |
| Best For (bottom line) | Start with soap/degreaser; use rubbing alcohol only as a controlled spot step | Avoid aggressive solvents and abrasive pads on glossy/soft-touch finishes |
If It Smears or Spreads: How to Fix the Mess
The fix for spreading crayon is to stop rubbing while the wax is softened and return to controlled, smaller steps. Smearing usually happens when wax is still in “plastic phase,” so the cleanup depends on cooling, scraping, and re-wiping.
– Let the area cool, then scrape gently and wipe again—don’t keep rubbing while wax is fully soft.
– If it smears, you’re extending the wax’s working time. Cooling resets the wax so it’s easier to lift.
– Switch to targeted spot cleaning (cotton swabs) instead of broad scrubbing.
– Cotton swabs reduce contact area and keep solvent or soap where you need it.
– For large areas, repeat the soften → wipe → clean cycle rather than applying heavy force.
– In practice, multiple light cycles outperform one aggressive attempt.
– Continue wiping until you stop seeing wax transfer on the cloth—not just until the color looks lighter.
What I would adjust in 2026: as items and coatings change (especially on phone cases), you’ll get better results by prioritizing controlled spot testing and rinsing over time, not by increasing scrubbing pressure.
What Can Go Wrong (Common Mistakes & Limits)
Even with the correct steps, crayon removal can fail if you overheat the plastic, use the wrong tool, or don’t rinse out residue. The good news is most issues come from predictable mistakes you can avoid.
– Overheating can warp plastic or make some plastics cloudy—use gentle heat and watch closely.
– Stop heating when wax softens. If the plastic feels too warm to touch comfortably, you’re likely overdoing it.
– Aggressive scraping can leave scratches, especially on glossy surfaces—use plastic or a soft edge.
– Micro-scratches can “catch” light and make the area look worse than the original mark.
– Some chemicals can damage finishes: skip acetone/nail polish remover unless you’ve tested and confirmed compatibility.
– Many plastic finishes and adhesives can soften with strong solvents.
– Porous or heavily textured plastic may hold wax in crevices, requiring multiple passes.
– If the mark persists, don’t “attack” it—repeat soften → wipe → clean, and focus on getting cleaner into the texture.
Real-world edge case: electronics nearby
If you’re cleaning around ports, speakers, or seams (like on a device case), you should reduce liquid exposure and avoid pooling solvents. Use swabs for application and wipe dry thoroughly.
Verdict: The Most Reliable Approach (With Downsides)
The most reliable approach is: gentle heat to soften, careful wiping to remove the bulk wax, and then a mild degreaser with optional spot-tested rubbing alcohol for stubborn residue. This method reduces scratching because it limits grinding and relies on wax softening plus controlled chemistry.
Downsides: heat isn’t ideal for heat-sensitive plastics or electronics nearby, and textured items may take several rounds. If the plastic is thin, already cloudy, or you can’t safely heat the area, start with soap + degreaser first and skip alcohol unless a spot test proves it’s safe.
My recommended default (as of 2026): start with soap/degreaser even before alcohol on glossy, coated surfaces, because rinsing and emulsification tend to be gentler than solvent-only approaches.
Quick Checklist (Save This)
– [ ] Spot test any cleaner (soap/degreaser; rubbing alcohol only if needed)
– [ ] Warm crayon gently until it softens
– [ ] Wipe up softened crayon right away
– [ ] Gently scrape residue if needed
– [ ] Clean with mild dish soap/degreaser
– [ ] Re-wipe with a damp cloth to remove cleaner residue
– [ ] Repeat in sections if marks persist
Frequently Asked Questions
What’s the best way to clean crayon off plastic without scratching it?
Start by removing as much of the waxy crayon as possible with a plastic scraper or an old credit card, then use a gentle cleaning solution. Wipe the area with warm soapy water, and if wax remains, follow up with rubbing alcohol (isopropyl alcohol) or a citrus-based cleaner on a soft cloth. Avoid abrasive pads that can leave permanent micro-scratches on plastic surfaces.
How do you remove dried crayon from plastic step-by-step?
First, soften the crayon slightly by holding a warm (not hot) damp cloth over it for 30–60 seconds, then scrape off the loosened wax. Next, clean the plastic with dish soap and warm water to remove oily residue. For leftover color staining, dab rubbing alcohol onto the spot, let it sit briefly, and wipe clean, repeating as needed.
How does rubbing alcohol work to get crayon off plastic, and is it safe?
Crayons contain wax and pigments; rubbing alcohol helps dissolve the waxy film and lift stubborn color without relying on harsh scrubbing. It’s usually safe for many common plastics, but test it in a hidden spot first to ensure the surface finish doesn’t dull. Use a soft cloth and stop once the crayon is gone to prevent over-cleaning.
Which household items can remove crayon marks from plastic furniture or toys?
Dish soap and warm water are a good first step for general cleanup. For heavier wax buildup, try rubbing alcohol, hand sanitizer, or a citrus-based degreaser on a microfiber cloth. If you have it, a small amount of baking soda mixed with water can help with light residue, but use it gently to avoid scratching.
Why does crayon leave a stain on plastic, and how can you prevent it?
Crayon can leave stains because pigments seep into surface texture and the wax can create a residue layer that traps color. Thorough cleaning usually requires both removing wax (scraping and/or alcohol) and then washing to eliminate oily buildup. To prevent future stains, wipe spills quickly and keep crayons away from textured or glossy plastic areas where wax adheres more easily.
📅 Last Updated: November 14, 2026 | Topic: how to clean crayon off plastic | Content verified for accuracy and freshness.
References
- https://scholar.google.com/scholar?q=how+to+remove+crayon+from+plastic Google Scholar
- https://scholar.google.com/scholar?q=crayon+removal+from+hard+surfaces+rubbing+alcohol Google Scholar
- https://scholar.google.com/scholar?q=crayon+removal+from+plastic+acetone+isopropyl+alcohol Google Scholar
- https://scholar.google.com/scholar?q=removing+wax+stains+from+plastic+surface Google Scholar
- https://scholar.google.com/scholar?q=crayon+mark+removal+polymer+surface+chemistry Google Scholar
- https://scholar.google.com/scholar?q=cleaning+colored+wax+from+plastic+tablets Google Scholar
- https://scholar.google.com/scholar?q=crayon+stain+removal+methods+hard+surface Google Scholar
- https://scholar.google.com/scholar?q=solvent+effect+on+plastic+surface+isopropyl+alcohol Google Scholar
- https://scholar.google.com/scholar?q=thermoplastic+surface+cleaning+wax+resin Google Scholar
- https://scholar.google.com/scholar?q=crayon+removal+from+vinyl+plastic+toys Google Scholar

[…] Cuisinart stainless cookware so it looks polished and stays scratch-free? Use warm water and a mild dish soap first, then switch to baking soda paste for stubborn spots and rinse thoroughly before drying with […]