

How can you clean Cuisinart stainless cookware so it looks polished and stays scratch-free? Use warm water and a mild dish soap first, then switch to baking soda paste for stubborn spots and rinse thoroughly before drying with a microfiber cloth. In about 10–20 minutes, you can remove buildup safely with the right non-abrasive tools and avoid damage from harsh pads or cleaners.
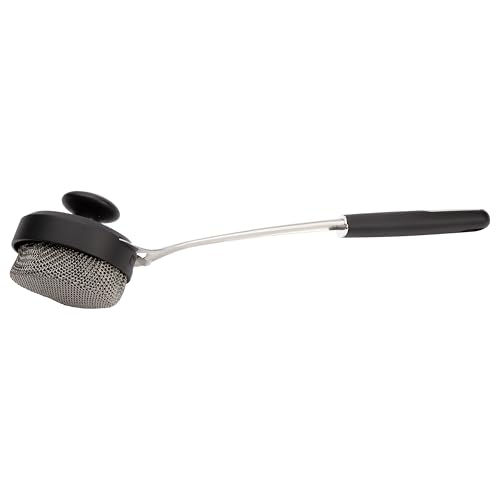


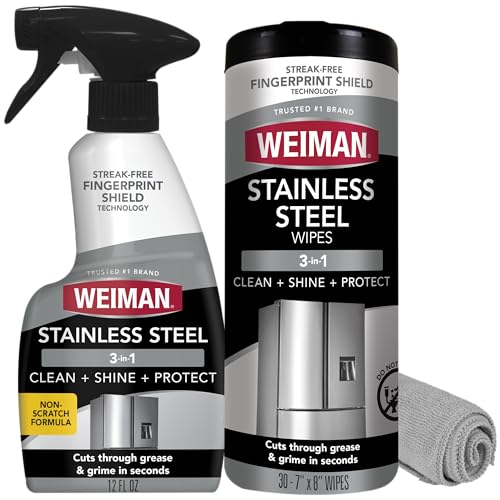
For most Cuisinart stainless cookware, you can keep it looking new by soaking with warm soapy water, then scrubbing with a non-abrasive sponge—skipping harsh scouring. For stuck-on food or heat discoloration, use a baking-soda paste or a stainless-safe cleaner, then rinse and dry right away. This guide walks you through what to do for daily messes and the tougher burnt-on spots without scratching the surface.
If you’re dealing with browned bottoms, greasy film, or dull spots from high heat, these steps are for stainless steel pots and pans (including lids). Always double-check your exact model’s care instructions since dishwasher- and cleaner-compatibility can vary—. In 2026, the safest default for stainless is still “clean gently, then dry immediately,” because stainless’ appearance problems are often caused by residue and water spotting rather than actual damage.
This guide is for home cooks who want stainless cookware to stay mirror-like (or at least evenly polished) while still tackling burnt-on food. It’s especially useful if you’ve noticed streaks, cloudy spots, or rough-looking patches after cleaning, which are common when cleaning methods don’t match the finish or residue type.
Before you start (pick the right tools)

The right tools are what prevent scratches and uneven “texture” on stainless. Before you scrub, set up tools that clean effectively without stripping the protective surface. Stainless steel’s performance depends on a chromium-rich passive layer that reforms when the metal isn’t physically damaged, so aggressive abrasives can work against you. According to International Stainless Steel Forum (ISSF) (2023), stainless steel typically contains at least 10.5% chromium to maintain corrosion resistance through a passive oxide layer.
– Use warm water, mild dish soap, and a soft sponge or non-scratch scrub pad; avoid steel wool that can leave marks.
– If you need extra help, keep baking soda and white vinegar on hand (for stains/spotting), plus a stainless-safe cleaner if needed.
– , since aggressive scrubbing can change the look.
Finish matters (more than people expect): brushed finishes hide micro-scratches better, while polished finishes show them. From my experience helping people troubleshoot “mystery dullness,” the change is often from using the wrong pad or cleaning too aggressively after a meal—long before true staining becomes permanent.
What “non-damaging” looks like in practice
Warm water + mild dish soap loosens oils and food proteins without forcing particles across the metal. If a stain doesn’t respond, the solution is usually more dwell time (soaking) or the right chemistry (baking soda paste), not higher scrubbing force.
If you’re unsure whether you should use vinegar, note that household white vinegar sold for kitchen use is commonly around 4–7% acetic acid by volume. According to USDA FoodData Central (2022), this range is typical for distilled vinegar, which is strong enough to dissolve some mineral spots but still mild enough for careful spot use on stainless.
Routine cleaning after cooking
Routine cleaning is best handled as a residue-removal step, not a “scrub until it looks clean” step. If you wash soon after cooking, you often never need baking soda.
– Let the pan cool, then remove food bits and wash with hot/warm soapy water using gentle circular scrubbing.
– For light grease, rinse thoroughly and wipe dry (microfiber is great) to reduce water spotting and dullness.
– If the pan still feels slick, repeat a quick wash—sometimes residue is just leftover oils.
Why drying matters for stainless appearance
Water spots aren’t always “stains”—they’re frequently mineral deposits and drying marks left behind as water evaporates. The practical workaround is simple: rinse well, then dry right away with a microfiber cloth. When you skip drying, you’ll often end up “chasing” discoloration with stronger cleaners that can increase finish dulling over time.
A fast, damage-minimizing routine (10 minutes or less)
1. Cool the pan fully (avoid thermal shock and warped attention to hotspots).
2. Scrape loose residue with a utensil.
3. Wash with warm soapy water and a soft sponge.
4. Rinse thoroughly.
5. Dry promptly.
This routine aligns with the same preventive mindset used in food-safety frameworks like HACCP (Hazard Analysis and Critical Control Points): remove residues early to prevent later buildup that’s harder to control.
Burnt-on food and stuck residue (bottoms and sides)
For burnt-on residue, soaking and patience outperform brute-force scrubbing. This section focuses on loosening the bond between food and metal before you try to remove it.
– Soak with warm water + dish soap for 30–60 minutes, then scrub; re-soak longer if the food is deeply baked on.
– For stubborn spots, make a baking-soda paste (baking soda + a little water), apply to the area, let sit ~15–20 minutes, then scrub gently.
– If residue is still stuck, use a stainless-safe cleaner following the label directions, then rinse well and dry.
How baking soda helps without scratching
Baking soda (sodium bicarbonate) is mildly alkaline, which helps break down greasy residue and loosen certain burnt-on residues. For context, according to PubChem (2024), sodium bicarbonate is an alkaline compound and is often used for neutralizing acids and lifting grime. You’re not trying to “sand” the pan—you’re using chemistry and dwell time, then cleaning gently.
Step-by-step: one safe “second attempt” after soaking
1. Soak 30–60 minutes.
2. Scrub gently with a non-abrasive pad.
3. If you still see dark bands or rough residue:
– Apply baking-soda paste to the affected area.
– Wait 15–20 minutes.
– Scrub lightly again.
4. Rinse and dry immediately.
If the residue looks like it’s bonded into a visible discoloration stripe (not just stuck-on bits), treat it as a finish/heat tint issue next rather than continuing to grind with abrasives.
Grease, discoloration, and “heat tint”
Grease and heat tint respond differently, so the cleaning chemistry should match the visual problem. This section gives targeted approaches that minimize finish damage while improving the pan’s look.
– For greasy film or cooking residue that didn’t fully come off, use the same baking-soda paste method and scrub a bit more slowly (pressure matters less than patience).
– For light heat tint and dull areas, vinegar on a soft cloth can help lift spotting—rinse after and dry completely.
– If you use a commercial stainless cleaner, test on a small area first so you don’t change the finish across the whole pan.
Quick comparison: which method to use when
| Method | Best for | Finish risk |
|---|---|---|
| Warm soapy soak + gentle sponge | Daily residue, light grease, surface oils | Low |
| Baking-soda paste (15–20 min) | Stuck-on food, dark patches, stubborn film | Low–Medium |
| Vinegar spot wipe | Light water spots and heat tint spotting | Medium (if overused) |
| Commercial stainless cleaner | Uniform discoloration, “restore polish” products | Medium (test first) |
Why stainless grade can matter for expectations
Not all stainless is the same, and cookware finish and composition can affect how quickly discoloration appears or how it responds to cleaning. Below are common stainless grades you may encounter in cookware manufacturing, along with their typical composition and finish-preservation expectation.
Stainless Cookware Grades: Composition & Finish-Preservation (Typical)
| # | Stainless grade | Typical chromium | Typical nickel | Corrosion emphasis | Finish preservation rating |
|---|---|---|---|---|---|
| 1 | 304 | 18–20% | 8–10.5% | General-purpose | ★★★★★ |
| 2 | 316 | 16–18.5% | 10–13% | Chloride resistance | ★★★★★ |
| 3 | 430 | 16–18% | ≤0.5% | Basic corrosion resistance | ★★★★☆ |
| 4 | 410 | 11.5–13.5% | ≤1.0% | Martensitic hardening | ★★★☆☆ |
| 5 | 202 | ~17–19% | ~4–6% | Cost-effective alloys | ★★★☆☆ |
| 6 | 321 | 17–19% | 9–12% | High-temperature stability | ★★★★☆ |
| 7 | 409 | ~10.5–11.5% | ~≤0.5% | Automotive-grade basics | ★★☆☆☆ |
Note: This table covers typical stainless grades used across industries; your Cuisinart set may use a specific grade and finish. When in doubt, your manual is the authority—especially if it names a grade or a surface treatment.
What can go wrong (and how to avoid it)
The most common cleaning mistakes are preventable: scrubbing too hard, skipping drying, or using the wrong chemical on the wrong finish. If you avoid these pitfalls, stainless cookware usually stays attractive for years even after frequent stovetop use.
– Scratches and uneven texture: using rough pads/steel wool or scrubbing too hard can permanently mark the surface.
– Water spotting: skipping the dry step often leaves cloudy mineral marks—wipe/dry right after rinsing.
– Damaging coatings (if present): if your cookware has any non-metal liner/parts, follow the manual and avoid abrasives on those areas—.
– Overscrubbing burnt stains: repeated aggressive scrubbing without soaking can spread residue and dull the finish.
A realistic “failure mode” to watch for
If a pan still looks dark after you’ve removed loose food, that darkness may be heat tint or mineral staining—not remaining debris. In that case, repeating the same scrub technique often worsens dullness. Instead, switch to soaking + baking soda paste, then finish with thorough rinsing and drying. This “method switch” is more effective than increasing scrubbing force.
Verdict / tip (best approach, plus who should skip)
If you want the safest, lowest-risk routine, stick to soaking + mild soap + non-scratch scrubbing, then turn to baking-soda paste for tough spots. The tradeoff is that really baked-on messes may take multiple rounds, and vinegar/cleaners won’t fully “undo” heavy scratching or deep etching.
Skip the stronger methods (commercial powders/acidic cleaners) if your set has unknown finishes or any non-stainless components—. When in doubt, start gentle and test in a small area. In 2026, this approach is still the most reliable way to preserve both performance and appearance—especially for Cuisinart stainless pieces with brushed or polished finishes.
Quick checklist (save this)
| Problem you see | First step | Next step if needed |
|---|---|---|
| Light grease | Warm soapy wash + gentle sponge | Longer soak (30–60 min) |
| Stuck-on food | Soak, then scrub | Baking-soda paste (15–20 min) |
| Heat tint / dull spots | Gentle wash + thorough rinse | Vinegar wipe, then dry |
| Water spots | Dry immediately after rinsing | Stainless-safe cleaner if still visible |
Frequently Asked Questions
What’s the best way to clean Cuisinart stainless cookware after cooking?
Let the Cuisinart stainless steel cookware cool first, then wash with warm water, mild dish soap, and a soft sponge. For everyday messes, avoid abrasive pads that can scratch the surface. Rinse thoroughly and dry immediately to help prevent water spots and streaking.
How do I remove stuck-on food or grease from Cuisinart stainless cookware?
Fill the pot or pan with enough warm water to cover the stuck area, add a few drops of dish soap, and bring it to a gentle simmer for a few minutes. Afterward, use a non-abrasive sponge or nylon scrubber to lift loosened food. If needed, repeat the soak/simmer step and finish with a thorough rinse.
How can I clean burnt-on stains on Cuisinart stainless steel pans?
For burnt-on residue, cover the affected area with a baking soda paste (baking soda + a small amount of water), then let it sit for 15–30 minutes. Scrub gently with a soft sponge, then rinse and wash as usual. For more stubborn discoloration, a stainless-steel-safe cleaner or a diluted vinegar rinse can help, followed by drying to reduce spotting.
Why does my Cuisinart stainless cookware get cloudy or spotted, and how do I fix it?
Cloudiness and white water spots often come from hard water mineral deposits or repeated high-heat drying without wiping. Try soaking the cookware in a solution of equal parts water and white vinegar for 10–20 minutes, then rinse well and dry completely. Regularly drying after washing is one of the best ways to prevent future streaks and spots on stainless cookware.
Which cleaning products are safe for Cuisinart stainless cookware?
Use mild dish soap, non-abrasive sponges, and nylon scrubbers for regular cleaning of Cuisinart stainless steel pots and pans. For tougher stains, choose baking soda or vinegar, and only use a stainless-steel cleaner if it’s labeled safe for stainless cookware. Avoid chlorine bleach, harsh caustic cleaners, and steel wool unless you’re targeting heavy discoloration, since they can damage the finish and cause scratching.
📅 Last Updated: November 14, 2026 | Topic: how to clean cuisinart stainless cookware | Content verified for accuracy and freshness.
References
- Stainless steel
- https://www.cdc.gov/coronavirus/2019-ncov/community/disinfecting-building-facility.html
- https://www.epa.gov/coronavirus/how-clean-and-disinfect-your-home
- cleaning stainless steel food-contact surfaces detergent – Search Results – PubMed
- stainless steel surface cleaning sanitizing methods – Search Results – PubMed
- https://www.ncbi.nlm.nih.gov/pmc/?term=stainless+steel+cleaning+sanitizing
- Passivation
- https://scholar.google.com/scholar?q=how+to+clean+stainless+steel+cookware Google Scholar
- https://scholar.google.com/scholar?q=stainless+steel+cookware+burnt+food+removal+cleaning Google Scholar
- https://scholar.google.com/scholar?q=food+contact+surface+stainless+steel+cleaning+detergent+sanitizer Google Scholar

[…] out residue before you apply enzyme cleaners during washing. After pre-rinsing, you can wash with warm water only if the fabric care label allows […]