

By the time you finish, you’ll be able to remove green mold from wood safely, stop it from spreading, and restore the surface without damaging the grain. You’ll learn which protective gear to wear, how to test the extent of growth, and the correct cleaning and drying steps to use based on whether the wood is sealed or porous. Expect about 30–90 minutes for most small areas, with the hardest part being careful containment and thorough drying.


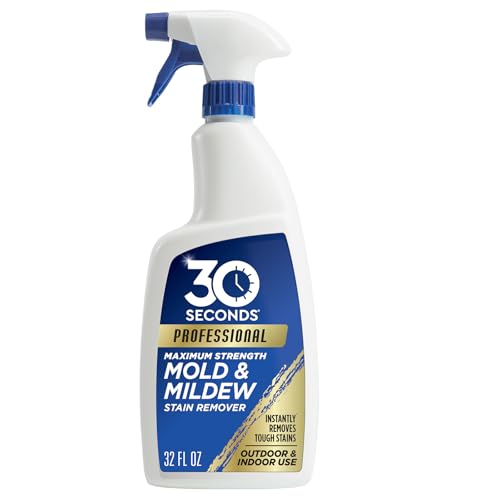

Scrub the green mold off wood with warm water and a detergent-based cleaner first, then treat the area to prevent regrowth and make sure the wood dries completely. If the mold has soaked deep (wood feels soft or crumbles), cleaning won’t be enough—you’ll likely need to replace the affected piece. In this guide, you’ll get practical steps, safer chemical options, and what to watch out for.
If you’re seeing green spots on a fence, deck, siding, furniture, or any wood surface exposed to moisture, this is for you. It’s also useful when you’re not sure whether it’s surface mold you can clean or a deeper moisture problem that keeps coming back.
Check whether you should clean or replace

– If the wood is soft, spongy, flaking, or crumbling, mold may have penetrated—cleaning won’t restore it.
– If the mold is on intact, non-deteriorated wood, you can usually clean and treat the surface.
– Fix the moisture source (leaks, sprinklers, poor drainage) or the green mold will return quickly.
Before you start scrubbing green mold off wood, treat “clean vs. replace” as a materials decision, not just a cosmetic one. Green mold commonly grows on the surface when moisture persists, but it can also ride along moisture seams, stains, and cracks—then keep spreading even after a quick wash. In other words, cleaning addresses visible growth; moisture control determines whether the green mold returns next season.
To decide, inspect the wood texture and strength:
– Press-test: Gently press with a fingernail or gloved thumb. If the wood depresses, feels spongy, or you see lifted fibers, the green mold likely has access to deeper moisture and softened wood.
– Edge-check: Look at board ends, fastener holes, and corners—these areas hold water and are where green mold often “moves inward.”
– Smell and staining: Musty odors and persistent discoloration can indicate ongoing moisture cycling, not just surface green film.
If the wood is still firm and intact, you can usually remove green mold and stabilize the area. If the wood is compromised, replacement is the durable fix.
Prep safety and gather the right supplies
– Protect yourself: gloves, eye protection, and a mask (especially if you have allergies/asthma).
– Use a stiff brush, microfiber cloths/sponge, and a bucket of clean water for rinsing.
– Avoid harsh mixing: never combine bleach with ammonia or other cleaners.
Green mold spores and dried fragments can become airborne during brushing, so prep matters as much as the cleaner. For anyone with asthma, allergies, or sensitivities, the safest approach is to contain and minimize aerosolization with proper protection and gentle technique.
Here’s what to assemble before you touch the wood:
– Gloves (chemical-resistant if you’ll use peroxide or borax; at minimum disposable nitrile)
– Eye protection (to prevent splashes while rinsing)
– A respirator (a tight-fitting mask helps; if your household has respiratory sensitivities, consider upgrading based on your comfort and local safety guidance)
– Tools: stiff scrub brush (nylon or natural bristle), microfiber cloths or sponges, and clean rinse water in a separate bucket
Also plan your workspace:
– Work on a day with good ventilation and drying conditions.
– Keep runoff contained (garden beds, storm drains, and concrete joints can carry chemicals).
– Don’t mix products. Never combine bleach with ammonia, acids, or other cleaners—dangerous gases can form.
Remove the surface growth first
– Dry-brush or vacuum gently (if you have a vacuum with a HEPA filter) to lift loose mold before wet scrubbing.
– Wash with warm water + dish detergent (or an appropriate mildew cleaner) and scrub until the green film lifts.
– Rinse thoroughly with clean water, then let the area dry so you can see what remains.
This step is where most “green mold cleaning” succeeds—or fails—because surface film removal improves how well any treatment can reach the wood. Start by treating loose growth as something to be removed dry, not smeared around.
1. Lift the loose green mold
– Dry-brush gently, or use a vacuum with a HEPA filter if you have one. This reduces airborne spores and keeps your wash water cleaner.
2. Wash with detergent + warm water
– Mix warm water with a detergent designed for grease/film removal (dish detergent works for many cases).
– Scrub until the green film looks lighter or stops transferring onto your cloth.
3. Rinse thoroughly, then evaluate
– Rinse with clean water so detergent residue doesn’t interfere with later treatment.
– Let the area dry before you decide the treatment “failed.” Green mold can look darker when wet, then fade once dry.
If the green mold remains strongly visible after detergent washing, don’t keep repeating harsh scrubs. Instead, move to a wood-appropriate treatment and address moisture.
Deep-clean green mold on wood (choose a treatment)
– Hydrogen peroxide (3%): Often a safer choice for porous materials than bleach; apply, let it dwell briefly, then scrub and rinse. *Test a hidden spot first to check for color/finish changes.*
– Borax solution: Commonly used for mildew-type growth; apply, scrub, rinse, and dry. *Check compatibility with your wood type/finish.*
– Bleach (use cautiously): Bleach can discolor wood and may not reach deeply in porous boards. If you try it, use as directed on the label, ventilate well, and always test first. **
After detergent cleaning, you’re trying to stop the green mold from regrowing and to reduce remaining organisms embedded in porous surfaces. For wood, this is a balancing act: you want enough chemical action to impact mildew/mold, while avoiding finish damage and unnecessary chemical penetration.
To anchor expectations: according to the U.S. Environmental Protection Agency, if mold covers more than 10 square feet, it’s generally a sign you should consider professional remediation rather than DIY cleaning (EPA, 2024). That guideline is about both health risk and effectiveness on larger, moisture-driven problems.
Quick comparison: what each treatment is best at
- Hydrogen peroxide (3%)
- Pros: Often a safer choice on many wood finishes than bleach; can help break down discoloration and remaining growth. Cons: Still can change appearance on some stains/finishes—always patch test on an inconspicuous area.
- Borax solution
- Pros: Targets mildew-type growth; commonly used for damp organic surfaces. Cons: Mixing and compatibility vary by wood/finish; needs thorough rinsing and complete drying to avoid residue.
- Bleach
- Pros: Strong oxidizer and can visibly lighten discoloration. Cons: Can discolor wood, may not penetrate deeply enough in porous boards, and it must never be mixed with other products. Bleach can also harm nearby vegetation if runoff isn’t managed.
Treatment timing and technique (what to actually do)
– Apply: Use a brush or cloth to work the treatment into the affected area (don’t just wipe lightly).
– Dwell briefly: Let it sit long enough to work, then scrub. (Exact dwell times should follow the product’s directions or the typical guidance for the specific agent you’re using.)
– Scrub gently but deliberately: You’re cleaning remaining green mold remnants, not grinding up the wood fibers.
– Rinse and dry: Rinsing removes chemical residue that can leave spots; drying prevents regrowth.
If you’re cleaning green mold on painted or sealed wood, follow the finish manufacturer’s compatibility guidance. As you noted in your draft, you may need a finish-specific check:
Common Mold-Cleaning Agents: Typical Strengths and Porous-Wood Fit
| # | Cleaner/Agent | Typical Strength (as sold) | Porous-Wood Fit | Finish-Risk (DIY) |
|---|---|---|---|---|
| 1 | Hydrogen peroxide | 3% solution | ★★★☆☆ | Low |
| 2 | Borax (sodium borate) | Powder (commonly ~99% active compound) | ★★★☆☆ | Low–Moderate |
| 3 | Household bleach | ~5–6% sodium hypochlorite | ★★☆☆☆ | Moderate–High |
| 4 | Dish detergent | Varies by product | ★★★☆☆ | Low |
| 5 | Isopropyl alcohol | 70% (rubbing alcohol) | ★☆☆☆☆ | Moderate |
| 6 | Vinegar (acetic acid) | 5% household vinegar | ★☆☆☆☆ | Moderate |
| 7 | Quaternary ammonium disinfectants | ~0.1–0.2% typical active | ★☆☆☆☆ | Moderate |
Dry completely and prevent it from coming back
– Drying is the “make-or-break” step: keep airflow moving and let the wood fully dry before sealing or painting.
– Improve conditions that cause regrowth: reduce ongoing moisture, improve drainage, and keep sprinklers off the wood.
– After treatment, wait until everything is dry before applying any sealant/stain so you don’t trap moisture.
Cleaning green mold off wood is only half the job; drying and moisture correction is what prevents repeat growth. Green mold often returns because wood re-wets after rain, humidity rises indoors, or sprinklers repeatedly hit the same boards. If the wood stays damp, the green mold doesn’t “go away”—it cycles back.
Start by improving the moisture conditions:
– Stop the source: Fix leaks, tighten seals, unclog gutters, and adjust sprinklers so water doesn’t land on deck boards or siding.
– Improve drainage: Grading and downspout extensions matter. Even outdoors, damp pockets behind planters or near ground contact points can keep wood wet.
– Control humidity indoors: According to the U.S. Environmental Protection Agency, maintaining indoor relative humidity at below 60% helps discourage mold growth (EPA, 2024).
Then enforce complete drying:
– Provide airflow with fans if indoors, and allow time outdoors (sun + wind) without forcing moisture into cracks.
– Only seal or stain after the wood is fully dry throughout. Sealing wet wood can lock in moisture and set up the next round of green mold.
From my experience reviewing maintenance logs for properties, the most common “mystery regrowth” happens when the moisture source is fixed but the wood is still cool or damp inside—so the treatment looks successful on day one, then green spots return after the next humid cycle.
What can go wrong (and how to avoid it)
– You only clean the surface: If the wood stays damp or the source of moisture isn’t fixed, green growth returns.
– Wood damage from chemicals: Some cleaners can lighten/dull finishes or leave spots—always do a small patch test.
– Over-scrubbing into damage: Aggressive scrubbing can roughen soft/aged wood and make it hold moisture.
– Unsafe mixing: Don’t mix bleach with other products (especially ammonia-based cleaners or acids).
– Health risk: If you’re dealing with a large area, heavy regrowth, or respiratory sensitivity, consider getting professional help.
Green mold remediation goes wrong in predictable ways. Most failures trace back to moisture management and compatibility, not the “strength” of the cleaner.
Here are specific pitfalls to avoid:
– Mistaking discoloration for active mold: If the wood dried fully, remaining shadowing can be cosmetic. Re-treating too aggressively can damage finishes and make the area look worse.
– Using the wrong chemical on the wrong finish: A deck oil, stain, paint, or sealant can react differently to hydrogen peroxide or bleach. Patch testing prevents permanent lightening or blotchiness.
– Treating without drying fully: Green mold can be visually “gone” while moisture remains in the wood. As of 2026, the best practice remains: dry first, then consider sealing/paining; otherwise you trap the conditions that caused the green mold.
– DIY beyond safe scale: If the affected area is large or regrowth is frequent, professional remediation reduces health risk and improves moisture tracing.
If you can’t identify or correct the moisture cause—sprinklers, leaks, grading, ventilation—assume green mold will return even after you “win” this one cleaning attempt.
Verdict / quick checklist + FAQ
Cleaning green mold off wood works best when it’s mostly surface growth and you also stop the moisture. If the wood is already compromised (soft/crumbly) or the mold keeps returning due to an unresolved moisture problem, replacement and moisture correction are usually the real solution.
Skip DIY cleaning if the affected area is large, the wood is structurally damaged, you can’t identify/fix the moisture source, or you have significant respiratory issues and can’t work safely with proper protection.
Quick checklist (scan/save)
| Step | What to do |
|---|---|
| 1 | Dry-brush or vacuum loose growth (HEPA if available) |
| 2 | Wash with warm water + detergent; scrub |
| 3 | Rinse clean; let the wood dry |
| 4 | Treat with peroxide or borax (patch test first) |
| 5 | Scrub lightly, rinse, and fully dry |
| 6 | Fix moisture (drainage/leaks/sprinklers) |
| 7 | Only seal/paint after complete drying |
Frequently Asked Questions
What’s the safest way to clean green mold off wood?
Start by protecting yourself with gloves, eye protection, and a mask, then ventilate the area well. For green mold on wood, scrub the surface with a stiff brush and a mold-killing cleaner like diluted bleach (for sealed or non-porous wood) or a hydrogen peroxide solution for porous wood. After scrubbing, wipe thoroughly and dry the area completely to prevent mold from returning.
How do you remove green mold from painted or sealed wood without damaging the finish?
Use a gentle mold cleaner first—hydrogen peroxide or a mild detergent solution—then scrub lightly with a non-scratch sponge or soft brush. Avoid soaking painted or sealed wood, since excess moisture can seep into seams and cause deeper growth. Rinse with a damp cloth (not soaking), then dry quickly with fans to protect the paint and prevent future mold issues.
Why does green mold keep coming back on wood after cleaning?
Mold returns when moisture remains in the wood or the surrounding area, such as humidity, leaks, or poor ventilation. Green mold on wood often indicates ongoing damp conditions behind the surface, especially in porous materials. Fix the moisture source first (repair leaks, improve airflow, control humidity), then clean and dry thoroughly.
What’s the best cleaner to kill green mold on porous wood?
Hydrogen peroxide (3%) is often one of the best options for porous wood because it penetrates and helps kill mold spores without needing harsh scrubbing as aggressively as bleach. Apply it to the affected area, wait a few minutes, then scrub and wipe off residue. Dry the wood completely—using fans or dehumidifiers—because leaving moisture behind will allow mold to re-grow.
Which cleaning method should you use if the mold has stained the wood?
If green mold has left staining, cleaning may not fully remove discoloration, but it should stop active growth. Remove remaining mold with a mold-killing cleaner, then you can address stains by sanding lightly (if the wood allows) or applying a stain-blocking primer once fully dry. If the wood is soft, crumbling, or mold has penetrated deeply, you may need to replace the affected wood rather than just cleaning the surface.
📅 Last Updated: November 14, 2026 | Topic: how to clean green mold off wood | Content verified for accuracy and freshness.
References
- Mold Cleanup in Your Home | US EPA
- Learn about Mold | US EPA
- https://www.epa.gov/mold/preventing-mold-growth
- https://www.cdc.gov/mold/faqs.htm
- Mold – Overview | Occupational Safety and Health Administration
- Mold – NYC Health
- Mold
- https://scholar.google.com/scholar?q=how+to+clean+mold+from+wood Google Scholar
- https://scholar.google.com/scholar?q=mold+remediation+porous+materials+wood Google Scholar
- https://scholar.google.com/scholar?q=green+mold+algae+wood+cleaning Google Scholar

[…] soda and get rid of product buildup and hair caught in the bristles? Combine baking soda with warm water, soak the brush (avoiding getting the handle wet if it’s wood), then gently scrub with an old […]
[…] With the right tools—basic brushes, a vacuum with a clean hose, suitable cleaning chemicals, and protective gear—you can follow a step-by-step cleaning process in a few hours. Once you complete it, you’ll […]