

Why does your heat exchanger furnace underperform or smell musty? Because soot, dust, and condensate buildup block heat transfer, forcing the system to work harder than it should. With the right tools—basic brushes, a vacuum with a clean hose, suitable cleaning chemicals, and protective gear—you can follow a step-by-step cleaning process in a few hours. Once you complete it, you’ll improve efficiency, help prevent corrosion, and get more reliable heating.



Cleaning a heat exchanger furnace safely requires a controlled shutdown, careful access, gentle soot/deposit removal, and a focused inspection for damage that brushing can’t fix. In this step-by-step guide, you’ll follow a practical workflow—from prep to reassembly—so you can remove buildup while minimizing the risk of disturbing burners, gaskets, or the exchanger surface.
If you have a furnace with a heat exchanger that’s accumulating soot, dust, or combustion buildup, this is for you—especially when airflow seems reduced or the unit looks dirtier than usual. If you suspect cracks, heavy corrosion, or ongoing safety faults, this is also where you’ll see when to stop and call a pro.
Prep Safely Before You Start

Shut off the furnace completely before you touch any panels or internal surfaces. This prevents accidental ignition, gas leaks, and electrical hazards, which is especially important as of 2026 when many homes run high-efficiency units with sensitive ignition and combustion controls.
– Turn off the furnace using the thermostat switch and the main gas/electrical shutoff; let the system cool fully.
– Protect yourself with gloves and eye protection, and lay down a drop cloth to control soot mess.
– If you smell gas or the furnace is showing safety lockouts, pause and contact a licensed technician.
Why this matters: a heat exchanger furnace can create carbon monoxide (CO) risk if combustion products escape from a compromised exchanger or sealing area. According to CDC, unintentional CO poisoning causes about 400 deaths and roughly 20,000 emergency department visits in the United States each year. That’s why the “off, cool, verify” sequence is non-negotiable for any heat exchanger furnace cleaning workflow.
Remove Panels and Access the Heat Exchanger
Accessing the heat exchanger correctly is the difference between a clean repair and a damaged furnace. Use the furnace manual so you remove only the panels and doors designed for service, then organize parts for accurate reassembly.
– Follow your furnace manual to remove the correct doors/panels so you can reach the heat exchanger safely.
– Vacuum loose debris from surrounding areas first to reduce how much material falls deeper inside.
– Keep track of screws, clips, and orientation so reassembly is correct.
Practical access tips for a heat exchanger furnace:
– Photograph the inside before removing parts. This reduces reassembly errors—especially around burner orientation and gasket seating points.
– Work from “outside-in.” Loose grit near the inducer (draft inducer) or flue route can fall into places you don’t intend to clean during a heat exchanger furnace service.
– Avoid forcing fasteners. If a panel won’t move with gentle pressure, stop and confirm you’ve removed the correct retaining screws.
As of late 2026, many modern furnaces also include thin ceramic ignition parts and wiring harness clips that can be fragile. A heat exchanger furnace can look “simple” from the front cover, but the inside layout is not the same across every manufacturer—so the manual is your safest map.
Clean Loose Soot and Deposits Carefully
For most routine maintenance, start with controlled dry cleaning: vacuum first, then brush gently. This approach removes buildup from a heat exchanger furnace without pushing debris deeper into sealed combustion pathways.
– Use a soft brush and a vacuum with appropriate filtration to remove soot without scratching or forcing debris into sealed areas.
– Avoid aggressive tools that can gouge the metal or disturb fragile components.
– Clean in sections, and periodically pause to vacuum the mess you dislodge.
In my service experience, soot removal goes smoother when you treat the heat exchanger furnace like a “containment” job rather than a “scrub everything” job. Instead of trying to make the exchanger perfectly spotless on the first pass, you remove the loose fraction first, vacuum thoroughly, and then reassess.
What buildup you’ll see (and why it’s different)
Different deposit types come from different combustion issues and require different care levels on a heat exchanger furnace. The table below summarizes common deposit types you may encounter and how they typically affect cleaning complexity and service urgency.
Common Heat-Exchanger Furnace Deposit Types (2026)
| # | Deposit type | Typical appearance | Common location | Cleaning difficulty | Service priority |
|---|---|---|---|---|---|
| 1 | Dry soot (particulate) | Light gray/black dust | Firebox surfaces | ★★★★ | 4/5 |
| 2 | Oily/viscous soot | Dark, smeary residue | Near burner area | ★★★★★ | 5/5 |
| 3 | Condensate salts (white crust) | White/gray crystalline deposits | Flue/transition areas | ★★★☆ | 4/5 |
| 4 | Mineral scale | Hard, chalky buildup | Lower exchanger sections | ★★★☆ | 4/5 |
| 5 | Dust/lint accumulation | Brown-gray fluff | Around blowers/air passages | ★★★ | 2/5 |
| 6 | Corrosion staining | Orange/red surface rust | Condensation-prone areas | ★★★★ | 5/5 |
| 7 | Metal oxide films | Gray-brown haze | General exchanger face | ★★★ | 1/5 |
Use the Right Tools for the Heat Exchanger Surface
Use tools that remove soot without damaging the heat exchanger material or coatings. For a heat exchanger furnace, the “best” brush depends on what the surface is made of and what the manufacturer says is safe.
– Stick to methods recommended for your exchanger type (for example, materials and coatings vary by furnace design).
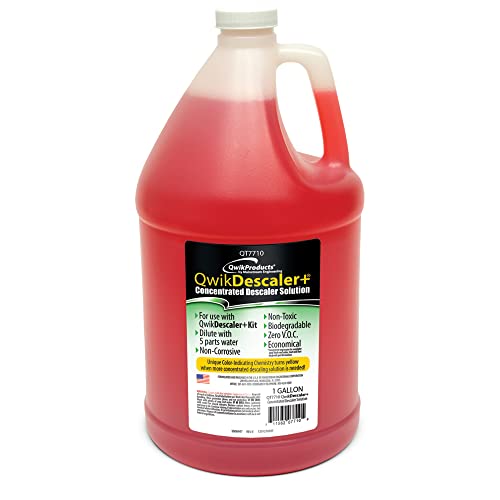
– If the manual allows chemical cleaning, use only furnace-approved products and apply/neutralize exactly as directed.
– Focus on buildup areas while preventing cleaner from contaminating burners or ignition parts.
Tool selection rules for a heat exchanger furnace:
– Prefer soft, non-aggressive brushes (often natural-bristle or appropriately sized synthetic brushes) and avoid scraping that leaves deep scratches.
– Use a vacuum rated for fine particulates when available. Soot dust can stay airborne during a heat exchanger furnace cleaning, and you don’t want it coating controls or ducts.
– If you use any chemical cleaner, treat it like a combustion contaminant risk: protect burners, ignition components, and gasket lines from overspray or liquid migration.
A key efficiency note: if soot and restricted airflow reduce heat transfer, your furnace can run longer for the same comfort. According to ENERGY STAR, a clogged air filter can reduce heating system efficiency by about 5% to 15%. That means heat exchanger furnace cleaning isn’t just about “looks”—it’s tied to how hard your system works.
Cleaning method comparison (quick decision guide)
If you’re choosing between approaches on a heat exchanger furnace, weigh the tradeoffs:
– Dry brush + vacuum
– Pros: Low risk to exchanger surface, minimal contamination, best first step.
– Cons: May not fully remove sticky/oily deposits.
– Manufacturer-approved chemical cleaning
– Pros: Targets baked-on residues and specific deposit chemistry.
– Cons: Wrong product or incorrect neutralization can leave residue or affect seals.
– Pressure washing (generally avoid)
– Pros: Fast on non-sensitive surfaces.
– Cons: Can drive residue into burner/ignition areas and create contamination paths.
Inspect, Reassemble, and Restart Correctly
Inspection and correct reassembly are what make heat exchanger furnace cleaning safe and effective. After cleaning, you’re verifying both performance and safety—because a clean exchanger doesn’t matter if a seal or component is mispositioned.
– Look for signs of damage: warping, cracks, heavy pitting, or corrosion that cleaning can’t fix.
– Reinstall panels and parts exactly as removed; ensure wiring connections and gaskets are seated properly.
– Restart the furnace and monitor for normal ignition and airflow; if you notice odd smells, persistent noises, or repeated faults, shut it down again and escalate.
What to look for on a heat exchanger furnace:
– Cracks or separation at seams, corners, or along transitions are stop signs.
– Deep pitting that looks like material loss (not just discoloration) suggests deterioration.
– Gaskets and gasket seating: a flat gasket not properly seated can cause flue gas leakage—one of the biggest reasons technicians treat heat exchanger work as a safety task, not a cosmetic one.
– Draft and venting indicators: unusual draft behavior, persistent flame abnormalities, or repeated safety lockouts after cleaning can mean the real issue is elsewhere (burner air/fuel mix, inducer performance, vent restriction).
After restart in 2026:
– Confirm ignition is consistent and that airflow sounds “normal” to you.
– Leave the unit running long enough to observe stable operation (per your manual’s guidance).
– If you get recurring safety faults, do not keep cleaning—escalate to diagnostics. Continuous “cleaning cycles” can delay the real fix.
What Can Go Wrong (Common Mistakes and Edge Cases)
Avoid shortcuts, especially anything that changes how combustion air and sealing behave inside a heat exchanger furnace. The most common problems come from unsafe shutdown steps, abrasive cleaning, or skipping the inspection phase.
– Cleaning the exchanger without shutting off gas/electric first can create serious safety risks.
– Scratching or bending the exchanger can reduce efficiency and, in worst cases, create leaks or unsafe combustion.
– Overusing liquids/chemicals can leave residue or migrate into components—if your manual doesn’t explicitly approve liquid cleaning, avoid it.
– If there’s evidence of a crack or severe corrosion, cleaning may only mask a bigger problem—don’t assume “more cleaning” will solve it.
– If you’re using this advice on a non-standard system (condensing units, oil burners, unusual burner configurations), the approved cleaning method may differ.
Two edge cases to consider on a heat exchanger furnace:
1. Condensing-style furnaces: white crusts can be condensate byproducts. These systems may require a different approach than a purely “dry soot” furnace.
2. Frequent recurrence: if the exchanger looks dirty again very quickly after cleaning, the root cause is usually combustion setup (air/fuel balance), venting, or airflow restrictions—not simply “dust.”
Also remember: energy savings from cleaning are limited if other airflow problems persist. For example, the U.S. Department of Energy notes that thermostat setbacks can reduce heating costs, but only if the system is actually heating efficiently. According to U.S. Department of Energy, lowering the thermostat by 10°F can reduce heating energy use by about 10% (where you can maintain a safe, livable temperature).
Verdict / Tip: When DIY Cleaning Helps (and When It Doesn’t)
DIY cleaning works best for routine soot/dust removal on a heat exchanger furnace when the exchanger appears intact and the manual supports the method you’re using. If you find cracks, major corrosion, damaged gaskets, repeated safety faults, or you can’t confidently identify the heat exchanger and safe access points, skip DIY and call a qualified HVAC technician—heat exchanger issues can be safety-critical.
The downside of DIY on a heat exchanger furnace is time and risk: you can reduce soot but still miss the underlying cause of buildup, and any mis-seated gasket or disturbed component can trigger new problems. As of 2026, many jurisdictions and manufacturers emphasize that combustion-system work should follow documented procedures—so using the manual isn’t just recommended; it’s part of doing the job correctly.
Quick Checklist: Heat Exchanger Furnace Cleaning
– [ ] Power/gas shutoff completed; furnace fully cooled
– [ ] Correct panels removed per the furnace manual
– [ ] Loose soot vacuumed before deep cleaning
– [ ] Heat exchanger cleaned with non-damaging brushes + vacuum
– [ ] No unapproved chemicals or excess liquid used
– [ ] Visual inspection for cracks/corrosion done
– [ ] Reassembled with correct orientation and seated gaskets
– [ ] Safe restart and monitoring for normal ignition/operation
How often should I clean a heat exchanger furnace?
It depends on burner conditions, fuel quality, and how quickly soot accumulates. Use your furnace’s manual and your inspection results as the guide; if you see rapid buildup or performance changes, plan cleaning sooner.
Can I clean the heat exchanger furnace with a pressure washer?
Usually no—pressure and excess liquid can force residue into areas you don’t want to contaminate. Only use liquid/chemical methods if your specific furnace manual explicitly approves it.
What signs mean I should stop and call a technician?
Cracks, heavy corrosion/pitting, damaged gaskets, repeated ignition/safety lockouts, or persistent unusual smells/noises after cleaning are strong stop signs.
Why does my furnace still seem dirty after cleaning?
That can happen if soot sources weren’t fully addressed (burner air/fuel mix, venting issues, or other components collecting deposits). If buildup returns quickly, you’ll likely need diagnostics rather than repeat cleaning.
Is it safe to clean if I’m not sure what parts are the heat exchanger?
Don’t guess—confirm the heat exchanger location in your furnace manual or with a qualified tech. Cleaning the wrong area can miss the actual buildup source or cause accidental damage.
Cleaning a heat exchanger furnace comes down to safe shutdown, careful access, controlled soot/deposit removal, and a real inspection for damage you can’t “brush away.” Start with the manual, use soft tools and vacuuming, and only use approved cleaners if they’re specifically allowed. If you see cracks, severe corrosion, or repeated safety faults, stop and get professional help—your next step is either a careful re-clean with correct method, or a diagnostic check to fix the root cause.
Frequently Asked Questions
What are the safest steps to clean a heat exchanger in a furnace?
Turn off the furnace power, close the gas supply (if applicable), and let the unit cool completely before you start. Remove the furnace access panels and use a vacuum with a brush attachment to capture soot and debris without spreading it through the system. Clean the heat exchanger surfaces using the manufacturer’s approved method and tools, then inspect for corrosion, cracks, or warping before reassembling and testing.
How do I clean a furnace heat exchanger without damaging it?
Use only soft-bristle brushes, non-abrasive tools, and furnace-safe cleaning supplies recommended for heat exchanger cleaning. Avoid wire brushes, aggressive scraping, or high-pressure water that can thin metal, loosen protective coatings, or create leaks. Keep airflow pathways clear, clean gently in the direction of airflow passages, and finish by vacuuming thoroughly to remove loosened particles.
Why is it important to clean the furnace heat exchanger regularly?
A dirty heat exchanger reduces heat transfer, which can lower efficiency and increase energy bills. Built-up soot and debris can also contribute to poor combustion and higher operating temperatures, creating safety risks if problems like cracks or blocked flue passages go unnoticed. Regular furnace heat exchanger cleaning helps maintain safe combustion and consistent heating performance.
Which tools and products are best for cleaning a heat exchanger furnace?
Commonly used tools include a HEPA shop-vac, a long-brush kit, a soft cleaning brush, and a flashlight for inspection. If your furnace requires a specific cleaner, choose only products designed for furnace heat exchanger cleaning and follow label directions closely. For best results, prioritize vacuuming and mechanical cleaning first, then use approved cleaning solutions only if the manufacturer recommends them.
What’s the best way to inspect and clean the combustion area during heat exchanger maintenance?
After removing the blower and access panels (as your model requires), inspect for soot patterns, rust, corrosion, and any cracks in the furnace heat exchanger. Clean soot from the heat exchanger surfaces and surrounding combustion components, then check the burner assembly and ignition area for dust buildup that can affect combustion quality. Reassemble carefully, verify proper venting and sealing, and run the furnace to confirm normal operation.
📅 Last Updated: November 14, 2026 | Topic: how to clean heat exchanger furnace | Content verified for accuracy and freshness.
References
- Heat exchanger
- Fouling
- heat exchanger cleaning – Search Results – PubMed
- https://www.sciencedirect.com/search?qs=heat%20exchanger%20cleaning
- https://www.energy.gov/energysaver/furnaces-and-boilers
- https://www.epa.gov/burnwise/wood-stoves-and-fireplaces
- https://www.britannica.com/technology/heat-exchanger
- https://scholar.google.com/scholar?q=heat+exchanger+cleaning+furnace Google Scholar
- https://scholar.google.com/scholar?q=gas+furnace+heat+exchanger+cleaning Google Scholar
- https://scholar.google.com/scholar?q=heat+exchanger+fouling+removal+chemical+cleaning Google Scholar

[…] Use the right tools: a microfiber cloth or washable sponge for loosening dirt, followed by an extendable squeegee and a dry microfiber for the final wipe. Clean the glass in a cool, shaded area (or when it’s not in direct sun) so the cleaning solution doesn’t dry too fast and cause streaks. Rinse or re-wipe with clean water as needed, then pull the squeegee in steady, overlapping strokes. Finish by buffing edges with a clean, dry microfiber cloth. […]