

When you find tarnished pennies in a drawer, you can bring back their shine with vinegar. You will only need white vinegar, a pinch of salt, and a small bowl, then soak and gently rub for a couple of minutes. Once the oxidation lifts, rinse and dry, and you will have clean, bright coins ready to use or keep.


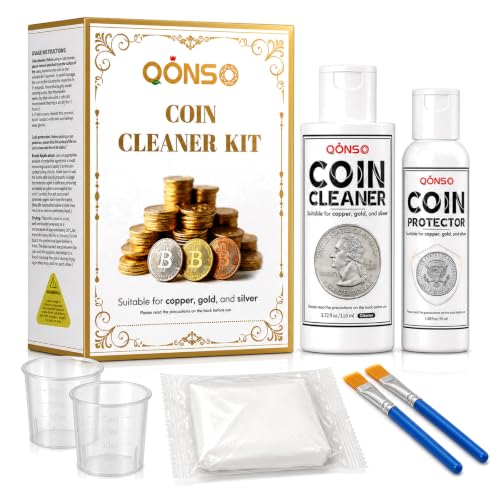

To clean pennies with vinegar, soak them in a mixture of white vinegar (and usually a pinch of salt) to dissolve copper tarnish, then rinse and dry right away. The key is checking progress frequently so you don’t leave them in too long—then finish with a quick soap wash and immediate drying to prevent streaks.
This is for you if you’re trying to remove that dull brown/green tarnish from everyday pennies at home, using supplies you likely already have. It’s also a good DIY option when you want a low-mess approach—just note it’s not ideal for collectible or valuable coins.
What You Need to Clean Pennies With Vinegar

The simplest answer is: you only need a mild acid (vinegar), optional salt, and a safe container—plus something soft to dry the coins. White vinegar works best because it’s consistently acidic and widely available, especially if you’re cleaning U.S. one-cent pennies at home in 2026.
To keep the process controlled and avoid unnecessary surface wear, gather these items first:
– White vinegar (distilled/regular works well) and a small amount of salt, plus a non-reactive container (glass or ceramic).
– Soft cloth or paper towels for drying, and dish soap for an optional pre-rinse or final clean.
– Optional: baking soda (for a separate rinse/cleanup step) and gloves if you don’t want vinegar on your skin.
A quick chemistry note that matters for results: vinegar is essentially acetic acid, which can dissolve many of the compounds that cause copper tarnish (especially green/blue patina related to copper carbonates/hydroxides). According to USDA FoodData Central, distilled white vinegar is commonly sold at about 5% acetic acid concentration (typical household product). This acidity is enough to brighten tarnished pennies without the heavy abrasion of scrubbing.
How Vinegar Responds to Common Penny Tarnish (Weak Acetic Acid ≈ 5%)
| # | Tarnish type (what you may see) | Typical color cue | Why vinegar helps | Vinegar effectiveness |
|---|---|---|---|---|
| 1 | Copper basic carbonate / patina-like film (often green/blue) | Green to blue-green | Acid dissolves carbonate/hydroxide-related compounds | ★★★★★ |
| 2 | Copper hydroxide / oxide-hydroxide mix | Whitish-green haze | Acid neutralizes and helps lift hydrated layers | ★★★★☆ |
| 3 | Cuprous oxide (Cu₂O) tarnish | Dull red-brown | Acid can react with copper oxides, but may be slower | ★★★☆☆ |
| 4 | Cupric oxide (CuO) surface oxidation | Dark brown to nearly black | Typically less responsive than carbonate-like patina | ★★☆☆☆ |
| 5 | Copper chloride-related films (environmental residues) | Light green speckling | Acid can loosen some chloride-associated corrosion layers | ★★★☆☆ |
| 6 | Sulfate residues (often from grime + moisture) | Stains, muted brown/gray | Some staining lifts, but may not fully dissolve | ★☆☆☆☆ |
| 7 | Loose dirt/grease (not true tarnish) | Dirty brown film | Vinegar won’t “buff out” embedded grime—soap rinsing matters | ★☆☆☆☆ |
Step-by-Step: Vinegar Pennies Soak Method
The fastest practical answer is: submerge pennies in a diluted vinegar + pinch-salt solution and monitor them closely, removing coins as soon as tarnish lightens. Vinegar cleaning works best when you treat it like a short, controlled process—not a “set it and forget it” soak.
Use this sequence for consistent results:
– Pour enough vinegar into the container to fully submerge the pennies, then add a pinch of salt and stir to dissolve.
– Place pennies in the vinegar mixture and let them soak while you monitor the change in color (tarnish should lighten as oxides come off).
– Remove each penny, rinse under water, and dry thoroughly; leaving them wet can make them look dull again.
A few details that matter for everyday U.S. pennies (including copper-plated zinc versions commonly in circulation):
– If you’re cleaning pre-1982 pennies, they’re typically 95% copper and 5% zinc, which tends to darken differently than later zinc cores. United States Mint documents this composition for most pre-1982 cents.
– If you’re cleaning cents from 1982 onward, many are zinc with a copper coating, so you may see the surface look “brighter” sooner, but also notice uneven results if tarnish has penetrated or if you over-soak. United States Mint describes the alloy change beginning in 1982.
– If you’re cleaning a rare 1943 steel cent, vinegar results can be unpredictable because the metal isn’t copper-based. United States Mint notes the 1943 cents were made using a steel planchet with zinc coating.
Progress monitoring tip (important): For vinegar pennies, “lighten” usually happens before “fully clean.” Once the dull layer lifts, remove the coin and rinse immediately so vinegar doesn’t keep reacting with the surface.
Best Way to Finish (So They Don’t Look Streaky)
The best finishing answer is: rinse fast, wash lightly with dish soap to remove residue, then dry immediately and thoroughly with a soft towel. Streaks usually come from leftover solution—salt/mineral residues and dissolved tarnish compounds that re-deposit if you let the coin air-dry.
After rinsing, follow this finish workflow:
– After rinsing, gently wash with a tiny bit of dish soap to remove residue, then rinse again.
– Dry immediately with a soft towel, pressing lightly to avoid leaving water spots.
– If you see stubborn spots, repeat a short soak/check/dry cycle rather than soaking longer in one go.
Why the soap step helps: vinegar cleaning can leave a thin film of dissolved copper compounds and salts. Dish soap is a surfactant (it helps oils and residues lift so they rinse away), which improves visual uniformity.
If you choose to use baking soda, keep it as a cleanup step—not another “soak your coins forever.” Baking soda can help neutralize acidic residue in some workflows, but for pennies it’s usually more reliable to neutralize with a brief rinse and then finish with dish soap and dry.
What Can Go Wrong (And How to Avoid It)
The most common failure point is over-soaking, which can make the penny look uneven or change the surface finish. The second is skipping prompt rinsing and drying, which allows solution residue to re-stick and makes the coin appear dull again—even if the tarnish initially lifted.
Here are the pitfalls to watch for:
– Over-soaking can change the appearance of the coin surface—especially if the penny has heavy tarnish or if you let it sit too long. Check often.
– Some pennies may re-tarnish after cleaning, because copper oxidizes again when exposed to air—drying thoroughly helps, but it’s not permanent.
– Avoid cleaning valuable or collectible coins: vinegar is an abrasive/chemical approach and can reduce numismatic value. If you’re unsure, .
Vinegar soak vs. gentler cleaning: pros and cons
If you’re deciding whether vinegar is appropriate for the coins you have, use this comparison:
| Approach | Pros | Cons / Risks |
|---|---|---|
| Vinegar + salt soak | Fast brightening for everyday brown/green tarnish; minimal tools. | Can alter surface appearance if left too long; not ideal for collectible coins; may require careful drying to avoid streaks. |
| Soap + water (no acid) | Safer for coin surfaces; good for loose grime and fingerprints. | Won’t reliably remove green/oxidized tarnish the way vinegar does. |
| Gentle coin-safe cleaners | Designed to be less aggressive; better option when coin value matters. | May cost more; results vary by tarnish chemistry. |
As of 2026, many people cleaning coins at home are balancing “look better now” with “don’t harm the metal.” Vinegar penny cleaning can deliver the first goal—but you need to accept the second tradeoff.
Verdict: Is Vinegar the Right Choice?
Vinegar is a straightforward, household-friendly way to improve the look of tarnished pennies, particularly for everyday coins with light to moderate discoloration. The downside is that vinegar can’t permanently “restore” metal the way professional conservation does, and it can alter the surface if the penny stays in solution too long—so it’s not a great choice for collectors or graded coins.
Here’s the honest recommendation:
– Choose vinegar if your goal is cosmetic cleaning for common pennies, and you can check progress frequently.
– Skip vinegar if the coin is rare, graded, or part of a collection where originality matters more than shine.
– Consider gentler, coin-safe approaches if you’re unsure about value or condition.
Quick Checklist: Clean Pennies With Vinegar
– [ ] Use white vinegar in a glass/ceramic container
– [ ] Add a pinch of salt (optional but commonly used for better results)
– [ ] Submerge pennies and check progress frequently
– [ ] Rinse promptly after tarnish lifts
– [ ] Wash with a little dish soap (optional) and rinse again
– [ ] Dry immediately with a soft cloth/towel
– [ ] Repeat short cycles for stubborn areas (don’t “set and forget”)
Frequently Asked Questions
What’s the best way to clean pennies with vinegar?
Use white vinegar in a non-reactive bowl (glass or ceramic) and submerge the pennies for 5–15 minutes. For light tarnish, simple soaking in vinegar often works by itself. Rinse the pennies under warm water, then dry immediately with a soft cloth to prevent new oxidation.
How do I clean pennies with vinegar and baking soda without damaging them?
First, soak pennies in white vinegar for a few minutes to loosen tarnish, then gently rub with a soft toothbrush. If you want extra lift, make a short-contact paste using a small amount of baking soda mixed with vinegar—apply briefly, then rinse right away. Avoid long soaking in any vinegar + abrasive mixture, as it can wear down the surface over time.
How long should pennies sit in vinegar to remove tarnish?
For typical everyday tarnish, try 10 minutes of soaking in white vinegar, checking every few minutes for progress. Heavily oxidized pennies may need up to 30 minutes, but frequent checking helps you avoid over-cleaning. Once the coppery shine returns, rinse thoroughly and dry immediately to keep the result longer.
Why does vinegar clean pennies, and is it safe for copper?
Vinegar (acetic acid) helps dissolve copper oxide and other tarnish compounds, making pennies look brighter again. It’s generally safe for copper when used with reasonable time limits and followed by a good rinse and dry. However, repeated or prolonged vinegar cleaning can gradually change the appearance, so it’s best to use controlled soaking times.
Which vinegar works best for cleaning pennies—white vinegar or apple cider vinegar?
White vinegar is usually the most effective because it’s typically higher in acetic acid consistency, which improves tarnish removal. Apple cider vinegar can work for mild oxidation, but it often takes longer to produce the same results. For best outcomes, choose plain white vinegar, soak, rinse, and dry quickly after cleaning pennies.
📅 Last Updated: November 17, 2026 | Topic: how to clean pennies vinegar | Content verified for accuracy and freshness.
References
- Vinegar
- https://en.wikipedia.org/wiki/Copper_patina
- Copper
- Checking your browser – reCAPTCHA
- Checking your browser – reCAPTCHA
- https://scholar.google.com/scholar?q=pennies+cleaning+vinegar+acetic+acid+copper+oxide Google Scholar
- https://scholar.google.com/scholar?q=acetic+acid+cleaning+copper+corrosion+products+oxide+acetate Google Scholar
- https://scholar.google.com/scholar?q=coin+cleaning+acetic+acid+copper+patina Google Scholar

[…] an hour with a simple soak and drying or a quick oven bake, using basic household items like water, white vinegar, and a baking sheet. Follow these easy steps and you will have pine cones ready for wreaths, […]
[…] it to a clear, clean surface in about 15–20 minutes with simple supplies: dish soap, baking soda, white vinegar, a soft sponge, and a toothbrush for corners. Follow the steps carefully, and you will remove […]