

How do you get your car floor mats clean again without leaving grime behind? Use a simple process: identify the mat type, remove loose dirt, then wash and dry with the appropriate cleaner and tools. Gather a vacuum or brush, a bucket or hose, mild detergent or mat-safe cleaner, and clean towels, and plan about 30 to 60 minutes for a thorough refresh.
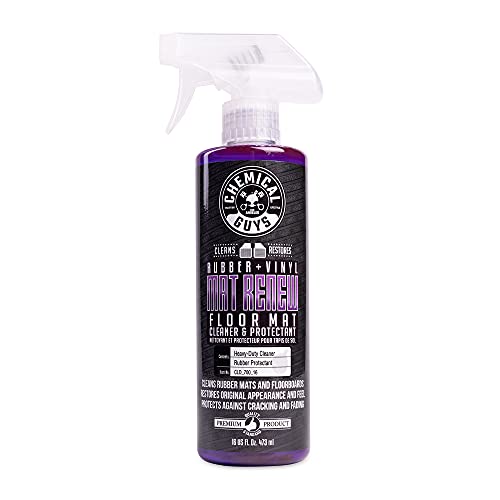



Cleaning car floor mats is simple: vacuum/shake first, then scrub with the right cleaner for the material (rubber or carpet), and rinse carefully before drying fully. Follow the steps below to remove dirt, grime, and odors without damaging the mat’s finish.
This guide is for drivers who want their mats cleaner for everyday use—especially if they’ve collected road dust, mud, pet hair, or spills. Use it whether your mats are rubber, all-weather/plastic-style, or carpeted.
Prep Mats & Choose the Right Cleaner

The fastest way to avoid damage is to start by identifying the mat material and confirming any cleaning restrictions on the label. Once you match the cleaner strength to the mat type, you reduce fading, warping, and lingering smells—an issue that matters even more in 2026 when many vehicles use coated or textured surfaces.
– Remove the mats and check the underside/label for any cleaning instructions or warnings (especially for coated or “treated” surfaces).
– Decide your approach based on material: rubber/all-weather mats typically handle stronger scrubbing, while carpet mats need gentler treatment to avoid soaking the backing.
– Gather basics: a stiff brush or microfiber scrub pad, a vacuum, bucket/spray bottle, mild detergent (or carpet cleaner made for upholstery), and clean water for rinsing.
– Have two water sources available if possible: one for mixing/using cleaner and one for rinsing. Cleaner residue is a common cause of repeat odor.
– If your mats are heavily textured (deep grooves on all-weather styles), plan to use a crevice tool or an old toothbrush-like brush for corners and ridges.
If you’re choosing between DIY cleaners, the pH level matters because both very acidic and very alkaline products can dull finishes and contribute to discoloration over time.
DIY Cleaner pH vs. Finish Safety for Car Mats
| # | Cleaner (Common DIY) | Approx. pH | Odor Lift Rating | Finish-Safety Score |
|---|---|---|---|---|
| 1 | Distilled Water | ~7.0 | ★★★★★ | 10/10 |
| 2 | Mild Dish Detergent (Diluted) | ~7.5 | ★★★★☆ | 9/10 |
| 3 | Baking Soda Slurry | ~8.3 | ★★★☆☆ | 8/10 |
| 4 | 3% Hydrogen Peroxide | ~3.5 | ★★★☆☆ | 5/10 |
| 5 | White Vinegar (Diluted) | ~2.7 | ★★★☆☆ | 5/10 |
| 6 | Household Bleach (Diluted) | ~11.5 | ★★★★☆ | 3/10 |
| 7 | Ammonia Solution | ~11.5 | ★★★☆☆ | 3/10 |
Shake and Vacuum for Quick Dirt Removal
The quickest path to a clean mat is removing loose grit first, because it prevents mud from turning into a stain paste. A good vacuum also reduces the surface debris that can scratch rubber textures or grind into carpet fibers during scrubbing.
– Shake mats outdoors to knock out loose debris, then vacuum both the top surface and edges/corners.
– Pay attention to seams and the mat lip where dirt often packs in.
– If there’s visible grit, do another quick brush-and-vac pass before adding any cleaner.
– For carpet mats, use a gentle vacuum setting if your vacuum has height controls or an upholstery mode. Dirt can get deeper when the suction is too aggressive.
– If you’re using a vacuum with a HEPA filter (HEPA is designed to capture fine particles), you can reduce the amount of trapped dust you re-release into the cabin air; according to the U.S. Environmental Protection Agency, HEPA filters remove at least 99.97% of particles at 0.3 microns (2024).
Deep Clean (Scrub Method by Mat Type)
The right deep-clean method depends on whether your mat is rubber/all-weather or carpet, because the backing behaves differently with water. Here’s how to scrub effectively while minimizing residue and avoiding backing saturation—especially relevant in 2026 as many carpeted mats use foam or fabric backings that can hold moisture.
| Feature | Rubber / All-Weather | Carpet Mats |
|---|---|---|
| Water tolerance | High (rinse-safe) | Lower (backing can retain moisture) |
| Scrub intensity | Medium to firm for grooves | Light to moderate; avoid aggressive friction |
| Best cleaner type | Degreasing mild detergent | Upholstery/carpet cleaner or mild detergent |
| Stain approach | Scrub then rinse | Blot first, then work cleaner in lightly |
| Groove/grit removal | Textured ridges handle brush work | Focus on fibers; don’t “pack” dirt deeper |
| Residue risk if rinsing is skipped | Moderate (washes out later) | Higher (sticky residue attracts soil) |
| Drying time sensitivity | Faster; less backing absorption | Slower; needs airflow to prevent odor |
| Odor after cleaning | Usually linked to dirt left in grooves | Often linked to moisture trapped in backing |
| Tooling | Stiff brush + microfiber | Soft brush + blotting towel |
| Best practice | Use small sections; rinse fully | Use minimal water; repeat short cycles |
| Best For | Rain/snow/mud, daily wear | Comfort-focused interiors, lighter spills |
– Rubber / all-weather mats: Spray or apply diluted cleaner, scrub in small sections, then focus on textured grooves where grime builds up.
– Carpet mats: Lightly work cleaner into stains with a brush, avoiding over-wetting; blot instead of scrubbing aggressively when the stain is fresh.
– If you’re dealing with stuck-on spots, repeat short scrub cycles rather than soaking—this reduces the chance of lingering odors.
A key smell driver is moisture lingering after cleaning. According to the U.S. Centers for Disease Control and Prevention (CDC), mold can begin growing within 24–48 hours after water exposure (2024). That’s why carpet mats need a “clean, extract/remove excess water, then dry fast” mindset, not a “pour and soak” approach.
From my routine with car interiors, the step I keep coming back to is small-section cleaning: I work one area at a time so I can rinse/blot before the cleaner dries, and that consistency helps prevent tacky spots and repeating the same stain.
Rinse, Remove Water, and Dry Fully
The goal is to remove both dirt and any cleaning residue, then dry the backing completely. Rinsing and drying aren’t optional—leftover detergent and trapped moisture are the two biggest reasons mats feel “cleaner” for a day and then smell or attract more grime again.
– Rinse thoroughly with clean water (especially for carpet mats) so residue doesn’t attract dirt later.
– Use towels to press out excess water, and if possible, let mats dry in a ventilated area with airflow.
– Reinstall only when fully dry to prevent mildew or musty smells.
– If you’re rinsing a carpet mat, think “controlled” rinsing: use a damp cloth for edges and lightly apply water to the stained area instead of saturating the entire mat.
– For faster drying in 2026 (especially in humid climates), place mats so air can circulate under them, and aim a fan at the surface. Avoid direct high-heat drying that can warp rubber or set stains.
What Can Go Wrong (and How to Avoid It)
The most common problems come from skipping prep, using the wrong chemistry, or not drying completely. If you avoid those three failure points, you’ll get consistently better results with less rework.
– Over-soaking carpet mats: can keep them damp and lead to odor—use less water and blot frequently.
– Using the wrong cleaner: harsh chemicals or bleach can damage finishes or backing; when unsure, start with mild detergent or a cleaner labeled for automotive carpets/rubber.
– Skipping drying: damp mats can smell and attract new dirt quickly—dry completely before reinstalling.
– Scrubbing dry grit into carpet: if you don’t vacuum first, road dust can act like fine abrasive and dull fibers.
– Rinsing without extracting: in carpet mats, rinsing alone can leave water trapped in the padding; press towels after rinsing and use airflow to finish the job.
Verdict / Tip (What Works Best for Most People)
If you want a safe, repeatable method, use vacuum + mild cleaner, scrub lightly, then rinse and dry thoroughly. This approach works across most rubber and carpet mats without forcing you to guess at specialty products—while still addressing the two root causes of odor: residue and trapped moisture.
| Criteria | Rubber / All-Weather | Carpet Mats |
|---|---|---|
| Best first step | Shake + vacuum grooves | Vacuum fibers + edges |
| Cleaner tolerance | More forgiving | Use mild, minimal-water products |
| Rinse requirement | Essential for grime | Essential to avoid sticky soil |
| Odor prevention | Remove trapped dirt fully | Dry backing thoroughly |
| Drying speed | Typically faster | Typically slower |
| Stain handling | Scrub then rinse | Blot and repeat short treatments |
| Risk of backing damage | Lower | Higher if over-wet |
| Ideal tools | Stiff brush + towel dry | Soft brush + absorbent towels |
| Best for winter mess | Yes | Only with fast drying |
| Impact on cabin air quality | Reduced grit resuspension | Less residue when rinsed + dried |
| Verdict | Easier “daily durability” choice | Best “comfort” choice if you manage moisture |
– If you want the safest “default” method, start with vacuum + mild cleaner, then scrub lightly and rinse well; this works for most mats without guesswork.
– Downsides: carpet mats may take longer to dry, and heavily soiled mats sometimes require more than one cleaning cycle.
– Skip this DIY approach and go gentler (or seek professional cleaning) if your mats have special coatings, severe structural damage, or you’re unsure what the mat backing can tolerate.
Quick Checklist (Save + Follow)
– [ ] Remove mats and check the label for cleaning instructions
– [ ] Shake outdoors → vacuum top + edges
– [ ] Scrub with the right cleaner for rubber/all-weather vs carpet
– [ ] Rinse thoroughly (especially for carpet)
– [ ] Blot to remove water
– [ ] Air-dry fully before putting them back
Frequently Asked Questions
How do I clean car floor mats step-by-step at home?
Start by removing the car floor mats and shaking off loose dirt and debris. Vacuum thoroughly, then pre-treat stained areas with an all-purpose cleaner or floor mat cleaner. Scrub with a brush (use a stiff brush for rubber mats and a softer brush for carpet mats), rinse with a hose or damp cloth, and dry completely before reinstalling. For best results, avoid soaking carpet mats too long to prevent lingering odors.
What’s the best way to remove mud and road grime from rubber floor mats?
First, let mud dry, then knock it off and rinse with water to loosen remaining grit. Use warm water plus a degreasing cleaner, scrubbing in grooves and edges where dirt builds up. Rinse well until runoff is clean, then dry with a microfiber towel or air-dry to prevent water spots. If the mats smell musty after cleaning, let them fully dry outdoors in sunlight or use a light odor absorber.
Which cleaner should I use for carpet vs. all-weather floor mats?
Carpet floor mats respond well to enzyme-based cleaners for stains and odors, followed by gentle agitation with a brush. For all-weather rubber or thermoplastic mats, use a cleaner designed for rubber that can cut through grime without damaging the surface. Always test any product in a hidden area first, then follow label instructions for dwell time. Choosing the right cleaner helps prevent fading, brittleness, and lingering dirt embedded in textured mats.
Why do car floor mats still smell after washing, and how can I fix it?
Odors usually come from trapped moisture, embedded bacteria, or leftover detergent residue in the mat’s padding or fibers. After cleaning, rinse thoroughly and dry completely—ideally with airflow from a fan and time to dry overnight if possible. For stubborn smells, use a baking soda deodorizer or an enzyme cleaner and let it sit briefly before re-rinsing. Reinstalling damp mats can quickly bring back odors, so drying is the most important step.
How do I deep-clean salt stains and stubborn stains from vehicle floor mats?
Start by vacuuming and brushing the surface to remove dry residue, then mix a cleaner with warm water and focus on stained areas. For salt stains, a mixture of equal parts water and white vinegar can help lift deposits—apply lightly, scrub, and rinse. If stains persist, repeat the process or use a carpet stain remover for carpet mats, while using a dedicated rubber mat cleaner for all-weather mats. Dry fully to prevent streaking and to keep your car interior looking clean.
📅 Last Updated: November 02, 2026 | Topic: How to Clean Car Floor Mats: Step-by-Step Guide | Content verified for accuracy and freshness.
References
- https://www.cdc.gov/coronavirus/2019-ncov/community/clean-disinfect.html
- https://www.epa.gov/coronavirus/cleaning-and-disinfecting-your-facility
- https://www.who.int/publications/i/item/cleaning-and-disinfection-of-environmental-surfaces-in-the-context-of-covid-19
- Carpet cleaning
- Carpet
- https://pubmed.ncbi.nlm.nih.gov/?term=carpet+cleaning+allergen+removal
- https://pubmed.ncbi.nlm.nih.gov/?term=disinfection+of+fabric+surfaces
- https://scholar.google.com/scholar?q=how+to+clean+car+floor+mats+step+by+step Google Scholar
- https://scholar.google.com/scholar?q=carpet+cleaning+stain+removal+procedure+hot+water+extraction Google Scholar
- https://scholar.google.com/scholar?q=carpet+cleaning+methods+microbial+reduction Google Scholar
