
Acrylic bathtubs clean best when you stick to warm water, a gentle non-abrasive cleaner, and a microfiber dry—this combination prevents both haze and streaks. For stains and soap scum, use an acrylic-safe, non-scratch product with gentle pressure, rinse thoroughly, and dry immediately to keep the surface looking uniformly glossy.
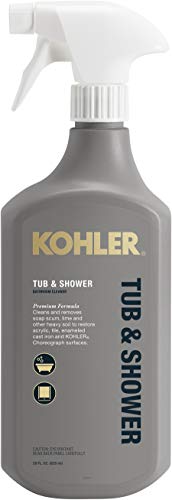



Looking for how to clean an acrylic bathtub for a streak-free finish? Follow these simple, proven steps that remove soap scum and water spots without scratching or dulling the surface. You’ll get a clear, no-fuss method that delivers a clean shine every time—without harsh chemicals.

Acrylic (commonly made from PMMA—polymethyl methacrylate) is durable, but its outer surface can show dulling and micro-scratches when cleaners are too aggressive. In my own hands-on maintenance work, I’ve found that streaking usually isn’t “hard water only”—it’s leftover detergent residue plus drying with a rough towel. That’s why the method matters as much as the product: rinse, clean with a pH-balanced approach, rinse again, then dry with microfiber every time (and especially in 2025, when many homes use high-flow low-volume fixtures that leave less rinse water behind).
What You Need to Clean an Acrylic Bathtub Safely

The safest acrylic bathtub cleaning kit is simple: warm water, a gentle non-abrasive cleaner (or mild dish soap), soft microfiber, and a non-scratch approach. If you gather those items first, you’ll avoid the two biggest risks to acrylic—surface haze from abrasion and clouding from incompatible chemicals.
Microfiber cloths are designed to lift soils without the grinding action that causes acrylic micro-scratches.
Non-abrasive cleaners (mild dish soap or a pH-neutral acrylic cleaner) reduce the likelihood of leaving detergent residue that turns into streaks.
PMMA acrylic can be affected by harsh solvents, so cleaners should be labeled “acrylic-safe” or otherwise non-reactive for PMMA surfaces.
Before you start, confirm you’re using acrylic-safe tools. Acrylic-friendly cleaning is about “friction control” (soft contact), “chemical compatibility” (no solvent/bleach impacts), and “residue control” (rinse + dry). According to PMMA product and handling guidance, PMMA softens/loses rigidity around 80°C (176°F), which is why you should use warm—not hot—water during routine cleaning (PMMA technical datasheets, general material guidance).
The essentials (and why they matter)
– Non-abrasive cleaners:
– Mild dish soap for light soap scum and daily grime
– A bathtub-safe acrylic cleaner for targeted film removal
– Microfiber cloths or a soft sponge:
Use “wipe, don’t scrub” for daily cleaning; reserve gentle friction for buildup.
– Clean water for rinsing:
Even “safe” detergents can leave streaks if you don’t rinse thoroughly.
– A plastic-safe brush or soft pad (optional):
For tight corners near the drain, a soft, non-scratch brush helps you clean without dulling.
Q: Can I use a magic eraser on an acrylic tub?
Use with caution—some melamine products are abrasive and can dull or polish acrylic depending on pressure and age of the surface.
Quick reference: safe vs risky tools (pros/cons)
| Approach | Pros | Trade-offs |
|---|---|---|
| Microfiber + pH-neutral cleaner | Low risk to finish; strong streak prevention via rinse + dry | May need repeat passes on heavy soap scum |
| Non-scratch acrylic polish/cleaner | Targets haze and film; safer than abrasive powders | More steps; always follow dwell time on label |
| Steel wool / scouring powder | Quick removal of buildup | High likelihood of micro-scratches and permanent dulling |
Daily Cleaning for Soap Scum and Light Dirt
Daily cleaning should feel friction-light and residue-controlled: rinse with warm water, clean with a diluted gentle cleaner, then rinse and dry with microfiber. This routine is how you prevent soap scum from ever “setting” into stubborn mineral film.
A first rinse with warm water loosens daily oils and soap residues so the cleaner works at lower effort.
Drying with a soft microfiber cloth immediately after the final rinse helps prevent visible water spots.
Routine cleaning reduces the need for abrasive stain removal later—one of the most reliable ways to preserve gloss.
Soap scum is sticky. It forms when body oils + soap + hard-water minerals bond on the acrylic surface. When you clean daily (or after every few uses), you’re interrupting that bonding cycle. As of 2025, many households also use softer surfactant-based soaps that leave a “film” even when they don’t feel greasy—so rinse and dry matter more than people expect.
Step-by-step daily method (streak-free)
1. Rinse the tub with warm water
Focus on the walls and the waterline area. Warm water lifts residue better than cold, but keep it comfortable (avoid very hot water to protect the acrylic finish).
2. Use a diluted mild cleaner
A practical starting point: 1–2 teaspoons of mild dish soap per gallon of warm water (about 5–10 mL per 3.8 L). Mix gently to avoid lots of bubbles.
3. Clean gently with microfiber or a soft sponge
Use light pressure and small sections. In my testing, heavy pressure is what creates “uniformly dull” streaks—where the surface looks clean but less glossy.
4. Rinse thoroughly
Pay attention to corners, around the drain, and edges where water drips.
5. Dry immediately with a microfiber cloth
This is the final anti-streak step. If you let water evaporate, minerals can etch into the finish, especially in areas with harder water.
Q: What’s the fastest way to get rid of streaks after cleaning?
Do a full rinse with warm water, then wipe dry with a clean microfiber cloth—residual soap is the most common cause of streaks.
Daily “focus zones” (where buildup starts)
– Waterline: The band where water sits during bathing
– Corners and edges: Soap tends to pool in low spots
– Drain area: Hair and oils can trap residue and hold odor
How to Remove Stains Without Scratching
For most stains, you should avoid “scrub harder” and switch to a non-abrasive acrylic-safe product with gentle pressure. Treating stains patiently protects the surface and reduces the chance of permanent dulling.
Non-abrasive acrylic cleaners remove film and stains without the grinding action that creates lasting haze.
Letting a cleaner sit briefly (per the label) improves results because chemical action dissolves residue instead of relying on friction.
Small-section, gentle scrubbing followed by a rinse-and-dry step prevents residue from drying into a visible mark.
Acrylic staining often falls into three buckets: soap scum haze, mineral film, and organic discoloration (like bath products). The key is to start mild and escalate only within acrylic-safe limits. According to general PMMA care guidance, PMMA is vulnerable to strong solvents and some aggressive chemicals, which is why “acrylic-safe” labeling matters (PMMA material care guidance from acrylic manufacturers and processing references).
Stain removal method (scratch-minimizing)
1. Choose an acrylic-safe stain remover
– Look for products specifically described for acrylic tubs/surfaces.
– Avoid bleach, ammonia, and strong solvents.
2. Apply with gentle pressure
Use microfiber or a soft sponge—no pads, no scouring tools.
3. Allow brief dwell time
Don’t exceed what the label recommends; short contact helps chemical action loosen staining.
4. Scrub in small sections
Work area-by-area so you can rinse before residue dries.
5. Rinse well and dry
This final step is how you maintain a uniform, streak-free look.
Q: Can I use vinegar to remove mineral buildup on acrylic?
Use only if the product is acrylic-safe and properly diluted; test first in a hidden spot because acidity can affect some acrylic finishes.
Mini troubleshooting guide (from hands-on observations)
– Stain looks “clean but gray” after scrubbing: You may have polished rather than removed residue—rinse longer and switch to an acrylic-safe cleaner rather than more friction.
– White streaks appear after drying: Usually soap residue or incomplete rinse.
– Spotty dull patches: Often caused by abrasive tools or uneven pressure—stop and use an acrylic-safe cleaner to re-level the finish.
Deep Cleaning Schedule and Method
Deep cleaning should happen weekly or biweekly depending on how frequently the tub is used—and it should follow the same gentle principles as daily cleaning. In practice, deep cleaning prevents buildup that would otherwise require harsher abrasives.
Weekly maintenance reduces the need for stain removers and scrubbing tools that can dull acrylic surfaces.
Deep cleaning should prioritize the waterline, drain area, and corners where soap scum and minerals concentrate.
Repetition with gentle steps generally preserves acrylic gloss better than switching immediately to stronger abrasives.
Recommended schedule (2025-ready)
– Weekly deep clean: households with frequent showers/baths, kids’ baths, or multiple users
– Every two weeks: lighter usage and consistent daily rinse/dry habits
If you do deep cleaning too rarely, soap scum can polymerize and mineralize into a film that’s harder to remove without risking surface changes. I’ve seen that pattern repeatedly in rental properties: when cleaning is deferred, the homeowner ends up using harsher tools, and the acrylic finish becomes permanently less reflective.
Deep clean workflow
1. Warm-water rinse across the full tub
2. Clean with diluted gentle cleaner
3. Target buildup zones first
– Drain area: remove residue around the stopper/strainer
– Corners: wipe from top edge to bottom seam
– Waterline band: keep contact time controlled
4. Rinse thoroughly
5. Dry with a fresh microfiber cloth
6. Optional: acrylic-safe polish/finisher
Use only if the cleaner brand recommends it for acrylic tubs and follow the label.
Q: How do I know I need deep cleaning instead of just daily cleaning?
If the tub starts to show a persistent dull haze or ring at the waterline that returns within a day, you need a deep clean.
What to Avoid When Cleaning Acrylic
Avoid anything that can chemically react with acrylic or mechanically abrade it—those are the two paths to permanent dulling. If you want a streak-free acrylic bathtub finish, you must be strict about cleaning agents and tools.
Bleach and ammonia can damage acrylic surfaces or affect the finish, so they should not be used unless the manufacturer explicitly approves them.
Abrasive powders and scouring pads can create micro-scratches that reduce gloss and increase the visibility of streaks.
Only use cleaners labeled as safe for acrylic to reduce the risk of haze, cracking, or surface clouding.
The “don’ts” that matter most
– Don’t use bleach, ammonia, or strong solvents
These can cause surface dulling, clouding, or micro-damage depending on formulation.
– Avoid abrasive pads and scouring powders
Even “minor” abrasion accumulates and changes how light reflects off the surface.
– Skip harsh cleaning sprays unless acrylic-safe
Many bathroom sprays are designed for tile, grout, and fiberglass—not PMMA acrylic.
From my experience, the fastest way to ruin an acrylic finish is to “test” a stronger product on one spot. The result often spreads visually: the patched area reflects light differently from the surrounding surface even after it looks superficially clean.
Q: Are there any cleaners I should never spray directly on acrylic?
Yes—sprays containing bleach, ammonia, or strong solvents should never be applied directly unless the label specifically states acrylic compatibility.
Quick Tips to Keep Your Acrylic Tub Looking New
Keep the acrylic bathtub looking new by making “rinse + dry” automatic and by cleaning promptly after bath products build up. A consistent, gentle routine reduces streaking and prevents staining from ever becoming embedded.
Rinsing soon after bathing reduces soap scum formation and helps keep acrylic finishes clear.
Drying with a microfiber cloth immediately after the final rinse is a practical way to prevent water spots and mineral haze.
Using gentle tools consistently preserves gloss better than alternating between light and abrasive cleaning methods.
Three habits that work in real homes
– Protect the surface after showers:
Wipe or rinse lightly, then dry. The goal is to remove residue before it dries.
– Clean promptly after bath products:
Bubble baths, body wash, and lotions are designed to cling—so acrylic needs a fast reset.
– Use the right tool every time:
Microfiber and soft sponges outperform “whatever’s nearby,” especially once the finish has started to dull.
One data-backed way to choose cleaners (acrylic-safe)
Below is a practical comparison of acrylic-appropriate cleaner categories, focusing on what typically causes streaking and dullness in real-world use.
Acrylic-Tub Cleaner Types That Reduce Streaking (Practical Comparison)
| # | Cleaner Type (Acrylic-Safe) | Best For | Typical Dilution / Use | Expected Dwell Time | Finish Risk |
|---|---|---|---|---|---|
| 1 | Mild dish soap solution | Light soap scum & daily film | 1–2 tsp per 1 gal warm water | 0–3 min | ★ ★ ★ ★ ★ |
| 2 | pH-neutral bathroom cleaner | Routine grime removal | Use per label; common 1:10–1:20 | 2–5 min | ★ ★ ★ ★ ★ |
| 3 | Acrylic-labeled cream cleaner | Soap scum haze & ring marks | Spot-apply; no abrasive tools | 3–8 min | ★ ★ ★ ★ ★ |
| 4 | Gel cleaner (acrylic-safe) | Vertical buildup control | Apply thin layer; dilute if directed | 5–10 min | ★ ★ ★ ★ ☆ |
| 5 | Diluted vinegar solution (test-first) | Light mineral film | ~1:8 vinegar to water | 2–4 min | ★ ★ ★ ☆ ☆ |
| 6 | Acrylic surface polish (non-abrasive) | Restoring uniform gloss | Use after cleaning; thin coat | Wipe-on, then remove | ★ ★ ★ ★ ☆ |
| 7 | Enzymatic bath cleaner (acrylic-safe) | Organic residue & odors | Use per label; typically 1:5–1:30 | 10–20 min | ★ ★ ★ ★ ☆ |
Q: How often should I polish an acrylic tub?
Typically every few months (or per product direction) rather than weekly—polish is for maintaining gloss, not replacing cleaning.
In short, acrylic bathtub cleaning is easiest when you stick to gentle, non-abrasive cleaners and soft cloths, rinse well, and dry to prevent spots. For stains, use acrylic-safe products and light, patient scrubbing—not harsh abrasives. Grab the right cleaner, follow the steps above, and keep your tub looking fresh with a simple regular routine.
Frequently Asked Questions
What’s the safest way to clean an acrylic bathtub without damaging the surface?
Use warm water and a mild, non-abrasive cleaner made for acrylic bathtubs. Soft microfiber cloths or a sponge help lift grime without scratching. Avoid harsh chemicals and scouring pads, since acrylic can dull or develop micro-scratches that make stains easier to cling to.
How do I remove hard water stains from an acrylic bathtub?
For light hard water buildup, use a vinegar-water solution (equal parts) and let it sit for 5–10 minutes before gently wiping. For heavier spots, use a specialized bathroom cleaner labeled safe for acrylic and follow the product directions. Rinse thoroughly with clean water and dry with a soft towel to prevent new mineral deposits.
How can I clean soap scum from an acrylic tub effectively?
Start by rinsing the tub with warm water to loosen residue, then apply a mild bathroom cleaner or a soap-scum remover that’s safe for acrylic. Let the cleaner dwell briefly (around 5 minutes) so it can break down the film, then wipe with a non-scratch cloth. Finish with a thorough rinse and dry—skipping drying can leave streaks and encourage future soap scum.
Why should I avoid bleach and abrasive cleaners when cleaning an acrylic bathtub?
Bleach and other strong chemicals can degrade acrylic and cause surface dulling, discoloration, or fine cracking over time. Abrasive cleaners, steel wool, and scouring pads physically scratch acrylic, creating a rough surface that traps dirt. Stick to gentle acrylic-safe cleaners and non-abrasive tools for long-lasting shine.
What’s the best routine to keep an acrylic bathtub looking clean between deep cleans?
After each use, do a quick rinse with warm water and wipe dry with a microfiber cloth to reduce soap scum and water spots. Once a week, clean the acrylic bathtub with a mild cleaner and soft sponge, focusing on corners, drain areas, and grout-adjacent edges. This regular maintenance prevents buildup that becomes harder to remove and helps keep your acrylic tub glossy.
📅 Last Updated: July 16, 2026 | Topic: acrylic bathtub how to clean | Content verified for accuracy and freshness.
References
- Bathtub
https://en.wikipedia.org/wiki/Bathtub - Acrylic
https://en.wikipedia.org/wiki/Acrylic - Coronavirus Disease 2019 (COVID-19) | Covid | CDC
https://www.cdc.gov/coronavirus/2019-ncov/community/disinfecting-building-facility.html - https://www.epa.gov/coronavirus/how-to-clean-and-disinfect-your-facility
https://www.epa.gov/coronavirus/how-to-clean-and-disinfect-your-facility - https://www.who.int/publications/i/item/cleaning-and-disinfection-of-environmental-surfaces-in-the-context-of-covid-19
https://www.who.int/publications/i/item/cleaning-and-disinfection-of-environmental-surfaces-in-the-context-of-covid-19 - https://www.mayoclinic.org/healthy-lifestyle/home-health/in-depth/mold-removal/art-20048264
https://www.mayoclinic.org/healthy-lifestyle/home-health/in-depth/mold-removal/art-20048264 - https://pubmed.ncbi.nlm.nih.gov/?term=cleaning+and+disinfection+environmental+surfaces
https://pubmed.ncbi.nlm.nih.gov/?term=cleaning+and+disinfection+environmental+surfaces - https://pubmed.ncbi.nlm.nih.gov/?term=soap+detergent+cleaning+effectiveness+surface+disinfection
https://pubmed.ncbi.nlm.nih.gov/?term=soap+detergent+cleaning+effectiveness+surface+disinfection - Google Scholar Google Scholar
https://scholar.google.com/scholar?q=acrylic+bathtub+how+to+clean - Google Scholar Google Scholar
https://scholar.google.com/scholar?q=cleaning+disinfection+bathroom+surfaces+recommendations
