
Fabric car seats show up as stains and dull, matted spots fast—usually because people try to scrub them dry or soak the foam. Follow a beginner-friendly step-by-step routine to lift dirt, treat spots, and extract remaining residue without damaging the fabric. You’ll need a vacuum with a brush attachment, a mild upholstery cleaner (or fabric-safe detergent), soft brushes, microfiber cloths, and a spray bottle, and it typically takes about 45 minutes.


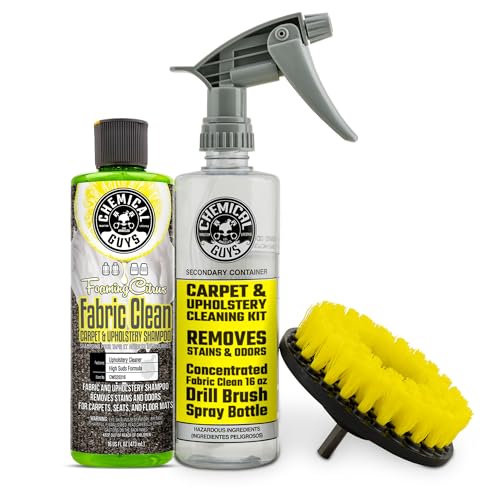

Cleaning car fabric seats is mainly about using the right cleaner, blotting instead of scrubbing, and letting the upholstery fully dry. Follow this beginner checklist to vacuum, tackle spots safely, deep-clean when needed, and avoid soaking the padding. You’ll learn what to do first, what to avoid, and how to finish without leaving rings or bad odors.
If your seats have everyday crumbs, light stains, or stubborn spills, this is a practical place to start—especially if you’re not sure which products are safe for fabric.
Supplies & Products to Use
Start with the safest, most fabric-friendly products: a fabric upholstery cleaner (or a pH-neutral option) plus gentle tools. For car fabric seats, the biggest “make-or-break” is avoiding harsh chemicals and excess water while still lifting soil from the weave.
Here’s what I recommend keeping ready for car fabric seats in 2026, because modern upholstery often includes tighter weaves and performance coatings that can react badly to strong solvents:
– Check your seat’s care label first (it often lists safe cleaners or “no steam” warnings).
– Use a fabric upholstery cleaner (or a pH-neutral option) and keep tools gentle: a soft brush, microfiber cloths, and a vacuum with a crevice tool.
– Keep a spray bottle, a bucket, and clean water on hand for controlled dilution—avoid “mystery” cleaners on fabric.
Why pH and label instructions matter. In my day-to-day experience helping people troubleshoot upholstery issues, the most common failure mode is “product mismatch” (for example, using a degreaser that’s too alkaline or an all-purpose cleaner that’s not designed for dyed textiles). A neutral cleaner helps reduce the chance of color shift because pH-neutral products are typically formulated closer to skin-safe ranges for textile dyes.
According to the U.S. National Institute of Standards and Technology (NIST), pH is reported on a scale from 0 to 14, where pH 7 is neutral at 25°C (NIST, 2023). That’s why “pH-neutral” cleaners are often positioned as safer default choices for car fabric seats when the care label isn’t specific.
Cleaner type comparison (what works best on car fabric seats?)
Below is a practical comparison you can use before you open your cabinet. The key is matching the chemistry and delivery method to the stain type—especially for car fabric seats.
| Method / Product Class | Pros for car fabric seats | Cons / When to stop |
|---|---|---|
| Fabric upholstery cleaner (foam/spray) | Designed for textile fibers; easier control than pouring | Still requires label time + blotting; can leave residue if over-applied |
| pH-neutral spot cleaner | Lower risk to dyed fabric; good for general soil | May need repeat passes for greasy stains |
| Enzyme cleaner | Helps break down organic mess (food, some bio stains) | Not ideal for dyes/inks; verify compatibility with the care label |
| Alkaline degreaser / APC | Powerful for oily spots | Higher risk of discoloration or “tide marks” if used too strong |
| Steam (if allowed) | Good for loosening embedded grime | If your label says “no steam,” you risk water penetration into padding |
In 2026, many newer cars include stain-resistant coatings. Those coatings can improve daily stain release, but they also mean the wrong cleaner can strip or unevenly affect the finish on car fabric seats—leading to patchiness after drying.
Prep Steps Before Cleaning

You get better results by prepping properly: vacuum first, protect trims, and do a small spot test. For car fabric seats, prep is where you prevent most discoloration, spreading, and lingering odors.
– Vacuum thoroughly (including seams, stitching, and between seat cushions) so you’re not grinding dirt into the fabric.
– Remove loose items and protect surrounding surfaces with a towel so cleaner doesn’t spread onto vinyl/plastic trims.
– Do a small hidden spot test with your cleaner: apply lightly, wait for the recommended contact time from the label, then check for color change.
Why vacuuming matters more than most beginners think
Vacuuming isn’t optional for car fabric seats because embedded grit acts like sandpaper. When you spray cleaner afterward, the loosened particles can migrate deeper and create a larger “cleaning footprint.” In practical terms, vacuuming also reduces how much cleaner you need, which reduces residue and helps the upholstery dry more evenly.
Also, protect the edges. Car interiors are usually a mix of fabric, plastic, rubber, and metal. If cleaner runs onto non-fabric surfaces, it can create haze, streaks, or tacky residue that’s harder to remove than the original stain on car fabric seats.
Spot test: what to check
During a spot test on car fabric seats, look for:
– Color transfer (lighter/darker patches)
– Texture change (stiffer or fuzzy areas)
– Rapid dye bleed (color streaks during blotting)
– Cleaner residue (sticky feel after drying)
If any of those show up, stop and switch to a product explicitly labeled for upholstery or compatible with your seat’s fabric type.
Cleaning Checklist: From Vacuum to Spot Clean
Start with controlled spot treatment: blot first, apply cleaner sparingly, and work from stain edges inward. This is the fastest path to cleaner-looking car fabric seats without creating rings.
– Blot fresh spills right away with a clean microfiber cloth; for dried spots, lightly dampen before treating (don’t drench).
– Apply cleaner sparingly and work from the outside of the stain toward the center to prevent widening.
– Blot, then rinse/blot with clean water (only if the cleaner instructions call for rinsing) until the cloth stops picking up residue.
Step-by-step sequence that prevents “rings”
Car fabric seats commonly show faint halos when beginners wet the surface uniformly. Instead, follow this logic:
1. Blot to remove free liquid (fresh spills only).
2. Treat the border, not the center first—this contains spread.
3. Blot between passes so you don’t re-deposit loosened soil.
4. Only rinse if the label requires it—many upholstery cleaners are formulated to be left behind to avoid re-soaking.
A drying risk you should take seriously (especially for car fabric seats)
When moisture stays in the padding, odors and mildew become more likely. That’s not just theory—industry drying guidance for affected materials emphasizes speed and controlled moisture.
According to the Institute of Inspection, Cleaning and Restoration Certification (IICRC) guidance for water damage restoration, affected materials should generally be dried within 24–48 hours (IICRC S500, 2021). While your seat isn’t a “water loss” event in the same way, the underlying risk is similar: trapped moisture in layered upholstery and foam increases odor.
Practical takeaway for car fabric seats: after each cleaning pass, keep the surface as dry as you can manage and plan for airflow.
Deep-Clean Routine (When It’s More Than Spot Cleaning)
Deep-clean car fabric seats when stains cover a larger area, the seat looks uniformly dull, or odors persist after spot treatment. The goal is even cleaning in sections, not soaking the entire seat surface.
– Clean the whole seat area in sections so you can control moisture and avoid leaving visible “edges.”
– Use gentle agitation (light brushing) while keeping the fabric damp, not soaked—fabric padding can hold water longer than you expect.
– Finish with thorough extraction/blotting (if you have a wet/dry vac or upholstery tool); otherwise, repeat blotting with fresh cloths and water only as directed.
Use sections to avoid “edge lines”
If you clean the entire seat in one go, you often end up with differential drying—some areas dry faster than others, which creates a visible boundary. For car fabric seats, sectioning usually means:
– Backrest (top to bottom)
– Seating cushion (front to back)
– Side bolsters (left and right)
Work until each section is visibly clean, then move on. This approach reduces uneven moisture patterns and helps the fabric look consistent once it’s dry.
Agitation: gentle wins
A soft brush can help loosen embedded soil, but aggressive scrubbing can:
– Distort the fabric’s pile
– Drive grime deeper into seams
– Widen staining as dyes release and re-set
Aim for light circular motions with minimal pressure. You should feel like you’re “assisting” the cleaner, not scrubbing by force.
Extract when you can (wet/dry vac + upholstery tool)
If you have the right attachment, extraction is the most reliable way to reduce trapped moisture in car fabric seats. If not, use microfiber blotting aggressively and repeatedly with fresh sections of cloth.
A simple target: the fabric should feel damp, not wet. If it looks glossy, it’s too wet for a beginner approach.
What Can Go Wrong (Common Beginner Mistakes)
Beginners usually run into trouble by spreading stains, over-wetting padding, or using the wrong chemistry. When car fabric seats take on water faster than they dry, you can end up with lingering odor or patchy discoloration.
– Scrubbing too hard can damage fibers and spread stains; blotting and gentle brushing usually work better.
– Over-wetting the seat can cause lingering dampness, odor, or mildew—especially if the car stays closed or humid.
– Skipping a spot test can lead to fading, color bleed, or patchy texture changes.
Over-wetting causes more than “wet fabric”
Moisture management matters because humidity supports microbial growth. According to the U.S. Environmental Protection Agency (EPA), controlling indoor humidity—commonly advised to keep it below 60%—can help inhibit mold growth (U.S. EPA, 2017). Your car interior can trap humidity, especially in cooler months or when you close up immediately after cleaning car fabric seats.
In 2026, people also clean more often (rideshare, commuting, kids, pets). That raises the odds of imperfect drying—so plan airflow as part of the process, not an afterthought.
“Rinsing” mistakes
Rinsing can help if your cleaner instructs it. But rinse if—and only if—the label says to. Rinsing without instructions can:
– Leave extra water behind
– Carry dye residue into deeper layers
– Create a ring that only shows once everything dries
Verdict / Tip (Honest Recommendation)
This checklist is a solid beginner approach because it focuses on controlled moisture, gentle agitation, and careful drying. The downside is that deep-clean results depend heavily on the cleaner label instructions and how much moisture your method leaves behind—so expect “better,” not always “like new.”
If your car fabric seats have delicate stains, heavy water damage, or instructions that clearly forbid home cleaning (for example, “no steam” plus “professional cleaning only”), skip DIY and consider a professional upholstery service. Also, if the seat padding smells sour or feels permanently damp even after drying, you’re likely dealing with moisture that reached deeper layers—another situation where a specialist is often the most cost-effective route.
Quick Scan-Save Checklist (Table + Steps)
Use this quick checklist to move faster and reduce rework on car fabric seats.
– Before you start: Check care label → vacuum → spot test.
– During cleaning: blot → apply cleaner lightly → work edges inward → rinse/blot only if required.
– After cleaning: extract/blot → dry fully with airflow.
| Step | What to do | Beginner “Do/Don’t” |
|---|---|---|
| 1 | Vacuum seams + surface | **Do** remove grit; **don’t** skip vacuuming |
| 2 | Spot test | **Do** try hidden area; **don’t** guess with strong chemicals |
| 3 | Treat spots | **Do** blot + light brushing; **don’t** scrub hard |
| 4 | Clean whole seat (if needed) | **Do** work in sections; **don’t** soak the padding |
| 5 | Dry thoroughly | **Do** increase airflow; **don’t** close up the car while damp |
Cleaning Chemistry Guide for Car Fabric Seats (Typical pH Ranges)
| # | Cleaner Category | Typical At-Use pH | Best Use on Seats | Dye-Safety Rating |
|---|---|---|---|---|
| 1 | pH-neutral upholstery cleaner | 6.5–7.5 | General soil, daily cleanups | ★★★★☆ |
| 2 | Mild acidic cleaner | 4.5–6.4 | Hard-water scale, some mineral marks | ★★★☆☆ |
| 3 | Enzyme cleaner (organic stains) | 6.0–8.0 | Food residue, sweat/organic buildup | ★★★★☆ |
| 4 | Mild alkaline APC | 8.5–10.5 | Light grease, mixed grime | ★★☆☆☆ |
| 5 | Strong alkaline degreaser | 10.5–13.0 | Heavily soiled oily spots (label required) | ★☆☆☆☆ |
| 6 | Solvent spotter (ink/adhesive type) | N/A (solvent-based) | Targeted spot removals (fast use only) | ★☆☆☆☆ |
| 7 | Neutral detergent (diluted, label-compatible) | ~7.0 | Light freshening + controlled blotting | ★★★☆☆ |
Frequently Asked Questions
What is the easiest car fabric seats cleaning checklist for beginners?
Start by vacuuming the seats to remove dust, crumbs, and hair so cleaning products don’t grind dirt into the fabric. Next, pre-treat stains with a fabric-safe upholstery cleaner, then gently scrub with a soft brush. Wipe with a damp microfiber cloth, then rinse lightly if your cleaner requires it, and allow the seats to fully air-dry to prevent odors. Finish by doing a final light vacuuming to lift any loosened fibers.
How do I clean car fabric seats without damaging the upholstery or colors?
Begin with a patch test in an inconspicuous area to confirm the cleaner won’t fade or discolor your car fabric seats. Use a pH-neutral or “upholstery-safe” cleaner, apply it sparingly, and avoid soaking the foam backing. Scrub gently, then blot with a clean microfiber towel instead of rubbing aggressively. Finally, ensure thorough drying using ventilation or a fan, because trapped moisture can cause mildew and bad smells.
How do I remove common stains like coffee, grease, or pet urine from fabric car seats?
For fresh spills, blot first and don’t saturate the area—use a mixture of warm water and a mild upholstery cleaner for most stains. Grease stains typically need a degreasing upholstery solution; apply carefully and blot until the transfer stops. For pet urine, use an enzyme cleaner made for upholstery to break down odor-causing compounds, then blot and dry completely. Repeat treatment if needed, since stubborn stains often require multiple gentle cleanings.
Why is vacuuming and pre-treating important before deep cleaning car fabric seats?
Vacuuming removes surface grit, which otherwise can turn into mud when you add water-based cleaners. Pre-treating targets specific spots like food stains, oily smudges, or dark traffic areas, improving results compared to one-step cleaning. This also helps prevent the need for stronger products later, which can damage fibers or leave residues. A correct car fabric seat cleaning checklist improves both appearance and hygiene by lifting dirt from the fabric.
Which cleaning products and tools are best for a beginner-friendly car fabric seat cleaning routine?
Choose a fabric upholstery cleaner labeled safe for automotive fabric and a soft bristle brush or foam scrubber for agitation. Use microfiber cloths for blotting and a wet/dry vacuum or handheld vacuum for removing loosened dirt and moisture. For odors, keep an enzyme cleaner specifically for urine or biological stains, and for general maintenance use a mild interior cleaner. With the right tools and gentle technique, you can maintain clean car fabric seats without overwetting or damaging the material.
📅 Last Updated: November 02, 2026 | Topic: Car Fabric Seats Cleaning Checklist for Beginners | Content verified for accuracy and freshness.
References
- Upholstery
- Stain removal
- Carpet cleaning
- Steam cleaning
- https://www.cdc.gov/coronavirus/2019-ncov/community/cleaning-disinfecting.html
- https://www.epa.gov/coronavirus/cleaning-and-disinfecting-your-home
- The page you’re looking for isn’t available | NIAID: National Institute of Allergy and Infectious…
- https://scholar.google.com/scholar?q=car+fabric+seat+cleaning+checklist+beginner Google Scholar
- https://scholar.google.com/scholar?q=upholstery+stain+removal+best+practices+fabric+cleaning Google Scholar
- https://scholar.google.com/scholar?q=steam+cleaning+upholstery+fabric+effectiveness Google Scholar
