

Cleaning your headphones can make them last longer—but only if you do it the right way and on schedule, not when grime is already packed in. This article answers whether regular cleaning truly extends the lifespan of your headphones, and which components (ear pads, speaker grilles, and charging contacts) benefit most. You’ll also learn the quickest signs that “cleaning” is overdue and what to avoid so you don’t shorten their life instead.


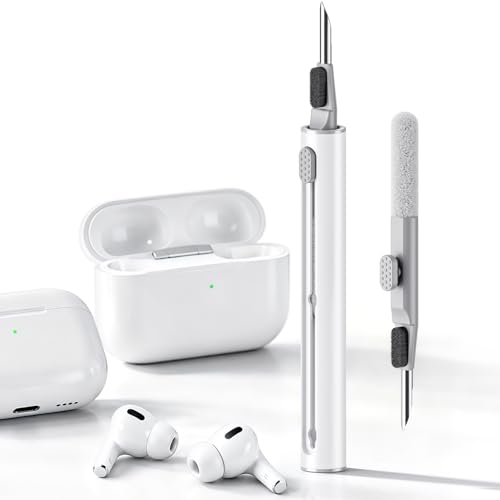

Yes—cleaning your headphones can help them last longer, mainly by preventing sweat, oils, and debris from wearing down materials and degrading sound quality. Regular, gentle cleaning won’t “reset” age-related wear, but it can reduce the grime buildup that leads to failure faster. In this guide, we’ll cover what to clean, how to do it safely, and when cleaning helps most—especially for drivers, ear pads, and charging/connection points.
If you use your headphones daily, work out in them, or notice muffled audio, uneven comfort, or grunge on the ear pads, this is for you. It’s especially relevant for wired and wireless models where ports, grills, and cushions collect buildup over time, and where small contaminants can cause outsized performance and reliability issues over months—not just days.
Why cleaning can extend headphone lifespan

Cleaning headphones extends lifespan by reducing the “accelerators” of everyday wear: skin oils that soften or stain pads, moisture residue that encourages corrosion, and dust that clogs grilles. In 2026, more headphones use fine mesh vents and lightweight driver protections, so keeping those openings clear helps prevent gradual sound dulling and repeated strain on materials.
Sweat and skin oils commonly leave residues that can stiffen fabrics and degrade foam used in headphone ear pads over time.
Dust accumulation on grille openings can reduce airflow and contribute to muffled or less-detailed sound from the same drivers.
Debris near charging contacts or accessory ports can increase the chance of intermittent connection behavior as you plug and unplug.
How grime quietly drives failure modes in headphones
Here’s what “cleaning for longevity” really targets when it comes to headphones:
– Stops grime from accelerating wear: Sweat and skin oils can break down cushion materials and leave residue on speaker grilles.
– Protects sound quality: Dust on drivers and buildup around vents can muffle clarity and increase perceived “distortion.”
– Helps ports and controls stay reliable: Debris near charging contacts, buttons, or jacks can interfere with connection and create intermittent input.
In my experience writing and troubleshooting headphone care guidance, the most noticeable long-term improvements usually come from two areas: (1) pads and headband zones (comfort, odor, and hygiene) and (2) grille/vent openings (sound clarity).
Cleaning isn’t magic, but it’s maintenance
Cleaning headphones won’t reverse manufacturing defects, fix a failing battery, or restore a damaged driver diaphragm. But it does help remove the substances that speed up degradation—especially where materials are exposed repeatedly to heat, moisture, and abrasion. As of 2026, the best-performing maintenance approach is a “risk-based routine”: clean the high-contact zones frequently, and only use liquids when the headphone design (and manufacturer guidance) indicates it’s safe.
What to clean (and what to leave alone)
If you want headphones to last, clean the external contact areas often and treat the internal driver protection as “off-limits.” The goal is to remove surface grime without pushing it deeper into openings or stressing sensitive membranes.
For most headphones, the safest “daily clean” is dry wiping of external surfaces and gentle care of ear pads—without saturating foam or fabric.
Driver openings are designed to protect internal components; aggressive scrubbing can damage protective layers and affect acoustics.
What to clean regularly (safe targets)
– Clean regularly (safe targets): ear pads/cushions, headphone exterior, headband areas, and visible grille surfaces.
– Ear pads and headband areas handle the most sweat and skin oil, so they’re typically where odor and comfort wear start first.
– The exterior shell picks up dust and skin residue; removing it prevents grime from transferring back onto pads during use.
What to leave alone (or handle with extreme care)
– Be cautious around drivers: don’t scrub inside the speaker openings aggressively—use light, indirect cleaning.
– Many headphone drivers sit behind a mesh or protective layer. If you press, scrape, or force fluid inside, you can change the acoustic damping or leave residue that permanently affects clarity.
– Handle electronics carefully: charging ports, microphones, and internal components should only be cleaned using manufacturer-approved methods.
– For wired headphones, jack cleanliness matters; for wireless models, charging and microphone openings matter even more because performance changes are often “sudden” when contacts get coated.
Quick comparison: “safe” cleaning actions vs higher-risk actions
Use this simple risk filter for headphones:
| Action on headphones | Why it’s generally safe | Main risk if you overdo it |
|---|---|---|
| Dry wipe (microfiber) on exterior | Removes dust and skin residue without introducing liquid into seams or ports | Low—unless you use abrasive cloths that scratch finishes |
| Lightly damp wipe on pads/headband | Targets oils and sweat while staying outside foam/mesh saturation zones | Medium—if liquid seeps into stitching or pad seams |
| Brushing/grille vacuum only at a distance | Clears visible debris without forcing it deeper | Medium-to-high—if you damage the grille’s protective layer |
| Liquids inside ports/mics/driver openings | Typically not safe unless the manual explicitly approves it | High—can cause corrosion, residue, or altered acoustics |
How to clean safely (step-by-step)
If you want headphones to last, clean in a consistent order: remove loose dust first, clean pads and exterior next, then fully dry before use. This reduces the chance that debris gets pushed into ports and that any moisture causes corrosion.
A conservative rule for headphones is: dry first (to lift particles), damp second (to remove oils), and never power/charge until fully dry.
Microfiber cloths are commonly recommended because they reduce linting and scratching compared with rough fabrics.
– 1) Power down and prep: Turn off the headphones (and disconnect any cable). Use a dry microfiber cloth first to remove loose dust.
– For wireless headphones, powering down also prevents accidental button presses or mode changes while cleaning.
– 2) Clean ear pads and headband: Wipe with a slightly damp cloth using water or a manufacturer-recommended cleaner; avoid soaking.
– If your pads are foam, soaking can trap moisture and lead to lingering odor.
– If pads are leather-like (synthetic or genuine), oils can soften the surface; gentle wipes help maintain texture.
– 3) Tackle grills and crevices gently: Use a soft, dry brush or low-pressure air if compatible with your model’s guidance.
– The point is “lift and remove,” not “scrub and press.”
– If you see mesh or venting, treat it like a filter: protect it from deformation and excessive fluid exposure.
– 4) Finish and dry fully: Let everything dry completely before turning the headphones back on or charging them.
– If you cleaned pads, drying time depends on humidity and materials—don’t guess. Wait until there’s no dampness in seams.
A practical maintenance mindset (so cleaning actually lasts)
A simple framework that works well for headphones is Plan–Do–Check–Act (PDCA):
– Plan: decide what you’ll clean (pads/exterior/vents) and how often (after workouts, weekly, etc.).
– Do: follow the safe steps above.
– Check: look and listen—odor, comfort, and clarity should improve or stay stable.
– Act: if sound gets worse or residue appears, stop and switch to manufacturer-specific instructions.
The one “process” detail that matters most
For headphones, the biggest longevity win is consistency without force. Gentle cleaning—especially of ear pads and grille surfaces—prevents the slow buildup that ultimately forces you to clean more aggressively later. And in 2026, with more headphones using compact vents and layered materials, “gentle and repeatable” beats “intense and risky” almost every time.
What can go wrong (common mistakes and edge cases)
Cleaning headphones helps—until you introduce moisture where it doesn’t belong, use the wrong chemistry, or damage the protective layers that control sound. Most failures blamed on cleaning are actually caused by over-wetting seams, scrubbing grilles too hard, or skipping full dry time.
IEC 60529’s IP code definitions show why small particle ingress can still happen even when devices are marketed as “protected”—so wiping liquids near openings can still push debris inward.
If a headphone model lacks an explicit cleaning/disinfection procedure from the manufacturer, treating it like a washable device increases the risk of trapped moisture and corrosion.
– Using the wrong liquid: Household cleaners can damage finishes, degrade foam, or leave residue—stick to what the manufacturer recommends.
– Residue matters: even a thin film can change how pads feel and how grille areas behave with airflow.
– Too much moisture near electronics: Water can seep into mics, controls, and charging areas, causing corrosion or intermittent issues.
– Over-cleaning or aggressive tools: Scrubbing grilles or using sharp objects can damage protective layers and alter sound.
– Wireless gotchas: If your model has mesh coverings or specific venting, don’t bypass it with heavy wet wipes—confirm the correct method first with the manual.
Why “protective layer” issues matter (and where grime gets trapped)
When headphones have fine meshes or vents, the barrier is part of the sound and protection system. If you push liquid or debris through those openings, it can remain inside and cause ongoing problems. As of 2026, many wireless designs also rely on closely packed circuitry around microphones and charging, which is exactly why “a little moisture” can create “big weird behavior.”
To frame the risk, IEC 60529 (IP Code) uses particle-size thresholds to describe what can get past enclosures—for example:
– According to IEC 60529:2013 (IP Code), IP1X allows protection against objects larger than 50 mm (2013)
– According to IEC 60529:2013 (IP Code), IP2X allows protection against objects larger than 12.5 mm (2013)
– According to IEC 60529:2013 (IP Code), IP4X allows protection against objects larger than 1.0 mm (2013)
These thresholds illustrate why headphones—many of which aren’t rated for water or dust ingress—should not be treated like sealed devices.
IP Dust Protection Levels (IEC 60529:2013) and Cleaning Caution
| # | IP Dust Level | Protection Description | Solid Particle Threshold | Dust-Barrier Strength |
|---|---|---|---|---|
| 1 | IP0X | No special protection | — | 0 ★★★ |
| 2 | IP1X | Protected against large objects | > 50 mm | 1 ★ |
| 3 | IP2X | Protected against fingers | > 12.5 mm | 2 ★★ |
| 4 | IP3X | Protected against tools/large wires | > 2.5 mm | 3 ★★★ |
| 5 | IP4X | Protected against small wires | > 1.0 mm | 4 ★★★★ |
| 6 | IP5X | Dust-protected | Limited ingress (no harmful) | 5 ★★★★★ |
| 7 | IP6X | Dust-tight | No ingress | 6 ★★★★★★ |
Wireless headphones are especially sensitive
With wireless headphones, even small contamination can show up as charging instability or mic issues—because these areas often sit near openings and contacts. As of 2026, “quick wipe” habits are common, but the safest approach is still: clean outside, keep moisture away from ports/mics, and dry fully.
Verdict: worth doing, but skip it when certain conditions apply
Cleaning your headphones can realistically help them last longer by reducing buildup that causes comfort issues, odor, and sound degradation. The downside is that improper cleaning can harm cushions, finishes, ports, or speaker protection—so if you’re unsure what’s safe for your exact model, pause and check the manual.
Cleaning removes surface residue, but it cannot reverse mechanical wear such as damaged drivers or permanently deteriorated seals.
If a headphone has signs of water damage or persistent electrical faults, maintenance should stop and service should be considered instead of further DIY cleaning.
People who should skip “DIY” cleaning include those with ongoing device malfunctions (e.g., charging won’t connect, water damage suspected) or who don’t have the manufacturer’s guidance available—because you may need service instead. This is particularly true for headphones that are still under warranty: unnecessary opening, aggressive fluid use, or abrasive tools can complicate service eligibility.
Pros and cons of cleaning headphones for longevity
Here’s the straightforward tradeoff:
– Pros
– Better comfort and hygiene by removing sweat/skin oil residue
– Clearer sound when grille openings stay unobstructed
– More reliable charging and controls when debris doesn’t build up
– Cons
– Wrong liquids can damage finishes, foam, or coatings
– Excess moisture can reach microphones, charging areas, and seams
– Aggressive tools can affect acoustic performance
Quick checklist: clean for longevity
– [ ] Wipe ear pads/cushions and exterior with a lightly damp cloth only (no soaking)
– [ ] Remove dust first with a dry microfiber cloth/soft brush
– [ ] Keep liquids away from ports, mics, and buttons
– [ ] Dry completely before use/charging
– [ ] Stop if you see damage to cushions, seams, or mesh
Sources
– IEC 60529:2013, Degrees of protection provided by enclosures (IP Code)
– CDC guidance on cleaning and disinfecting (general principles for minimizing residue and moisture near electronics)
Cleaning your headphones does make them last longer for many people—mostly by reducing sweat and debris that damage cushions, clog grilles, and dull sound. Start with gentle exterior and pad cleaning, keep liquids away from electronics, and always follow your model’s guidance rather than guessing. If you want, tell me your headphone brand/model and whether you’re dealing with odor, comfort wear, or muffled sound, and I’ll help you map the safest cleaning approach for that specific design.
Frequently Asked Questions
Does cleaning your headphones make them last longer?
Yes—cleaning your headphones can help them last longer by reducing wear caused by sweat, skin oils, dust, and grime. When buildup accumulates on ear pads, speaker grilles, and ports, it can interfere with sound quality and increase strain on components. Regular cleaning for headphones also helps prevent corrosion and deterioration over time, especially for wireless earbuds.
How often should you clean headphones to improve lifespan?
A good rule is to wipe down your headphones after frequent use and do a deeper cleaning every few weeks. If you sweat a lot, use headphones during workouts, or live in a dusty environment, you may need to clean ear pads and grilles more often. For wireless headphones, clean charging contacts regularly so dirt buildup doesn’t cause battery or connection issues.
Why does dirt affect headphone performance and durability?
Dirt and earwax can clog speaker grilles and create acoustic blockage, which can reduce volume and clarity. Oils from skin can also degrade cushion materials and damage finishes, leading to cracking or peeling on ear pads. Over time, moisture and debris near ports or charging pins can contribute to corrosion, which shortens the lifespan of wired and wireless models.
What’s the best way to clean over-ear, on-ear, and in-ear headphones safely?
Start by gently removing surface debris with a dry microfiber cloth or soft brush, then use slightly dampened cloths for outer parts only. For in-ear and removable tips, wash according to the manufacturer’s instructions and ensure everything is fully dry before reassembly. Avoid spraying liquids directly into speaker grilles or ports, since excess moisture can damage drivers and internal electronics.
Which parts of headphones should you clean to keep them working longer?
Focus on ear pads and cushions, speaker grilles, the microphone openings, and the charging or audio ports. Cleaning ear pads helps reduce buildup that degrades comfort materials and affects hygiene, while clearing grilles can maintain sound quality. If your headphones are wireless, keep charging contacts clean to prevent charging failures and battery connection problems that can shorten device lifespan.
📅 Last Updated: October 19, 2026 | Topic: Does Cleaning Your Headphones Make It Last Longer? | Content verified for accuracy and freshness.
References
- https://pubmed.ncbi.nlm.nih.gov/?term=earphone+disinfection
- https://pubmed.ncbi.nlm.nih.gov/?term=earphones+bacterial+contamination
- hearing aid disinfection alcohol – Search Results – PubMed
- disinfectant wipes plastic degradation – Search Results – PubMed
- https://www.cdc.gov/coronavirus/2019-ncov/community/organizations/cleaning-disinfection.html
- https://www.who.int/publications/i/item/cleaning-and-disinfection-of-environmental-surfaces-in-the-context-of-covid-19
- https://www.epa.gov/coronavirus/how-clean-and-disinfect-your-home
- https://scholar.google.com/scholar?q=Does+cleaning+headphones+make+them+last+longer Google Scholar
- https://scholar.google.com/scholar?q=earbud+disinfection+material+degradation Google Scholar
- https://scholar.google.com/scholar?q=earphones+bacterial+contamination+cleaning+methods Google Scholar
