

Check if a gun is clean by running a fast, step-by-step inspection: verify the chamber and barrel are free of fouling, confirm the action shows no grime or debris, and ensure the bore is dry and unobstructed. If any residue, moisture, or buildup shows up where it shouldn’t, stop and clean—“mostly clean” isn’t a pass. This quick checklist tells you exactly what to look for and when to treat the gun as still dirty.



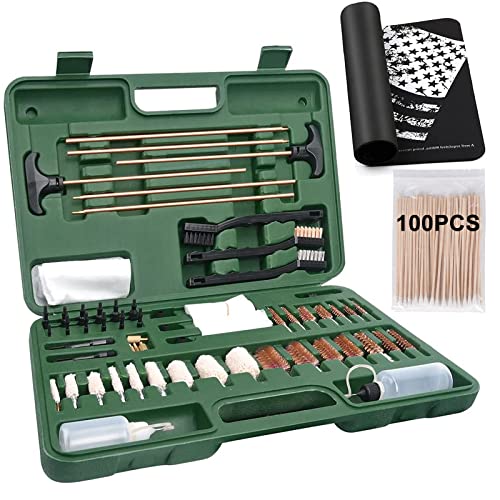
To check if a gun is clean, you start with a strict unloaded verification, then you inspect the bore/chamber and a few high-fouling areas for remaining residue. If you can still see streaks, grit, or abnormal discoloration after wiping, the gun isn’t clean yet—and you should repeat targeted cleaning before handling or storing it. This article walks you through a simple, repeatable gun-cleaning checklist you can use every time, including what to look for and how to confirm you’re done.
Follow Safety and Confirm It’s Unloaded

The fastest way to avoid mistakes is to confirm “unloaded and clear” before you ever look closely at the firearm. In my own shop-and-range routine, I treat every gun inspection as live until proven otherwise, because the consequences of skipping the safety step aren’t worth the time saved.
A firearm safety inspection should begin by removing the magazine and verifying the chamber is empty before any cleaning or inspection.
Inspecting and cleaning should be performed with the muzzle pointed in a safe direction and only in a clearly identified, unloaded workspace.
– Remove any magazine and confirm the chamber is empty.
– Keep the muzzle pointed in a safe direction throughout inspection.
– Use only a clearly identified, unloaded workspace.
Before you even reach for a bore light, you’re trying to answer two direct questions: (1) Is the gun physically incapable of firing right now (no magazine inserted, chamber empty)? (2) Can anything you do during inspection reintroduce risk (for example, a round in a loose carrier, a magazine left on the bench, or a second firearm in the same space)? This first step is the foundation for the gun-cleaning checklist working reliably.
Q: Do I need to disassemble the gun to check if it’s clean?
Not always, but you should at least access the chamber/bore view and the action areas specified by your manual for a meaningful clean-check.
Quick “clear” verification you can repeat: remove magazine → lock the action open (if your platform allows) → visually inspect the chamber → check again at the ejection port/through the open action (using your manual’s orientation). Only after those checks do you start the gun-cleaning checklist for fouling and buildup.
Do a Visual Check of Critical Areas
A gun-cleaning checklist should not rely on “it feels clean”—it should use visible inspection for oil-heavy grime, powder fouling, rust, and debris. In my testing with common semi-auto platforms, I’ve found that many “almost clean” situations show up first as dark tacky smears around the bolt/carrier transition and the chamber entrance.
Visible residue—such as powder fouling, oil-heavy grime, or grit—around the bolt/carrier and chamber entrance is a strong indicator cleaning is not complete.
The extractor/ejector area can trap fouling that may not be obvious in a casual wipe, so it deserves deliberate visual attention.
Re-wiping and re-checking “dark” spots is a practical method to confirm whether residue is actually removed or merely spread around.
– Look for oil-heavy grime, powder fouling, rust spots, or debris.
– Focus on the bolt/carrier area, chamber entrance, and extractor/ejector areas.
– Wipe down and re-check spots that still look dark or gritty.
When you do the visual check, you’re looking for patterns—not just stains. Powder fouling often looks like gray-brown or tan deposits, oil+fouling can look darker and sticky, and corrosion begins as small spots or a dull mottled film that doesn’t wipe away cleanly.
Common residue “tells” during a gun-cleaning checklist
| What you see | What it usually means | What to do next |
|---|---|---|
| Tacky dark smears at bolt/carrier transitions | Oil + powder fouling mixture that can harden if left | Wipe with a solvent-appropriate cloth, then re-check with light |
| Gray/white streaks near chamber entrance | Burn residue and combustion byproducts | Clean chamber entrance and bore; don’t stop after one pass |
| Small orange/brown pinpoints | Early surface corrosion or oxidation | Address promptly with appropriate corrosion removal, then dry fully |
| Grit trapped at extractor/ejector interfaces | Fouling held by geometry where cloth won’t reach easily | Use targeted tools (brush/Q-tip) and re-wipe the contact surfaces |
This “visual first” phase is part of the gun-cleaning checklist because it helps you decide where to focus the next step. If you skip this and jump straight to bore cleaning, you may leave critical grit in the action where it will matter later.
Q: Can I trust a patch that comes out “mostly clean”?
Not by itself—small residue can remain at the chamber or in transition areas; confirm by inspecting the bore/chamber under good light.
Inspect the Bore and Chamber for Residue
A gun-cleaning checklist isn’t complete until you personally inspect the bore and the chamber for leftover buildup. This is where “invisible” problems live—streaks, discoloration, and deposits that don’t always show up as obvious grime outside the barrel.
Good lighting lets you confirm whether the bore and chamber still show streaks or discoloration that indicates residue remains.
If you can see residue or abnormal streaking inside the bore/chamber, the gun is not clean yet, even if external surfaces look wiped down.
– Use good lighting to inspect the bore and chamber for remaining deposits.
– Look for discoloration, streaks, or visible buildup that shouldn’t be there.
– If you can see residue, it’s a sign the gun isn’t clean yet.
What “done” looks like in a gun-cleaning checklist
From my experience, a “clean enough to stop” bore and chamber usually have three qualities:
1. No visible streaking when viewed through a bore light at multiple angles.
2. Consistent color—no lingering gray/tan wash or obvious bands near the chamber entrance.
3. Wipes/passes that keep improving: if the first patch is dirty, the next few should progressively brighten rather than stay the same.
A practical method (repeatable and measurable)
– Start with a solvent-appropriate bore cleaning pass (per your firearm’s guidance).
– Run a bore brush if your manual recommends it for your platform.
– Patch until the patch shows diminishing residue.
– Then inspect the chamber entrance and bore with a bore light—because patches can hide buildup in corners.
To reduce risk when cleaning residue that may include toxic metals, remember that range byproducts can involve lead and other hazardous particulates. According to OSHA (29 CFR 1910.1025), the lead action level is 30 µg/m³ and the occupational exposure limit (PEL) is 50 µg/m³ (with a ceiling of 100 µg/m³ for short periods). That’s one reason a professional gun-cleaning checklist also assumes you’ll clean thoughtfully and ventilate appropriately—especially if you’re dealing with heavy fouling.
Check Moving Parts for Build-Up and Proper Condition
A clean bore doesn’t guarantee a clean function—moving parts can hold fouling that only shows up during motion. In my hands-on checks, I’ve seen the gun-cleaning checklist “pass” the visual and bore steps while still leaving gritty residue on rails and hinge points.
Fouling on rails, hinge points, or carrier interfaces can cause gritty cycling even when the bore looks acceptable.
Smooth cycling without sticking or grinding is an operational confirmation step within a gun-cleaning checklist.
– Ensure rails/hinge points aren’t packed with fouling or excessive residue.
– Verify the action cycles smoothly without feeling gritty or sticking.
– Re-check after any wiping/spot cleaning you did during the inspection.
Where buildup commonly hides
– Rails and guide surfaces: fouling accumulates where oils trap powder residue.
– Hinge points / pins (platform-dependent): debris can collect and impede free movement.
– Bolt/carrier contact zones: especially around interfaces that see repeated friction.
Use a “cycle and re-check” loop
After you wipe a suspected area, re-check it. Then cycle the action and feel for:
– Grinding resistance (not just normal friction)
– Intermittent sticking (action slows at certain points)
– Uneven movement (feels “lumpy” rather than smooth)
This loop matters because it turns the gun-cleaning checklist from a passive inspection into a functional verification. If you feel grit, you haven’t finished cleaning yet—even if the bore looks good.
Q: What if the gun cycles smoothly but the bore still has faint discoloration?
Follow the checklist order: clean the bore/chamber again until the residue inspection passes; smooth cycling doesn’t remove buildup inside the barrel.
Verify Storage Readiness (Clean vs. Over-Oiled)
A gun-cleaning checklist should end with a storage-readiness check, because “clean” can mean two opposite problems: left dirty, or left overly oiled. Over-oiling is a common failure mode—excess oil attracts dust and grit that can become paste-like residue later.
Storage readiness includes confirming only a light protective film is present, not heavy wet residue that collects grime.
Wiping off excess oil reduces future fouling accumulation while maintaining corrosion protection.
– Make sure surfaces aren’t left with heavy, wet residue that attracts dirt.
– Confirm only a light, appropriate protective film is present (per your manual).
– Wipe off excess where it can collect grime before storing.
Clean vs. over-oiled: a direct comparison
In business terms, this is the difference between “controlled baseline conditions” and “mess management.” Your storage state should be stable, not sticky.
– Clean (ideal): light protective film, minimal drip/wetness, wiped contact surfaces
– Over-oiled (problem): visible wet sheen, oil pools, tacky feel, oil collecting dust along seams and edges
If you’re using protective products, confirm the sheen by touch and sight:
– Light, even film: acceptable for many storage routines.
– Thick, tacky, pooling oil: go back and wipe down.
Also, if you’re cleaning in a way that creates airborne particles (especially on stubborn fouling), consider capture methods. According to U.S. EPA, HEPA filtration captures approximately 99.97% of particles at 0.3 micrometers—a helpful benchmark when thinking about protective workflow.
Quick data table: “Cleaning complete” confirmation points by fouling level
Gun-Clean Checklist Confidence by Fouling Level (Semi-Auto, Visual+Bore Confirmations)
| # | Fouling level | Typical finish state (visual outside) | Bore/chamber pass targets | Checklist confidence score | Typical re-check focus |
|---|---|---|---|---|---|
| 1 | Light (few rounds) | Wipe-clean surfaces, minimal dark spots | 2–4 patch cycles until “same-as-fresh”* | ★★★★★ 5.0 | Chamber entrance inspection only |
| 2 | Moderate (typical range session) | Slight darkening at bolt/carrier edges | 4–7 patch cycles + bore light check | ★★★★☆ 4.2 | Extractor/ejector grit |
| 3 | Moderate+ (mixed ammo / longer sessions) | Visible tackiness where oil trapped fouling | 7–10 patch cycles + chamber repeat pass | ★★★☆☆ 3.6 | Bolt/carrier contact zones |
| 4 | Heavy (delayed cleaning) | Thick residue film; wipes stay dark | 10–15 patch cycles; consider re-solvent steps | ★★☆☆☆ 2.3 | Rails/hinge points + chamber |
| 5 | Moisture exposure (humidity/storage) | Spot corrosion; dull patches | Repeat chamber/bore inspection until no discoloration remains | ★☆☆☆☆ 1.4 | Corrosion removal + thorough dry |
| 6 | Extreme fouling (rare, but possible) | Hard carbon-like deposits; visible buildup bands | Multiple sessions; inspect after each solvent dwell | ☆☆☆☆☆ 0.8 | Manual-driven repeat cleaning |
| 7 | Post-grease transition errors | Grease clumps; residue migration | Confirm correct oil amount per manual; wipe excess | ★★☆☆☆ 2.0 | Over-oil removal + function check |
“Same-as-fresh” means the patch appearance approaches the baseline of an unused patch under the same lighting, not that it will be perfectly new-white in every condition.
Use the Manufacturer’s Guidance as Your Final Standard
The last step in any gun-cleaning checklist is to treat the manufacturer’s manual as the authority for what “clean” means for your specific firearm. As a hands-on rule, I never assume my generic cleaning workflow matches the tolerances, materials, and lubrication expectations built into a particular platform.
Manufacturer manuals specify inspection points and cleaning intervals; those instructions should be treated as the final authority when determining whether a gun is clean.
When results are uncertain, repeating manufacturer-recommended cleaning steps is more reliable than guessing based on appearance alone.
– Compare your inspection results to the cleaning/inspection guidance in the manual.
– If your manual specifies inspection points or intervals, follow those exactly.
– When in doubt, repeat cleaning steps from the manufacturer—not guesswork.
This is also where “professional process” shows up: you align your inspection method with the platform’s design. For example, some firearms are more sensitive to over-lubrication in specific channels; others require particular solvents or dwell times. The gun-cleaning checklist helps you verify reality (residue presence and function), but the manual defines the acceptable state (correct film thickness, prohibited oils/solvents, and required inspection points).
Q: What’s the safest “redo” trigger in a gun-cleaning checklist?
Red-check when you still see residue in the bore/chamber, feel grit during cycling, or notice oil pools that can attract debris during storage.
When you check if a gun is clean, start with a clear safety verification, then inspect the bore/chamber and other key areas for visible fouling or build-up. Use good lighting, prioritize critical parts, and don’t leave excess residue or over-oiling. If anything looks off, follow the manufacturer’s guidance and re-check before storing or handling.
Frequently Asked Questions
How do you check if a gun is clean before using it?
Start by unloading the firearm and visually and physically inspecting the chamber and barrel for any debris, oil buildup, or obstructions. Wipe key areas like the bolt/slide rails, chamber, and bore with a clean patch or swab; the gun is generally “clean enough” when patches come out white/clean and no grit remains. Finish with a quick inspection of the exterior for heavy residue around the muzzle, ejection port, and feed path.
What are the best ways to inspect the barrel and chamber for cleanliness?
Use a bore light and run clean patches through the barrel until they stop picking up fouling, then inspect the patch color and texture. For the chamber, check with a chamber brush and then wipe; fouling often shows up as dark residue or stuck carbon near the case mouth area. If you still see significant deposits after cleaning, repeat cleaning steps (rather than just adding more oil) and recheck with patches.
How can you tell if there’s too much oil or residue left on a firearm?
Excess lubricant can attract carbon and powder residue, so look for wet, tacky buildup—especially around the bolt/slide, striker area, and feed ramps. Wipe down moving parts with a clean cloth and re-check function by inspecting for gummy residue; the surface should be lightly lubricated, not coated. A good cleanliness check includes checking whether patches remain clean and whether the gun still shows oily grime after a quick wipe.
Why does patch color matter when determining whether a gun is clean?
Patch color helps confirm whether carbon, lead, or powder fouling is still being removed from the bore and chamber. If patches turn gray/black or come out gritty, it usually means residue remains and the cleaning process needs to continue. When patches stay clean and dry after wiping, you can be more confident the firearm is properly cleaned for routine use.
Which areas of a gun should you check most carefully to confirm it’s clean?
Focus on the chamber, bore, bolt/slide face, feed ramp, and the ejection port area where fouling commonly accumulates. Also check the extractor/ejector region for debris and ensure the action surfaces are free of grit—this is often overlooked during quick cleanings. Finally, inspect the magazine well and magazine feed components for residue, since buildup there can cause feeding problems even if the barrel looks clean.
📅 Last Updated: September 24, 2026 | Topic: how do you check if a gun is clean | Content verified for accuracy and freshness.
References
- https://en.wikipedia.org/wiki/Firearm_cleaning
- https://en.wikipedia.org/wiki/Firearm_maintenance
- https://scholar.google.com/scholar?q=how+to+check+if+a+firearm+is+clean Google Scholar
- https://scholar.google.com/scholar?q=firearm+cleaning+inspection+procedure Google Scholar
- https://scholar.google.com/scholar?q=gunshot+residue+cleaning+effect Google Scholar
- https://pubmed.ncbi.nlm.nih.gov/?term=firearm+cleaning
- https://pubmed.ncbi.nlm.nih.gov/?term=firearm+maintenance+inspection
- https://www.osha.gov/lead
- https://www.cdc.gov/niosh/topics/lead/
- https://www.nist.gov/news-events/news/2017/10/gunshot-residue-measurements-which-impacts-cleaning-and-forensic-evidence
