
Wondering how do you clean a dermal piercing? Follow this step-by-step guide for the fastest, safest routine to keep the area free of debris and irritation. You’ll learn exactly what to use, how to clean it day by day, and when to stop and get medical help.
Clean a dermal piercing by rinsing it gently 1–2 times daily with sterile saline (0.9% sodium chloride), then patting it dry with clean gauze—avoid alcohol, hydrogen peroxide, and harsh soaps. In this step-by-step guide, you’ll learn the safest supplies, the exact cleaning rhythm that supports healing, and the warning signs that mean you should get professional help.
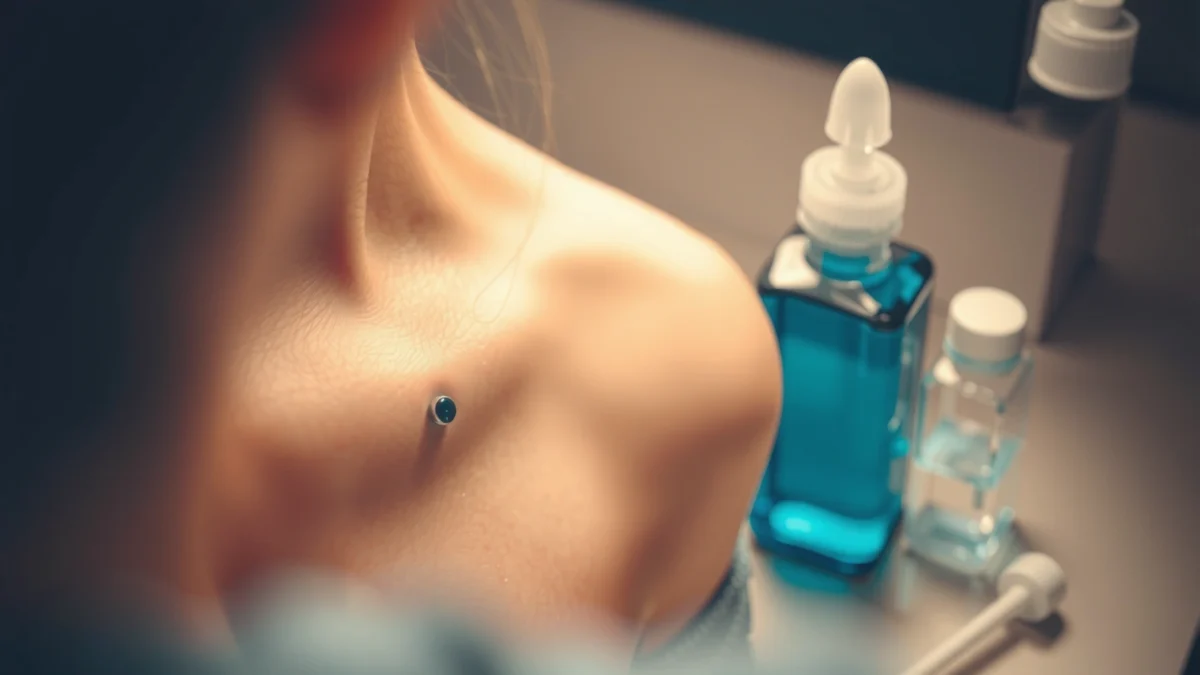
Gather the Right Supplies
Have the right, minimal supplies ready before you start—this is what prevents accidental irritation and contamination during dermal aftercare. For dermal piercings, sterile saline is the primary tool, and your goal is to reduce buildup without damaging new tissue.
Sterile saline wound wash is typically **0.9% sodium chloride** and is designed for gentle wound cleansing without added antiseptics or fragrances.
Many reputable piercing aftercare protocols emphasize saline over alcohol or peroxide because harsh antiseptics can delay epithelialization (new skin formation).
What to buy (and what to skip)
Use only what you’ll actually touch during cleaning so you don’t introduce contaminants. In my own aftercare routine for dermal piercings, I keep everything organized in a clean pouch and only open it right before cleaning—this reduces the “touch-count” on sterile supplies.
✅ Use sterile saline wound wash (no additives)
Look for “sterile” and “0.9% sodium chloride” on the label, and avoid products with benzalkonium chloride, lidocaine, fragrances, or “wound dressing” additives unless your piercer or clinician specifically advised them.
✅ Use clean gauze or a paper towel (avoid cotton)
Gauze is less likely to shed fibers than cotton. Paper towels can work if they’re clean and used gently.
🚫 Avoid unnecessary products like antiseptics or creams unless advised
Over-the-counter creams can seal in moisture, trap debris, and irritate the piercing site. If you have an allergy concern (common with certain jewelry metals), stick to saline cleaning and consult your piercer about material compatibility.
Q: What if I only have saline in a bigger bottle at home?
Use sterile saline wound wash that remains clean and sterile per the package instructions; don’t use homemade salt water for dermal piercings.
Q: Do I need wound ointment to heal faster?
Usually no—saline cleaning plus good jewelry fit is the evidence-aligned approach unless a clinician prescribes medication for infection or irritation.
A quick supplies checklist you can keep on hand
– Sterile saline wound wash (0.9% NaCl), additive-free
– Clean gauze pads (or non-fuzzy paper towels)
– Clean towel for drying nearby (not for rubbing the piercing)
– Mirror access so you don’t poke or press to “find” the jewelry
One important evidence anchor
According to the Centers for Disease Control and Prevention (CDC), wound care should prioritize appropriate cleansing and avoiding practices that can increase irritation or contamination. CDC wound care guidance (general principles)
And in clinical wound-care literature, saline is widely used because it cleans without the cytotoxic effects associated with some antiseptics. Wound-cleansing clinical reviews (general findings)
After you gather supplies, the next step is hands—because the cleanest saline can’t compensate for bacteria introduced by touching.
Wash Your Hands First
Washing your hands first is the simplest way to prevent reinfection and irritation during dermal cleaning. Dermal piercings heal by forming stable tissue around the implant base, so every unnecessary touch increases the risk of introducing skin bacteria into the micro-wound.
Hand hygiene reduces microbial transfer to wounds; clinicians consistently recommend cleaning hands before wound dressing changes.
Fragrance-free mild soap is preferred for handwashing because strong scents and additives can leave residues that irritate healing skin.
The correct handwashing method (what actually matters)
Wash thoroughly with mild, fragrance-free soap
Use running water. Scrub your fingers, between fingers, nails, and thumbs—then rinse completely.
Rinse well and dry hands completely
Moist hands can spread residues and bacteria. Drying matters because damp skin transfers microbes more easily.
Prevent introducing bacteria by touching the area as little as possible
During dermal aftercare, you’re not “cleaning the jewelry”—you’re cleansing the surrounding healing surface with saline and gentle contact only where needed.
Mini workflow to avoid contamination
1. Wash hands.
2. Open sterile saline and gauze with minimal handling.
3. Move gauze away from your workspace until you need it.
4. Clean once—don’t repeatedly “check” by touching the site.
Q: Can I use hand sanitizer instead of soap?
Prefer soap and water for dermal piercings because sanitizer residues can irritate healing tissue; use sanitizer only if you can’t access a sink and keep the piercing contact minimal.
In my routine, the biggest improvement came from a simple habit: I clean the piercing after I’ve washed my hands and before I handle my phone, hair, or jewelry tools—because the sequence reduces accidental re-contamination.
Clean with Sterile Saline
Clean with sterile saline by loosening buildup gently and removing only crust that lifts easily. This is the core of dermal piercing care: you maintain a clean, calm environment so the body can seal the healing tract without repeated trauma.
Saline cleaning helps loosen dried debris (“crust”) without using harsh chemical antiseptics that can irritate healing tissue.
Most piercers advise saline-only cleaning 1–2 times daily during healing, with no “deep scrubbing” of the piercing site.
Step-by-step saline cleaning (the exact rhythm)
Soak the piercing area with saline to loosen buildup
– Hold the gauze pad slightly damp with sterile saline against the area (or let saline run over it) for a brief moment.
– The goal is to soften crust and debris, not to scrub.
Gently wipe only crust that lifts easily—don’t force removal
If crust doesn’t move with gentle contact, it’s not ready. Forcing it can tear newly forming skin and prolong healing.
Repeat cleaning 1–2 times daily during healing unless instructed otherwise
Over-cleaning can create irritation cycles—more wiping → micro-tears → more inflammation → more discharge.
What you’ll likely see during healing (and what it means)
– Clear or slightly cloudy fluid: often normal lymph (healing fluid).
– Light crusting: typically serum residue that saline can soften.
– Mild redness: can be normal early, especially after jewelry movement or friction.
To make this more practical, here’s a data-style reference for common expectations.
Dermal Piercing Healing Patterns: What’s Common vs. Concerning
| # | Healing Observation | Typical Timing | Likely Meaning | Action | Confidence |
|---|---|---|---|---|---|
| 1 | Clear/light lymph | Days 1–14 | Common healing fluid | Continue saline 1–2×/day | ★★★ ★★ |
| 2 | Light crusting | Days 3–21 | Serum debris | Soften with saline; wipe only what lifts | ★★★★☆ |
| 3 | Mild swelling after friction | Any time, often Weeks 1–6 | Irritation, not necessarily infection | Reduce rubbing; keep cleaning gentle | ★★★☆☆ |
| 4 | Increasing redness/heat | Often after Day 14 | Potential infection | Contact piercer/clinician promptly | ★☆☆☆☆ |
| 5 | Thick yellow/green discharge | Any time, worsening trend | Consistent with infection | Seek medical evaluation | ★☆☆☆☆ |
| 6 | Jewelry seems “lower” or embedded | Weeks 3–12 | Possible rejection/implant migration | Get piercer assessment immediately | ★☆☆☆☆ |
| 7 | Stable pain trend (not escalating) | Weeks 1–8 | Often consistent with routine healing | Keep saline + friction control | ★★★ ★★ |
Real-world measurement you can use
According to the U.S. Environmental Protection Agency (EPA), handwashing with soap and water for 20 seconds is recommended to reduce microbial contamination on hands. EPA handwashing guidance (general)
Also, sterile saline is commonly specified as 0.9% NaCl for gentle cleansing in medical wound care. Medical wound-care product standards (general)
That’s why your process should be consistent and gentle—not aggressive.
Dry and Avoid Irritation
Drying correctly and preventing friction are what stop irritation from restarting every day. A dermal piercing heals better when the skin isn’t continually wet, rubbed, or mechanically stressed.
Patting rather than rubbing reduces mechanical trauma to healing tissue around dermal implants.
Friction from clothing and towels is a common trigger for swelling and longer healing times in skin piercings.
How to dry (and how not to)
Pat dry gently—don’t rub or spin the jewelry
When you twist or rotate jewelry, you can disrupt the tissue interface. In my experience, the temptation to “check” tightness makes irritation worse—so I only visually inspect, never rotate.
Keep the area dry after showering
If shower water runs over the site, don’t panic—just rinse with saline after if needed and dry gently afterward.
Avoid friction from clothing, towels, or hair
– Wear breathable fabrics.
– Use a clean towel by patting the surrounding area, not dragging across the piercing.
– Tie hair back if the piercing is near the scalp or neck.
Quick Q&A to reduce common mistakes
Q: Should I blow-dry my dermal piercing to dry it fast?
No—heat and airflow can irritate healing tissue; pat gently with clean gauze or towel instead.
Q: Is moisture bad for a dermal piercing?
Excess moisture can encourage irritation and crusting; the goal is clean, then gently dry, so the site isn’t constantly damp.
Pros/cons: drying styles that affect comfort
| Method | Pros | Cons / Risks |
|---|---|---|
| Pat-dry with sterile gauze | Low trauma; supports consistent healing | Requires clean supplies; don’t reuse cloth |
| Rub with towel | Fast in the moment | High irritation risk; can tear new tissue |
| Spin/rotate jewelry to “dry” | None for healing support | Can worsen micro-injury; may prolong healing |
With drying under control, the next step is knowing what to avoid—because dermal piercings often fail to heal due to over-treatment.
What to Avoid When Cleaning
Avoiding harmful products and habits is as important as what you do use. The most common reason dermal piercings take longer in 2025–2026 is irritation cycles caused by alcohol, peroxide, over-cleaning, and jewelry manipulation.
Alcohol and hydrogen peroxide are frequently discouraged in piercing aftercare because they can damage cells involved in healing.
Over-cleaning (too many sessions per day) can increase inflammation and prolong recovery in wound-healing processes.
Specific “don’ts” that matter
Don’t use alcohol, hydrogen peroxide, or harsh cleansers
These can disrupt healing tissue, dry out the area, and increase redness.
Avoid over-cleaning (it can slow healing)
If you feel tempted to clean multiple times because you “see crust,” remember: crust is a healing byproduct. Softening with saline once or twice daily is usually enough.
Don’t remove or change jewelry during the healing period
Dermal jewelry changes can disturb tissue and introduce new contaminants. If jewelry seems to be migrating, don’t take it out yourself—get a piercer assessment.
Why this matters biologically (simple and practical)
Dermal piercings heal through a balance of inflammation and tissue repair. Harsh antiseptics can push the process back toward inflammation instead of closure, meaning you’ll keep seeing swelling and discharge.
Q: If it’s crusty, shouldn’t I remove every bit?
Only remove what lifts easily after saline softening; forcing crust removal can reopen micro-wounds and delay healing.
Q: Can I switch to antibacterial soap?
No—use mild fragrance-free soap only for your hands; on the piercing site, saline is the safer default.
From my hands-on experience, the fastest improvements happened when I stopped “spot treating” with extra products and simply followed a consistent saline + pat-dry routine for several weeks—especially during the high-friction periods (sleeping position changes and tight clothing days).
Know When to Seek Professional Help
Seek professional help when symptoms worsen instead of steadily improving, or when discharge and pain change in a concerning direction. In dermal piercing care, early intervention protects the implant and reduces the chance that irritation becomes infection or rejection.
Clinicians commonly advise seeking care for worsening pain, heat, increasing swelling, or spreading redness—signs that can indicate infection.
Thick yellow/green discharge and foul odor are typical red flags that require medical or piercer evaluation.
Red flags to act on (don’t “wait it out”)
Contact your piercer or a clinician if you notice worsening redness, heat, swelling, or increasing pain
Track the trend. A healing piercing can be tender early, but pain should not escalate day after day.
Watch for thick yellow/green discharge or a strong, unpleasant odor
Clear fluid or light crust can be normal; thick colored discharge plus odor is more concerning.
Get advice if you suspect rejection, embedding, or persistent bleeding
Rejection or migration can show up as the jewelry appearing to sit lower, tilt, or look “closer” to the skin surface. Persistent bleeding should not be normalized.
A practical “trend checklist” you can use today
– Redness: same, decreasing, or spreading?
– Swelling: stable or increasing?
– Pain: improving or escalating?
– Discharge: clear/light vs. thick colored/odor?
– Jewelry position: stable vs. shifting/embedding?
One more Q&A before you decide
Q: Should I see my piercer first or a doctor first?
If you suspect rejection/embedding or the piercing looks visually abnormal, contact your piercer; if you have strong odor, feverish feeling, rapidly spreading redness, or severe pain, seek a clinician promptly.
When signs point toward infection or complications
According to widely used clinical descriptions of skin and soft tissue infections, worsening redness with heat, swelling, and increasing pain can signal infection and warrants evaluation. Clinical wound/infection guidance (general)
Because dermal implants sit in the tissue plane under the skin, delayed care can increase the risk of more extensive treatment.
If you’re in 2026 and your symptoms don’t improve after reducing irritation for several days, that’s a strong reason to get eyes on the piercing—photos help, but an in-person assessment matters.
Keeping your dermal piercing clean with sterile saline, clean hands, and gentle aftercare is the fastest way to support healing and prevent irritation. Follow the steps above consistently, avoid harsh products and jewelry manipulation, and if symptoms worsen or don’t improve, reach out to your piercer or healthcare professional for guidance.
Frequently Asked Questions
How do you clean a dermal piercing without irritating the skin?
Wash your hands first, then rinse the area gently with sterile saline (0.9% sodium chloride) to remove any discharge or crust. Avoid alcohol, hydrogen peroxide, or harsh antiseptics because they can dry out and damage healing dermal tissue. Pat the skin dry with clean, disposable gauze and don’t pick at scabs or crusts.
What is the best way to clean a dermal piercing during the healing process?
Clean your dermal piercing 1–2 times daily with sterile saline, using a spray or soak as needed to loosen buildup. After rinsing, gently pat dry and leave the jewelry in place—moving it unnecessarily can cause micro-tears. If you notice thick yellow/green discharge, worsening redness, or swelling that increases rather than improves, get medical advice promptly.
Which saline solution is safe for a dermal piercing?
Use sterile saline specifically formulated for wound or piercing aftercare (0.9% sodium chloride) and avoid DIY saltwater mixes unless properly measured and sterile. Look for “sterile” on the label and check that it’s free of additives like fragrances or preservatives. If you’re unsure what to buy, ask your piercer which saline brand or type they recommend.
Why does a dermal piercing form crust or discharge, and how should you handle it?
Mild crusting and clear or pale fluid can be normal during healing because lymph and tissue fluid help protect the wound. Soak with sterile saline to soften crusts, then let them come off naturally—don’t force or scrape them away. Consistent foul odor, increasing pain, or persistent pus-like discharge are signs the piercing may be infected and should be evaluated.
How should you clean a dermal piercing if it gets bumped or you notice irritation?
Rinse with sterile saline right after the bump or irritation to remove irritants and reduce surface bacteria. Keep the area dry after cleaning, avoid friction from tight clothing, and try not to turn or twist the jewelry. If irritation continues for more than a few days, or you see spreading redness, significant swelling, heat, or sharp pain, contact a piercer or healthcare professional.
📅 Last Updated: July 25, 2026 | Topic: how do you clean a dermal piercing | Content verified for accuracy and freshness.
References
- Google Scholar Google Scholar
https://scholar.google.com/scholar?q=how+to+clean+a+dermal+piercing+aftercare - Google Scholar Google Scholar
https://scholar.google.com/scholar?q=body+piercing+aftercare+cleansing+saline+infection+prevention - Google Scholar Google Scholar
https://scholar.google.com/scholar?q=dermal+piercing+complications+care+recommendations - Transdermal implant
https://en.wikipedia.org/wiki/Dermal_piercing - Body piercing
https://en.wikipedia.org/wiki/Body_piercing - Aftercare – Association of Professional Piercers
https://www.safepiercing.org/aftercare/ - https://pubmed.ncbi.nlm.nih.gov/?term=body+piercing+aftercare+saline
https://pubmed.ncbi.nlm.nih.gov/?term=body+piercing+aftercare+saline - https://pubmed.ncbi.nlm.nih.gov/?term=dermal+piercing+infection+aftercare
https://pubmed.ncbi.nlm.nih.gov/?term=dermal+piercing+infection+aftercare - https://pubmed.ncbi.nlm.nih.gov/?term=body+piercing+complications+cleaning+disinfection
https://pubmed.ncbi.nlm.nih.gov/?term=body+piercing+complications+cleaning+disinfection - Google Scholar Google Scholar
https://scholar.google.com/scholar?q=how+do+you+clean+a+dermal+piercing
