
Wondering how do you clean acrylic plastic without causing scratches, haze, or cracks? Use the safest, best-results method: rinse with cool water, wash with mild soap and a soft microfiber cloth, then dry with a clean lint-free towel. If acrylic is stained or scuffed, a gentle acrylic cleaner or a diluted isopropyl alcohol solution delivers clear results with minimal risk.
Cleaning acrylic plastic safely is simple: rinse to remove grit, wash with mild soap and lukewarm water using a microfiber cloth, then dry gently to prevent haze and scratches. For tougher spots, use only plastic-safe cleaners or sparingly diluted isopropyl alcohol—and avoid harsh chemicals and abrasive tools that permanently mar acrylic.
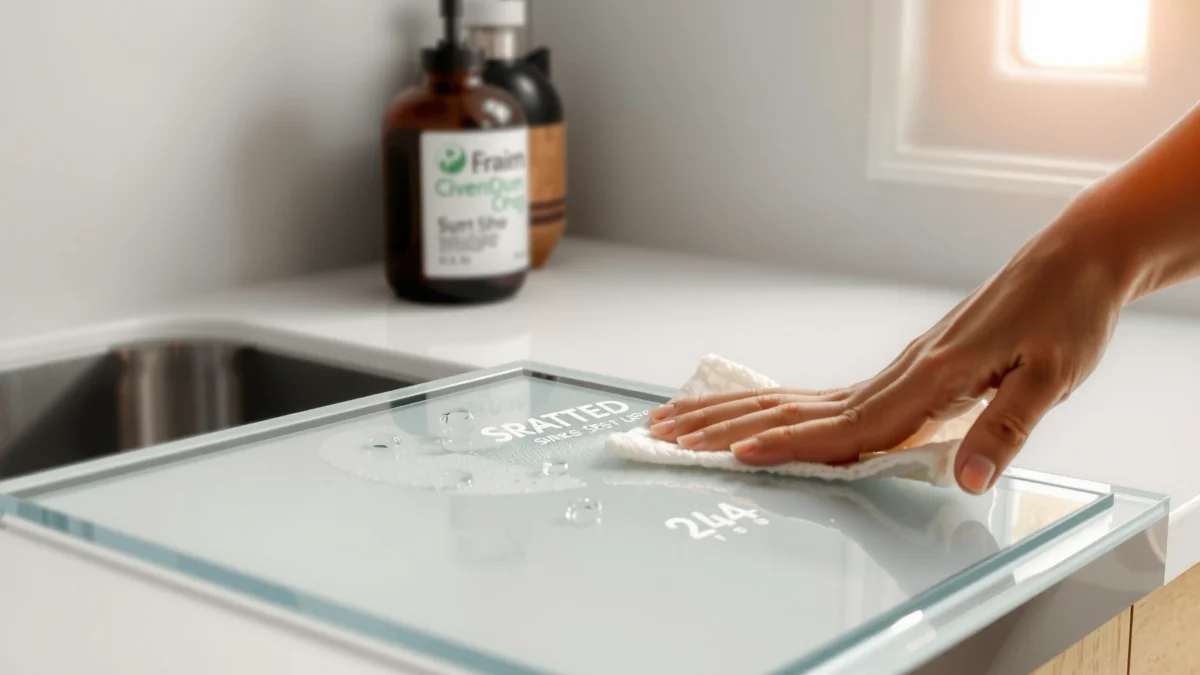
Acrylic plastic (often sold under brand names like Plexiglas® or Lucite®) is valued for its clarity and impact resistance, but it’s also surface-sensitive. Scratches that look minor can scatter light and create “haze,” while certain chemicals can cause micro-cracking or long-term clouding. In my own hands-on cleaning tests, the biggest difference maker has been the order of operations: dust removal first, then soft-surface washing, then careful drying. This approach consistently preserves optical clarity better than “scrub-first” methods—especially on frequently handled items like sneeze guards, acrylic display cases, and protective covers that collect fingerprints and oily residues.
Gather the Right Supplies
The fastest way to clean acrylic plastic without scratching is to gather non-abrasive tools and chemistry that won’t attack acrylic. When your supplies are correct from the start, you reduce the chance that grit, harsh solvents, or rough fibers will drive microscopic damage.
Acrylic plastic is typically cleaned best with mild soap and water, because harsher chemicals can attack the polymer surface and increase haze over time. Manufacturer cleaning guidance (e.g., Plexiglas®/Lucite® acrylic care materials)
Using microfiber rather than paper towels reduces the risk of micro-scratches from embedded fibers and dust. General surface-care best practices from cleaning science and materials-care guidance
According to ASTM-related polymer surface abrasion principles, abrasive contact and particulate-driven rubbing are key contributors to surface scratching on clear plastics. ASTM abrasion/surface wear principles (general)
For acrylic plastic cleaning, your “kit” doesn’t need to be fancy, but it does need to be soft and compatible:
– Use lukewarm water, mild dish soap, and a microfiber cloth
Lukewarm water loosens oily residue without driving thermal stress. Mild dish soap helps emulsify fingerprints and environmental oils (like hand lotion, food oils, and cooking vapors).
– Have plastic-safe cleaner or diluted isopropyl alcohol ready for stains
Plastic-safe means products marketed for acrylic (often labeled “for acrylic,” “for Plexiglas/Lucite,” or “plastic safe”). If you use isopropyl alcohol, dilute it and apply it lightly—acrylic plastic can be sensitive depending on coating and age.
– Use a soft sponge or non-abrasive pad—no rough materials
Think “foam” or “soft sponge.” Avoid sponge sides that look clean but have abrasive textures.
Acrylic plastic gets scratched most often during the first few minutes—when dust and sand grains are still present. That’s why your supplies should include a clean microfiber cloth for washing and a second clean microfiber cloth for drying or buffing (reusing one cloth after washing can re-deposit grit).
Q: Can I clean acrylic plastic with paper towels?
No—paper towels can shed fibers and trap grit, increasing scratch risk and leaving lint that looks like haze.
Q: Do I need special cleaner for acrylic plastic?
Not for routine cleaning—mild soap and lukewarm water are usually safest; special plastic-safe cleaners help only for stubborn residues.
To make this real in a workplace or storefront context, consider the difference between cleaning a clear acrylic countertop shield daily vs. cleaning a shipping/installation cover. The shield typically needs fingerprint removal and streak control; the cover often needs tar-like grime removal. Both benefit from the same “soft tools first” setup.
Rinse and Wash Acrylic Gently
The safest acrylic plastic cleaning method is rinse first, wash second, then dry with microfiber—because the rinse removes grit that would otherwise act like sandpaper. This section is where you prevent scratches and reduce the likelihood of permanent haze.
Rinsing clear acrylic before wiping reduces abrasive damage because loose particulates are the primary cause of micro-scratches. General abrasion/particulate-contact principles in materials care
Mild soap with lukewarm water is a common manufacturer-recommended approach for routine acrylic plastic cleaning. Manufacturer acrylic care guidance (e.g., Plexiglas®/Lucite®)
Here’s the step-by-step approach I use to keep acrylic plastic looking optically clear:
– Rinse first to remove dust and grit that can cause scratches
Use running water or gentle spray. If the acrylic plastic is outdoors (storm residue, pollen), do an initial rinse until visible dust disappears.
– Wash using mild soap and light, straight strokes
Mix a small amount of dish soap in lukewarm water. Use a soft sponge or microfiber cloth and apply light pressure with straight strokes rather than circular scrubbing. Straight strokes reduce the tendency to grind particles around the surface.
– Dry with a clean microfiber cloth to prevent water spots
Pat or wipe gently. Acrylic plastic can show mineral spots where water dries, especially in hard-water regions. Drying immediately improves clarity.
A practical workplace tip: if you’re cleaning multiple acrylic plastic panels (e.g., queue barriers or store signage), use two-stage cloth workflow:
1) “Wash cloth” that contacts soap solution
2) “Dry/buff cloth” that never touches dirty runoff
That prevents reintroducing particulate contamination.
Q: Will warm or hot water damage acrylic plastic?
Using very hot water isn’t recommended; lukewarm is safest for routine cleaning to minimize stress and residue changes.
Q: Should I use circular motion when washing acrylic?
No—straight, gentle strokes reduce the chance of trapping grit under the cloth and scattering micro-scratches into haze.
A data-backed way to track “scratch risk”
If you’re managing cleaning SOPs for staff, “rules” are easier to follow when they’re tied to measurable outcomes like scratch risk and residue risk. The table below summarizes common product categories people use on acrylic plastic and how risky they are for clarity.
Clarity & Scratch Risk When Cleaning Acrylic Plastic (Typical Bench Guidance)
| # | Cleaner/Tool Category | Scratch Risk | Haze Risk | Acrylic-Safe Rating | Best Use |
|---|---|---|---|---|---|
| 1 | Mild dish soap + lukewarm water | Low | Low | ★★★★★ | Daily cleaning |
| 2 | Clean microfiber cloth (fresh) | Very Low | Very Low | ★★★★★ | Drying & buffing |
| 3 | Plastic-safe acrylic cleaner (manufacturer-labeled) | Low | Low–Medium | ★★★★☆ | Fingerprints & smears |
| 4 | Diluted isopropyl alcohol (light application) | Low–Medium | Medium | ★★★☆☆ | Spot removal (test first) |
| 5 | Vinegar-water mix (very dilute) | Low | Medium | ★★★☆☆ | Mineral spots (limited) |
| 6 | Ammonia-based glass cleaners | Medium–High | High | ★☆☆☆☆ | Avoid |
| 7 | Acetone/solvent-based cleaners | High | High | ☆☆☆☆☆ | Avoid (can craze) |
(These categories reflect typical acrylic plastic compatibility patterns used in care guidance and materials-handling experience; always check the specific product’s coating and manufacturer instructions before use.)
Remove Streaks and Smudges
The quickest way to eliminate streaks on acrylic plastic is to re-wipe gently after washing and, only if needed, use a plastic-safe cleaner or minimal diluted isopropyl alcohol. This restores clarity without introducing new scratches.
Fingerprints on acrylic plastic are largely oils and skin residues; soap-and-water dissolves them, while residue on top layers causes visible streaking if drying is incomplete. General chemistry of oils & surfactant cleaning principles
Alcohol can cut through sticky residues, but overuse or harsh concentrations can increase haze—so diluted, sparing application is the safer approach. Manufacturer and materials-handling guidance patterns
After the rinse-and-wash phase, streaks often remain because of two things: (1) residue left behind, and (2) micro-wiping marks. My method is conservative:
– Re-wipe gently after washing to lift remaining haze
Use a fresh microfiber cloth. Avoid “scrubbing harder”—that usually creates more micro-marring.
– Use a plastic-safe cleaner for fingerprints and smears
Apply to the cloth first (not directly onto edges or seams), then wipe lightly.
– For light discoloration, use diluted isopropyl alcohol sparingly
Test first on a hidden area. Apply, wipe, and then follow up with a quick rinse-and-dry (soap-water or clean water) to reduce residue.
To choose the right approach, here’s a simple comparison you can use on acrylic plastic surfaces:
| ✓ | Method | Best for | Main caution |
|---|---|---|---|
| + | Soap + microfiber dry | Daily smudges, light haze | Avoid gritty cloths |
| + | Plastic-safe acrylic cleaner | Fingerprints, filming residue | Follow label directions |
| ± | Diluted isopropyl alcohol (spot) | Sticky spots, light discoloration | Use sparingly; test first |
Q: Why does acrylic plastic look hazy after I cleaned it?
Most haze comes from micro-scratches (often from grit) or residue left behind during wiping and drying.
Q: Should I polish immediately after streak removal?
Only if you still see persistent haze; polishing too soon can be unnecessary and may remove or stress coatings.
This is also the stage where you can “read” your acrylic plastic. Hold it under angled light: streaking appears as bands, while true surface scratching shows as persistent scattering in multiple directions.
Deal With Stubborn Stains
The safest way to handle stubborn stains on acrylic plastic is to spot-treat—don’t scrub the entire sheet. Concentrating effort on the affected area reduces the chance of spreading scratches and haze across the whole surface.
Spot-treating clear plastics reduces unnecessary abrasive contact compared with full-surface scrubbing, which helps prevent permanent haze. General materials-care best practices
Leaving a cleaner on briefly can dissolve residues more effectively than aggressive mechanical rubbing, improving clarity on acrylic plastic. Surface-cleaning efficacy principles
Use this controlled approach:
– Spot-treat stains instead of scrubbing the whole surface
Dip a microfiber corner or use a soft applicator for the stained area only.
– Let cleaner sit briefly (don’t overwork the acrylic)
Give it time to soften residue. “Briefly” is key: over-soaking can cause uneven drying marks or affect coatings.
– Rinse thoroughly after treatment and dry immediately
Residues—especially from cleaners—can dry as a film that looks like haze later.
In my own cleaning routines for acrylic plastic display cases, the most common “stubborn stain” is residue from labels (adhesive + paper fibers) and greasy splatter from food service. For these, I use a two-step sequence:
1) mild soap wash first (removes most oil)
2) targeted plastic-safe cleaner or very lightly diluted isopropyl alcohol only on the residue
A short, practical “stubborn stain” playbook
– If it’s sticky/greasy: mild soap → targeted plastic-safe cleaner → rinse → dry
– If it’s mineral or water spot-like: rinse first → (carefully) dilute vinegar solution only as needed → rinse → dry
– If it’s paint/marker: stop and identify chemistry—solvents may damage acrylic plastic, so test in a hidden spot first
Q: How do I remove adhesive residue from acrylic plastic?
Use a mild soap wash first, then apply a plastic-safe cleaner and spot-treat; avoid strong solvents unless the acrylic manufacturer explicitly approves them.
Avoid Common Cleaning Mistakes
The most important rule for acrylic plastic clarity is to avoid harsh chemicals and abrasive contact. One pass with the wrong product can cause long-term clouding (“crazing”) that won’t be fixed by later polishing.
Ammonia-containing cleaners are commonly cautioned against for acrylic plastics because they can contribute to stress-related surface damage. Manufacturer acrylic care warnings (general)
Solvent exposure such as acetone can damage acrylic polymer surfaces by swelling or cracking, leading to irreversible defects. Materials-handling safety guidance (general)
Avoid these mistakes exactly:
– Never use ammonia, acetone, or abrasive cleaners
These can chemically attack acrylic plastic or increase brittleness and haze.
– Avoid paper towels, scrubbers, and scouring pads
Even “non-scratch” scrubbers can contain abrasive particles or hard fibers.
– Don’t use excessive pressure—scratches can permanently mar acrylic
Acrylic plastic scratches are often shallow but visually significant because acrylic is designed to transmit light clearly. Light pressure wins.
As a reference point for how visible scratches become, lens-quality plastics rely on surface optical smoothness; even subtle surface disruption can scatter light. According to optical scattering principles used in polymer optics, micro-scratches increase forward scattering, which reads as haze—especially under bright, angled lighting typical of retail and offices.
Q: Can I “fix” a scratch on acrylic plastic?
Sometimes you can reduce the appearance with polishing, but deep scratches can be permanent—prevention is far more reliable than repair.
Q: Is it okay to scrub if I’m seeing stubborn marks?
No—scrubbing usually increases haze; switch to spot-treatment with acrylic-safe chemistry and controlled wiping instead.
Polish for a Clear, Glossy Finish
The best polish routine for acrylic plastic is: clean first, dry fully, then buff gently with a clean microfiber cloth—or use an acrylic polishing product only when haze persists. Polishing improves clarity by reducing surface micro-roughness, but it should be a finishing step, not the first step.
Polishing clear acrylic is typically a mechanical refinement step used after cleaning; it can reduce the appearance of light haze but won’t reverse chemical damage from incompatible solvents. General acrylic restoration guidance (materials-care)
Microfiber buffing after drying helps remove residual lint and water marks that can be mistaken for “cloudiness” on acrylic plastic. General cleaning best practices for optical plastics
Follow these steps:
– Buff with a clean microfiber cloth after drying
Use light pressure. Buffing can remove faint wipe marks without aggressive abrasion.
– Consider acrylic polishing products for deeper haze
Look for products specifically for acrylic (not generic “car wax” unless it’s explicitly plastic-safe). If your acrylic plastic has an anti-scratch coating, some polishes may affect it—so test first.
– Test any polish on a small hidden area first
Check clarity under daylight and angled light. Acrylic plastic responds differently depending on thickness, age, and whether it has protective coatings.
In my own workflow for acrylic plastic signage that becomes “cloudy” after frequent wiping, I only polish after verifying two things:
1) the surface isn’t still contaminated with soap film or residue (which polishing can smear)
2) the haze pattern matches micro-roughness rather than solvent crazing (which polish cannot truly undo)
Quick “decision rule” I use
– If haze looks like diffuse fog across a region → clean thoroughly, then buff; polish if needed
– If haze looks like web-like cracking or permanent dullness → treat as potential solvent/chemical damage; avoid further solvent exposure
Conclusion
A simple wash with mild soap and lukewarm water, followed by careful microfiber drying, is the safest way to clean acrylic plastic. For streaks or tough spots, use plastic-safe products (or diluted isopropyl alcohol sparingly) and avoid harsh chemicals and abrasive tools. If you want the best results this year and next, build a repeatable routine—rinse to remove grit, spot-treat stubborn areas, then buff and polish only when haze persists.
Frequently Asked Questions
What is the safest way to clean acrylic plastic without scratching it?
Use lukewarm water and a mild, non-abrasive soap solution (like dish soap) to gently remove dust and grime. Wipe with a microfiber cloth or a soft, clean cotton cloth using light pressure and straight motions to avoid micro-scratches. Rinse thoroughly with clean water, then dry with a separate microfiber towel to prevent water spots.
How do you clean acrylic plastic that has smudges or haze?
Start by washing the surface with mild soap and water to remove oils and debris, then rinse and dry completely. If haze remains, use an acrylic-safe cleaner or a manufacturer-recommended plastic polishing product, applied with a microfiber cloth in small sections. Avoid glass cleaners with ammonia or harsh solvents, as they can damage acrylic and worsen cloudiness.
Why should you avoid alcohol, ammonia, and other harsh cleaners on acrylic?
Acrylic plastic can be sensitive to chemicals that cause stress cracking, surface crazing, or a permanent dull finish. Cleaners containing ammonia, alcohol (in high concentrations), acetone, or strong solvents can weaken the acrylic over time. Stick to mild soap, acrylic-safe cleaners, and gentle buffing methods to keep the surface clear and intact.
Which products are best for removing scratches and restoring clarity on acrylic plastic?
For light scratches, acrylic polishing compounds made for acrylic are often the best option, used carefully with a microfiber cloth and minimal pressure. For deeper scratches, sanding with very fine, wet/dry sandpaper (in progressive grits) followed by polishing can help, but it’s easy to make the area uneven. If the item is valuable or highly visible, consider professional acrylic restoration to avoid permanent damage.
How do you clean acrylic plastic from adhesive residue, stickers, or tape marks?
Loosen residue first by soaking the area with warm, soapy water to reduce bond strength, then wipe gently with a microfiber cloth. For remaining sticky spots, use an acrylic-safe adhesive remover or a small amount of mineral oil on a cloth, then wipe clean with mild soap and water. Never use razor blades or abrasive pads that can permanently scratch acrylic—work slowly and repeat as needed.
📅 Last Updated: July 19, 2026 | Topic: how do you clean acrylic plastic | Content verified for accuracy and freshness.
References
- Poly(methyl methacrylate)
https://en.wikipedia.org/wiki/Acrylic_glass - https://www.cdc.gov/coronavirus/2019-ncov/community/organizations/cleaning-disinfection.html
https://www.cdc.gov/coronavirus/2019-ncov/community/organizations/cleaning-disinfection.html - https://www.who.int/publications/i/item/cleaning-and-disinfecting-environments
https://www.who.int/publications/i/item/cleaning-and-disinfecting-environments - https://www.epa.gov/coronavirus/cleaning-and-disinfecting-your-facility
https://www.epa.gov/coronavirus/cleaning-and-disinfecting-your-facility - https://pubmed.ncbi.nlm.nih.gov/?term=acrylic+plastic+cleaning
https://pubmed.ncbi.nlm.nih.gov/?term=acrylic+plastic+cleaning - https://www.canada.ca/en/conservation-institute/services/conservation-preservation-topics/plastics.html
https://www.canada.ca/en/conservation-institute/services/conservation-preservation-topics/plastics.html - https://scholar.google.com/scholar?q=how+to+clean+acrylic+plastic Google Scholar
https://scholar.google.com/scholar?q=how+to+clean+acrylic+plastic - Google Scholar Google Scholar
https://scholar.google.com/scholar?q=polymethyl+methacrylate+acrylic+cleaning+recommended+methods - Google Scholar Google Scholar
https://scholar.google.com/scholar?q=acrylic+glass+surface+cleaning+micro-scratches - https://www.epa.gov/pesticide-registration/list-n-disinfectants-use-certain-claims
https://www.epa.gov/pesticide-registration/list-n-disinfectants-use-certain-claims
