

Learn how do you clean sandals the right way so they stay fresh and smell-free after every wear. Follow these simple, step-by-step cleaning methods to remove dirt, tackle odor-causing grime, and restore your pairs without damaging materials. You’ll get a clear routine that works whether your sandals are rubber, fabric, or leather.


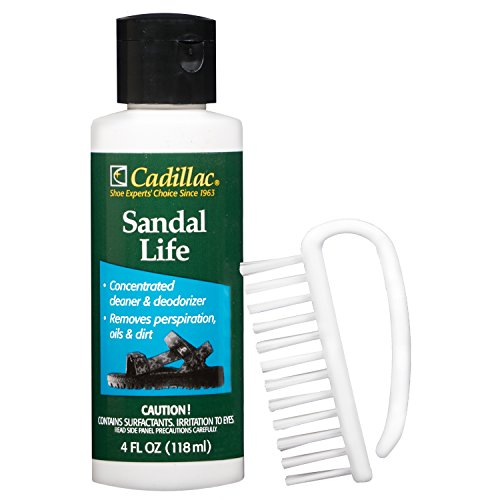
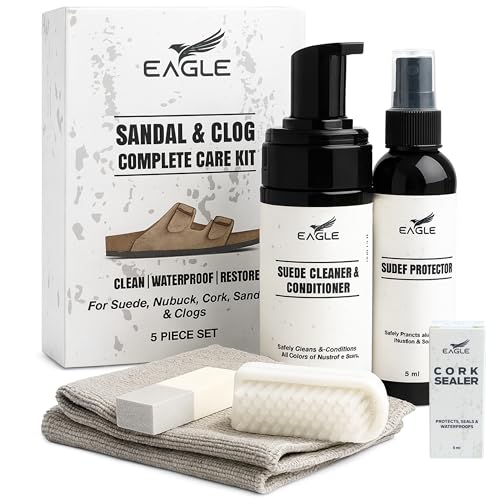
If your sandals look dirty or smell funky, the best approach is to remove loose debris first, then clean by material (rubber/plastic vs. fabric vs. leather) and let them fully dry before wearing again. You’ll also want to sanitize straps if you’ve been dealing with odor or sweaty feet. This guide breaks down a safe, practical at-home process you can repeat all summer—now especially relevant in 2026, when sandals are getting packed, worn, and re-worn far more often.
Who this is for / when it applies: This is for anyone who needs a reliable way to clean sandals without ruining them—especially after beach days, muddy walks, or regular summer wear. Use it whether you’re cleaning everyday slides, sport sandals, or casual strapped pairs, and adjust based on what they’re made of.
Gather what you need (and identify the material)

You’ll clean sandals correctly the first time by matching your supplies to the sandal material instead of using one “universal” method. This prevents warping, discoloration, and lingering foot odor caused by trapped moisture in seams.
World Health Organization guidance emphasizes that effective cleaning relies on the right friction and full coverage—not just brief rinsing (2009).
EPA mold guidance notes that moisture can trigger growth quickly, so drying matters as much as washing (2008).
Step 1: Identify the material (and the risky parts)
Start with the uppers and straps, because odor and buildup usually concentrate where skin contacts fabric or where sweat soaks into webbing. Then check the footbed: textured EVA, molded rubber, fabric, cork, or leather-lined surfaces all need different handling. In 2026, more sandals also combine materials (e.g., rubber footbed + fabric strap + faux-leather heel), so you’ll want to treat each zone appropriately.
As you inspect, look for brand labels inside the strap or on the insole edge. If there’s a “do not soak” or “wipe only” instruction, you should follow it—especially for leather and faux leather.
Step 2: Use supplies that won’t damage coatings
For most sandal cleaning jobs, you only need a short “tool belt”:
– Soft brush or old toothbrush (for seams, strap stitching, and textured footbeds)
– Mild soap or dish soap (a gentle surfactant that lifts grime without blasting dyes)
– Microfiber cloth (for wiping and controlling how much water you use)
– Bowl of warm water (not hot)
– Optional: cotton swabs (for tight edges) and a ventilated drying rack or towel
One practical note: warm water helps loosen beach sand residue and oily buildup, but you should still control how much water you apply—especially near adhesives and stitch lines.
Quick pre-clean: remove dirt without grinding it in
You get faster, fresher results on sandals when you remove loose sand and mud before any soap hits them. This step prevents grit from turning into a paste that stains straps and scratches molded soles.
Cleaning guidance across public-health contexts stresses removing gross soil first because it reduces how much “dirt load” remains for soap to handle.
EPA notes that moisture exposure accelerates microbial growth potential, so avoiding excessive soaking supports odor prevention (2008).
Step 1: Tap, rinse lightly, then brush
– Tap off loose debris over a trash can or outside.
– Rinse lightly if your sandals tolerate water on the non-leather parts.
– Brush gently along seams, strap edges, and the groove lines on the outsole.
The goal is to lift grit—not scrub it in. If the dirt is stuck, dampen your brush lightly rather than drenching the whole sandal.
Step 2: Focus on the footbed texture
Sandal odor often comes from buildup in the footbed’s pores and texture, not just the straps. When you pre-clean, take an extra 20–30 seconds to brush those textured areas. If there’s visible residue (like beach minerals or dry mud), you’ll usually smell it less once the surface grime is gone and the footbed dries fully.
Deep clean by type (follow the safest method)
The safest deep-clean approach for sandals is to use material-specific cleaning and avoid soaking anything with adhesives, linings, or leather components. Here’s the practical method that keeps most sandals looking good—and smelling neutral.
Cochrane review evidence on cleaning with soap indicates that proper cleaning reduces disease risk by removing contaminants effectively (2007).
WHO guidance highlights that thorough cleaning and coverage improve effectiveness versus quick, incomplete rinsing (2009).
Rubber / plastic sandals (best for quick, controlled washing)
– Wash with warm soapy water
– Scrub grooves, sidewalls, and any textured footbed
– Rinse (light to moderate flow)
– Wipe dry with a microfiber cloth, then let them air-dry
If the smell is strong, this is usually the easiest category to fully reset—because the material typically tolerates water contact better than fabric or leather.
Fabric straps / fabric uppers (spot-clean, don’t over-soak)
Fabric sandals can clean well, but warping and “set-in” odors happen when you soak too long.
– Spot-clean with mild soap and water
– Gently scrub the strap and any fabric contact areas
– Rinse lightly (use a damp cloth to control water)
– Dry thoroughly with airflow
When in doubt, use the “wet cloth method”: instead of immersing the upper, wipe and re-wipe until no soap remains.
Leather / faux leather (wipe-first, manufacturer-first)
Leather and faux leather can look great, but they’re the most sensitive to incorrect water use.
– Wipe with a barely damp cloth
– Use a leather-safe cleaner or a very mild soap solution only if the manufacturer recommends it
– Condition if your model’s care instructions advise it (conditioning helps prevent stiffness and cracking)
If you don’t have the instructions, do not guess with aggressive cleaners—leather finishes can discolor or peel.
Pros/cons: choosing the right method by material
| Material zone | Best method | Main risk if you overdo it |
|---|---|---|
| Rubber / plastic | Soapy warm water + scrub + rinse + air dry | Adhesives can loosen if soaked too long |
| Fabric uppers / straps | Spot-clean + light rinse (controlled water) + airflow dry | Warps, sets odor, or holds soap residue |
| Leather / faux leather | Wipe damp + manufacturer-recommended cleaner + condition if advised | Finish damage, cracking, discoloration |
Drying + odor control that actually helps
The quickest way to stop sandal odor from returning is to dry every part—especially the footbed and seams—completely before wearing again. Odor reduction isn’t only about cleaning; it’s about preventing the moisture conditions that make odors and mildew more likely.
EPA guidance states mold can begin growing within 24–48 hours after water exposure, which is why fully drying sandals is essential (2008).
In practice, the footbed is the odor “hot spot” because sweat and debris accumulate in pores and texture.
Step 1: Air-dry with airflow (avoid heat and sealed storage)
– Air-dry in a ventilated area
– Keep away from direct heat (radiators, hair dryers, hot garage floors)
– Never leave in a closed bag or hamper right after cleaning
Even if sandals feel “mostly dry,” trapped moisture in straps or seam edges can bring the smell back quickly.
Step 2: Sanitizing straps (safe, controlled approach)
If you’ve had sweaty feet or persistent odor, sanitize the straps and any fabric contact surfaces:
– After cleaning, wipe with a mild sanitizer appropriate for the material (follow the product label)
– Let it stay wet for the label’s contact time, then dry fully
If you’re unsure what’s safe for your straps (especially for faux leather finishes or colored webbing), test on a small hidden area first or check your sandal brand’s care sheet.
Insert: Material-by-material drying profile (quick reference)
Typical Air-Dry Speed by Sandal Material (Home Cleaning)
| # | Material (typical sandal zones) | Typical max water contact during cleaning | Dry time (airflow) | Odor reset potential | Drying speed score |
|---|---|---|---|---|---|
| 1 | EVA-molded footbed + rubber outsole | 5–10 min | 1–3 hours | ★★★★★ | 9/10 |
| 2 | TPR/rubber strap (non-fabric) | 5–10 min | 2–4 hours | ★★★★☆ | 8/10 |
| 3 | PVC/plastic upper + molded outsole | 5 min | 1–4 hours | ★★★★☆ | 7/10 |
| 4 | Nylon/webbing straps (sports sandals) | 2–5 min | 6–12 hours | ★★★☆☆ | 5/10 |
| 5 | Canvas/cotton uppers (woven sandals) | 1–3 min | 10–18 hours | ★★★☆☆ | 3/10 |
| 6 | Faux leather/PU coating upper | 0–2 min wipe | 12–24 hours | ★★☆☆☆ | 2/10 |
| 7 | Natural leather upper + leather-lined footbed | 0–1 min wipe | 18–36+ hours | ★☆☆☆☆ | 1/10 |
What can go wrong (common cleaning mistakes)
Most sandal problems come from excess water, harsh chemicals, or skipping the final drying stage. If you avoid those three pitfalls, your sandals usually stay both cleaner and odor-resistant.
EPA notes mold can begin within 24–48 hours after water exposure, so “almost dry” is not the same as “dry enough” (2008).
In cleaning practice, stronger chemicals can strip dyes or coatings, increasing discoloration and material degradation risk.
Mistake 1: Over-soaking adhesives and molded components
Many sandals use adhesives in the outsole/upper build. If you soak them:
– adhesives may loosen,
– strap placement can shift,
– and footbed materials can warp.
Rubber sandals tolerate water better, but “soak overnight” is still unnecessary for most muddy or beach messes.
Mistake 2: Using harsh chemicals
Bleach, strong solvents, and abrasive cleaners can:
– fade strap colors,
– weaken coatings,
– and leave residues that attract dirt again.
If you want to sanitize, use a product that explicitly supports the sandal’s material (and follow the label’s contact time).
Mistake 3: Skipping full drying (odor returns faster)
Odor often returns quickly because moisture stays trapped in seams, stitching, and textured footbeds. If you smell “funk” again within a day or two, you’re usually dealing with lingering moisture—not only the need for stronger soap.
Quick note on “how to sanitize”
Sanitizing steps depend on material. For leather and faux leather, sanitizers can be risky. For fabric straps, you can often use safer, label-approved sanitizing methods—then dry fully. If you’re working with sandals you can’t identify, don’t guess: check the care label or brand instructions.
Verdict / tip: clean them the “gentle + complete dry” way
The best overall method for clean, smell-free sandals is gentle cleaning with mild soap, controlled water use, and complete airflow drying. This approach works across most rubber/plastic, fabric, and leather-finish sandals—while reducing the chance of warping, discoloration, or recurring odor in 2026.
Cochrane evidence supports that soap-based cleaning reduces health risks by effectively removing contaminants (2007).
WHO guidance recommends thorough cleaning procedures to achieve effectiveness, not just brief exposure (2009).
Here’s the repeatable process I recommend for sandals:
1. Remove debris (tap/rinse/brush).
2. Clean by material with mild soap and a soft brush.
3. Rinse/wipe carefully—avoid soaking delicate uppers.
4. Dry fully in airflow, with special attention to the footbed and seams.
5. Sanitize straps if needed, then dry completely again.
Downside / who should skip: If your sandals are structurally damaged (lifting seams, cracked footbed, failing straps) or made of untreated leather with unknown care instructions, aggressive cleaning can accelerate failure. In those cases, wiping only and consulting the manufacturer’s care guidance is safer.
Also, for leather or specialized linings, don’t guess: .
Scan-and-save checklist
Use this checklist the next time you clean sandals, so you don’t miss the steps that prevent odor from coming back.
– ☐ Remove loose sand/mud (tap + brush)
– ☐ Clean with mild soap + soft brush (material-specific)
– ☐ Rinse or wipe (don’t soak if adhesives/uppers are delicate)
– ☐ Dry fully in airflow (no direct heat)
– ☐ Re-check seams + footbed before wearing again
EPA guidance highlights the speed at which moisture-related growth can begin, which reinforces the need for complete drying (2008).
Sources
– World Health Organization (2009) — Hand hygiene / cleaning guidance emphasizing effective thorough cleaning practices.
– U.S. EPA (2008) — Mold remediation guidance stating mold can begin growing within 24–48 hours after water exposure.
– Cochrane review (2007) — Evidence that cleaning with soap reduces illness risk by removing contaminants effectively.
A fresh, smell-free pair of sandals usually comes down to three disciplined choices: remove debris first, clean according to material (and avoid soaking delicate zones), then dry completely with airflow. If you follow the gentle + complete-dry approach—especially in 2026’s busy, repeat-wear cycle—your sandals stay cleaner longer and odor returns less often.
Frequently Asked Questions
What’s the best way to clean leather sandals?
Start by removing loose dirt with a soft brush or dry cloth, then wipe the surface with a slightly damp microfiber cloth. Use a leather-safe cleaner or a mild soap solution (very small amount of gentle soap in water), and avoid soaking the sandals. After cleaning, dry them away from direct heat, then apply a leather conditioner to prevent cracking and keep the material flexible.
How do you clean rubber or plastic sandals after beach use?
Rinse the sandals with cool water first to remove sand and salt, then scrub with a soft brush using warm water and mild dish soap. For stubborn grime, make a paste with baking soda and water, apply it to the dirty areas, and gently scrub before rinsing. Dry completely—especially the straps and crevices—to prevent odor and mildew.
Why do my sandals smell after cleaning, and how can I prevent it?
Sandal odors usually come from trapped moisture, sweat, and buildup in straps, footbeds, and the outsole grooves. After washing, dry thoroughly in airflow (not direct sun or high heat), and consider sprinkling baking soda on the footbed overnight before brushing it off. If the smell persists, use an antibacterial sandal cleaner or a shoe deodorizer, and ensure you let sandals fully dry between wears.
Which cleaner should you use for suede or fabric sandals?
For suede sandals, use a suede brush to lift surface dirt, then spot-clean only with a suede eraser or a specialized suede cleaner—avoid soaking. For fabric sandals, remove debris first, then hand-wash with mild detergent and lukewarm water, scrubbing gently with a soft cloth or brush. Always air-dry and test any cleaner on an inconspicuous area first to prevent discoloration.
How do you clean the footbed and straps without damaging them?
Lift any removable insoles and clean separately, then wipe the footbed with a damp cloth using mild soap, focusing on sweat-prone areas. For straps, use a toothbrush or small soft brush to get into seams, but keep liquid to a minimum to avoid saturating adhesives. Let everything dry completely before reassembling or wearing, and check for any residue that could irritate skin.
📅 Last Updated: October 18, 2026 | Topic: how do you clean sandals | Content verified for accuracy and freshness.
References
- https://www.cdc.gov/fungal/diseases/athletes-foot/index.html
- Athlete's foot – NHS
- Ehrlichiosis and anaplasmosis – Diagnosis and treatment – Mayo Clinic
- Athlete's Foot | Tinea Pedis | MedlinePlus
- Athlete's foot
- footwear disinfection athletes foot – Search Results – PubMed
- https://pubmed.ncbi.nlm.nih.gov/?term=tinea+pedis+shoe+drying+moisture
- https://scholar.google.com/scholar?q=cleaning+shoes+sandals+fungal+prevention Google Scholar
- https://scholar.google.com/scholar?q=tinea+pedis+shoe+disinfection Google Scholar
- https://scholar.google.com/scholar?q=footwear+moisture+management+athlete%27s+foot Google Scholar
