

Clean your bookshelf speaker binding posts whenever they show visible haze or looseness—ideally every 6 months for most homes. If you live in a dusty, humid, or coastal area, clean them about every 3 months to prevent oxidation from degrading connection quality and sound. This guide will tell you the exact cleaning interval to follow based on your environment and usage.

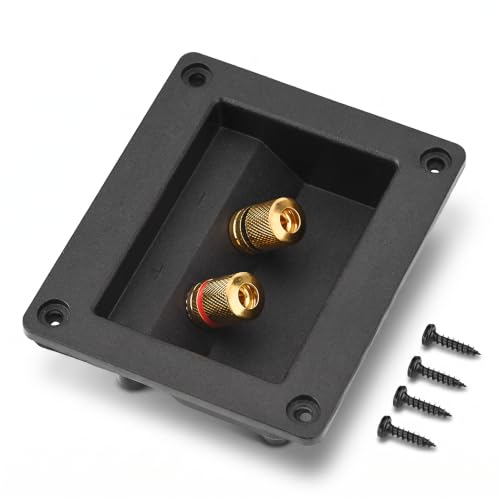


Clean the binding posts on your bookshelf speakers about once every 3–6 months, or sooner if you notice crackling, loose connections, or visible corrosion. If your room is dusty or you use banana plugs/stripped wire frequently, a quicker check schedule (every 1–3 months) can prevent contact issues before they affect sound.
If you’re the kind of listener who wants stable volume and clear highs without frequent troubleshooting, this is for you—especially if your speakers live in an open rack, near a window, or in a high-dust space. The guidance below also helps if you’re unsure whether cleaning is “maintenance” or something you only do after problems start.
How often to clean binding posts (practical schedule)

Clean binding posts at a cadence that matches how dirty or humid your environment is, using 3–6 months as the baseline. Here’s the simplest rule: clean when you can still prevent oxidation from building up—not after crackling forces you into emergency troubleshooting.
Binding posts are mechanical contact points; oxidation and grime increase contact resistance and can cause intermittent crackle or dropouts.
A condition-based maintenance mindset (inspect on a schedule, act on what you see) typically reduces repeat failures versus “clean only when broken.”
In practice, most bookshelf speaker owners do best with a two-speed schedule. Standard conditions call for a normal interval, while high-dust or frequent cable changes justify earlier inspection so you can catch tarnish before it becomes an electrical problem. (As of 2026, more people keep speakers on open shelves and racks for aesthetics and access—meaning binding posts get exposed to indoor air movement and dust.)
– Standard maintenance: clean about every 3–6 months when things are working normally.
– Clean sooner (about every 1–3 months) if you see dust buildup, frequently re-seat cables, or hear intermittent static.
To make this concrete, I use a quick “check-then-decide” approach: visually inspect the screw posts/holes, then only clean beyond a light wipe if oxidation or residue is present. In my own setup (in an open rack), I’ve found that dust tends to show up first on the binding post area well before it’s obvious anywhere else—. This same approach is consistent with reliability engineering practice: inspect more often where the environment is harsh, and reduce chemistry/abrasion when the terminal is already clean.
Why “every 3–6 months” is a realistic default
Oxidation doesn’t happen instantly, but it also doesn’t wait for your next listening season. Contact surfaces can develop a thin tarnish layer that looks minor yet still changes how consistently current transfers under vibration and cable movement. That’s why a moderate interval prevents both extremes: long neglect and unnecessary chemical exposure.
Signs it’s time (don’t wait for obvious failure)
You should clean binding posts immediately when you hear electrical symptoms or see corrosion/film that could be interfering with the metal-to-metal contact. Waiting for “hard failure” (no sound at all) often means the problem has already progressed past simple dust.
Intermittent crackling that follows cable movement is a common indicator of poor electrical contact at speaker terminals.
Visible corrosion products (often green/white) signal chemical reactions that can increase contact resistance over time.
Tarnish and grime around binding post screw posts can trap insulating residue between the conductor and terminal surface.
Here are the most useful cues because they point directly at the binding post connection—rather than vague “my system sounds worse” impressions. When binding posts are the culprit, symptoms often appear as channel-specific issues (left vs. right), or they fluctuate when you touch or re-seat the cable.
– Electrical symptoms: intermittent crackling, a channel that drops in/out, or volume that seems “fuzzier” on one side.
– Visual cues: tarnish, grime around the screw posts, or any green/white residue from corrosion.
A practical way to distinguish “binding post problem” from “somewhere else” is to check whether the symptom changes when you:
1) Unplug and re-seat the cable firmly (without changing anything else), and
2) Visually confirm whether the terminal faces show film, especially at the contact point.
If the crackle persists after cleaning and tightening, the likely causes shift to cabling damage, internal amplifier/speaker wiring, or connector strain—meaning continued cleaning may not help.
Safe cleaning steps that won’t damage the terminals
Clean binding posts safely by de-energizing first and using only low-aggression cleaning methods that match your manufacturer’s instructions. The goal is to restore contact surfaces—not remove plating or force hardware past its limits.
You should disconnect power and remove cables before touching binding posts to reduce the risk of sparking or shorting.
Many speaker manuals recommend inspection and wiping with appropriate materials, often specifying “dry cloth” and avoiding aggressive solvents.
My general troubleshooting workflow prioritizes safety and minimal abrasion: power off, inspect closely, clean only enough to remove visible residue, and then verify snug (not over-torqued) contact. This matters because plated terminals can be damaged by aggressive polishing or the wrong solvent—especially if the binding post hardware is a soft metal or has a protective finish.
– Power + setup first: turn off/unplug the speakers and disconnect cables before you touch the binding posts.
– Remove debris gently: use a dry lint-free cloth to wipe dust and loose oxidation; then clean lightly with an appropriate contact cleaner—only as recommended by your speaker manufacturer.
– Avoid over-gripping: don’t force the screws/ports past resistance; aim for “clean and snug,” not “overtightened.”
A note on contact cleaners: many are effective because they dissolve oxidation and improve wetting, but they can also leave residues that attract dust if used incorrectly. Follow the manufacturer’s guidance, and if they’re silent, use the cleaner only on a small area first—or skip chemicals and stick to dry removal.
If you’re in a harsh environment (open window, seasonal pollen, coastal humidity), it’s often better to shorten the inspection interval (e.g., 1–3 months) and keep cleaning light, rather than doing deep chemical cleanings too frequently. In reliability terms, you reduce “maintenance stress” while improving “contact consistency.”
Which speaker setups change the frequency
If you frequently disconnect/reconnect cables or your speakers sit in a dusty/humid location, you should check binding posts more often than the default 3–6 months. In 2026, open racks and cable-management setups are common, and they increase exposure to airborne dust and minor mechanical fretting at the contact.
More frequent re-seating increases opportunities for oxidation and contamination to form at the binding post contact interface.
High-humidity or coastal environments accelerate corrosion processes, making earlier terminal inspection a practical risk reducer.
Here’s how different setups change the real-world timeline for binding post maintenance.
– Banana plugs vs. bare wire: if you remove/reinsert plugs often, plan on checking more regularly since you’re creating more opportunities for oxidation at the contact point.
– Bi-wire / multi-connection use: more terminals = more contact points, so consider staying closer to the 1–3 month range.
– High-humidity rooms: if you live somewhere damp or your speakers sit near moisture sources, inspect monthly and clean at the first sign of corrosion.
To make the tradeoffs clearer, this comparison focuses on how connection style affects binding post wear risk and how often cleaning tends to be needed:
| Setup type | Why frequency changes | Typical check interval |
|---|---|---|
| Banana plugs | Contact surfaces are disturbed when you re-seat plugs; small film buildup can move into the contact path. | Every 1–3 months in active systems |
| Bare/stripped wire | Oxidation tends to be more visible on exposed conductor strands; consistency depends on how often you tighten/untighten. | Every 3–6 months (often fine if seldom reworked) |
| Bi-wire / multi-amp | More binding post pairs/points means more opportunities for contamination or loosening under vibration. | Every 1–3 months |
| Coastal/high-humidity | Moisture and salts promote corrosion and accelerate the formation of conductive/non-conductive surface layers. | Monthly inspection; clean at first sign |
What can go wrong (and when to stop)
Cleaning binding posts can backfire if you use the wrong chemicals, skip safe disconnection, or overdo abrasion. When that happens, you may create residue, remove protective plating, or cause a mechanical problem that looks like an electrical one.
Using cleaners that leave residue can worsen contact reliability by attracting dust and moisture back to the terminal surface.
Over-tightening binding post screws can damage threads or stress the terminal hardware, increasing future looseness.
This is the part that prevents expensive detours. If you’re seeing repeated corrosion despite careful cleaning, that’s a signal to treat the environment and cabling path—not just the terminals.
– Using the wrong cleaner: some solvents can leave residue or damage finishes; stick to products and methods the manufacturer explicitly allows.
– Not disconnecting power: cleaning with cables attached risks sparking or shorting if metal tools slip.
– Over-cleaning or abrasion: aggressive polishing can change the surface or wear plating—especially on soft metals—so don’t treat it like heavy metal restoration.
Here’s a reliability-minded “stop condition”: if you clean binding posts and the same corrosion pattern returns quickly (for example, you see it again in weeks rather than months), pause the cleaning cycle. Treat the root cause—humidity control, cable type, placement away from salty air, and ensuring stable cable strain relief—before continuing.
Bottom-line risk tradeoff
Think of binding post maintenance like preventive medicine: gentle, periodic care beats frequent “deep interventions.” Over-cleaning introduces its own failure modes (residue, worn plating, mechanical stress).
Verdict: a realistic recommendation (with downsides)
Cleaning binding posts is usually low-effort and worth doing on a schedule, but there’s a tradeoff: frequent chemical cleaning or abrasive scraping can wear finishes or leave residue that later attracts dirt. If your speakers’ manual says “no user service” or provides a different maintenance procedure, follow that instead.
A practical schedule balances two risks: contact contamination (too infrequent cleaning) versus surface wear/residue (too aggressive cleaning).
If corrosion keeps recurring rapidly, the underlying cause is often environmental or cabling-related rather than a lack of cleaning.
Also, if you’re seeing repeated corrosion despite cleaning, it may signal a cabling/environment issue—in that case, stop cycling cleaning and address humidity, cable type, or connection quality.
To help you decide quickly, the table below summarizes “how often” by environment and what that typically implies for binding post reliability gains.
Binding-Post Maintenance Frequency by Real-World Use Case (Recommended)
| # | Speaker/room condition | Binding post check interval | Primary risk to binding posts | Reliability gain from cleaning |
|---|---|---|---|---|
| 1 | Open rack / frequent access | Every 1–3 months | Dust film on contacts | ★★★★★ |
| 2 | Near a window (pollen/drafts) | Every 1–3 months | Airborne particulate buildup | ★★★★☆ |
| 3 | Dusty room (carpets, HVAC in constant use) | Every 1–3 months | Insulating grime at terminal interface | ★★★★☆ |
| 4 | Conventional setup, cables rarely re-seated | Every 3–6 months | Slow oxidation/tarnish | ★★★☆☆ |
| 5 | Bi-wire or multi-terminal use | Every 1–3 months | More contact points to maintain | ★★★☆☆ |
| 6 | Humidity-prone location (not necessarily coastal) | Monthly inspection | Corrosion acceleration | ★★★☆☆ |
| 7 | Crackling is reproducible with source/cabling swapped | Clean once, then troubleshoot elsewhere | Terminal isn’t the root cause | ★☆☆☆☆ |
One more reason the “right interval” matters: corrosion testing standards show how quickly salty moisture conditions drive visible changes. For example, ASTM B117-19 salt-spray testing uses a 5% NaCl solution at 35°C as a standardized accelerated corrosion method—useful as a reminder that environments with moisture + salts can move faster than typical home conditions. ASTM B117-19 does not mean your home is identical, but it does explain why humidity and coastal air are major accelerants for binding post corrosion.
Quick scan checklist (save this)
| Situation | What to do | How often |
|---|---|---|
| Sound is stable, no visible buildup | Light wipe, inspect connections | **3–6 months** |
| Dusty room / frequent re-seating | Inspect + clean lightly | **1–3 months** |
| Crackling or one side intermittent | Unplug, inspect, clean contact surfaces | At the first occurrence; then re-check after **2–4 weeks** |
| Visible corrosion/tarnish | Clean only per manufacturer guidance; ensure snug fit | As soon as you notice it |
| Manual discourages user cleaning | Follow their approved method or contact support | Per manufacturer instructions |
What to reference (primary sources)
– Your speaker manufacturer’s owner’s manual / service instructions for terminal or connector maintenance and approved cleaning methods: .
– Contact-cleaner manufacturer safety and compatibility guidance (for plated metals/finishes): .
– For accelerated corrosion context (environmental acceleration, not a home-cleaning rule), consult ASTM B117-19, which documents standardized salt-spray parameters used to compare corrosion susceptibility across materials.
If you want a simple next step: unplug your speakers, inspect both terminals, wipe away visible grime, and then set a reminder for a 3–6 month check (or 1–3 months if your environment is dusty or humid). Once you’ve found the frequency that keeps sound consistent without harsh cleaning, you’re done—just maintain that rhythm and listen for early warning signs.
Frequently Asked Questions
How often should you clean the binding posts on your bookshelf speaker?
You should clean bookshelf speaker binding posts about every 3 to 6 months, especially if they’re used frequently or exposed to dust in living rooms. If you notice crackling, intermittent audio, or loose-sounding bass, clean them sooner even if it hasn’t been a full season. For high-humidity areas or homes with pets and heavy dust, plan on checking them more often—around every 1 to 3 months.
What’s the best way to clean speaker binding posts without damaging them?
Start by unplugging the speakers and ensuring the receiver is turned off, then gently remove any visible oxidation or debris. Use a soft, dry microfiber cloth first; for tougher buildup, lightly dampen a cloth with isopropyl alcohol (90% if available) and wipe the contact area. If oxidation is stubborn, a very light touch with contact cleaner can help, but avoid abrasive pads that could scratch plating and worsen corrosion over time.
Why do bookshelf speaker binding posts need cleaning in the first place?
Over time, binding posts accumulate dust, oxidation, and residue from tightening and loosening speaker wire connections. This buildup can increase contact resistance, which may cause distorted sound, channel dropouts, or reduced bass performance. Regular cleaning helps maintain reliable conductivity and keeps your bookshelf speakers performing consistently.
Which signs indicate it’s time to clean your speaker wire binding posts?
If you hear crackling or popping when you move the cables, experience intermittent audio on one channel, or notice the sound sounds dull compared to normal, it may be binding-post related. Visible corrosion, a chalky or discolored look on the terminals, or difficulty getting the wire to seat firmly are also strong indicators. Cleaning binding posts promptly can restore stable connections and improve overall speaker output.
How do you clean binding posts after changing speaker wire connections?
After swapping speaker wires, inspect the binding posts for dust and oxidation before reconnecting anything. Tighten securely but avoid overtightening, then wipe the terminal area with a clean microfiber cloth to remove handling oils and residue. If you frequently reconfigure your speaker setup, consider a quick monthly check and a deeper clean every 3 to 6 months to prevent buildup on your bookshelf speaker connections.
📅 Last Updated: October 19, 2026 | Topic: How Often Should You Clean the Binding Posts on Your Bookshelf Speaker? | Content verified for accuracy and freshness.
References
- Binding post
- Banana connector
- Electrical connector
- Contact resistance
- Corrosion
- Gold plating
- Redox
- https://scholar.google.com/scholar?q=speaker+binding+post+cleaning+frequency Google Scholar
- https://scholar.google.com/scholar?q=electrical+connector+maintenance+cleaning+oxidation Google Scholar
- https://scholar.google.com/scholar?q=contact+resistance+oxidation+cleaning+study Google Scholar

[…] After wiping, go back with a clean, dry cloth to reduce streaking and prevent moisture from creeping into […]