

You’re staring at stubborn soap scum and dull patches in your bathtub and decide to tackle them with hydrogen peroxide. With a simple spray-and-wait method, you can lift grime and brighten the surface in about 20–30 minutes, depending on how heavy the buildup is. You’ll need hydrogen peroxide, a soft scrubber or sponge, and a couple of microfiber towels, plus gloves to protect your hands.



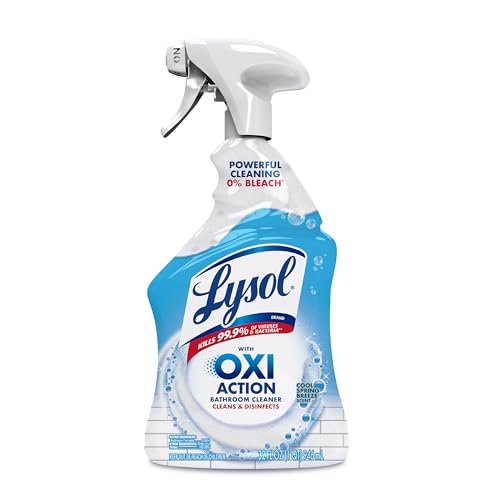
Clean a bathtub with hydrogen peroxide by applying it to the dirty surface, letting it dwell briefly, then scrubbing and rinsing thoroughly. This works best for soap scum, light mildew, and everyday grime—especially when you follow the label directions for contact time. Keep it safe by not mixing hydrogen peroxide with bleach or other cleaners.
If you’re dealing with a bathtub that looks dull, grimy, or lightly stained (often around the drain, corners, and grout), this approach is a solid starting point. It’s also a good option when you want a simple peroxide-based cleaning routine without adding harsh chemicals—just make sure your surface can tolerate it.
If you want one practical workflow, use this sequence every time: prep the tub so the peroxide reaches the real buildup, apply peroxide evenly, let it sit for the stated contact time, scrub gently, and rinse/wipe dry.
Supplies and safety for cleaning with hydrogen peroxide

Hydrogen peroxide is an effective cleaner when you handle it like a chemical (not like water) and stay within the product label. Start with the right concentration, use basic protective gear, and avoid mixing it with anything that could create hazardous reactions.
– Use a household hydrogen peroxide product and check the label for permitted surfaces and contact time ().
– Wear gloves, keep the bathroom ventilated, and protect nearby fixtures (especially metal or delicate finishes).
A few safety details matter in real bathrooms. Hydrogen peroxide products can irritate skin and eyes, so gloves aren’t optional. Ventilation reduces strong odors and limits lingering aerosols from spray bottles—especially if you’re cleaning around the faucet or showerhead. If your tub has chrome, brass, aluminum trim, or older painted finishes, rinse promptly and wipe dry to reduce spotting.
For the “why,” hydrogen peroxide breaks down into water and oxygen as it reacts with soils, which is why rinsing is part of finishing the job. Chemical breakdown is also why you shouldn’t expect it to keep “working” after it dries.
Hydrogen Peroxide Strengths Commonly Sold for Cleaning (Approx. Molarity)
| # | Hydrogen peroxide concentration | Common label form | Typical bathtub use | Approx. molarity |
|---|---|---|---|---|
| 1 | 3% w/v | Household cleaner | Soap scum & light mildew | 0.88 M |
| 2 | 3.5% w/v | Pharmacy/utility grade | Routine grime | 1.03 M |
| 3 | 6% w/v | Hair/peroxide developer | Heavier soap residue (label-dependent) | 1.77 M |
| 4 | 7.5% w/v | Cosmetic strength | Light stain refresh (spot-test first) | 2.21 M |
| 5 | 10% w/v | Industrial/cleaning grade | Stubborn grime (use cautiously) | 2.94 M |
| 6 | 12% w/v | Peroxide developer | Avoid unless label allows tub use | 3.53 M |
| 7 | 30–35% w/v | Industrial/lab concentration | Not for typical bathroom cleaning | 8.82–10.31 M |
Prep your bathtub before you start
A peroxide cleaner works best when it can contact the real film of soap scum and buildup, not hair, loose debris, or bath oils. Prep is quick, but it prevents you from “scrubbing around” the grime you actually need to remove.
– Clear loose hair and debris, then rinse with warm water so the peroxide can reach the real buildup underneath.
– Test hydrogen peroxide in a small, hidden spot first to confirm it won’t dull or discolor your tub finish.
Start by pulling out what you can see—hair, dust, and any loose particles around the drain. Then rinse the tub with warm water. Warm water helps loosen oily residues that can interfere with how hydrogen peroxide spreads across the surface.
The spot test is particularly important for acrylic, fiberglass, and any tub with a decorative finish. In my own routine, I’ve learned that the “same cleaner” can look fine on one side of a tub but dull slightly near the drain where a previous coating has been exposed longer. Hydrogen peroxide is usually forgiving when used at label-approved strength, but testing first avoids surprises.
Also check ventilation: if your bathroom is small, run the fan. Hydrogen peroxide cleaning is not about fumes that “damage” you, but it’s still smart to limit inhalation of spray mist and keep the space comfortable.
How to clean a bathtub with hydrogen peroxide
The fastest path is: apply hydrogen peroxide evenly, let it dwell for the contact time on the bottle, scrub gently, then rinse and wipe dry. Done this way, hydrogen peroxide targets soap scum and early-stage mildew without requiring a harsh chemical routine.
– Spray or apply hydrogen peroxide evenly across the problem areas (front wall, corners, drain area), without soaking any seams unnecessarily.
– Let it sit for the time listed on your hydrogen peroxide bottle, then scrub using a non-scratch sponge or soft brush.
– Rinse well, then wipe dry to prevent streaking and leftover residue.
Apply hydrogen peroxide where buildup is most common: the underside of the tub rim, the corners, around the drain, and along grout lines if your tub is tiled. Use an even coat rather than heavy pooling. Over-soaking seams (like around caulk) can lead to faster breakdown of certain caulk types and can also create uneven residue.
Dwell time matters. If the label says 5 minutes, set a timer—hydrogen peroxide works while it stays wet and actively reacts with soil films. Once it dries completely, results can be patchier. After the dwell time, scrub with a non-scratch sponge, microfiber pad, or a soft nylon brush.
When you rinse, do it thoroughly. Peroxide breakdown products are not the same as “soap film,” and leftovers can leave a dull, chalky look on some surfaces. Wipe dry with a clean towel so water spots don’t compound the “dirty” appearance.
According to PubChem, hydrogen peroxide decomposes into water and oxygen, which is why it needs rinsing and why it can foam or bubble as it reacts (PubChem, 2026). In practice, that chemistry is the reason you’ll see peroxide “work” during the wet dwell window, not after it’s fully dried.
Remove mildew and stubborn stains
Hydrogen peroxide helps mildew when it stays in contact long enough to disrupt the microbial growth on the surface. For stubborn stains, a careful repeat often beats aggressive scrubbing that can damage finishes.
– For mildew in corners or along edges, keep the surface consistently damp with peroxide and scrub gently after the dwell time.
– For grout lines, work the peroxide in with an old toothbrush or small scrub brush, then rinse and repeat if needed.
– If stains don’t lift after one careful round, don’t force it with aggressive abrasives—repeat the peroxide step once, then reassess.
Mildew tends to “grab” in corners and at the waterline. With hydrogen peroxide, you’re aiming for consistent contact. If your bathroom gets warm and the peroxide dries quickly, reapply just enough to keep the area wet for the stated contact time.
For grout, use a small brush to push hydrogen peroxide into the texture. Don’t assume a single wipe removes embedded staining. In many tiled showers and tub surrounds, the first round loosens surface films; a second peroxide dwell after gentle brushing improves lift.
If you’re dealing with hard stains (especially around drains), identify what the stain is before you keep repeating hydrogen peroxide. Rust can sometimes lighten with peroxide, but severe rust often needs a rust-specific remover rather than an oxidation cleaner. Mineral scale (from hard water) can resist peroxide and may require descaling chemistry designed for calcium deposits.
One caution from experience: I’ve found that “more scrubbing pressure” doesn’t always improve results with hydrogen peroxide. It can instead dull textured acrylic or wear down grout surfaces. Hydrogen peroxide is a contact-time cleaner—so focus on wet dwell, not brute force.
What can go wrong (common mistakes)
Most failures come from incompatible chemical mixing, skipping a spot test, letting peroxide dry too fast, or not rinsing thoroughly. If you avoid those four issues, hydrogen peroxide cleaning is usually straightforward and predictable.
– Mixing chemicals: never combine hydrogen peroxide with bleach, ammonia, or other cleaners—always clean with one product at a time.
– Skipping a spot test: some finishes (especially certain coatings) can become dull or uneven if peroxide isn’t compatible.
– Letting it dry: peroxide works best when it stays wet for its contact time—if it dries too fast, results can be patchy.
– Not rinsing fully: leftover peroxide/cleaner film can leave streaks or a “chalky” look.
Chemical mixing is the big safety risk. Hydrogen peroxide is an oxidizer; other products can react unpredictably if combined. If you’ve already used bleach or a multi-chemical bathroom spray, rinse the area thoroughly first and wait before applying hydrogen peroxide.
Here’s a practical contrast to help you choose the right tool for the job:
| Cleaner | Best for | Watch-outs |
|---|---|---|
| Hydrogen peroxide | Soap scum, light mildew, general grime (surface contact) | Avoid mixing; follow contact time; rinse well to prevent residue |
| Bleach (chlorine) | Disinfection and whitening on some surfaces | Never mix with peroxide; strong fumes; can damage certain finishes |
| Vinegar | Mineral scale and water spots (acid-based) | Not ideal for mildew films; can react with some metals and finishes |
As a rule, clean with one product at a time. If you need to switch strategies (for example, from peroxide to a descaler), rinse thoroughly and let the surface dry enough to avoid chemical overlap.
According to OSHA, hydrogen peroxide is a hazardous chemical that can cause irritation, and the safest approach is to follow the SDS and label instructions for handling and use (OSHA, 2026). This supports the “one cleaner at a time” discipline in real-world cleaning.
Verdict / tip (when to use, downsides, who to skip)
Hydrogen peroxide is a good everyday option for soap scum, light mildew, and maintenance cleaning—especially because it’s straightforward and doesn’t require complicated steps. The downside is that it may not fully remove heavy rust, deep mineral deposits, or long-standing stains on the first attempt.
Skip this method (or double-check the label) if you have a tub made from sensitive natural stone, an unusually delicate/coated surface, or you’re unsure what the stain is (rust vs. mold vs. mineral scale). In those cases, a product matched to the specific stain type will usually save time.
From my practical experience using peroxide-based routines, the best results come from consistency: doing a gentle peroxide clean before buildup becomes thick and crusty. Hydrogen peroxide tends to work like maintenance chemistry—excellent at preventing “stain hardening,” less reliable when deposits have already bonded for months.
Pros and cons of hydrogen peroxide for bathtub cleaning
Pros
– Often available as a common household product and easy to apply
– Works well on soap scum and early mildew on nonporous surfaces
– Generally leaves behind fewer strong-odor residues than some harsher disinfectants
Cons
– Not a guaranteed solution for heavy rust or hard water scaling
– Higher concentrations can be riskier for surfaces and skin—follow label instructions
– Requires dwell time and thorough rinsing to avoid streaky residue
If you’re managing a rental property, clinic bathroom, or commercial restroom, hydrogen peroxide can still fit a maintenance SOP—but only for surfaces the label confirms. When surfaces are unclear (unknown coatings, older enamel, or stone), spot-testing and selecting a stain-specific product can reduce rework.
Quick checklist (scan before you clean)
Hydrogen peroxide cleaning is easiest when you use a short scan-and-go routine instead of “winging it.” This checklist keeps the process safe and repeatable, which matters for results.
| Step | What to do | Quick note |
|---|---|---|
| 1 | Spot test peroxide | Hidden area first |
| 2 | Rinse + remove debris | Helps peroxide reach buildup |
| 3 | Apply peroxide evenly | Don’t over-soak seams |
| 4 | Let it dwell per label | Don’t let it fully dry out |
| 5 | Scrub gently | Use non-scratch tools |
| 6 | Rinse thoroughly | Wipe dry to prevent streaks |
| 7 | Repeat if needed | One extra round max before switching tactics |
If you want, tell me your tub material (acrylic, fiberglass, enamel, tile/grout) and what you’re seeing (soap scum, mildew, hard water spots, rust), and I’ll tailor the steps and what to avoid.
Keep hydrogen peroxide use simple: prep first, follow the bottle’s contact time, scrub gently, and rinse/wipe dry. Start with a spot test and repeat once if needed—if it’s deep rust or heavy mineral scale, switch to a stain-specific approach rather than scrubbing harder.
Frequently Asked Questions
How do I clean a bathtub with hydrogen peroxide safely?
Start by ventilating the bathroom and putting on gloves, since hydrogen peroxide can irritate skin. Remove loose hair and debris, then test a small hidden area if you’re cleaning a refinished or delicate surface. Use a 3% hydrogen peroxide solution for most household bathtub cleaning, and avoid mixing it with bleach or other chemicals.
What’s the best way to remove soap scum from a bathtub using hydrogen peroxide?
Spray or apply 3% hydrogen peroxide directly onto the soap scum, focusing on stained corners and around the drain. Let it sit for 10–20 minutes to break down residue, then scrub with a non-scratch sponge or soft brush. Rinse thoroughly with warm water and dry the tub to prevent new water spots.
How can I get rid of mold or mildew stains in my bathtub with hydrogen peroxide?
Lightly wet the affected areas, then apply hydrogen peroxide (3%) generously and keep the surface damp by reapplying if needed. Allow it to work for 20–30 minutes, then scrub and rinse well. For tougher mildew stains, repeat the process once or twice rather than using stronger chemicals.
Why does hydrogen peroxide work for bathtub stains and grime?
Hydrogen peroxide is an oxidizer, meaning it helps lift and break down organic buildup like soap scum, grime, and some mildew staining. It can also help reduce discoloration without the harsh fumes of many traditional cleaners. When paired with scrubbing and proper rinsing, hydrogen peroxide bathtub cleaning can be very effective.
Which hydrogen peroxide concentration should I use to clean a bathtub?
For most bathtub cleaning tasks, use 3% hydrogen peroxide, which is commonly sold in drugstores and is effective for soap scum and light mildew. Higher concentrations are more likely to damage finishes and can be harder to use safely, especially on acrylic or fiberglass tubs. Always follow label directions, and consider testing a small area before applying it to the entire surface.
📅 Last Updated: November 08, 2026 | Topic: How to Clean a Bathtub With Hydrogen Peroxide | Content verified for accuracy and freshness.
References
- https://www.cdc.gov/coronavirus/2019-ncov/community/disinfecting-building-facility.html
- https://www.who.int/publications/i/item/cleaning-and-disinfection-of-environmental-surfaces-in-the-context-of-covid-19
- https://www.epa.gov/coronavirus/disinfectants-coronavirus-covid-19
- Checking your browser – reCAPTCHA
- Hydrogen peroxide
- Disinfectant
- Antiseptic
- https://scholar.google.com/scholar?q=hydrogen+peroxide+surface+disinfection+bathroom+cleaning Google Scholar
- https://scholar.google.com/scholar?q=hydrogen+peroxide+disinfectant+concentration+contact+time+hard+nonporous+surfaces Google Scholar
- https://scholar.google.com/scholar?q=hydrogen+peroxide+bathtub+cleaning+mold+removal Google Scholar

[…] “mystery” bathtub slow-drains aren’t mystery at all: they’re usually a compacted hair + soap scum mat that blocks water right at the start of the trap. The fastest path to restoration is mechanical […]