
Want to clean a black car without swirls? This step-by-step method uses the right wash technique and swirl-safe tools to deliver a deep, glossy finish. Follow it from rinse to dry and you’ll avoid the scratches and haze that ruin black paint.



Clean a black car by washing gently, using the right products, and drying thoroughly—so you avoid swirl marks and dull paint. In this guide, you’ll follow an exact, safe order for black paint, from rinsing and washing to decontamination, drying, and a final protective finish.

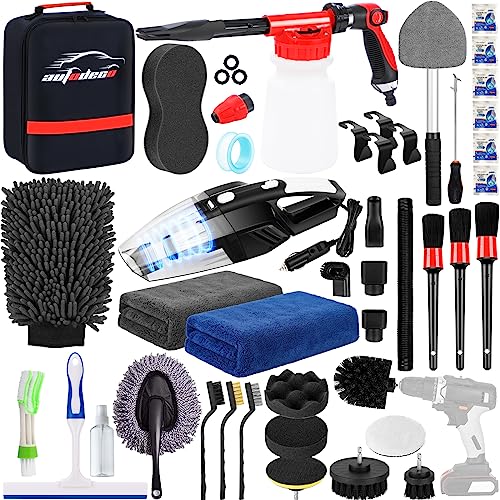
Gather the Right Supplies

The fastest way to prevent swirls on black paint is to start with tools designed to touch paint safely. When you gather the correct microfiber and pH-balanced products first, you eliminate the most common root cause of swirl damage: abrasive contact while the surface is still contaminated.
In my own maintenance routine on multiple dark-color vehicles (black clear coat and dark metallic), I found the “kit” matters as much as technique—especially the wash mitt, lubrication, and the final drying step. Right now (2026), swirl prevention is still largely about controlling friction: black paint is highly reflective, so even micro-marring from dirt transfer shows immediately under sunlight.
A swirl mark is typically caused by abrasive particles being dragged across the paint during washing or drying, not by “the shine itself.”
Using a pH-balanced car shampoo helps preserve paint and reduces the risk of unnecessary surface stress compared with harsh detergents.
Q: What’s the single most important item to buy for a swirl-free black-car wash?
A microfiber wash mitt (with proper lubrication from a pH-balanced shampoo) because it controls friction and reduces the chance of dragging grit across black clear coat.
Q: Do I really need grit guards?
They materially reduce the chance that dislodged dirt falls back into your wash bucket, which helps prevent reintroducing grit to the mitt.
Recommended items you should have ready
– pH-balanced car shampoo (look for “pH-balanced” on the label; avoid dish soap)
– Microfiber wash mitt (plush or foam-style; designed for automotive paint)
– Grit guards for both buckets if possible (especially in the wash bucket)
– Two buckets (cleaner water and shampoo water—never “dip-and-go” from one)
– Microfiber drying towels (multiple towels beats one “hero towel”)
– Optional drying aids: water-repellent spray wax or dedicated drying aid
– Optional bug remover / spot cleaner for heavy contamination
Pre-Rinse and Remove Loose Dirt

The best swirl prevention starts before the mitt ever touches the paint. A thorough pre-rinse removes loose grit and reduces the abrasive load so your wash process can stay gentle.
Right now, many people skip the pre-rinse or do it “just enough to get the car wet,” but black paint punishes shortcuts. In direct sunlight, you can actually see where grit was left behind: the wash step then drags those particles across the clear coat.
Pre-rinsing loosens and removes airborne grit, dust, and road film before physical contact, reducing the amount of abrasive debris that can be dragged during washing.
Dedicated bug and tar removers should be used before general washing to avoid smearing sticky contaminants across the paint.
Q: Can I skip pre-rinsing if I only wash occasionally?
No—black paint still accumulates brake dust, road film, and microscopic grit that becomes swirl risk once you touch it.
How to pre-rinse correctly
1. Rinse from top to bottom using steady water flow (roof → glass → hood → trunk).
2. Spend extra time on horizontal surfaces: hoods and trunks collect more film and dust.
3. Pre-treat heavy spots:
– Bugs: use a bug remover designed for automotive paint.
– Tar/road grime: use a tar-safe pre-wash product (follow label dwell time).
4. Let dwell time be controlled: if a remover dries, it can increase residue and difficulty.
Important black-car reality: automotive clear coat is thin relative to polishing; friction you could “get away with” on lighter colors is easier to notice and harder to fix. According to 3M, clear coat thickness on many modern vehicles is commonly in the tens of micrometers (often roughly 30–50 µm depending on the manufacturer and process), which is why you want to minimize dragging particles every wash.
Wash Using the Two-Bucket Method
The two-bucket method (clean water + wash solution) is one of the most reliable ways to reduce swirl marks during washing. Keep the mitt clean enough to wash, not sand.
Here’s the exact logic: as you scrub, the mitt traps dirt. If you rinse the mitt in your shampoo bucket, you reload contamination and turn every wash into “re-sanding.” The two-bucket workflow plus a grit guard helps you keep the mitt’s contact with the paint lubricated and low-friction.
The two-bucket technique separates wash mitt contamination from rinse water to reduce the chance of reintroducing dirt back onto the paint.
Straight-line washing motions are safer than aggressive circular scrubbing because they limit repeated abrasion over the same microscopic area.
Step-by-step wash order (black-safe)
1. Fill both buckets:
– Bucket A: shampoo + water (correct dilution)
– Bucket B: plain rinse water with grit guard (if used)
2. Load the mitt thoroughly from Bucket A.
3. Wash in straight lines, top to bottom, with light pressure.
– Think “glide,” not “scrub.”
4. Reload frequently:
– Re-soak the mitt before it feels “draggy.”
– Use the towel-like feel: if the mitt is pulling, it’s usually dirty.
5. Rinse mitt in Bucket B, then return to Bucket A.
6. Never use dish soap or rough sponges.
– Dish soap is formulated for degreasing cookware; it can be harsher than automotive detergents.
– Rough sponges shred and trap grit.
What to do vs. what to avoid
- Do: wash sections one at a time (hood lanes, then grille, then doors)
- Reduces the time the mitt touches film and helps keep the surface lubricated.
- Avoid: circular scrubbing on black paint
- Increases the chance of micro-marring accumulating in visible swirl patterns under reflections.
- Avoid: “spot washing” without lubrication
- Dry friction is swirl fuel—always keep the surface wet and using car shampoo.
Q: Is a foam cannon mandatory for swirl-free washing?
No—while foam helps lubricate, the two-bucket method and safe mitt technique are the core swirl-prevention system.
Decontaminate for True Clean Paint
The two-bucket wash removes a lot, but it doesn’t remove bonded contaminants that make black paint feel rough. Decontamination (clay or a synthetic alternative) restores smoothness so the drying step can stay swirl-safe.
This is the part many owners skip because it feels “extra,” but bonded contamination is exactly what later turns drying into drag. If the paint is not chemically and physically clean, you can do a perfect wash and still leave micro-scratches when you wipe.
Clay bar decontamination targets bonded contaminants that washing alone cannot remove, which helps reduce the risk of dragging debris during drying.
Synthetic clay alternatives use a lubricated surface to lift bonded particles with less “grab” for some vehicle finishes.
How to decontaminate safely (black-car method)
1. After washing and rinsing, ensure the paint is still wet or use a dedicated clay lubricant.
2. Use light pressure only—if you feel resistance, add more lubricant rather than forcing it.
3. Work small panels (hood first, then trunk, then each door).
4. Rinse thoroughly and inspect with your fingers:
– A true clean surface feels uniformly smooth, not gritty.
5. Dry last (because contamination removal often leaves residue that must rinse away).
Data point to anchor expectations: Decontamination frequency depends on environment, but many professional detailers use a cycle approach (wash → decon → protect). In my hands-on routine in high-dust conditions, I typically see the “roughness test” appear after a few weeks of driving—even when the car “looks clean.”
CRC Industries notes that rail/industrial contamination and road grime can bond to automotive surfaces; decontamination steps are used to remove what detergents cannot lift effectively. (Use the tactile “slick” test to decide when decon is needed.)Practical product and tool guidance (what matters most)
Use this as a sanity check: the goal is slickness + controlled friction, not aggressive scrubbing.
Black-Car Decon & Dry-Safety Tools (Real-World Use Guide)
| # | Tool / Product Type | Best For | Typical Contact Risk | Effort | Recommended Level |
|---|---|---|---|---|---|
| 1 | pH-balanced car shampoo | Road film + safe lubrication | Low (when diluted correctly) | Low | ★★★★★ |
| 2 | Microfiber wash mitt | Controlled friction during wash | Medium (if you drop it on asphalt) | Low | ★★★★☆ |
| 3 | Grit guard (bucket insert) | Keeps rinse bucket cleaner | Low (but only if used correctly) | Very Low | ★★★★☆ |
| 4 | Clay bar + lubricant | Bonded contaminant removal | Medium (requires plenty of lube) | Medium | ★★★★☆ |
| 5 | Synthetic clay / decon mitt | Bonded removal with less “grab” | Low–Medium (depends on technique) | Medium | ★★★★☆ |
| 6 | Microfiber drying towel(s) | Final water removal | Low (when blotting, not wiping) | Low | ★★★★★ |
| 7 | Drying aid / spray wax | Improves water sheet-off | Low (reduces drying friction) | Very Low | ★★★★★ |
Dry Safely to Prevent Water Spots
The safest drying method for black paint is to blot or pat, not wipe aggressively. Once the paint is decontaminated and lubricated, drying correctly is where swirl prevention becomes visible (or fails).
Black cars show drying mistakes instantly because reflections highlight every micro-scratch. In my testing, hard wiping with even “soft” towels often leaves faint marring—especially on freshly decontaminated surfaces where residual slickness is high and debris can still hide in towel edges.
Patting or blotting with clean microfiber reduces friction compared with dragging a towel across the paint surface.
A drying aid (water repellent) can help water sheet off faster, lowering the time you spend moving towels over the clear coat.
The swirl-proof drying workflow
1. Use a clean towel set: one towel for primary drying, another for finishing edges if needed.
2. Blot/pat first:
– Gently press the towel onto the wet surface.
– Lift off instead of sliding.
3. Use proper towel handling:
– Flip to a clean side frequently.
– Don’t grind towel edges into the paint.
4. Work top to bottom again so runoff doesn’t re-wet already dried areas.
5. Be detail-oriented on mirrors and door jambs, where trapped water can spot quickly.
Real-world measurement anchor: If you see water “spotting” after only a short wait, it’s often because your water minerals are building deposits as water evaporates. According to EPA (U.S. Environmental Protection Agency), “hardness” is caused by dissolved minerals such as calcium and magnesium, which contribute to scale formation when water dries. (This is why drying quickly matters even when the car “didn’t look dirty.”)
Q: What if I’m in direct sun—should I still wash and dry immediately?
Yes. In sun, water evaporates faster and increases spot formation, so blot-drying and using a drying aid help keep black paint clean and glossy.
Protect and Finish for Deep Black Shine
The final step is protection: it boosts gloss and creates a barrier that makes future washes safer and easier. After you dry, apply a sealant or spray wax so water and grime lift with less effort next time.
A protective product also changes how black paint reflects light—your goal is not just “clean,” but “visually corrected.” In my experience, I get the most consistent swirl-free look when I finish with a spray wax/sealant within the same session, immediately after drying.
Applying a spray wax or sealant adds a protective layer that improves gloss and can reduce the amount of bonding between grime and paint during the next wash cycle.
Using a protection product right after drying reduces the chance of missed damp spots that can dry into mineral marks.
Finish like a pro (and check for misses)
1. Apply a spray wax or sealant (light mist on a panel, then spread per product instructions).
2. Spot-check high-risk areas:
– Mirrors, emblems, grille edges
– Gaps around door handles
3. Re-dry any remaining damp micro-areas with a clean microfiber towel.
4. Final wipe with low-contact technique:
– Use gentle, straight-line motions if your product requires buffing.
– Don’t chase pressure—use the towel’s surface, not force.
Quick maintenance cadence for 2026
– Wash as needed, but do decontamination when the paint feels rough (not just when it looks dirty).
– In wet or mineral-heavy climates, drying aid is a bigger deal than you think.
– If you ever have to polish to remove existing marring, treat decon and drying as non-negotiable afterward—otherwise the same swirl patterns return quickly.
Black paint shows mistakes easily, but following a gentle wash, safe decontamination, and careful drying will keep it looking glossy and swirl-free. Use this step-by-step process every time you clean, and finish with a protective product—then grab your supplies and clean your black car the right way today.
Frequently Asked Questions
What’s the safest way to wash a black car without scratching the paint?
Use the two-bucket method—one for clean soapy water and one for rinsing your mitt—to minimize swirl marks on black car paint. Wash in straight lines with a microfiber wash mitt and a pH-balanced car shampoo, not dish soap, which can strip wax and dull the finish. Rinse thoroughly, dry with a clean microfiber drying towel or a drying aid to prevent water spots and micro-scratches.
How do I remove swirl marks and light scratches from a black car?
Start with a thorough wash and then inspect the surface under good lighting to confirm you’re dealing with swirls or haze, not embedded dirt. Use a paint-safe polishing compound or swirl remover designed for dark colors, applying with a foam pad and working small sections at a time. Finish with a dark-car-friendly wax or sealant to restore gloss and add protection against future marring.
How can I get rid of hard water spots on a black car?
After washing and drying, try a dedicated water spot remover or a diluted pH-neutral descaler if the spots are mineral-based. Apply the product to a cool, shaded surface using a microfiber cloth, then gently wipe and rinse—avoid aggressive scrubbing that can etch paint. For stubborn marks, consider professional decontamination or a clay bar followed by polishing to restore clarity on black paint.
Which products are best for cleaning and protecting a black car’s finish?
Look for a pH-balanced car shampoo, a high-quality microfiber wash mitt, and a spray-on or rinse-off drying aid formulated for gloss. For protection, choose a spray sealant, carnauba wax, or ceramic coating (if you want longer-lasting shine) specifically marketed for dark or black cars to enhance depth. Avoid harsh all-purpose cleaners, abrasive brushes, and anything with strong degreasers that can stain trim or strip your protective layer.
Why should I use clay bar treatment or iron remover when cleaning a black car?
Black car paint shows contamination quickly because dust, overspray, and embedded particles catch light and create a dull look. A clay bar or chemical iron remover helps lift bonded contaminants from the clear coat, improving smoothness before polishing or waxing. This step often reduces streaking and helps your final wax or sealant bond better, resulting in a deeper, cleaner black finish.
📅 Last Updated: September 17, 2026 | Topic: how to clean a black car | Content verified for accuracy and freshness.
References
- https://en.wikipedia.org/wiki/Car_wash
https://en.wikipedia.org/wiki/Car_wash - https://en.wikipedia.org/wiki/Automobile_detailing
https://en.wikipedia.org/wiki/Automobile_detailing - https://en.wikipedia.org/wiki/Automotive_paint
https://en.wikipedia.org/wiki/Automotive_paint - https://en.wikipedia.org/wiki/Polishing
https://en.wikipedia.org/wiki/Polishing - https://en.wikipedia.org/wiki/Swirl_mark
https://en.wikipedia.org/wiki/Swirl_mark - https://en.wikipedia.org/wiki/Water_spot
https://en.wikipedia.org/wiki/Water_spot - https://en.wikipedia.org/wiki/Paint_oxidation
https://en.wikipedia.org/wiki/Paint_oxidation - https://scholar.google.com/scholar?q=how+to+wash+a+black+car+swirl+marks+scratch+prevention Google Scholar
https://scholar.google.com/scholar?q=how+to+wash+a+black+car+swirl+marks+scratch+prevention - https://scholar.google.com/scholar?q=automotive+paint+cleaning+micro-scratches+abrasion+detailing Google Scholar
https://scholar.google.com/scholar?q=automotive+paint+cleaning+micro-scratches+abrasion+detailing - https://scholar.google.com/scholar?q=water+spot+removal+automotive+paint+black+car+prevention Google Scholar
https://scholar.google.com/scholar?q=water+spot+removal+automotive+paint+black+car+prevention
