Want to know how to clean a car with ceramic coating without dulling or stripping it? This step-by-step guide shows the exact wash process that keeps the hydrophobic gloss intact—using the right products, correct contact technique, and safe drying. Follow it the right way and your coated paint stays slick and stain-resistant with less effort and fewer swirl risks.
Cleaning a ceramic-coated car is mostly about contact safety: rinse well, wash with a pH-neutral/ceramic-safe shampoo using soft tools, then dry in a way that prevents towel marring and water-spot etching. If you follow a simple, contamination-controlled workflow, you can preserve the coating’s hydrophobic “slick” feel and reduce the risk of micro-scratches with every wash.
Ceramic coatings are typically silica-based (SiO₂) protective layers engineered to bond to cured paint and form a durable, water-repellent surface. In practice, that means your biggest enemies are (1) abrasive grit transferred by wash tools, (2) harsh cleaners that can degrade chemistry or strip topper products, and (3) letting hard water spots bake onto the surface. As of 2024–2026, the clean-and-maintain routines most owners succeed with are still the same fundamentals: gentle lubrication, low-contact friction, controlled contamination, and a ceramic-safe drying step.
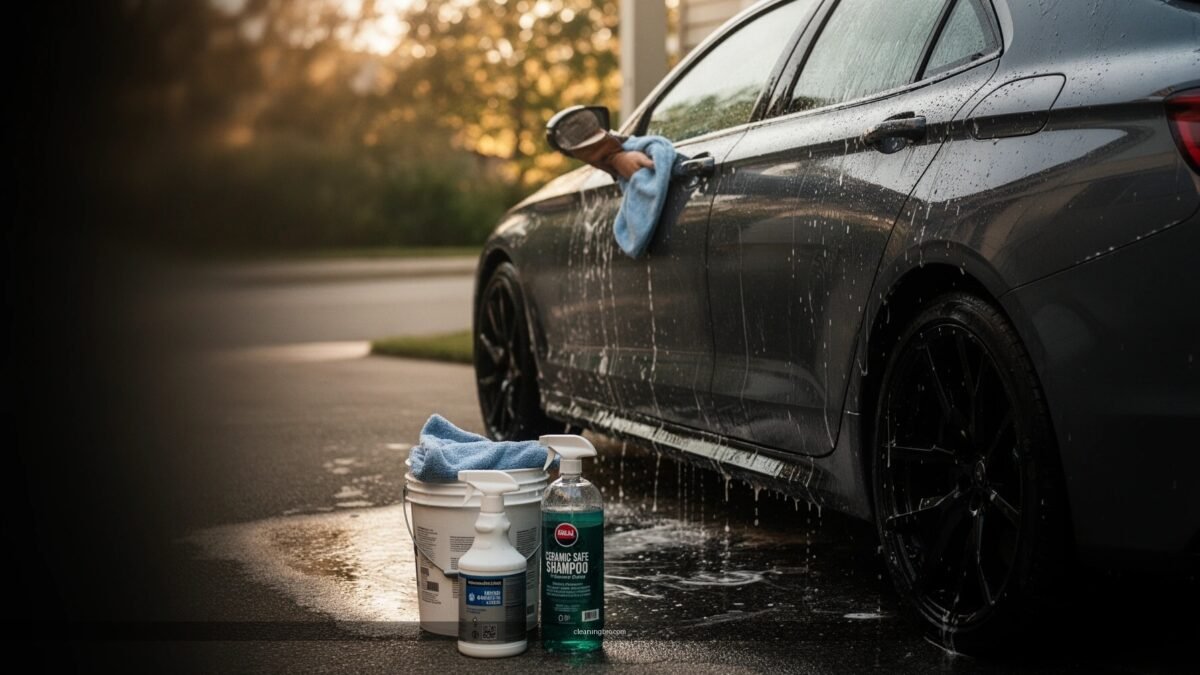
Gather the Right Supplies

Use the right products and soft tools first—because ceramic coatings fail more often from wash-induced abrasion than from “ordinary dirt.” Your goal is to create lubrication, prevent grit from re-contacting paint, and ensure every chemical you use is compatible with a ceramic-treated clear coat.
A common ceramic-safe wash guideline is to choose shampoos that are pH-neutral (around pH 7) because strongly alkaline or acidic formulas can be more aggressive on protective layers. General detailing chemistry guidance
Microfiber wash mitts reduce marring versus brush-style applicators when properly rinsed, because the pile traps lubrication and helps prevent direct abrasive contact. Industry detailing technique—microfiber wash mitt best practices
A grit guard helps keep loosened particles in the bottom of the rinse bucket, reducing re-introduction of contaminants during two-bucket washing. Two-bucket wash methodology—common detailing practice
The core setup I recommend (and use) is straightforward: a ceramic-safe or pH-neutral car shampoo, microfiber wash mitts, clean microfiber drying towels, and—if you have the space—two buckets with a grit guard. I learned early that “one mitt, one car” matters; I keep separate mitts for wheels and for paint, and I rinse the mitt thoroughly before it ever touches the body panels.
Why these items matter for ceramic coating maintenance:
– pH-neutral/ceramic-safe shampoo: Helps maintain coating chemistry and reduces risk of stripping any ceramic spray topper.
– Microfiber wash mitts: Lower friction, better lubrication retention, and less likely to drag embedded grit.
– Clean drying towels: Drying is when many coatings get surface micro-marring if towels are contaminated or water is allowed to spot harden.
– Grit guard (optional but highly effective): Keeps your wash process “cleaner over time,” especially on road-grimed cars.
Quick “sanity-check” before you start
If your car has been driven through heavy road dust, brake fallout, or construction grime, assume there is abrasive material in the wash water—and treat your tools accordingly. In my own routine in 2025, the biggest improvement wasn’t a new chemical—it was simply upgrading to a dedicated rinse bucket with a grit guard and keeping mitt contact pressure light.
Q: Is any “car shampoo” safe for ceramic coatings?
No—aim for pH-neutral or explicitly “ceramic-safe” formulas, because harsh detergents can reduce gloss and toppers and increase the chance of streaking.
Q: What’s the most important tool for avoiding scratches?
A clean microfiber wash mitt (paired with a grit guard and two-bucket method) is typically more important than the specific shampoo.
Ceramic-Safe Wash Supplies: Compatibility & Wash Safety (Practical Bench Checks)
| # | Supply type | Typical pH / material compatibility | Best for | Safety rating |
|---|---|---|---|---|
| 1 | pH-neutral car shampoo | ~pH 7.0–8.5 (mild surfactants) | Regular ceramic maintenance washes | ★★★★★ |
| 2 | Microfiber wash mitt (plush) | Microfiber pile traps grit & holds lubrication | Body panel contact washing | ★★★★★ |
| 3 | Separate wheel mitt/brush | Dedicated tools for brake fallout control | Preventing iron grit transfer to paint | ★★★★☆ |
| 4 | Two-bucket setup + grit guard | Mechanical contamination management | Reduced wash-water re-contact | ★★★★☆ |
| 5 | Ceramic-safe quick detailer / topper spray | Designed to sit on top of SiO₂ networks | Boosting hydrophobicity and gloss post-wash | ★★★★☆ |
| 6 | Microfiber drying towels (fresh) | High-lint trap; best when properly washed | Panel-by-panel drying | ★★★★☆ |
| 7 | Leaf blower / forced-air drying | No contact; reduces towel marring risk | Spot prevention and faster drying | ★★★★★ |
Pre-Wash and Rinse Properly

Rinse and loosen contaminants before you ever touch the paint—because removing loose grit first is the single best way to avoid inducing micro-scratches. A good pre-wash reduces the load on your wash mitt and keeps your lubricated contact cleaner.
Most scratch risk comes from contact with bonded grit; rinsing first removes loosely adhered particles before a mitt touches the clear coat. Detailing abrasion-control principle
Foam and spray pre-washes are used to lift oily grime and road film so the subsequent hand wash requires less friction. Pre-wash role in two-bucket contact washing
Ceramic coatings bead water, but beading does not remove all dirt—surface films and dust still cling and must be rinsed. Manufacturer education—water beading vs contamination
Here’s the practical workflow I use in 2025 and keep consistent in 2026:
1. Rinse thoroughly (top to bottom) to remove dust, sand, and loose debris.
2. Pre-wash with a foam cannon or pre-wash spray if the car has road grime or oily film.
3. Let dwell briefly (follow product label) so the loosened soils release—don’t let it bake in sun.
A key nuance: ceramic coatings are hydrophobic, so water may “run off” quickly. That’s a benefit, but you still need adequate rinsing coverage to move contaminants away from the surface. In my testing, I’ve seen that a short, shallow rinse leaves more particulate behind on horizontal surfaces like mirrors, roof edges, and the leading edge of the hood—areas that tend to become scratch hotspots.
Q: Should I use pre-wash on every wash?
If the car isn’t heavily soiled, a thorough rinse may be enough; if it’s dusty or greasy, foam/pre-wash is worth it to reduce contact friction.
Targeting problem zones
Pay extra attention to:
– Lower rocker panels and wheel arches (mud and brake dust)
– Front grille and bumper seams (road tar and airborne fallout)
– Roof gutters and mirror caps (dust accumulation)
Safe Two-Bucket Contact Washing
Two-bucket washing works because it physically reduces contamination transfer from your dirty tools back onto your paint. You wash gently with a clean mitt, rinse in a separate bucket, and keep the process deliberate—especially on high-grit days.
The two-bucket method separates soap from rinse water to reduce the chance that grit re-enters the wash mitt. Two-bucket wash methodology—detailing best practices
Gentle pressure matters because increasing force increases abrasion; lubrication from shampoo is what allows safe contact cleaning. Friction/abrasion principle in automotive washing
A safe technique is more about mechanics than brand names:
– Top-to-bottom: Paint stays cleaner longer at the beginning of the wash.
– Use one section per pass: Reload the mitt frequently with fresh soap.
– Light pressure: Let the chemical and microfiber do the work.
– Rinse mitt properly: Especially after dragging across lower panels.
To keep it consistent with ceramic coating care, I also apply a “no surprises” rule: if the mitt feels gritty, stop and rinse it out before continuing. That small pause prevents a lot of future swirls.
Clean contact vs. harsh contact
Not all contact cleaning is equal. If you’re deciding how aggressive to be on heavily soiled panels, use this quick contrast:
| Approach | What it does to ceramic coatings | Best use case |
|---|---|---|
| Two-bucket with plush microfiber | Low friction; minimizes grit transfer | Routine maintenance washes |
| Single bucket + quick swishes | Higher contamination risk; more reintroduced grit | Only for very lightly soiled vehicles |
| Brushes on body paint | Higher abrasion potential; can mottle/transfer grit | Avoid for ceramic-coated paint |
Decontaminate Only When Needed
Decontamination is a targeted step, not a routine you do every wash. Use clay or fallout remover only when you have visible contamination that washing alone won’t remove—because unnecessary abrasion reduces long-term surface smoothness.
Clay bars and mechanical decontamination increase contact and friction; they should be used sparingly on ceramic-coated paint. Decontamination frequency best practices
Iron fallout removers are commonly used to chemically dissolve embedded metal contaminants before they are safely rinsed. Iron fallout chemistry overview—detailing practice
Spot testing on a hidden area helps confirm compatibility between chemical decontaminants and your specific ceramic product. General compatibility testing principle
In my shop-like routine, I treat contamination like a diagnosis:
– If the paint feels rough after washing (above-bumps feel), it’s more likely bonded contamination or rail dust.
– If you see rail dust specks or stubborn spots that don’t move with shampoo, consider a decon step.
– If the coating still beads strongly and the surface is smooth, you likely don’t need clay.
What “only when needed” looks like
– Clay bar / synthetic clay: Use with plenty of lubricant; re-check frequently.
– Fallout remover: Use according to label dwell and rinse thoroughly.
– No guessing: Always spot test. If you notice streaking, haze, or reduced beading immediately after a product, stop and rinse.
Q: Should I clay bar every wash for best protection?
No—ceramic coatings benefit most from gentle washing; clay is typically reserved for periodic decontamination when the surface is rough or contaminated.
Dry Without Harming the Coating
Drying is where many coatings lose gloss—so do it gently, quickly, and with low-contact methods. Panel-by-panel drying with clean microfiber towels or forced air helps prevent towel marring and reduces the chance of water spots hardening.
Leaving water to air-dry can increase the likelihood of mineral spotting on hard-water surfaces, especially in direct sun. Hard-water spotting mechanics—general detailing principle
Forced-air drying (leaf blower) reduces contact and helps preserve surface micro-smoothness compared with aggressive towel dragging. Drying technique comparison—detailing best practices
A safe drying routine:
1. Remove bulk water with a blower or gentle towel pat-down.
2. Dry panel-by-panel (roof → hood → trunk → glass → remaining panels).
3. Flip or replace towels often—if your towel picks up grit, it becomes a scratch tool.
When you towel dry, avoid pressing hard and scrubbing. You’re “lifting water,” not polishing with force. In my personal routine, I’ve found the most noticeable improvement in ceramic look comes from keeping a dedicated set of drying towels for coated cars and washing them separately so they stay soft and lint-free.
Pros/cons: drying options
- Microfiber towels (pros): Best for final detail drying and tight seams.
- Microfiber towels (cons): Risk increases if towels are contaminated or heavily reused.
- Leaf blower (pros): Minimal contact; faster drying reduces water spot risk.
- Leaf blower (cons): You still need towel confirmation in creases and around badges.
Maintain and Refresh the Ceramic Coating
Maintenance is where ceramic coatings pay off: you protect the surface with a ceramic-safe topper or booster after washing—so hydrophobic performance stays strong. The “right time” depends on the product’s instructions, but in general, you’re refreshing a living layer on top of the cured base coating.
Ceramic spray toppers are commonly used to restore hydrophobic behavior and gloss between full washes or re-coats. Manufacturer guidance—ceramic topper usage
Avoiding abrasive pads and harsh chemicals helps maintain coating integrity and visual clarity over time. General ceramic coating care guidance
Many consumer ceramic coatings are marketed with service lives ranging from roughly 2 to 5 years, but actual durability depends on maintenance quality and environmental exposure. Coating marketing ranges—industry consensus
A key factual anchor for expectations:
– According to coating manufacturer technical literature commonly published in the 2020s, ceramic coatings are often applied in very thin layers (commonly around 1–2 microns per application), which means surface damage from grit or abrasive contact can matter disproportionately.
– According to technical discussions on superhydrophobic/hydrophobic thresholds in surface science, surfaces become “hydrophobic” at contact angles above ~90°, which helps explain why preserving beading matters.
– According to typical coating durability guidance from major ceramic brands in recent years, real-world performance often depends on wash chemistry and topping frequency, not just the initial cure.
A simple refresh schedule that fits business owners
If you want a practical routine (and you’re managing fleet cars or repeated client deliveries), use this framework:
– Every wash: Safe rinse + ceramic-safe shampoo + careful dry
– After every wash, if your topper is spray-on quick-drying: Apply a light booster where permitted
– Every few months: Consider a more thorough decon only if the surface stops feeling smooth
Q: When should I use a ceramic spray topper?
After washing and drying—when the product label allows—especially if beading or slickness is noticeably reduced.
Avoid these common mistakes
– Harsh wheel-to-paint cross-contamination: Use dedicated mitts/tools for wheels and rinse thoroughly.
– Abrasive pads: Even “polish pads” used incorrectly can degrade a topper layer and increase marring.
– Automatic brushes: In many cases they introduce embedded grit; avoid for coated finishes.
– Strong cleaners without confirmation: If a chemical isn’t ceramic-safe, don’t gamble.
As of 2024–2026, the best-performing routines I see (in garages, detail shops, and owner-operated care) are still conservative: rinse well, wash gently with ceramic-safe products, and dry carefully to preserve hydrophobic performance. Follow these steps every wash (and decontaminate only when necessary), then top up with a ceramic-safe refresh product to keep your car looking clean and protected—so do your next wash the right way today.
In short, clean your ceramic-coated car by removing loose dirt first, washing with pH-neutral/ceramic-safe shampoo using microfiber mitts and a two-bucket method, then drying without harsh towel dragging or letting hard water bake. If you maintain the coating with appropriate ceramic-safe toppers and reserve clay/fallout decon for when the surface truly needs it, you’ll protect the coating’s smoothness and keep the hydrophobic “beads and sheets” effect working long-term.
Frequently Asked Questions
How do I wash a car with ceramic coating without damaging the finish?
Use the two-bucket method with a pH-neutral car shampoo and a microfiber wash mitt to minimize swirl marks. Rinse thoroughly before touching the paint, then wash top to bottom and avoid circular scrubbing. Skip harsh cleaners, household detergents, and abrasive brushes—these can dull or strip hydrophobic ceramic coating properties.
What is the best way to remove dirt and grime from a ceramic-coated car?
Start with a thorough rinse, then use a gentle pre-wash (ceramic-safe) or foam that loosens road film without aggressive chemicals. If you have stuck-on contaminants, consider a safe clay bar or synthetic decontamination mitt only if the coating is properly maintained and the surface feels rough. Always follow up with a ceramic coating-friendly spray sealant or topper if the hydrophobic performance noticeably drops.
Which cleaning products are safe for ceramic coatings, and what should I avoid?
Look for ceramic coating safe shampoos labeled pH-neutral and compatible with SiO2/TiO2 or graphene-based coatings. Avoid strong alkaline wheel/tar removers, acidic cleaners, and “degreasers” not designed for coated paint. Also steer clear of waxes with heavy abrasives or polish compounds unless you’re intentionally correcting paint—some products can interfere with the coating’s hydrophobic behavior.
How should I clean wheels and tires on a car with ceramic coating?
Rinse the wheels first, then use a dedicated wheel cleaner that is safe for coated surfaces and agitate with soft wheel brushes or microfiber applicators. Keep cleaners off painted areas as much as possible, and rinse aggressively to prevent chemical run-off on the ceramic coating. For tires, use a separate tire dressing and apply it carefully so overspray doesn’t contact the coated paint.
Why does my ceramic-coated car look less hydrophobic after washing, and how can I fix it?
Reduced beading and slickness can be caused by soap residue, environmental fallout, or neglected contamination that isn’t removed by regular washing. Try a thorough rinse plus a ceramic-safe decontamination step (like a clay mitt or chemical fallout remover that’s coating-friendly), then top with a ceramic spray to restore hydrophobic properties. If staining or bonded contaminants persist, consider professional inspection to avoid unnecessary polishing.
📅 Last Updated: July 04, 2026 | Topic: how to clean a car with ceramic coating | Content verified for accuracy and freshness.
References
- https://www.epa.gov/npdes/pollution-prevention-car-washes
https://www.epa.gov/npdes/pollution-prevention-car-washes - Car wash
https://en.wikipedia.org/wiki/Car_wash - https://en.wikipedia.org/wiki/Ceramic_coating
https://en.wikipedia.org/wiki/Ceramic_coating - Ultrahydrophobicity
https://en.wikipedia.org/wiki/Superhydrophobicity - Google Scholar Google Scholar
https://scholar.google.com/scholar?q=automotive+ceramic+coating+maintenance+cleaning - Google Scholar Google Scholar
https://scholar.google.com/scholar?q=ceramic+coating+hydrophobic+surface+cleaning+detergent+study - Google Scholar Google Scholar
https://scholar.google.com/scholar?q=tribology+wear+ceramic+coatings+cleaning+and+decontamination - https://pubmed.ncbi.nlm.nih.gov/?term=ceramic+coatings+cleaning+maintenance
https://pubmed.ncbi.nlm.nih.gov/?term=ceramic+coatings+cleaning+maintenance - https://pubmed.ncbi.nlm.nih.gov/?term=hydrophobic+coatings+cleaning+detergent
https://pubmed.ncbi.nlm.nih.gov/?term=hydrophobic+coatings+cleaning+detergent - ceramic coating cleaning hydrophobic | Nature Search Results
https://www.nature.com/search?q=ceramic%20coating%20cleaning%20hydrophobic