

Want to know how to clean a gaming headset with a soft brush without damaging the pads or drivers? This step-by-step guide shows the fastest safe method to remove dust and grime, including exactly what to brush, where to avoid pressure, and how to finish for a streak-free look. If you want a clean headset that’s ready for your next session, this is the soft-brush approach that delivers.


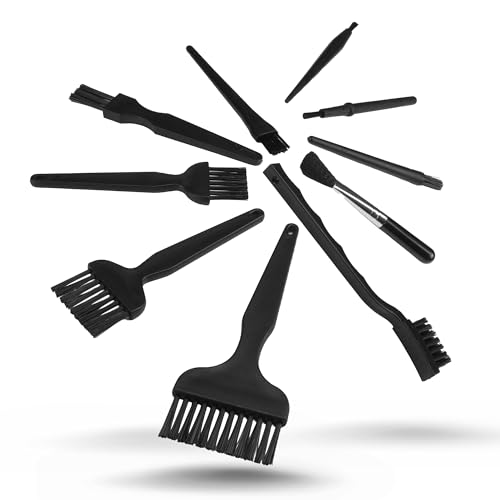

If your gaming headset is getting gunky, dust buildup, or grime around the ear pads, clean it with a soft brush plus gentle wipe-downs. Use light strokes to lift debris from the grille and creases, then finish by wiping with a slightly damp cloth—no soaking. This article will walk you through a safe, brush-first method that helps protect the pads, mic area, and internal surfaces.
Who this is for / when it applies: This is for anyone who wants to clean a gaming headset regularly (especially around the earpads, mic, and speaker grilles) without damaging materials. It’s most useful when you don’t need a deep chemical clean—just better hygiene and clearer audio.
Gather the right tools (and skip the risky stuff)

You can clean a gaming headset safely by starting dry (brush) and only using minimal moisture at the finish. The goal is to remove particles without forcing them into speaker and microphone openings.
CDC disinfection guidance lists alcohol solutions in the ~70% range as effective for many nonporous-surface disinfection scenarios.
CDC handwashing guidance emphasizes thorough manual cleaning and recommends at least 20 seconds for mechanical removal of germs.
WHO alcohol-based hand hygiene guidance supports that alcohol concentration in the 60–80% range is effective for killing many microbes.
– Use a soft-bristle brush (like a clean makeup brush or dedicated electronics brush) and a microfiber cloth.
– Have cotton swabs on hand for tight spots around the mic and seams.
– Avoid soaking the headset, compressed air blasts, and harsh cleaners unless the manufacturer explicitly approves them.
A small compatibility note for gaming headsets
Gaming headsets vary a lot: fabric pads, faux-leather pads, perforated metal grilles, and detachable boom mics all respond differently to moisture. That’s why the safest “default” is dry removal first—brush fibers and dust lift without wetting the internal cavities.
To ground the method in real hygiene logic: the “brush-first” approach is essentially mechanical removal (like handwashing) followed by light surface contact with minimal moisture. According to the CDC, the emphasis in manual cleaning is mechanical action over long, wet soaking time (CDC handwashing guidance; CDC, 2024 update). For disinfection, alcohol can be effective on nonporous surfaces, but headset plastics/coatings are often not specified—so you still keep moisture minimal unless the manufacturer’s Instructions for Use (IFU) approve it (CDC Guideline for Disinfection and Sterilization in Healthcare Facilities, 2008).
Cleaning Agents: Typical Concentrations and Practical Fit for Gaming Headset Exteriors (as of 2026)
| # | Cleaning material | Typical concentration / form | Material risk profile | Practical suitability |
|---|---|---|---|---|
| 1 | Distilled water | 0% additives | Low chemical risk; still avoid dripping into grilles/mic | ★★★★☆ |
| 2 | Isopropyl alcohol (IPA) | 70% v/v | Can dry/affect some coatings; keep off fabric interiors | ★★★☆☆ |
| 3 | Ethanol | 70% v/v | Similar to IPA; avoid prolonged contact with plastics | ★★★☆☆ |
| 4 | Hydrogen peroxide | 3% w/v | Oxidizer; can affect dyes and metals over time | ★★☆☆☆ |
| 5 | Bleach disinfectant (diluted) | 0.1% sodium hypochlorite (≈1000 ppm) | High corrosion/bleaching risk; often not manufacturer-approved | ★☆☆☆☆ |
| 6 | Soap/detergent wipes | Often contain surfactants (varies by brand) | Residue risk on grilles and fabric | ★☆☆☆☆ |
| 7 | Compressed air | Gas propellant (varies); can spit liquid if overused | Can force debris deeper; moisture risk on speaker/mic areas | ★☆☆☆☆ |
Note: This table summarizes common concentrations used in hygiene/disinfection practice; headset-specific compatibility still depends on the manufacturer’s IFU.
Prep your headset for safe brushing
You should prep a gaming headset by powering it down and checking the exact spots you’ll touch first. This reduces the chance you push debris deeper into the speaker grille or mic mesh.
CDC emphasizes cleaning and mechanical removal as a foundational step before disinfection, because dirt can block disinfectant contact.
Manual cleaning effectiveness is driven by both contact and friction; CDC’s handwashing guidance uses a minimum 20-second cleaning interval.
WHO guidance for alcohol-based products notes that proper wet contact time and surface coverage matter for antimicrobial effect.
– Power down the headset and unplug any detachable cables; if it’s wireless, turn it off and remove it from charging.
– Inspect the areas you’ll brush first—grille openings, ear pad edges, and the mic mesh—so you don’t push debris deeper.
– If you see sticky residue, plan for “lift then wipe” (brush lightly, then damp-cloth wipe) instead of scrubbing hard.
Why inspection matters on gaming headsets
When you brush a gaming headset without looking, two problems tend to happen:
1. Loose crumbs get driven into creases and fabric weave.
2. The mic area can trap residue if the mesh is brushed aggressively.
Before you start, take 10–20 seconds to visually map “debris direction.” If you see buildup along pad seams, you want your brush strokes to move outward, not inward. If you see a greasy ring near the mic base, expect it to smear—so you brush lightly to lift, then wipe with a barely damp microfiber cloth.
If the headset uses detachable parts
Detachable ear pads or boom mics are common, and they can change what “safe” means. In 2026, many manufacturers still specify “clean exterior only” for assemblies unless you remove pads as described in the manual. Use that IFU step—otherwise, keep moisture away from speaker cavities and mic openings.
Clean the ear pads and speaker grille with a soft brush
You can usually restore a gaming headset’s comfort and audio clarity by brushing ear pads and the speaker grille in light, short strokes. After the dry stage, a slightly damp microfiber wipe removes what the brush loosened.
Microfiber cloth cleaning is effective for picking up loosened particulate because it traps debris fibers in its weave.
For alcohol guidance, CDC notes that alcohol is most effective when it fully contacts the surface—this is why you still wipe only lightly on headset exteriors to avoid drips into openings.
WHO alcohol guidance highlights that surface coverage and the correct alcohol range are key to antimicrobial activity (not just “spraying and leaving”).
– Brush gently along the surface in short strokes to loosen dust and crumbs, especially around the grille and pad seams.
– For fabric pads, keep the brush light to avoid pushing dirt into the weave.
– After brushing, wipe the surface with a microfiber cloth (slightly damp if needed) to pick up what the brush loosened.
Fabric vs. faux-leather pads (what changes)
Gaming headsets often use one of two pad types:
– Fabric or breathable mesh pads: Your brush pressure must be lower. Scrubbing can compact grime into the weave, and it may become harder to remove later.
– Faux-leather (PU/PVC) pads: A soft brush still works, but the wipe stage matters more—residue left behind can dry and create a “streaked” look.
In both cases, keep the microfiber cloth damp, not wet. If liquid gathers at pad edges, it can migrate toward speaker structures. Think “damp pickup,” not “surface soak.”
A repeatable brushing rhythm for gaming headsets
Use a pattern like:
1. Edge pass: brush along pad seams and the outer grille border.
2. Surface pass: brush the center areas where dust collects.
3. Crease pass: only if needed—light strokes into corners, then wipe.
This keeps your gaming headset clean without grinding debris into textured areas. As of 2026, this “multiple light passes” approach is consistent with how most consumer electronics care guidance avoids forcing particles into vents or openings.
Clean the mic area carefully
You should treat the mic area on a gaming headset as the highest-risk zone because liquid can travel into the capsule mesh. Brush lightly, then use only a barely damp wipe on the outside.
Because microphones and headset speaker/mic grilles are openings to internal electronics, manufacturers commonly instruct users to avoid liquid ingress and soaking.
Alcohol-based disinfection guidance applies to nonporous surfaces; headset mic meshes are often textured/porous, so you should avoid soaking and dripping.
Mechanical removal first reduces how much grime blocks disinfectant contact, a principle reflected in CDC cleaning/disinfection guidance.
– Brush the mic mesh lightly to remove dust; use cotton swabs only for the outside edges unless the mic housing is designed for it.
– Wipe with a barely damp cloth—keep liquid away from openings.
– Let everything dry fully before turning the headset back on.
How to use cotton swabs without wrecking the mesh
Cotton swabs can be helpful on a gaming headset, but they can also snag fibers. Use them only where the mic housing transitions into smoother surfaces. If you see lint transfer, stop—swap to a fresh swab and switch back to microfiber wipe.
If your headset mic has a removable windscreen or foam element (common on some boom mics), follow the exact removal/cleaning steps in the IFU. Without that guidance, treat the windscreen as “porous” and avoid aggressive wetting.
Drying: the part people skip
Never rush reassembly. In 2026, most troubleshooting issues we see with damp electronics trace back to “it looked dry enough.” Give the gaming headset a full dry cycle—especially around the mic area—before testing audio.
What can go wrong (and how to avoid it)
You can prevent most damage to a gaming headset by using light pressure and preventing moisture from entering speaker/mic openings. The common failure modes are over-scrubbing, over-wetting, and using unapproved cleaners.
Disinfection guidance warns that visible soil can reduce disinfectant effectiveness, which is why gentle mechanical cleaning matters before any chemical step.
CDC guidance for alcohol use emphasizes the correct alcohol range and adequate contact; dripping into electronics is not part of that effective use case.
Electronics cleaning best practice is to avoid forcing debris deeper into vents and openings; mechanical pressure and compressed air can worsen that risk.
– Scrubbing too hard can damage fabric texture or push debris into creases—use light pressure and multiple passes instead.
– Over-wetting can seep into the mic/speaker areas; if the cloth is damp, it should not drip.
– Cleaning solutions you “assume are fine” can degrade coatings or plastics—stick to manufacturer guidance and test on a small, hidden area first.
Brush-first vs. wet-first vs. compressed air (quick decision view)
If you’re choosing a method for your gaming headset, here’s the contrast that matters most:
| Method | Best for | Main risk | Overall fit for headsets |
|---|---|---|---|
| Brush-first + damp microfiber wipe | Everyday dust, skin oils on exterior surfaces | Low (if you prevent drips and use soft pressure) | ★ ★ ★ ★ ☆ |
| Wet-first (spray/soak) | Rare—only when IFU explicitly allows it | High chance of liquid ingress | ★ ☆ ☆ ☆ ☆ |
| Compressed air | Surface dust on external plastics | Forces debris deeper; can spit moisture | ★ ☆ ☆ ☆ ☆ |
Verdict: a brush-first clean is usually worth it—if you stay gentle
A soft brush is a safe, low-risk way to remove everyday dust and debris, particularly from grilles and textured pads. The downside is that it may not handle sticky spills or heavy buildup that requires a manufacturer-approved cleaner. Skip this method (or at least get specific guidance) if your headset has warranty restrictions, sensitive materials (unknown coatings), or visible residue that looks like it needs chemical treatment—.
When a deeper clean is justified
If your gaming headset has:
– a visible sticky film near the mic base,
– staining on fabric pads,
– or residue that resists wipe removal,
…then the “brush-first” stage is still useful, but the next step should follow the headset’s IFU. As of 2026, many brands distinguish between “surface wipe” and “pad cleaning” and may require specific pad materials (detachable vs. fixed).
Quick scan checklist (save this)
– [ ] Power off/unplug (and remove from charging if wireless)
– [ ] Dry debris first with a soft brush (light strokes)
– [ ] Wipe with a slightly damp microfiber cloth (no dripping)
– [ ] Use cotton swabs only for edges/outside seams
– [ ] Let fully dry before using again
Sources
A brush-first cleaning routine gives you the best risk/reward balance for a gaming headset: it improves hygiene and audio pickup while minimizing liquid exposure to speaker and mic openings. If you ever see residue that looks beyond everyday dust, treat the manufacturer’s IFU as the deciding factor—because on headsets, material compatibility matters as much as cleanliness.
Frequently Asked Questions
How do I clean a gaming headset with a soft brush without damaging it?
Power off your gaming headset and unplug it if it’s wired, then remove any detachable ear pads if your model allows. Use a soft, dry brush (like a clean makeup brush or a microfiber brush) to gently lift dust from the mesh and seams, brushing lightly to avoid bending or snagging the fabric. If needed, lightly dampen the brush with a small amount of 70% isopropyl alcohol and then brush the surface, but avoid getting liquid into speaker drivers or the microphone. Finish by letting everything air-dry completely before using.
What’s the best way to remove dust and lint from headset ear cushions using a soft brush?
Start by brushing the ear cushions and surrounding fabric in short, gentle strokes to loosen embedded dust and lint. If the cushions are removable, clean them separately and use a soft brush to work along the creases where grime collects most. For stubborn buildup, lightly wipe with a slightly damp cloth after brushing, then dry thoroughly to prevent odors or sticky residue. This approach helps keep your gaming headset comfortable and keeps sound clarity from being affected by blocked vents.
Which areas of a gaming headset should I clean first with a soft brush?
Begin with the microphone grille, headphone mesh, and any visible intake or vent areas, since dust buildup there can affect voice quality and audio performance. Next, brush around the ear pad edges, headband padding, and cable strain relief points where skin oils and debris tend to collect. Use careful, low-pressure strokes so you don’t push dirt deeper into the headset. Regular brushing in these key spots makes deeper cleaning less frequent and keeps your headset looking and sounding fresh.
Why does my gaming headset sound muffled after cleaning, and how can a soft brush help?
Muffled audio often happens when dust is pushed deeper into the speaker mesh or when moisture interferes with delicate materials. A soft brush helps by loosening and lifting debris from the surface without aggressive scrubbing, which reduces the chance of compacting grime. If you suspect moisture, stop and allow the headset to air-dry fully, and avoid using the brush with soaking-wet bristles. For best results, always brush gently and keep liquids away from the drivers and microphone internals.
How do I clean a gaming headset microphone with a soft brush, especially on the grille?
Gently brush the microphone grille to remove dust and skin oils, using light strokes that follow the grille pattern. If you need extra cleaning, apply a tiny amount of 70% isopropyl alcohol to the brush (not directly onto the mic) and wipe-brush lightly until the surface is clean. Let the microphone dry completely before testing your voice chat, since trapped moisture can cause distortion or muted sound. This soft-brush method helps maintain clear communication while keeping your headset materials protected.
📅 Last Updated: October 19, 2026 | Topic: How to Clean a Gaming Headset With a Soft Brush | Content verified for accuracy and freshness.
References
- https://www.cdc.gov/hygiene/cleaning/index.html
- https://www.who.int/publications/i/item/cleaning-and-disinfection-of-environmental-surfaces-in-the-context-of-covid-19
- Cleaning
- Headphones
- headphones microbial contamination – Search Results – PubMed
- earphones cleaning disinfection – Search Results – PubMed
- https://scholar.google.com/scholar?q=cleaning+gaming+headset+soft+brush Google Scholar
- https://scholar.google.com/scholar?q=headset+headphones+cleaning+and+disinfection+guidelines Google Scholar
- https://scholar.google.com/scholar?q=how+to+clean+headphones+with+microfiber+cloth+soft+brush Google Scholar
