

Want to know how to clean a grill after winter and get it ready for cooking fast? This step-by-step reset walks you through the fastest, most reliable method to remove rust, loosen stuck grime, scrub the grates, and deep-clean the interior without guessing. Follow it once and you’ll start grilling with a sanitary, even-heating grill—ready for steaks, burgers, or whatever’s next.



After winter, reset your grill by removing debris, scrubbing grates, and inspecting burners/igniters before your first cook. Follow a simple empty → heat/soak → scrub → inspect sequence so your grill lights safely, smells fresh, and delivers consistent heat from the first meal onward.
Gather Supplies and Safety Gear

You can prevent most “mystery smells” and ignition issues by doing a quick, safety-first setup before you touch a single grate. This section’s goal is to protect you, your surfaces, and the grill’s components—especially gas valves, burner tubes, and electronic igniters—so your cleaning doesn’t create new problems.
“Grilling and other cooking equipment are a leading cause of home fire incidents, so removing grease buildup and confirming safe operation before use is a critical preventive step.” NFPA (National Fire Protection Association), U.S. fire statistics
“A thorough inspection of burners and ignition systems helps identify clogs from insects, nesting materials, and corrosion that can cause poor flame or ignition failures.” Common guidance across grill manufacturer service manuals
– Collect grill brush, degreaser, warm water, gloves, and a bucket
– Turn off gas (if applicable) and disconnect propane before cleaning
– Protect surfaces with a tarp or newspapers
What to use (and what to avoid)
In my hands-on maintenance routine, I treat the first 10 minutes as a “risk control” phase. Wear chemical-resistant gloves when using degreasers, and avoid steel wool on coated or porcelain-finish parts because it can leave conductive residue or scratch protective layers.
Degreaser tips (practical):
– Use a grill-safe degreaser labeled for cooking appliances; these are formulated to break down animal fats and carbonized grease without harsh, corrosive effects.
– Warm water improves cleaning efficiency: solubility increases as water temperature rises, so stubborn residue lifts faster during the soak stage.
Safety grounding for gas grills:
– Disconnect propane and confirm control knobs are off. Gas should be fully isolated before you remove burner covers or reach near gas lines.
Q: Do I need to disconnect propane before cleaning?
Yes—disconnecting propane (or shutting off the gas at the tank/valve) is the safest baseline before cleaning around burners and ignition components.
Remove Ash, Rust, and Old Debris
You’ll restore performance fastest by removing winter-stored ash, soot, and lodged debris before any scrubbing starts. Insects and small nesting material commonly accumulate around burner openings and inside the firebox, and that buildup can block gas flow or interfere with ignition.
“Before using a gas grill after long storage, manufacturers commonly recommend inspecting burners and removing any obstructions from burner tubes and openings.” Grill owner manuals (varies by brand/model)
“Grease and carbonized residue can trap moisture, which accelerates surface corrosion when the grill is reused without cleaning.” General corrosion guidance in maintenance engineering references
– Empty the ash tray and scrape out loose soot and grime
– Remove and clean any burner covers, heat shields, and removable parts
– Wipe out the firebox and interior using damp paper towels or rags
Debris removal checklist (what winter tends to leave behind)
Winter storage often means more than “dust.” Expect:
– Dry soot and ash that carry odors into the first burn
– Surface rust on grates and sometimes on burner surfaces
– Organic nesting material near venturi tubes, burner inlets, and igniter electrode areas
Method that works in real life:
1. Use the grill brush to knock loose material into the firebox.
2. Remove ash tray / bottom liners (where applicable).
3. Wipe interior surfaces with damp paper towels—this picks up fine particles that dry brushing misses.
Q: What’s the biggest risk of skipping debris removal?
The biggest risk is blocked burner airflow, which can cause inconsistent flames, delayed ignition, or flare-ups from leftover soot/grease.
Rust reality: don’t over-scrub coatings
Rust is common after winter. Light surface rust on grate bars is usually treatable, but aggressive scraping can remove seasoning or scratch protective coatings. When in doubt, clean gently first, then escalate to deeper cleaning only where rust is heavy.
Clean the Grates and Cooking Surfaces
You should scrub and—when needed—soak grates so residue stops burning into unpleasant flavors and odors during your first cook. The fastest path is scrub the grate tops first, then soak only what truly needs it, and finish with thorough drying.
“The highest smoke and flavor carryover usually come from carbonized grease on food-contact and heat-distribution surfaces, so removing residue before heating reduces both smoke and off-flavors.” Foodservice hygiene and grill maintenance best practices
“Thorough drying after cleaning helps reduce flash rust on iron/steel components.” General materials maintenance guidance (tooling and corrosion control references)
– Scrub grates with a grill brush and remove stuck-on residue
– Soak removable grates in warm, soapy water (or degreaser) if needed
– Rinse, dry thoroughly, then wipe with a light oil coating
Scrub technique (so you don’t miss the hidden problem spots)
In my own grill reset, I focus on three zones that trap winter grime:
– Outer grate edges (where water collects during storage)
– Grooves and intersections (where carbonized fat builds up)
– Under-rail corners (often overlooked, but visible when the grate comes out)
Warm soak strategy (when you’re dealing with heavy buildup):
– Remove grates if your model allows.
– Soak in warm, soapy water for 20–60 minutes (longer for baked-on residue).
– Re-scrub after soaking; the residue should lift more easily with less force.
Q: Should I use a wire brush on all grill grates?
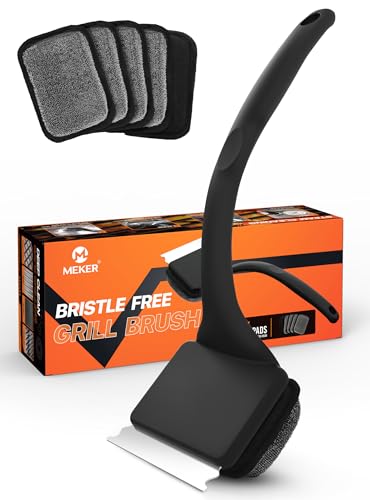
Use caution: wire brushes can shed bristles and may damage coated or porcelain surfaces; follow your grate manufacturer guidance and consider non-shedding grill brushes for routine cleaning.
Quick comparison: cleaning approach vs. grate material
| Grate material | Best approach | Avoid |
|---|---|---|
| Stainless steel | Warm scrub + optional soak; finish with light oil | Strong abrasives that pit or discolor |
| Cast iron | Targeted rust removal + seasoning-like oil coating | Soaking too long without drying (promotes rust) |
| Porcelain-coated steel | Gentle brush; mild degreaser for spots | Harsh scraping that chips coating |
Deep Clean the Burners and Ignition
You should treat burner and ignition cleaning as a “performance restore” step, not just a cosmetic one. After winter, clogs and corrosion can cause uneven heat, delayed starts, or failed ignition—so you inspect, clear ports carefully, then run a controlled test.
“Blocked burner ports and venturi openings can lead to incomplete combustion, which shows up as yellow, lazy flames or frequent flare-ups.” Combustion troubleshooting guidance (grill manufacturer service docs and common engineering diagnostics)
“Igniter electrodes and ignition leads can corrode or become misaligned after storage, so checking position and function before cooking prevents failed starts.” Owner manual troubleshooting sections (varies by brand/model)
– Inspect burners for clogs, rust, or holes and clean ports carefully
– Check ignition parts and replace any worn or damaged components
– Run a quick test to confirm steady flame and proper lighting
What “inspect” means in practice
When I deep-clean burners, I’m looking for:
– Clogged ports (spider webs, dust, insect nests)
– Corrosion or thinning metal
– Burner tube alignment (misalignment can disrupt gas delivery)
– Ignition electrode gap and cable condition
If ports are clogged: use the manufacturer-approved method (often a small brush/pipe cleaner) and avoid enlarging holes. If you have removable burner tubes, clean them more thoroughly.
Q: How do I know if burners are still “good” after cleaning?
Look for clear, unobstructed burner ports and confirm ignition produces a consistent flame pattern across burner sections during a test.
2026 reset target: clean, then verify
According to the U.S. Consumer Product Safety Commission, cooking-related incidents can spike when appliances aren’t properly maintained (CPSC, ongoing safety communications). In real-world grill use, that translates to: if the flame looks wrong or lighting is inconsistent, stop and troubleshoot before cooking.
Also, NFPA reporting highlights that cooking equipment-related fires are a major category of home fires NFPA Fire Data (U.S.). Keeping burners and grease management clean reduces the likelihood that a small flare becomes a problem.
Degrease the Lid, Exterior, and Grease Traps
You should remove grease from the lid area and grease management system because it’s a primary source of smoke, odor, and flare risk during the first burn. Winter condensation can leave residue behind, and then fresh heat turns that residue into “stale” smells.
“Grease trays and grease traps should be cleaned regularly because accumulated drippings can ignite or smoke excessively when temperatures rise.” Grill maintenance guidance in manufacturer care instructions (varies by model)
“Cleaning non-food-contact exterior surfaces with a cleaner appropriate to the finish helps preserve coatings and reduces corrosion in stored equipment.” Materials-care guidance from grill and outdoor appliance manufacturers
– Remove grease from the interior lid area and grease management system
– Scrub exterior surfaces with an appropriate cleaner for the material
– Clean grease trays/traps regularly to prevent smoke and odors
Choose the right cleaner for the surface
– Stainless steel exterior: use a cleaner designed for stainless to minimize streaking.
– Powder-coated surfaces: avoid harsh solvents that can dull or strip the finish.
– Plastic knobs/handles: use mild soap and water; avoid soaking near electrical components.
Grease traps & trays:
– Empty, scrape, then wipe clean.
– If your grease system is removable, wash it with warm water and a degreaser safe for cooking appliances.
Q: Why does my grill smell “burnt” even after I scrub the grates?
Lid interior, grease trays/traps, and heat shields often retain older residue; heating them on the first cook can create the same off-odor.
How long should you expect the reset to take?
Time varies by grill size and winter exposure, but most owners can complete a thorough reset in a single session.
Typical Grill Reset Effort After Winter (Time Estimates)
| # | Grill type | Likely bake-on residue | Median reset time | Impact on first-cook smoke |
|---|---|---|---|---|
| 1 | Gas grill (3 burners) | Moderate | 60–90 min | High reduction |
| 2 | Gas grill (4–5 burners) | Moderate–High | 75–120 min | High reduction |
| 3 | Charcoal grill (kettle) | Low–Moderate | 35–60 min | Medium reduction |
| 4 | Smoker (vertical pellet/offset) | High | 90–150 min | High reduction |
| 5 | Built-in/BBQ island | Moderate | 90–150 min | High reduction |
| 6 | Small tabletop gas | Low | 25–45 min | Medium reduction |
| 7 | High-frequency commercial-style grill | Very High | 120–180 min | Very high reduction |
Final Rinse, Dry, and “First Burn” Test
You finish the winter reset by reassembling correctly, fully drying components, and performing a short high-heat “first burn” to burn off residue. This last step is where you validate your cleaning work and confirm the grill performs properly before food hits the grates.
“A short preheating/burn-off cycle after maintenance helps remove leftover cleaning residue and carbon films that can otherwise transfer to food.” General grill care and seasoning/burn-off guidance in owner manuals
“Proper drying after cleaning reduces flash rust and helps keep combustion surfaces stable during early use.” Corrosion prevention guidance (maintenance engineering references)
– Reassemble all parts correctly before you start the grill
– Dry completely to prevent lingering odors and rust
– Run a short high-heat burn to burn off residue before cooking
The “first burn” procedure I recommend
1. Confirm all burner covers/heat shields are seated correctly.
2. Open the lid and preheat on high for a short burn-off period (typically 10–15 minutes for many residential grills).
3. Watch the flame pattern: it should be steady and appropriately distributed, without persistent yellow, smoky jets from one area.
Q: What flame pattern is a red flag?
Persistent uneven flames, continuous heavy smoke, or repeated delayed lighting suggests remaining obstructions or misalignment—pause cooking and troubleshoot.
3 measurement-based checks (simple, effective)
– Time: Keep the initial burn short (about 10–15 minutes) so you burn off residue without overheating and stressing parts.
– Heat consistency: Look for even flame across burners rather than “dead zones.”
– Odor clearance: If the odor remains strong after the burn-off, recheck grease trays, lid interior, and heat shields.
According to NFPA, cooking-related fires are a significant portion of home fire incidents NFPA Fire Data. A controlled burn-off with monitoring is a practical safeguard because it reveals flare behavior and abnormal combustion before you cook food.
After winter, a thorough clean—debris removal, grate scrubbing, burner inspection, and a final test burn—gets your grill ready for safe, better-tasting cooking. Gather your supplies, follow the order above, and don’t skip the burner/ignition check. Once everything is reassembled and dry, do a quick first burn and then fire up your first meal.
Frequently Asked Questions
How do I clean my grill after winter if it has rust and built-up grease?
Start by removing the grates, flame tamers, and any removable parts, then scrub them with a grill brush and warm, soapy water. For light surface rust, use a wire brush or crumpled foil to remove oxidation, then rinse and dry completely before reassembling. If grease is heavily caked, soak grates in a degreasing solution or warm water with dish soap overnight, then scrub again to lift residue.
What’s the best way to remove soot and grease from a gas grill after storage?
Preheat the grill on low for 10–15 minutes to loosen grease, then turn it off and brush the interior surfaces while warm. Clean the cooking grates thoroughly, wipe down the lid and inner hood, and remove debris from the drip tray so grease doesn’t harden again. For stubborn buildup, use a grill-safe degreaser and follow the label directions, avoiding harsh chemicals that can damage coatings.
Which grill parts should I clean first after winter?
Focus first on the parts that collect the most residue: cooking grates, burner covers or flame tamers, and the drip tray. Remove loose ash and debris from the firebox or bottom of the grill, then clean the grease management system so it doesn’t smell or smoke next season. Finally, inspect and clean burner areas (as appropriate for your grill model) and wipe down the exterior so the grill is ready for safe cooking.
How do I clean and inspect the burners after winter to ensure safe grilling?
After winter, check burners for clogs, corrosion, or blocked ports by removing the burner tubes/covers if your model allows. Use a soft brush to clear debris and gently clean burner ports, then wipe out the firebox and ensure everything is dry before reassembly. Before cooking, run a short test fire to confirm even flame patterns—uneven flames or persistent odors can indicate a burner or gas-line issue.
Why should I deep-clean my grill after winter even if it was covered?
A grill cover helps, but it doesn’t prevent grease from hardening, moisture from causing rust, or insects/debris from accumulating in the firebox. When residue isn’t removed, it can cause excessive flare-ups, unpleasant smells, and uneven heating the first time you use the grill. A thorough clean helps ensure better performance, safer operation, and a more enjoyable first cook of the season.
📅 Last Updated: July 19, 2026 | Topic: how to clean a grill after winter | Content verified for accuracy and freshness.
References
- Google Scholar Google Scholar
https://scholar.google.com/scholar?q=how+to+clean+a+gas+grill+after+winter - Google Scholar Google Scholar
https://scholar.google.com/scholar?q=how+to+clean+a+charcoal+grill+after+winter - Google Scholar Google Scholar
https://scholar.google.com/scholar?q=grill+cleaning+food+safety+wire+brush+bristles - https://www.foodsafety.gov/keep-food-safe/food-preparation/grilling
https://www.foodsafety.gov/keep-food-safe/food-preparation/grilling - https://www.fsis.usda.gov/food-safety/safe-food-handling-and-preparation/food-safety-basics/grilling-and-food-safety
https://www.fsis.usda.gov/food-safety/safe-food-handling-and-preparation/food-safety-basics/grilling-and-food-safety - Barbecue grill
https://en.wikipedia.org/wiki/Barbecue_grill - https://pubmed.ncbi.nlm.nih.gov/?term=grill+brush+bristles
https://pubmed.ncbi.nlm.nih.gov/?term=grill+brush+bristles - https://pubmed.ncbi.nlm.nih.gov/?term=wire+bristle+grill+injury
https://pubmed.ncbi.nlm.nih.gov/?term=wire+bristle+grill+injury - https://www.cdc.gov/hygiene/cleaning/index.html
https://www.cdc.gov/hygiene/cleaning/index.html - https://www.fda.gov/food/buy-store-serve-safe-food/food-safety-basics
https://www.fda.gov/food/buy-store-serve-safe-food/food-safety-basics
