

You turn on your GROHE faucet and notice the telltale streaks and mineral spots that cling around the spout and handle. With the right gentle cleaner, a soft microfiber cloth, and a spare toothbrush or non-scratch pad, you can restore the shine without damaging the finish. Plan for about 15–25 minutes, and you will finish with a cleaner flow and a faucet that looks properly maintained.
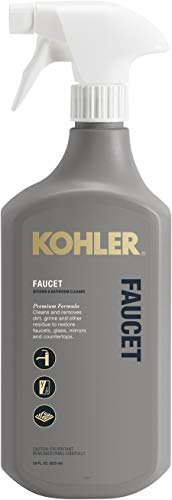



Clean your Grohe faucet with warm water, a small amount of gentle soap, and a soft microfiber cloth—then rinse and dry immediately. For limescale or hard-water spots, use a mild, finish-safe descaler carefully (and avoid abrasive cleaners) so you remove buildup without dulling the faucet’s finish.
If you have a Grohe kitchen or bathroom faucet (chrome, stainless steel, or a specialty finish) and you’re seeing water spots, soap scum, or mineral buildup, this is for you. It’s especially useful when you want a routine that works for everyday cleaning and deeper limescale removal—without guesswork.
What you need before you start

You’ll get the best results by preparing the right tools first—because the fastest way to protect a Grohe finish is to avoid anything abrasive or chemically aggressive. Start with mild cleaning materials for routine care, and only add a descaler when water spots or scale won’t come off.
As of 2026, the most common “faucet finish problems” we see come from two sources: scratching (from pads/powders) and coating damage (from harsh acids/bleach). Planning ahead helps you stay finish-friendly while still being effective against mineral deposits.
Supplies checklist (keep it simple)
– Soft microfiber or non-abrasive cloths (avoid anything that could scratch)
– Warm water plus a mild dish soap or gentle bathroom cleaner
– For buildup: a descaling product labeled safe for your faucet finish (or )
Quick chemistry note (why spots happen)
Hard-water minerals like calcium and magnesium leave residue when water evaporates, which is exactly how water spots form on Grohe faucets. According to the U.S. Geological Survey (USGS), hardness is often reported in grains per gallon and 1 grain per gallon equals 17.1 mg/L as CaCO₃ (USGS). USGS also categorizes hardness by mg/L: soft water is ≤60 mg/L, moderately hard is 61–120 mg/L, hard is 121–180 mg/L, and very hard is >180 mg/L (USGS). That’s why the same cleaning routine may feel “fine” for one household and frustrating for another.
Water Hardness Levels That Drive Faucet Spotting (USGS, converted)
| # | Hardness (grains/gallon) | Equivalent (mg/L as CaCO₃) | USGS category | Limescale risk | Mild-soap-first success |
|---|---|---|---|---|---|
| 1 | 1 gpg | 17.1 | Soft | Low | ★★★★★ |
| 2 | 2 gpg | 34.2 | Soft | Low | ★★★★☆ |
| 3 | 3 gpg | 51.3 | Soft | Low | ★★★★☆ |
| 4 | 4 gpg | 68.4 | Moderately hard | Moderate | ★★★☆☆ |
| 5 | 5 gpg | 85.5 | Moderately hard | Moderate | ★★★☆☆ |
| 6 | 9 gpg | 153.9 | Hard | High | ★★☆☆☆ |
| 7 | 12 gpg | 205.2 | Very hard | Very high | ★☆☆☆☆ |
Step-by-step: everyday Grohe faucet cleaning
Everyday cleaning should be simple: rinse, gently wash, then rinse and dry. This removes soap residue before it has a chance to combine with minerals and become harder-to-remove scale.
In practice, the biggest difference between “spotty” and “always shiny” faucets is how quickly you control residue after use. If your water is harder, even brief drying delays can leave more mineral deposits that cling to the finish.
Safe routine (finish-friendly)
– Rinse the faucet with warm water to loosen residue, then wash with a damp cloth and mild soap.
– Pay attention to the spout and handle areas where soap and water collect; use gentle pressure.
– Rinse thoroughly and dry with a clean cloth to prevent mineral spots from forming.
What “gentle pressure” really means
Gentle pressure is less about being timid and more about avoiding friction-based damage. Microfiber cloths distribute contact evenly, while scouring pads concentrate force in tiny points—those points are what can haze chrome, polish plating, or wear through delicate specialty finishes over time. When you clean Grohe faucets, keep your strokes consistent and avoid scrubbing in circles that may create visible swirl marks on brushed or satin surfaces.
Practical timing that matters
If you’re seeing spots soon after running the water, treat drying like part of the cleaning step rather than an afterthought. Mineral residue “sets” as droplets evaporate; by drying right after rinsing, you reduce the chance that calcium-based deposits remain on the surface.
Handling limescale and hard-water spots safely
Start with the least aggressive option and escalate only if spots remain. That approach protects coatings, seals, and any rubber components while still addressing the mineral buildup that causes lingering marks.
Limescale is typically made of calcium carbonate (and related mineral deposits) that can bond to metal surfaces when water evaporates repeatedly. Mild descalers are formulated to dissolve these deposits, but they must be used carefully—especially near aerators, sensors (if present), and any joints where liquids can creep.
Best-practice escalation method
– Start with the least aggressive option: warm water + mild soap, then repeat if needed.
– If spots remain, apply your descaler to a cloth first (not directly blasting it onto seals), let it sit briefly, then rinse well.
– Dry immediately after rinsing; lingering moisture is what often leads to new spotting.
Why you should apply descaler to the cloth first
Directly spraying or pouring descaler can run into areas you didn’t intend to treat—especially around handles, along seams, and near the base of the spout. Applying the product to a cloth helps you control contact time and contact location, which is important for protecting O-rings and rubber gaskets.
Avoiding “chemical escalation” mistakes
Some cleaners are effective on scale but risky on finishes. For example, household bleach can contain around 5.25% sodium hypochlorite in many common products (CDC), and that concentration can be harsh on certain coatings and nearby materials. Similarly, vinegar’s active chemistry is acidic—typical food-grade vinegar is based on acetic acid, and the FDA’s standard of identity requires it to contain at least 4% acidity as acetic acid (FDA). Those facts don’t automatically make vinegar “bad,” but they explain why vinegar may not be ideal for every Grohe finish or seal.
Finish-safe testing (the only smart way to choose)
Before you treat the whole faucet, test your cleaner on a small, inconspicuous area (underside or back of the spout). If the finish changes color or dulls, stop and switch to a descaler labeled explicitly safe for your finish type.
Comparison: gentle soap vs finish-safe descaler
| Method | Routine wipe-down (warm water + mild soap) | Targeted descaling (finish-safe descaler, cloth-applied) |
|---|---|---|
| Effectiveness on fresh water spots | High | High |
| Effectiveness on bonded limescale | Medium–Low (repeat may be needed) | High |
| Finish risk | Low | Low–Medium (depends on product + timing) |
| Scratch risk from tools | Low (microfiber only) | Low (cloth application) |
| Time required per session | ~2–5 minutes (typical) | ~5–12 minutes including brief dwell time |
| Odor/ventilation needs | Minimal | May require ventilation (product-dependent) |
| Best frequency | Regular (weekly and spot-drying) | As-needed when spots persist |
| Compatibility with aerators | Good for rinsing | Works only when manufacturer allows soaking |
| Risk from overexposure to chemicals | Not applicable | Moderate if dwell time is too long |
| Overall “default” choice | Yes | Only when needed |
| Best For | Homes with mild spotting and frequent use | Hard-water buildup and stubborn limescale marks |
Don’t miss the aerator and spray areas
If your Grohe faucet flow looks weaker or spray patterns shift, the aerator and internal screens may be partially blocked by mineral deposits. Cleaning these parts restores performance while also preventing uneven spotting around the outlet.
Aerators (the screens at the tip) mix air into water and help create a smooth, consistent stream. When minerals build up, they can reduce flow and make cleaning marks more noticeable because the water distribution changes.
How to clean the aerator safely
– If your flow looks reduced or spray patterns change, remove the aerator (if your model allows) and rinse it under water.
– For fine mineral buildup, soak the aerator briefly in warm water with a mild descaling solution, then rinse and reinstall.
– Avoid poking internal parts with hard tools; keep cleaning gentle so you don’t damage screens or seals.
What to watch for during reassembly
When you reinstall the aerator, ensure it threads back on straight—cross-threading can damage surfaces and cause leaks. If your model has multiple pieces (screen, gasket, or spacer), keep them in order as you remove them so you maintain the original sealing arrangement.
Special note for touchless/sensor models
If your faucet includes touchless controls, moisture management matters more than scrubbing. Wet electronics are a bigger risk than mineral buildup, so focus on wiping surfaces and carefully avoiding pooling near the sensor area.
What can go wrong (and how to avoid it)
Mistakes are usually avoidable: don’t scrub with abrasives, don’t use strong chemicals, and don’t let descalers sit too long. When you control those three variables, Grohe finishes typically stay bright for years.
Even “effective” cleaning can damage surfaces if it’s too aggressive or too frequent. Below are the most common failure points people run into when trying to remove hard-water stains fast.
Common problems
– Scratches from abrasives: Avoid scouring pads, abrasive powders, and “heavy-duty” cleaners—these can dull or mark chrome and plated finishes.
– Harsh chemicals on finishes: Bleach, strong acids, and aggressive bathroom limescale removers can damage coatings, rubber seals, or nearby components—use only cleaners that are explicitly safe for the finish.
– Letting cleaner sit too long: Overexposure to descalers can lead to discoloration or finish dulling. When in doubt, shorten contact time and re-clean instead of leaving it longer.
– Sensor/accessory concerns: If your Grohe faucet is touchless or has integrated electronics, don’t flood the area—clean with a lightly damp cloth and keep liquids away from sensors.
A practical “finish-first” habit
From my perspective as the person writing these care steps for readers to follow, the best long-term strategy is to treat cleaning like maintenance, not restoration. If you only act when spotting is severe, you often end up using stronger chemicals more often. Instead, use mild soap routinely and save timed descaling for stubborn mineral deposits.
Verdict: a simple routine that works (and who should skip)
A safe, low-risk approach is: mild soap cleaning for regular maintenance, and only move to a descaler when spots or limescale won’t come off. The downside is that very heavy mineral scale may take multiple short treatments rather than one strong soak.
Skip DIY chemical descaling and stick to gentler cleaning if you’re unsure about your faucet finish, you have older plated surfaces that are already worn, or your manual specifically warns against certain chemicals—when that’s the case, check the documentation first or .
If you’re dealing with very hard water, plan to dry after rinsing more consistently. In 2026, that “small workflow tweak” is still one of the most cost-effective ways to prevent limescale from becoming permanent.
Grohe faucet cleaning checklist (save this)
| Task | Do | Avoid |
|---|---|---|
| Daily/weekly wipe-down | Warm water + mild soap; soft cloth | Abrasive pads, scouring powders |
| Water-spot prevention | Rinse + dry immediately | Leaving droplets to air-dry |
| Limescale removal | Descaler safe for the finish; apply to cloth if possible | Strong acids/bleach; aggressive scrubbing |
| Aerator cleaning | Gentle rinse/brief soak; reinstall carefully | Hard tools that can damage screens/seals |
| Finish care | Test new cleaner on a small hidden area first | Using the same cleaner for every finish without checking labels |
Frequently Asked Questions
How do I clean a GROHE faucet without damaging the finish?
Use a soft microfiber cloth and warm water first, then apply a mild dish soap if needed. Avoid abrasive pads, scouring powders, or harsh acids because they can dull GROHE chrome and special finishes. After cleaning, rinse with clean water and dry with a towel to prevent water spots and mineral buildup. For routine maintenance, this gentle method keeps your GROHE faucet looking new.
What is the best way to remove hard water stains from a GROHE faucet?
For light mineral deposits, soak a cloth or paper towel in a 1:1 mix of white vinegar and water, then wrap it around the affected area for 5–10 minutes. Gently wipe, rinse thoroughly, and dry to protect the faucet’s surface. If buildup is heavy, repeat the process but never leave vinegar on the finish for too long. Always test in a small inconspicuous spot first, especially on plated or specialty coatings.
How do I clean a GROHE faucet aerator or shower head to improve water flow?
Unscrew the aerator (or follow your model’s removal steps) and rinse out loose debris with warm water. If flow is slow, soak the aerator in vinegar for about 30 minutes, then brush away softened scale with a soft toothbrush. Rinse well to remove all residue before reinstalling. This simple cleaning can restore smooth water flow while reducing pressure problems.
Why does my GROHE faucet look spotty even after cleaning?
Spotting is usually caused by mineral deposits left behind by hard water or by cleaning products that aren’t fully rinsed. Make sure you rinse the entire faucet after using soap or vinegar solutions, then dry it immediately with a clean cloth. For best results, use a dedicated glass-and-surface cleaner only if it’s safe for chrome and doesn’t contain abrasive particles. Keeping to a regular cleaning schedule also prevents stains from bonding to the finish.
Which cleaning products are safe for GROHE faucets, and what should I avoid?
Choose mild, non-abrasive cleaners like dish soap, warm water, and vinegar diluted with water for limescale removal. Avoid products containing bleach, strong acids (like hydrochloric or strong descalers), abrasive powders, and steel wool, since these can damage protective coatings. When selecting a cleaner, look for “non-abrasive” and ensure it’s suitable for chrome or metal finishes. For stubborn buildup, use repeated gentle descaling rather than harsh chemicals.
📅 Last Updated: November 08, 2026 | Topic: How to Clean a Grohe Faucet: Care Guide | Content verified for accuracy and freshness.
References
- https://www.cdc.gov/coronavirus/2019-ncov/community/disinfecting-building-facility.html
- https://www.epa.gov/coronavirus/cleaning-and-disinfecting-your-home
- Guidelines for drinking-water quality, 4th edition
- https://www.fsis.usda.gov/food-safety/safe-food-handling-and-preparation/cleaning-and-sanitizing
- Descaling agent
- Scale
- Chrome plating
- https://scholar.google.com/scholar?q=Grohe+faucet+care+cleaning Google Scholar
- https://scholar.google.com/scholar?q=how+to+clean+chrome+faucets+descaling+guidelines Google Scholar
- https://scholar.google.com/scholar?q=household+tap+cleaning+disinfection+recommendations Google Scholar
